
~Kief Junkie & QueenKief's 250w Organic Medi-Cab (soil) Grow!~ ~Pure & Blue Mystic~
Before I get started, I want to thank Gypsy and everyone involved in administering this wonderful site! It's a gem of a community that every cannabis enthusiast should be grateful for. I know we are!
I have learned so much since October when I first joined ICmag. Although we are just now starting our first grow, I am by no means a noob when it comes to cannabis. I have studied everything about it, including growing, for over a decade now. That said, I have learned more from the people of this great community than I have anywhere else. Instead of listing the names of those who stand out in particular, I would just like to thank every contributor to the Growers Forums, Dr. Jay's Medicinal Marijuana Forum, and the Strains and Hybrids Forums; you have all been an invaluable help over the past few months as my wife and I researched and designed our first grow!
The purpose of this journal is to document the first ever medical grow of my wife and I (both legal patients in our state of residence). We will provide notes and pictures on both the construction of our grow cabinet and every step of our grow, from germination to harvest. Our goal is to find the genetics that work best for our conditions (chronic pain, chronic migraine, muscle spasticity, depression/anxiety) and produce a perpetual harvest every 3-4 months. We will be working within the limits of our states medical cannabis law, which allows us to have a combined 6 plants in veg and 6 plants in flower, plus 4 ounces of medicine on hand at any one time. We will also be doing some amateur breeding in the future. Eventually, we would like to branch out a little and take on CG duties for a handful of patients in need.
We want this journal to be informative, fun, interesting to look at and read, and a place where we can discuss the trials, travails and joys of growing your own medicine. More than providing our own medicine and saving us much needed money, this garden is an integral part of our medical therapy and therefore by extension so is this online journal, where we can share our passion for cannabis with other like minded folk. So please feel free to comment and join us in our first grow.
A little background: We recently relocated from a VERY cannabis unfriendly state to one that allows the legal use of medical cannabis. We came here so as to have the freedom to choose cannabis as our medicine and reduce, if not completely eliminate, our need to depend on pharmaceutical medications. We are grateful for all that RX's have done for us over the years, even though they have often failed, but we believe cannabis is what's best for us...mind, body and spirit.
Our cabinet: As we wanted to keep this on the DL, even though we're legal, we had to find a way to grow the medicine we need while remaining relatively stealthy, so we decided upon the cabinet style of growing. It wasn't only for these reasons though. We also really enjoy the ingenuity, simplicity and closeness to the plants that cabinet growing can foster (particularly when growing organically in soil). We have modeled our cabinet off the famous NGB-style cabs that one can find all over these forums. They're amazingly well suited to our needs, with a few modifications. Below I will list the vitals on our cabinet build, including materials used and prices.
Here are the dimensions of our design-
Overall cab dimensions:
4.5' tall x 5' wide x 2.5' deep
Individual room dimensions:
Veg/mother/clone room-
2' tall x 2' wide x 2.5' deep (5 sq. feet) [25 watts per sq. foot]
Flower room-
4.5' tall x 3' wide x 2.5' deep (7.5 sq. feet) [33.3 watts per sq. foot]
Utility room-
2.5' tall x 2' wide x 2.5' deep
Below is the materials list, with prices. It's not complete yet as there are things we will need later in the process which haven't been purchased yet; we'll add those as we pick them up. The reason we include prices is to show others what the real world costs of setting up even a mini-medical grow are. There is this weird idea out there in the medical cannabis community that medicine should be dirt cheap, or preferably free! I find it preposterous. All grows cost the grower valuable time and coin, and I wholeheartedly support their right to charge whatever they deem reasonable for their services.
We are both fairly able bodied and we have the financial means and the spare time to put into such a huge undertaking. Many patients aren't so lucky and cannot grow their own even if they wanted to. Anyhow, on to the list(s).
Cabinet Supply List:
2 3.5" door hinges $26.00
4 3" door hinges $12.00
4 door catches $5.00
6-4" ducting reducer $6.00
Air filter material for PVC pipe covers $5.00
8 steel C-clamps $32.00
Hole Saw bit $4.00
Paint Brushes $35.00
8 1-1/2" corner L-brackets $20.00
2 Dewalt Safety Glasses $18.00
Dewalt Jigsaw $99.00
Dewalt 18v Cordless Drill $139.00
Jigsaw Blades $5.38
PVC piping $35.00 total
Sandpaper $10.00
Dewalt Palm Sander $50.00
6 Gallon Shopvac $44.97
Guerrilla Wood Glue $5.97
Screws $27.00
Paint Trays $5.00
Shop Towels $8.99
1 Gallon no VOC paint $39.99
PVC cement $3.76
2 Gallons Killz Primer $40.00
Caulking Gun $4.97
Duct Tape $6.97
Particle Board Sheets $158.32
1"x2" Select Pine $60.40
Carpenter/Gardening Gloves $35.00
Toolbox $15.00
Chalk Line Marker $10.00
2 Sundial Manual Timers $40.00.
2 Steel Saw Horses $40.00
9-count pack of Tot Loks $30
4 Heavy Duty 3" Casters $20
Growing Supplies:
Kelp Meal (4lbs) $17.00
Blood Meal (8lbs) $13.50
Bone Meal $6.99
Jersey Greensand $5.99
Earth Worm Castings $19.95
Sunshine Mix #4 $44.00
Fox Farm Chunky Perlite $30.95
Grodan rockwool cubes $12.95
Rooting/cloning tray $2.50
Humidity Dome $5.95
Dolomite lime $5.95
Peruvian Seabird Guano (11lbs) $24.95
Indonesian Bat Guano (11lbs) $19.95
Mexican Bat Guano (11lbs) $23.95
Liquid Karma (1gal) $64.95
Diatomaceous Earth $7.50
Dyna-gro Neem Oil $9.95
32oz. Spray Bottle $3.95
Airpots (4" and 5 Gal.) $65.00
Bright Wing System with 125 cool CFL bulb $99.95
CAN 33 Combo (6-inch CAN fan, filter, flange) $269.95
6" Duct Muffler $61.50
2 Yo-yo Reflector Hanging Kits $40.00
Super Sun II Reflector w/ 250W Galaxy Ballast (Eye Hortilux Super HPS Bulb included) $300.90
Shipping for lights/fan $100.00
60x Handheld Microscope (for trich viewing) $18.00
3L Watering Can $18.00
Hydrofarm Seedling Heat Mat $23.00
Digital Thermometer/Hygrometer $23.00
Pot Label Stakes $3.00
Genetics:
1 x MRN-Spice $58.03
1 x FLY - The Pure $29.77
Total (thus far): $2,425.18 (or $370 for each of the 6 flowering plants comprising our first harvest)
Obviously there will be tons of leftover product on many of these items, but they cannot be purchased in the specific amounts one needs so it's a cost of doing a grow that pays out over a few harvests. There was also quite a bit spent on power tools and other workshop items. We have lived in a place without a garage/basement so long that we just didn't purchase and keep equipment like this and therefore had to either buy or rent it. Now that we have the space to work on projects like this, these items will be a great long term investment for us.
As you can see, it isn't cheap to do even a very small personal medical grow, let alone one for multiple patients.
The cab will consist of three rooms; veg/mother/clone, flower and utility. The veg room will be lit by a 125w cool CFL under a batwing reflector and the flower room by a 250w HPS in an air cooled Super Sun II. Ventilation consists of a 256cfm Canfan pulling through a CAN33 carbon filter. The veg room will have 6 1" PVC pipes bent to 90 degrees (at 2 points or more so as to block light from entering) for fresh air intake. The wall between the veg and flower rooms will have the same type of PVC pipes (6 @ 1" ea.) connecting the two for airflow from veg to flower. From there the air flows into the Super Sun through one end and out the other via ducting, going from there into the utility room where it gets pulled through the carbon filter and out the 6" muffler connected directly to the hole in the back wall.
Both lights will of course be on their own timers and there will be a small circulating fan in the flower room for a slight breeze. The doors of the cabinets will be locked down with Tot Lok's (3 on the flower room door, 2 each on the veg and utility room doors). The inside of the cab will be sealed for protection against water and dirt and then painted with a no-VOC semi-gloss white for reflectivity (and easy cleaning). Lights will be suspended on movable yo-yo hangers. The veg room will also have a half-shelf extending from the back wall that will hold our clones.
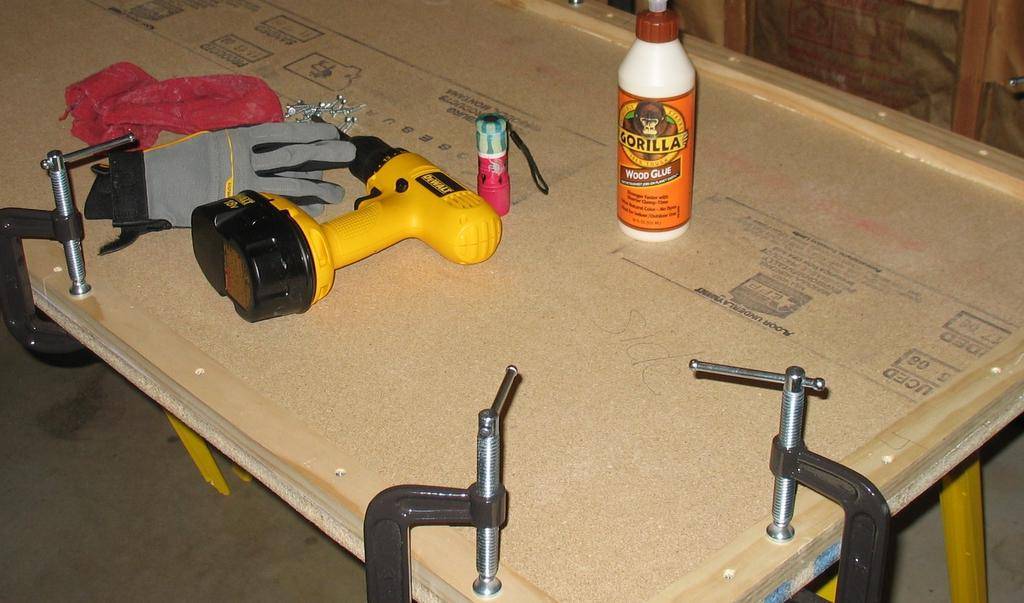
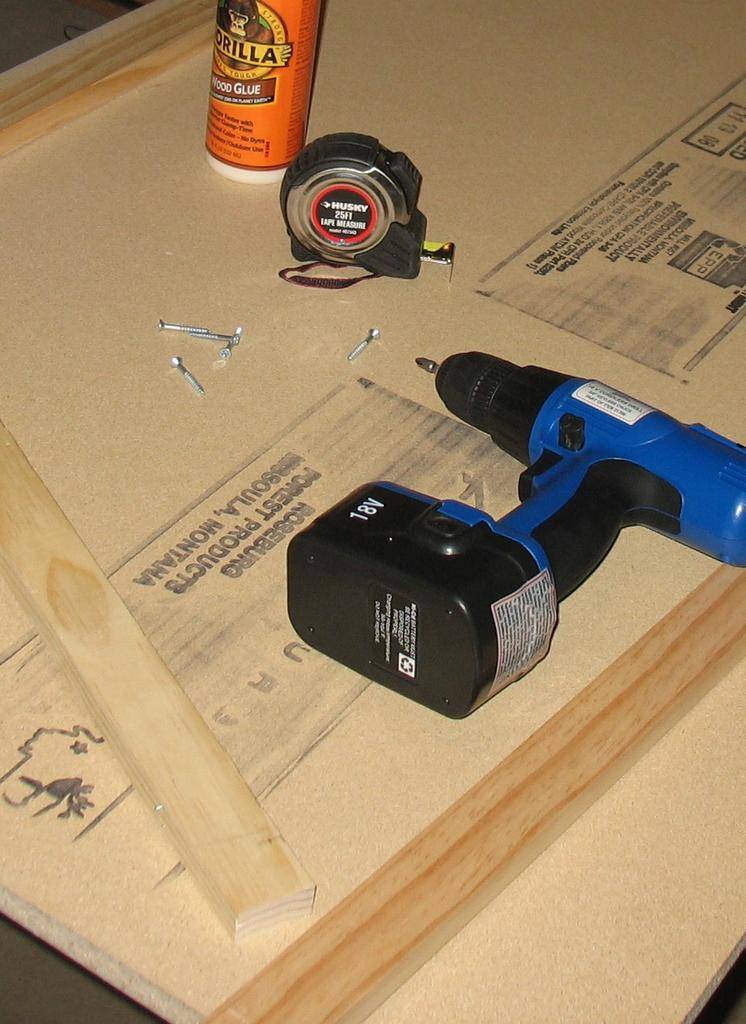
Here are a few pictures of our cab in progress. We won't be posting an exhaustive how-to on this cab, as it's been done before on these forums with very similar setups, but we would be VERY happy to answer any questions you might have about its construction. More pictures and text will be coming as we progress.
These two show a few of the panels under construction. This is 3/4 in. particle board framed with 1"x2" select pine. Both are from sustainable sources and meet stringent formaldehyde restrictions.
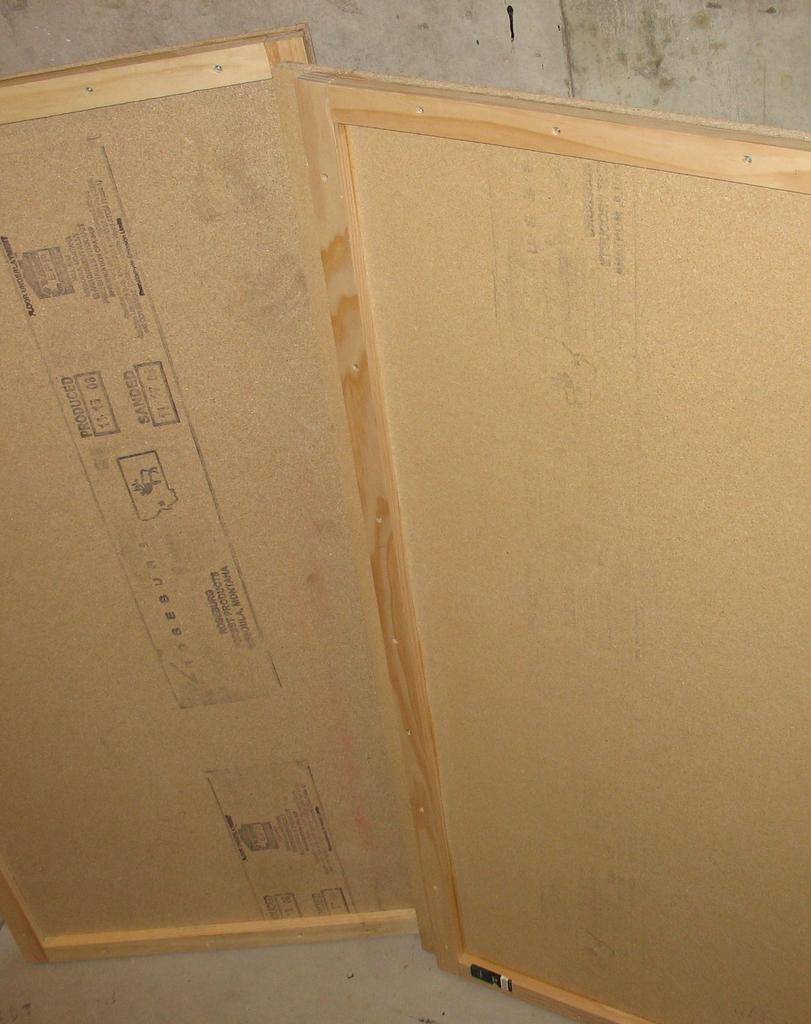
These are the framed panels we have finished at this point. We still need to drill holes for the ventilation system, seal, and paint.
We are currently putting together the wall panels and their frames. Keep watching for updates.
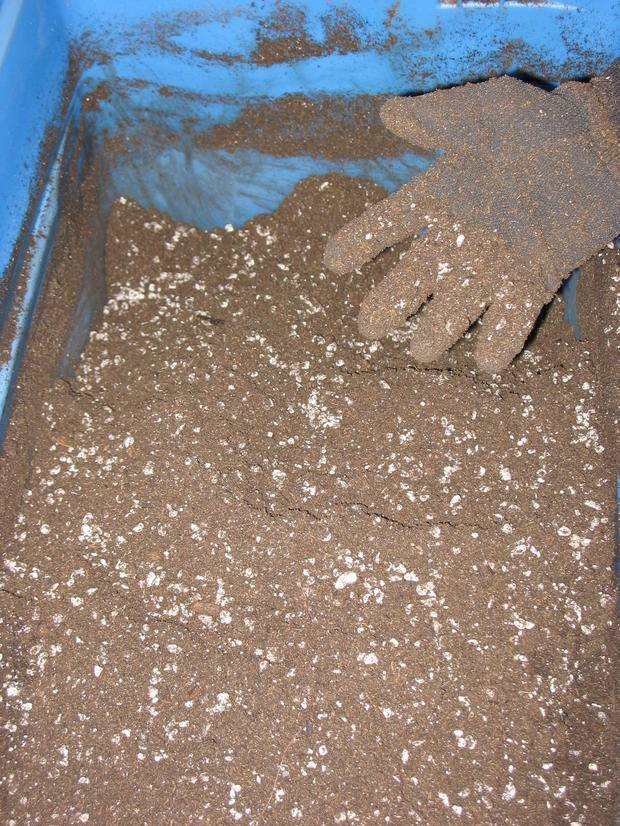
We will be growing in a soiless, organic medium. We spent hours yesterday mixing it up by hand and getting it ready to "cook". The recipe we used is as follows (multiplied by 2 1/2). It was combined and mixed well in a large Rubbermaid tub for a total of about 25 gallons of medium:
6 gallons Sunshine Mix #4
1-1/2 gallons chunky perlite
2 gallons earthworm castings
Powdered dolomite lime @ 2 tablespoons per gallon of the soiless mix
Dry Ferts (per gallon of soiless mix):
1 tablespoon blood meal
2 tablespoons bone meal
1 tablespoon kelp meal
1 tablespoon Jersey Greensand
All dry ferts were poured into the soiless mix and then the entire mix was wetted with a solution consisting of 1/4 teaspoon Liquid Karma, 1/4 teaspoon Mycogrow Mycorrhizal fungi and water in our 32oz. spray bottle.
The soil mix will be stirred and mixed a few times a week for two weeks so the bacteria and fungi receive oxygen; they will then begin breaking down the amendments/nutrients, making them available for our ladies. The mix will be kept moist, but not soaking, throughout.
A pic of our soil bin with lovely organics and fungus cooking away!
On Sunday January 18, we popped 3 Spice and 3 Pure beans into a cup of room temp water with a very dilute amount of Liquid Karma, rested the lids on top of the container to allow air in, and sat them on top of the cable box overnight. Less than 24 hours later, all 6 beans were displaying their radical! We quickly prepared our rockwool cubes and humidity dome and sowed them.
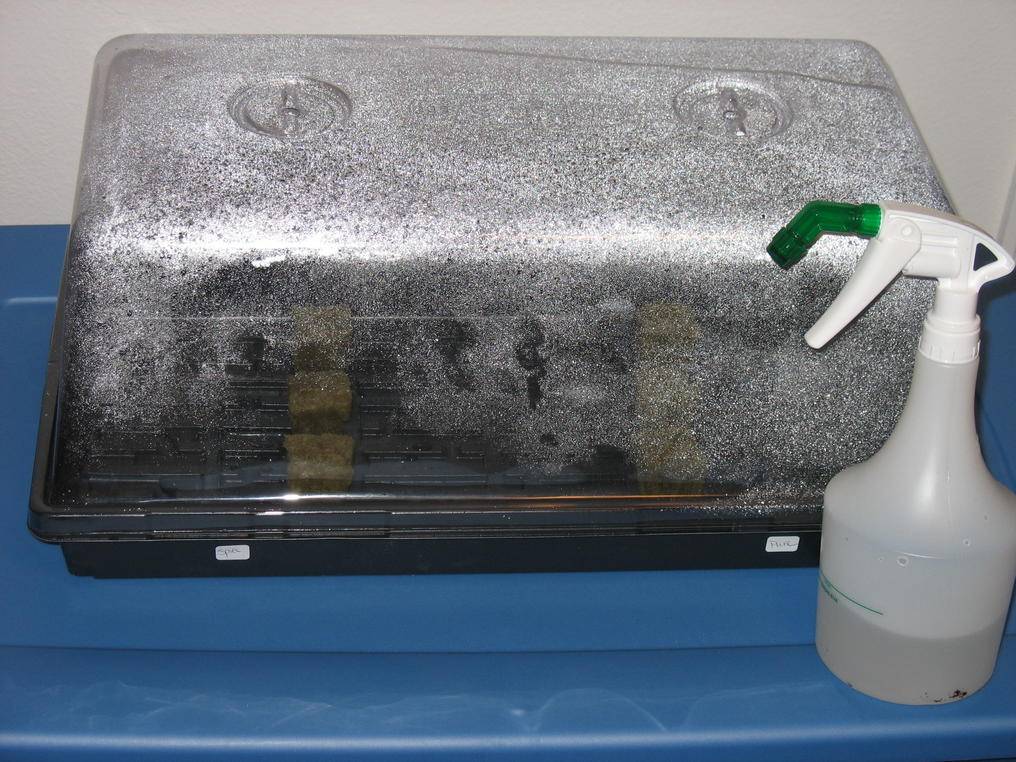
Here's a pic of our ladies in their rockwool.

And under their dome.
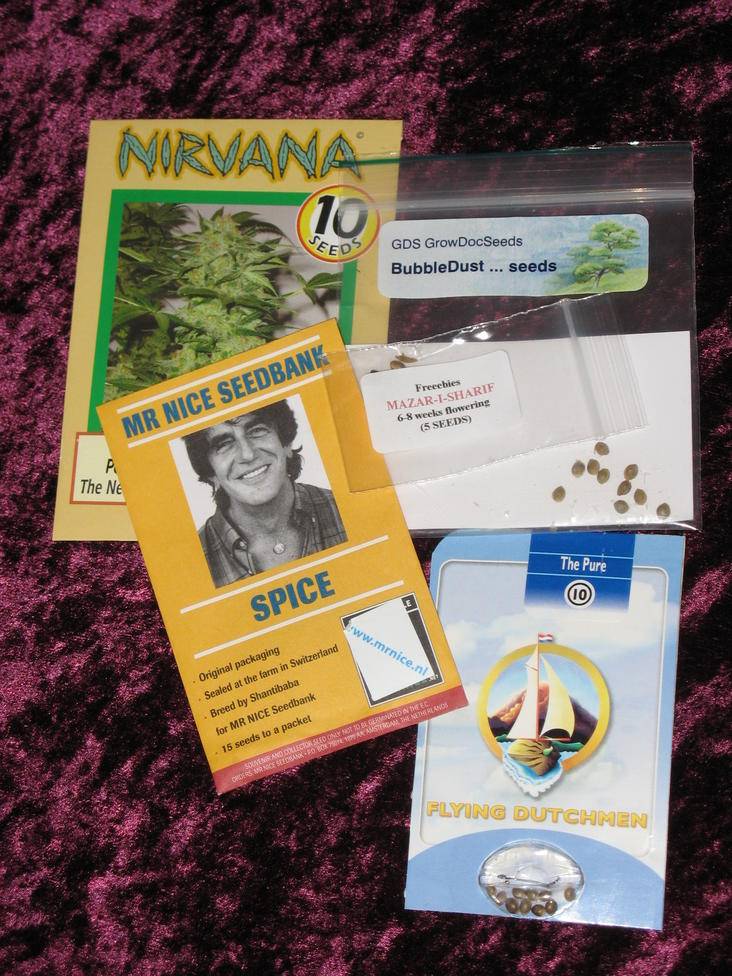
A group shot of the various genetics we currently have; some slated for near-future grows. Strains are Blue Mystic, Bubbledust, The Pure, Spice and Mazar-I-Sharif.
So begins our adventure! It's been a long time coming. We hope you stick around and chit-chat with us over the next few months!


Before I get started, I want to thank Gypsy and everyone involved in administering this wonderful site! It's a gem of a community that every cannabis enthusiast should be grateful for. I know we are!
I have learned so much since October when I first joined ICmag. Although we are just now starting our first grow, I am by no means a noob when it comes to cannabis. I have studied everything about it, including growing, for over a decade now. That said, I have learned more from the people of this great community than I have anywhere else. Instead of listing the names of those who stand out in particular, I would just like to thank every contributor to the Growers Forums, Dr. Jay's Medicinal Marijuana Forum, and the Strains and Hybrids Forums; you have all been an invaluable help over the past few months as my wife and I researched and designed our first grow!
The purpose of this journal is to document the first ever medical grow of my wife and I (both legal patients in our state of residence). We will provide notes and pictures on both the construction of our grow cabinet and every step of our grow, from germination to harvest. Our goal is to find the genetics that work best for our conditions (chronic pain, chronic migraine, muscle spasticity, depression/anxiety) and produce a perpetual harvest every 3-4 months. We will be working within the limits of our states medical cannabis law, which allows us to have a combined 6 plants in veg and 6 plants in flower, plus 4 ounces of medicine on hand at any one time. We will also be doing some amateur breeding in the future. Eventually, we would like to branch out a little and take on CG duties for a handful of patients in need.
We want this journal to be informative, fun, interesting to look at and read, and a place where we can discuss the trials, travails and joys of growing your own medicine. More than providing our own medicine and saving us much needed money, this garden is an integral part of our medical therapy and therefore by extension so is this online journal, where we can share our passion for cannabis with other like minded folk. So please feel free to comment and join us in our first grow.
A little background: We recently relocated from a VERY cannabis unfriendly state to one that allows the legal use of medical cannabis. We came here so as to have the freedom to choose cannabis as our medicine and reduce, if not completely eliminate, our need to depend on pharmaceutical medications. We are grateful for all that RX's have done for us over the years, even though they have often failed, but we believe cannabis is what's best for us...mind, body and spirit.
Our cabinet: As we wanted to keep this on the DL, even though we're legal, we had to find a way to grow the medicine we need while remaining relatively stealthy, so we decided upon the cabinet style of growing. It wasn't only for these reasons though. We also really enjoy the ingenuity, simplicity and closeness to the plants that cabinet growing can foster (particularly when growing organically in soil). We have modeled our cabinet off the famous NGB-style cabs that one can find all over these forums. They're amazingly well suited to our needs, with a few modifications. Below I will list the vitals on our cabinet build, including materials used and prices.
Here are the dimensions of our design-
Overall cab dimensions:
4.5' tall x 5' wide x 2.5' deep
Individual room dimensions:
Veg/mother/clone room-
2' tall x 2' wide x 2.5' deep (5 sq. feet) [25 watts per sq. foot]
Flower room-
4.5' tall x 3' wide x 2.5' deep (7.5 sq. feet) [33.3 watts per sq. foot]
Utility room-
2.5' tall x 2' wide x 2.5' deep
Below is the materials list, with prices. It's not complete yet as there are things we will need later in the process which haven't been purchased yet; we'll add those as we pick them up. The reason we include prices is to show others what the real world costs of setting up even a mini-medical grow are. There is this weird idea out there in the medical cannabis community that medicine should be dirt cheap, or preferably free! I find it preposterous. All grows cost the grower valuable time and coin, and I wholeheartedly support their right to charge whatever they deem reasonable for their services.
We are both fairly able bodied and we have the financial means and the spare time to put into such a huge undertaking. Many patients aren't so lucky and cannot grow their own even if they wanted to. Anyhow, on to the list(s).
Cabinet Supply List:
2 3.5" door hinges $26.00
4 3" door hinges $12.00
4 door catches $5.00
6-4" ducting reducer $6.00
Air filter material for PVC pipe covers $5.00
8 steel C-clamps $32.00
Hole Saw bit $4.00
Paint Brushes $35.00
8 1-1/2" corner L-brackets $20.00
2 Dewalt Safety Glasses $18.00
Dewalt Jigsaw $99.00
Dewalt 18v Cordless Drill $139.00
Jigsaw Blades $5.38
PVC piping $35.00 total
Sandpaper $10.00
Dewalt Palm Sander $50.00
6 Gallon Shopvac $44.97
Guerrilla Wood Glue $5.97
Screws $27.00
Paint Trays $5.00
Shop Towels $8.99
1 Gallon no VOC paint $39.99
PVC cement $3.76
2 Gallons Killz Primer $40.00
Caulking Gun $4.97
Duct Tape $6.97
Particle Board Sheets $158.32
1"x2" Select Pine $60.40
Carpenter/Gardening Gloves $35.00
Toolbox $15.00
Chalk Line Marker $10.00
2 Sundial Manual Timers $40.00.
2 Steel Saw Horses $40.00
9-count pack of Tot Loks $30
4 Heavy Duty 3" Casters $20
Growing Supplies:
Kelp Meal (4lbs) $17.00
Blood Meal (8lbs) $13.50
Bone Meal $6.99
Jersey Greensand $5.99
Earth Worm Castings $19.95
Sunshine Mix #4 $44.00
Fox Farm Chunky Perlite $30.95
Grodan rockwool cubes $12.95
Rooting/cloning tray $2.50
Humidity Dome $5.95
Dolomite lime $5.95
Peruvian Seabird Guano (11lbs) $24.95
Indonesian Bat Guano (11lbs) $19.95
Mexican Bat Guano (11lbs) $23.95
Liquid Karma (1gal) $64.95
Diatomaceous Earth $7.50
Dyna-gro Neem Oil $9.95
32oz. Spray Bottle $3.95
Airpots (4" and 5 Gal.) $65.00
Bright Wing System with 125 cool CFL bulb $99.95
CAN 33 Combo (6-inch CAN fan, filter, flange) $269.95
6" Duct Muffler $61.50
2 Yo-yo Reflector Hanging Kits $40.00
Super Sun II Reflector w/ 250W Galaxy Ballast (Eye Hortilux Super HPS Bulb included) $300.90
Shipping for lights/fan $100.00
60x Handheld Microscope (for trich viewing) $18.00
3L Watering Can $18.00
Hydrofarm Seedling Heat Mat $23.00
Digital Thermometer/Hygrometer $23.00
Pot Label Stakes $3.00
Genetics:
1 x MRN-Spice $58.03
1 x FLY - The Pure $29.77
Total (thus far): $2,425.18 (or $370 for each of the 6 flowering plants comprising our first harvest)
Obviously there will be tons of leftover product on many of these items, but they cannot be purchased in the specific amounts one needs so it's a cost of doing a grow that pays out over a few harvests. There was also quite a bit spent on power tools and other workshop items. We have lived in a place without a garage/basement so long that we just didn't purchase and keep equipment like this and therefore had to either buy or rent it. Now that we have the space to work on projects like this, these items will be a great long term investment for us.
As you can see, it isn't cheap to do even a very small personal medical grow, let alone one for multiple patients.
The cab will consist of three rooms; veg/mother/clone, flower and utility. The veg room will be lit by a 125w cool CFL under a batwing reflector and the flower room by a 250w HPS in an air cooled Super Sun II. Ventilation consists of a 256cfm Canfan pulling through a CAN33 carbon filter. The veg room will have 6 1" PVC pipes bent to 90 degrees (at 2 points or more so as to block light from entering) for fresh air intake. The wall between the veg and flower rooms will have the same type of PVC pipes (6 @ 1" ea.) connecting the two for airflow from veg to flower. From there the air flows into the Super Sun through one end and out the other via ducting, going from there into the utility room where it gets pulled through the carbon filter and out the 6" muffler connected directly to the hole in the back wall.
Both lights will of course be on their own timers and there will be a small circulating fan in the flower room for a slight breeze. The doors of the cabinets will be locked down with Tot Lok's (3 on the flower room door, 2 each on the veg and utility room doors). The inside of the cab will be sealed for protection against water and dirt and then painted with a no-VOC semi-gloss white for reflectivity (and easy cleaning). Lights will be suspended on movable yo-yo hangers. The veg room will also have a half-shelf extending from the back wall that will hold our clones.
Here are a few pictures of our cab in progress. We won't be posting an exhaustive how-to on this cab, as it's been done before on these forums with very similar setups, but we would be VERY happy to answer any questions you might have about its construction. More pictures and text will be coming as we progress.
These two show a few of the panels under construction. This is 3/4 in. particle board framed with 1"x2" select pine. Both are from sustainable sources and meet stringent formaldehyde restrictions.
These are the framed panels we have finished at this point. We still need to drill holes for the ventilation system, seal, and paint.
We are currently putting together the wall panels and their frames. Keep watching for updates.
We will be growing in a soiless, organic medium. We spent hours yesterday mixing it up by hand and getting it ready to "cook". The recipe we used is as follows (multiplied by 2 1/2). It was combined and mixed well in a large Rubbermaid tub for a total of about 25 gallons of medium:
6 gallons Sunshine Mix #4
1-1/2 gallons chunky perlite
2 gallons earthworm castings
Powdered dolomite lime @ 2 tablespoons per gallon of the soiless mix
Dry Ferts (per gallon of soiless mix):
1 tablespoon blood meal
2 tablespoons bone meal
1 tablespoon kelp meal
1 tablespoon Jersey Greensand
All dry ferts were poured into the soiless mix and then the entire mix was wetted with a solution consisting of 1/4 teaspoon Liquid Karma, 1/4 teaspoon Mycogrow Mycorrhizal fungi and water in our 32oz. spray bottle.
The soil mix will be stirred and mixed a few times a week for two weeks so the bacteria and fungi receive oxygen; they will then begin breaking down the amendments/nutrients, making them available for our ladies. The mix will be kept moist, but not soaking, throughout.
A pic of our soil bin with lovely organics and fungus cooking away!
On Sunday January 18, we popped 3 Spice and 3 Pure beans into a cup of room temp water with a very dilute amount of Liquid Karma, rested the lids on top of the container to allow air in, and sat them on top of the cable box overnight. Less than 24 hours later, all 6 beans were displaying their radical! We quickly prepared our rockwool cubes and humidity dome and sowed them.
Here's a pic of our ladies in their rockwool.
And under their dome.
A group shot of the various genetics we currently have; some slated for near-future grows. Strains are Blue Mystic, Bubbledust, The Pure, Spice and Mazar-I-Sharif.
So begins our adventure! It's been a long time coming. We hope you stick around and chit-chat with us over the next few months!
Last edited:
")


