Can't ... stop ... building!


You are using an out of date browser. It may not display this or other websites correctly.
You should upgrade or use an alternative browser.
You should upgrade or use an alternative browser.
The CannaBunker Begins
- Thread starter CannaBunkerMan
- Start date
The rocks are going be used to build a small koi pond/water fall that will straddle the two patio circles. It's going to be sweet!
The concrete mixer is [still] posessed by the devil.
The retaining wall blocks from the previous thread post, and the concrete blocks from the 6th picture will be used to make a retaining wall planter around the outside of the patio circles.


The concrete mixer is [still] posessed by the devil.
The retaining wall blocks from the previous thread post, and the concrete blocks from the 6th picture will be used to make a retaining wall planter around the outside of the patio circles.
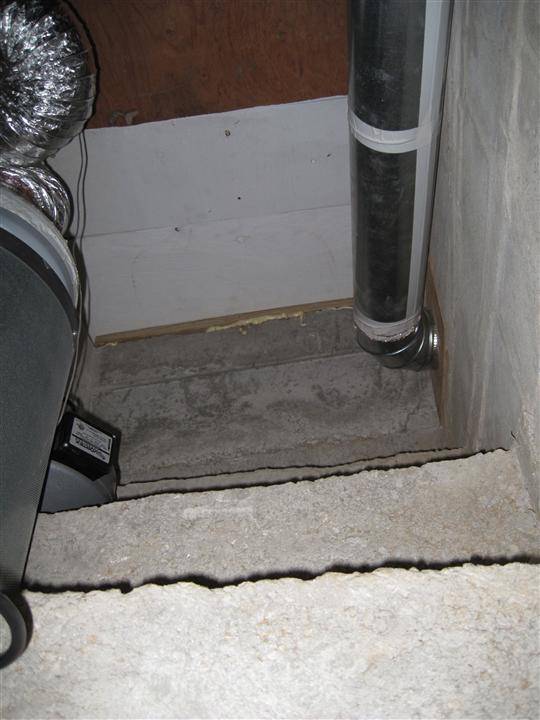
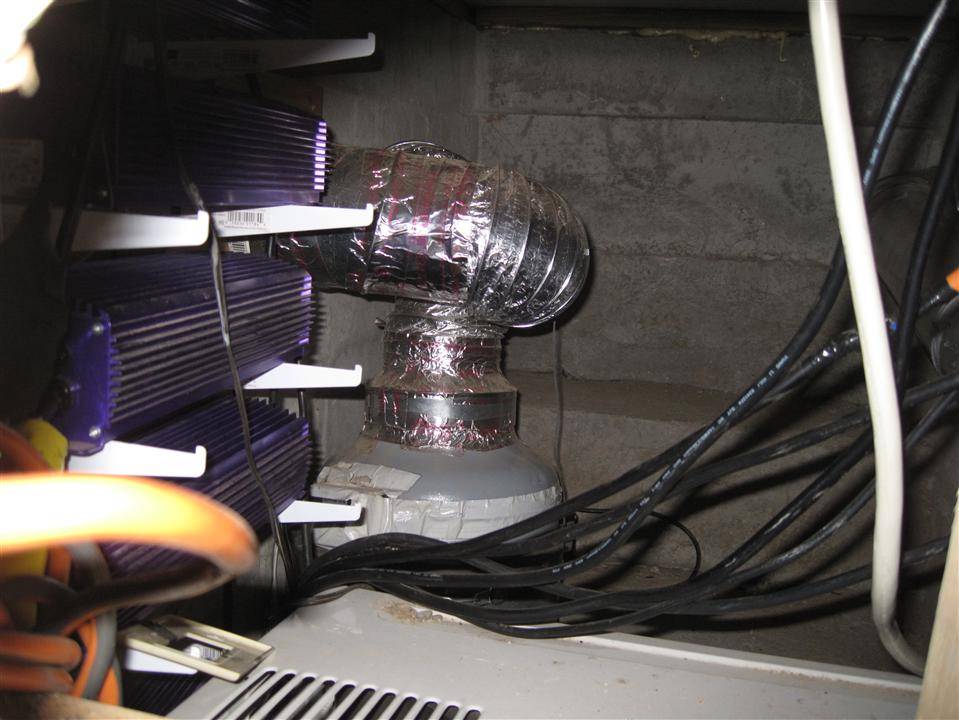
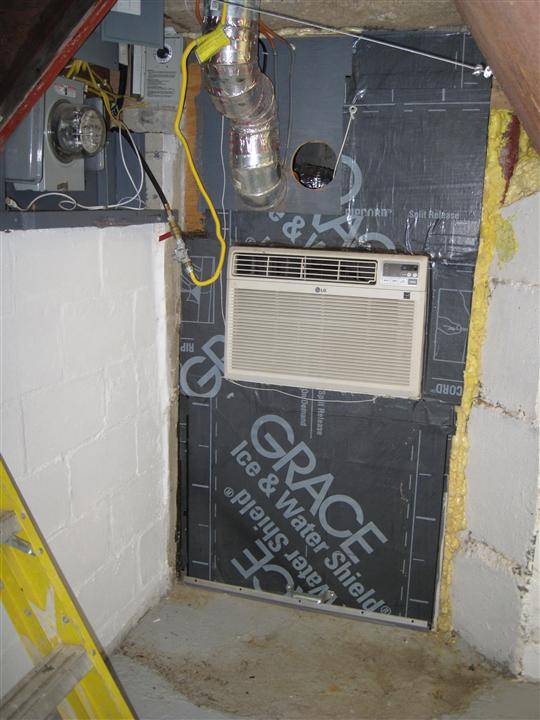
Here's a revisiting to the ventilation room that I built at the beginning. Poor mr. chipmunk, RIP. The 3rd picture shows the right vent shaft that goes under the foundation, and out below the porch. The 4th pictures shows the left vent that goes into the crawl space.
What do you think about that last picture? The black stripes on the two left outlets are OBVIOUSLY 240v, right?") The middle ones are 240v as well, but I ran out of plates. The two on the right are both 120v.
The middle ones are 240v as well, but I ran out of plates. The two on the right are both 120v.


What do you think about that last picture? The black stripes on the two left outlets are OBVIOUSLY 240v, right?
The middle ones are 240v as well, but I ran out of plates. The two on the right are both 120v.Right vent, goes outside.
Looking out the carbon scrubber's exhaust hole that I'm not using anymore, due to the CO2, and sealed room setup. I'll be covering that up soon.
Looking into the old carbon scrubber exhaust hole.
A shot of the ventilation room's hatch closed.
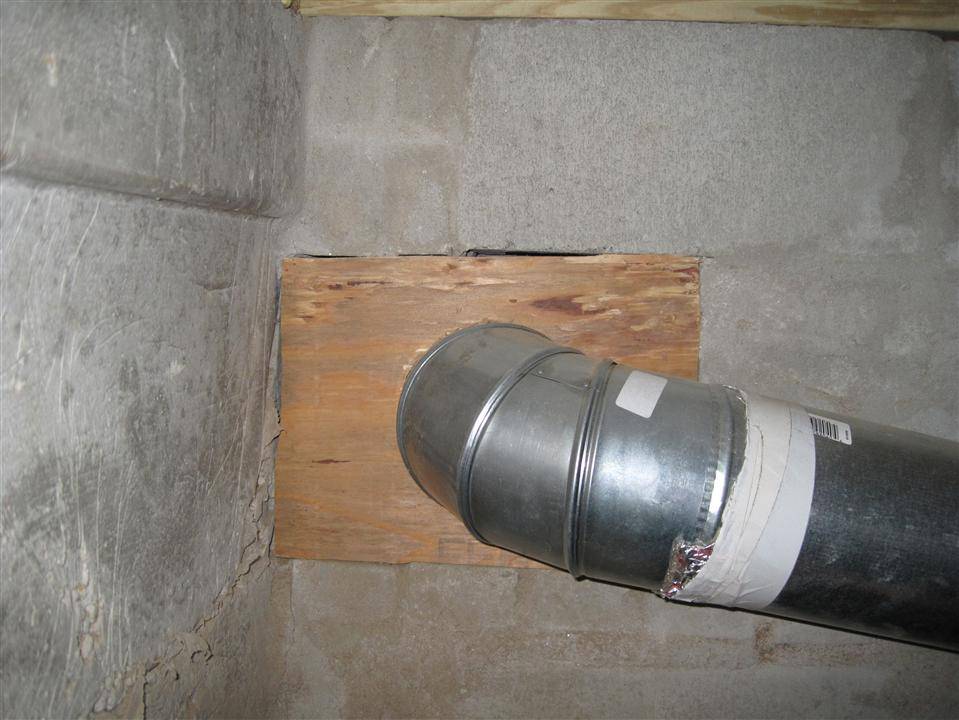

Looking out the carbon scrubber's exhaust hole that I'm not using anymore, due to the CO2, and sealed room setup. I'll be covering that up soon.
Looking into the old carbon scrubber exhaust hole.
A shot of the ventilation room's hatch closed.
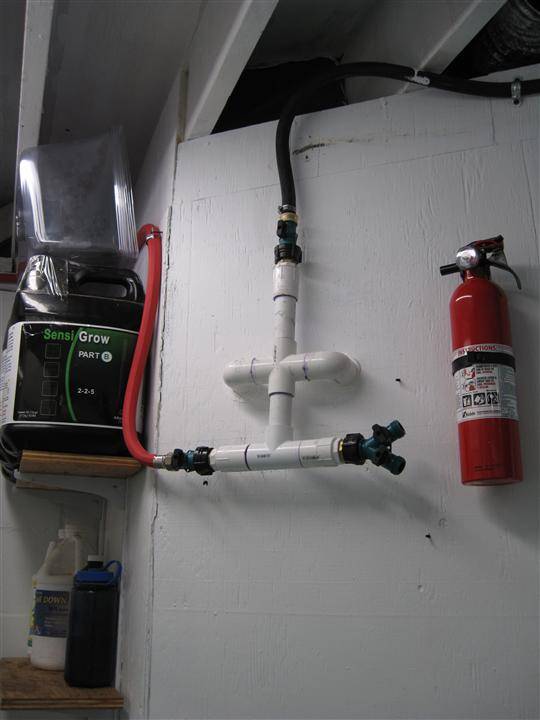
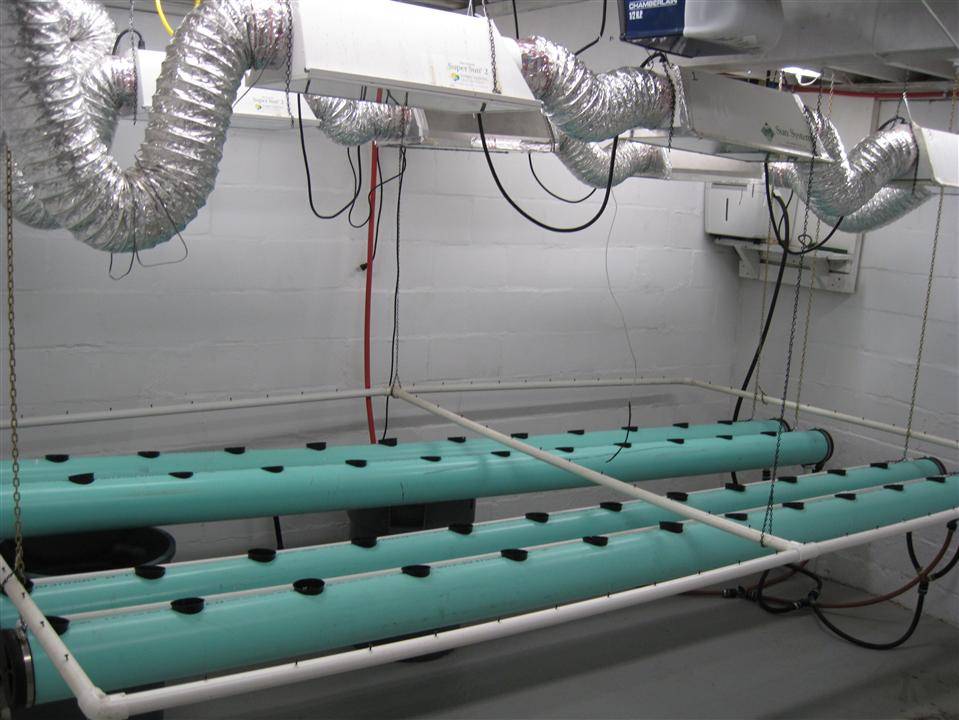
I just installed a new water manifold in the first shot. The water comes in on the top. In the middle, the pvc goes through the wall into the mother room.
The second shot is one of the main reasons that I redesigned the hydro setup. Having auto watering while you're using a controller tub and buckets that are below the reservoir's water level is a pain in the ass. Now the water in the 6" pvc will be above the reservoir's water level. No more control bucket makes me happy. Before, there could be up to 50 gallons in the system at one time, not even considering the water in the res. Now everything drains directly back into the res. The timer is wired as a "flip-flop" timer. Only one of the romex pig-tail plugs are live at any one time. The res pump is plugged into a cycle timer, that is in turn plugged into the orange plug. The float switch from the 3rd and 4th pictures is plugged into the yellow romex pig-tail. The solonoid from the bottom of the second picture is plugged into the float valve.
The result from above is automatic watering to the res that is only flowing when the res pump is off, and the water level is low enough for the float valve to activate.
The 5th picture is unrelated to auto watering, and it shows the support mesh (unwired) loom.
EDIT - The timer is set to give power to the solonoid for 30 minutes out of the day. This is more than enough time to refil whatever the plants drank that day, and it keeps a system failure from flooding the room for more than 30 minutes out of the day. This makes me much more comfortable letting the logic take control of the water main.
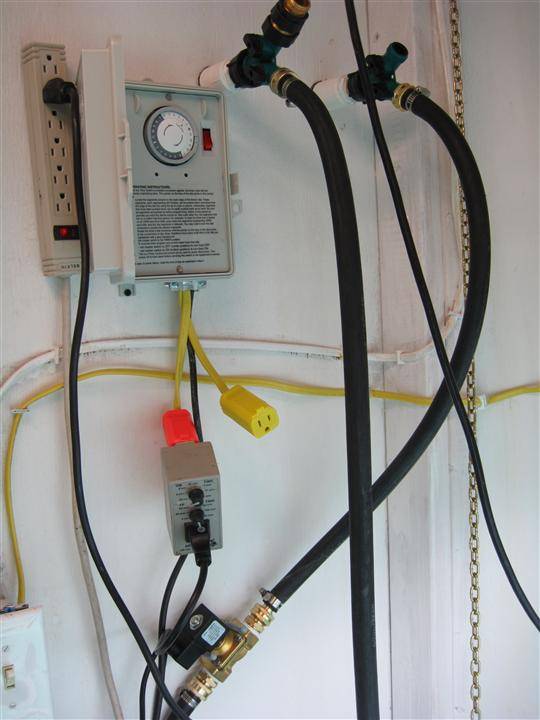
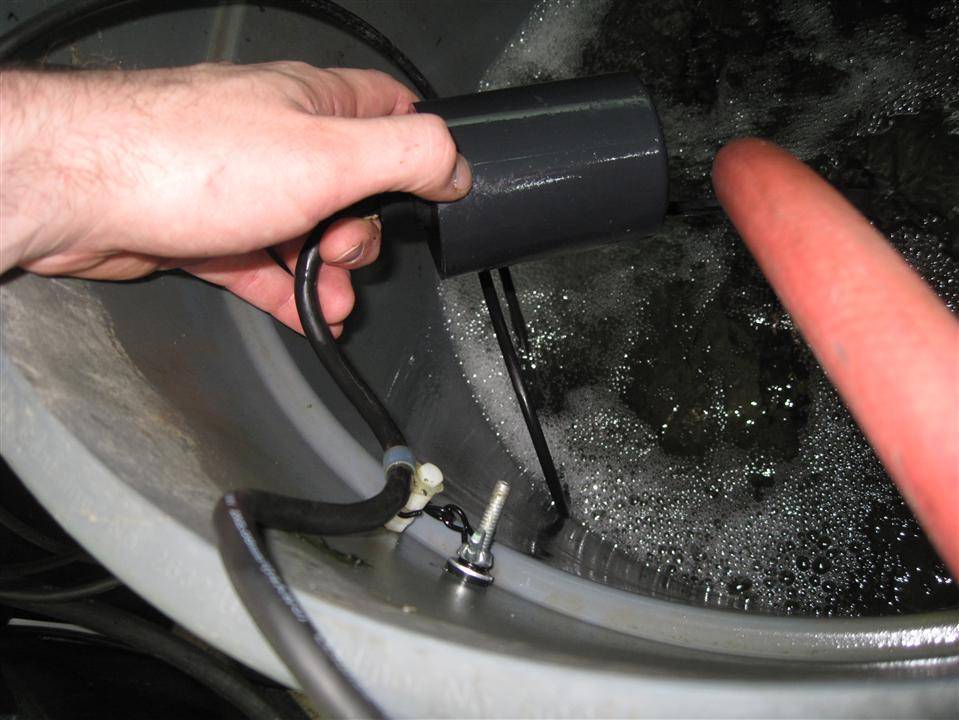
L
laylow
this is what i need to build... Great thread CBM
Flying High
Member
Wow!!! Thank you for taking the time to post so much detail; very few people see the bigger picture and I think your thread will help many a grower/builder.
Just reading your thread has given me some much needed inspiration to keep fighting to keep my dream alive!
It sounds like we experienced many the same things in regards to; hiring friends who claim to be professionals, other friends not following through on the bargains they asked for and received, and also the amount of labor, time, and money lost as a result of taking advice from supposed professionals... Not to mention the loneliness that comes from working non-stop in a room devoid of sunlight every day for a couple of years...
Awesome work!!! Once again thanks for taking the time to post, I learned a lot. I really like the power meter before your rooms panel.
H
I can't believe no one said anything about the chipmunk bit. Maybe that's just a smile and nod moment.
C
CANNATOPIA
Awesome Set up!!!!!!!!
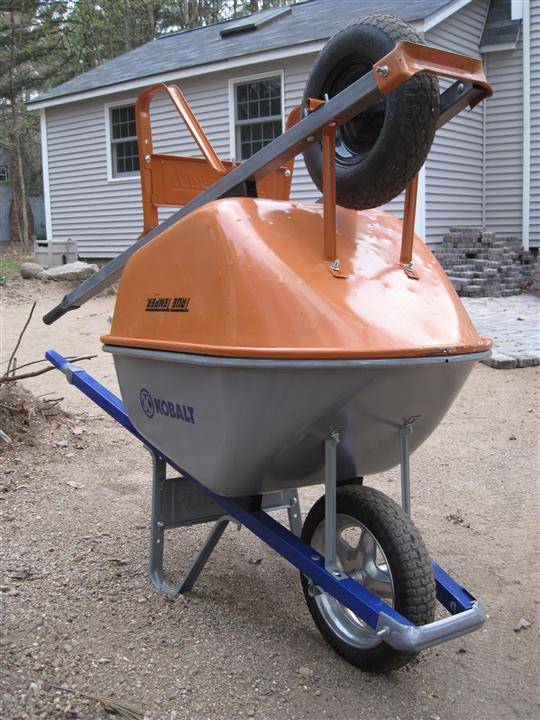
nice, those pavers must be expensive, why so many/?
M
mugenbao
I showed that to my wife, and carefully watched her expressions as she read it, but didn't think to comment on it here, haha.I can't believe no one said anything about the chipmunk bit. Maybe that's just a smile and nod moment.
Um, yeah... Makes me really glad I've never had to deal with that kind of thing in my grow area

nice, those pavers must be expensive, why so many/?
I have enough pavers to finish the 2nd half. Why so many? I wanted to cover the entire back area. I really like koi, and wanted a nice Mr. Miyagi, wax-on wax-off back yard koi garden. It's going to be sweet! I'm kind of making it up as I go.
dude are you hiring man you got some serious cash flowing there. great stuff
great stuffI have enough pavers to finish the 2nd half. Why so many? I wanted to cover the entire back area. I really like koi, and wanted a nice Mr. Miyagi, wax-on wax-off back yard koi garden. It's going to be sweet! I'm kind of making it up as I go.
yes sir
dude are you hiring man you got some serious cash flowing there.
That's the reason I can spend a little more on the materials; I don't have any labor cost. I spent another $3k on the stones for a total of about $5k.
What's that saying about idle hands?
EDIT - Oh, you mean the entire operation? Man, I dream of a world where I could actually hire someone to help me. Holy shit, that'd be great.
I think that I'm going to start another thread now that the building phase is just about finished. I'll keep posting pictures of the patio here until it's done. I'll come back if I make any changes to the mechanics of the room.
Does anyone out there know of any good DIYs for making a plate compactor? I could really use one, and they're like $3000 new. That's some bullshit, man! $300 a week for rental at the HD? Any other suggestions?
Hmm, it looks like the second batch of pavers is NOTHING like the first. It's always something.
Here's a few shots from the last few day's work:
dude are you hiring man you got some serious cash flowing there.
Hey hammerhead, are you Opie from Cannabis Culture? You have a similar avatar.
I think that I'm going to start another thread now that the building phase is just about finished. I'll keep posting pictures of the patio here until it's done. I'll come back if I make any changes to the mechanics of the room.
Does anyone out there know of any good DIYs for making a plate compactor? I could really use one, and they're like $3000 new. That's some bullshit, man! $300 a week for rental at the HD? Any other suggestions?
Hmm, it looks like the second batch of pavers is NOTHING like the first. It's always something.
Here's a few shots from the last few day's work:
Your work looks great bunker, very professional looking. The diy plate compactor would be a tough one, they tend to rattle themselves to pieces as it is. A roller compactor is easy but not as efficent and it's tough to get as even a surface as with the plate style. I have purchased a few of these at pawnshops when I worked as a mason but even then it was 500$ a pop and most are patially dismembered. It's part of the reason paver patios/drives cost so damn much to install. I'm going to install a three strip grass and paver driveway this summer and this has me stoked to get started, now if we could just get a day without rain...
HM
Is everyone ready to jump ship with me? Here's the next volume in the series;
The CannaBunker Continues
https://www.icmag.com/ic/showthread.php?t=211665
The CannaBunker Continues
https://www.icmag.com/ic/showthread.php?t=211665

Latest posts
-

-

-
 University of Guelph paper- Flushing is a myth!
- Latest: Douglas.Curtis
-

-
Latest posts
-
-
-
University of Guelph paper- Flushing is a myth!
- Latest: Douglas.Curtis
-
-
