What's new
  • Happy Birthday ICMag! Been 20 years since Gypsy Nirvana created the forum! We are celebrating with a 4/20 Giveaway and by launching a new Patreon tier called "420club". You can read more here.
  • Important notice: ICMag's T.O.U. has been updated. Please review it here. For your convenience, it is also available in the main forum menu, under 'Quick Links"!

Off the shelf retail store screw-in LED and CFL bulb comparisons

ScrogMonster

Active member
Veteran
View Image

That meter pins hard right (roughly 2500) outside in southern California full sun at noon in July. 2000 is the brightest shade possible - basically full sun and thin leaf cover if the wind rustles the leaves. As you'd imagine, the plants grow very much like they're in my yard, they're just smaller in size (3ft versus 12ft).

The cab you're looking at is 4ft wide x 2ft deep x and 4ft tall. I've recorded the light levels with this meter down the right wall when it was empty. If you look very closely at the brown panel about 2/3rds down the right side you'll see a "750" in black sharpie.
View Image

When I first started growing in '08, I took this little light meter to all of my friends gardens with big lights. I tested canopy brightness of multiple light 5k setups, 1000w / 600w / 400w solo HPS, MH, CMH, etc. because I needed an idea of how bright my canopy needed to be.

As a general rule, the guys with 600w (non air cooled) were around 1000umol at center canopy on this meter, while the guys who had air cooled lights could run closer and were usually about 1300umol under the center of the bulb. My friends with 1000w or multiple 1000w bulbs ran 1400-1700umol under the bulb center, the latter being air cooled hoods.

Will cannabis produce bud at 800umol? Absolutely. You can see at the 750 mark (even shaded) the buds look great. The top of my canopy is at the 2000 mark and haven't really seen any issues, very occasionally I see bleaching in the buds. Normally, they just look like they were run at max tilt under big lights.

Boats N Hoes
View Image

MAC1
View Image

Love the cab set up and those plant look beautiful my man.
:tiphat:

Meters and numbers and semantics aside, what you’re doin is obviously working real nice for you. ;)
 

ScrogMonster

Active member
Veteran
I was resetting my tent after harvesting a two tier horizontal grow and going to a 1 plant vertical grow and was playing with the light fixtures and thought this diagonal fixture shape would compliment a natural tree shape KISS grow quite nicely.

picture.php
 

Drop That Sound

Well-known member
ScrogM- You were gonna air cool those right? Your frames look about ready to box out. What material were you gonna use?


Terpene- Did you use polycarbonate\lexan, like plexi glass? Or was it just some kind of thicker and softer acrylic?..


The reason I ask is, I'm scared to blast over 40 holes through an expensive 3'x4' sheet of thin plexi glass, without cracking it. Even if I leave the protective film on, and add tape over the holes first, it sounds sketchy. Im usually ok with small screw holes, but bigger ones with hole saws always gave me problems cracking in the past.

The plexi glass would look extra cool with my current project i'm working on. A see through box to show off the wiring and SILs.

I would order some 1/4" corian solid surface instead, but covid has the warehouses shut down so I can't get a sheet.

Also, I got a large used classroom sized aluminum sandwiched composite dry erase board, but I can't get the glue they put the wood frame around off, without scratching up the nice white paint. I cant get 2 full size panels like I need.


I really want to pickup 2 3x'4 sheets for the air cooled boxes, anyone have any other idea's? Or should I take the risk and try drilling it....
 

Drop That Sound

Well-known member
I'll be drilling a total of 74 holes over 2 panels, so I know plywood or hard tempered wall boards would be the easiest and cheapest choice, and I could do it with one hole saw. Also skin it later with FRP or plastic wall panel material, or simply paint it, etc.

Metal sheeting is probably the best material wise, being the lightest. Still, kind of expensive though. And will wear out many hole saws in no time, with that many holes, that are too small to cut with tin snips. It would also act as an extra heat sink in my case, because i'm gluing the SIL globe side rims directly to the panel with holes.

Metal ducting\fittings - The ultimate off the shelf air cooled SIL hood material. Very expensive though, or I would go that route. Better off to buy it by the sheet and bend into whatever shapes yourself.

attachment.php


Anything else like plexiglass, acrylic, solid surface shower panel material, etc, is kind of over the top. But then again so are my goals...
 

Klompen

Active member
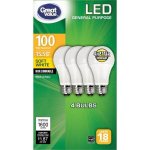
ok i need help with my situation...im not using great value bulbs after the blurple deal, sylvania 5000 watt daylight dimmables are not good.
Which bulbs still have the plastic globes and wont crap out on me in a month? i need to expand my grow area.
i use agribrite cfls at 42 watt for my vegging and baby clones, but LEDs for my flowering. the sylvania 2700 k are good for that but i cannot cut the globes off as they are glass, and the led filamint? sticks out into the globe.

Diamond bits on a Dremmel tool will make quick work of that glass....
 

Drop That Sound

Well-known member
Diamond bits on a Dremmel tool will make quick work of that glass....


On the Great Value bulbs I have, the globe pops right out with some leverage. I just use a large knife and keep rolling it in there, prying a little bit at a time.

They are pretty skimpy with the adhesive, and also the rims are flat.

I see no need to cut anything on them, when you can pry off a globe in less than a minute. Just watch your fingers!

attachment.php
 

Attachments

  • gvSIL.jpeg
    gvSIL.jpeg
    22.4 KB · Views: 20

Drop That Sound

Well-known member
^ Oh nm, I see he was talking about actual glass bulbs. But that's how I remove the globes on the GV bulbs, without turning them blurple either, lol. Fully intact.
 

igrowone

Well-known member
Veteran
i use great value bulbs, the 9 watters
cut off the globes about 2 years ago, all still running fine
no color distortion that i've seen
 

ScrogMonster

Active member
Veteran
I'll be drilling a total of 74 holes over 2 panels, so I know plywood or hard tempered wall boards would be the easiest and cheapest choice, and I could do it with one hole saw. Also skin it later with FRP or plastic wall panel material, or simply paint it, etc.

Metal sheeting is probably the best material wise, being the lightest. Still, kind of expensive though. And will wear out many hole saws in no time, with that many holes, that are too small to cut with tin snips. It would also act as an extra heat sink in my case, because i'm gluing the SIL globe side rims directly to the panel with holes.

Metal ducting\fittings - The ultimate off the shelf air cooled SIL hood material. Very expensive though, or I would go that route. Better off to buy it by the sheet and bend into whatever shapes yourself.

View Image


Anything else like plexiglass, acrylic, solid surface shower panel material, etc, is kind of over the top. But then again so are my goals...

I’ve already bought the stuff to air cool my lights. I just got some thin plywood and that I’m gonna drill holes for SIL’s through and the 6” duct to register/vent pieces to hook up the ducting. I’m gonna cover the front of fixture with the plywood and just tape foam insulation around the boards every where else and hook up both light fixtures to a 6” ‘T’ and hook that up the tents exhaust flange. So the air will be exiting the tent through the holes in both light fixtures. I haven’t decided whether I want the bulbs to flush with the board or stick out just a wee bit.

You another idea I had if I hadn’t already built my fixtures... I really wish I could do this... is just to take some of that square vinyl down spout which is only 1$ per foot and drill holes on one side that bulbs could screw into like a socket and bigger holes on the other side for the light to shine through where they’d sit flush or stick out a bit, and then just run wire along the back where the bulb screws are and just solder the wire directly to contacts on the end of the bulb. The globes of the bulbs (if you still have them!) could be used to cover the exposed bulb screws and wires... if you didn’t have them I’m sure something you might have to buy could work even better.

One could also just get actual vinyl gutters And drill holes on the bottom and screw them over they’re bulbs and sockets onto a board and then a 3” to 4” duct expander/reducer could be attacked to the end. One could use 3” or 4” squares of thin plexiglass or what have you and cover the holes for sealed separated air cooling and a $20 dollar 4” or 6” 100-240cfm inline fan for separated through and through air cooling.

Anyway ramble ramble it cost me $86 at Lowe’s with my military discount for 1 - 4 x 8 piece of thin plywood and the duct pieces and more aluminum tape and another 20ft of flexible 6” ducting which is all I need to air cool my 4 - 2ft x 4ft fixtures ... I’ve been hoarding lots of reflective foam insulation board scraps from my projects so I already have plenty of that to box in the sides and backs of the fixtures. Don’t need fans since I’ll be exhausting through the fixtures and just tapping into the existing exhaust fans.

I really want to build some nice looking air cooled gutter SIL fixtures just for fun and to post them for others to see but I really shouldn’t take that on I’m already behind on things in general lol. I hope you or some else does a gutter or ducting or air cooled fixture build it’d be cool to see.
 

f-e

Well-known member
Mentor
Veteran
3 ply or sign board. Both are good insulators. Metal would be a bad choice.
 

Im'One

Active member
Im wondering if the vibrations of the dremel made the connections go bad...?

i have no idea. i found another brand i had cut off and it didnt do it. my sylvanias have glass, but im not sure if i want to use the dremel if its gonna cause a problem...also will the led protruding into the space make a difference? the great values have a flat surface with chips in a circle as you know.
 

f-e

Well-known member
Mentor
Veteran
I was really careful at first, sawing around them, leaving a little skirt behind, so as to not get near the good bits.

Now I use a screwdriver, with a hammer behind it. Though a new brand would mean assessing the first one again.

A bench vice would be lovely.
 

Drop That Sound

Well-known member
I really want to build some nice looking air cooled gutter SIL fixtures just for fun and to post them for others to see but I really shouldn’t take that on I’m already behind on things in general lol. I hope you or some else does a gutter or ducting or air cooled fixture build it’d be cool to see.


Same here. I already thought about using some 4x4" vinyl PVC fence post sleeves, but I already have plans for a NFT hydro system with them, and they cost like 16-18 a piece. Not bad really, but I was holding one up, and they are kind of heavy. Could get two 4' strips out of a full 8ft'er. Sounds like you got a plan, hope to check it out soon.


I may just use the 4x8 dry erase board I got for $8, and make my 2 3x4' panels a few inches shorter. I think i'm gonna burn through hole saws in that too, going through the aluminum skins almost 80 times.

We'll see, might just use plywood as well.
 

Drop That Sound

Well-known member
f-e-

Ya signboard would work good. I was even thinking about the polycarbonate multi-wall greenhouse panels, that are kind of like the coroplast sign board. $80 for a 4x8 sheet at HD. Not totally clear, but its indestructable, and UV resistant. Takes 10's of years to start yellowing. I could even add RGB leds inside the box, and make it light up all sorts of cool colors with a remotre, just for fun & looks...
 

Drop That Sound

Well-known member
Im wondering if the vibrations of the dremel made the connections go bad...?

i have no idea. i found another brand i had cut off and it didnt do it. my sylvanias have glass, but im not sure if i want to use the dremel if its gonna cause a problem...also will the led protruding into the space make a difference? the great values have a flat surface with chips in a circle as you know.

Maybe you could score the glass bulb all the way around, with a glass cutter? Give it a whack into the trash can. It's not like they add vacuum to the led glass bulb, like they do with real incandescents. It won't implode as much.


As for the blurple great value bulb, ya thats what I was thinking, knocked a connection loose. It would be cool to know how. Otherwise, I would be kind of sketched out that it might catch fire or something, if trying to run it. Can you hear it emitting any weird high pitch noises?
 

piramidon

recidivist icmag - OUT-ist convins - microgrower
Veteran
Im wondering if the vibrations of the dremel made the connections go bad...
My money is on you shaved off the top of the led's with the dremel.
As far as I know all led are emitting uv light inside, it's the top layer that gives the color we see.
Take a closer look, maybe with a magnifier and please come back to us, you made me curious now. :tiphat:
I was planning to use uv to boost up the trichomes but I had to give up due to the hefty prices on them but nowadays with the cheap SIL I can experiment all I want with no fear for high cost.

So thank you for partially confirming my thesis. :tiphat:
 

SuperBadGrower

Active member
Indeed white leds are made by converting blue leds 440-470 nm through a layer of phosphor. Most are just blue when you take away that layer. Why are red diodes used in that particular one? Who knows. But I can bet you $100 that it's not to make them better, lol*. Maybe they used a batch of refuse "grow light" pcbs and covered them with the plastic. Maybe they were able to find out a way to somehow cheap out even more, using red diodes and less phosphor, or whatever material is used for the cheapest color conversion on the planet. (Lord knows what they use to color the dome, it could be done with urine)

*No disdain that's just the name of the game here; none of these bulb makers will ever go above 100 lm/w until the energy label requires them to. But they can always strive to make them cheaper (which is great)
 
Last edited:

Im'One

Active member
Maybe you could score the glass bulb all the way around, with a glass cutter? Give it a whack into the trash can. It's not like they add vacuum to the led glass bulb, like they do with real incandescents. It won't implode as much.


As for the blurple great value bulb, ya thats what I was thinking, knocked a connection loose. It would be cool to know how. Otherwise, I would be kind of sketched out that it might catch fire or something, if trying to run it. Can you hear it emitting any weird high pitch noises?


no high pitch noises and yes i have left them running for a few minutes. i have an over head fixture and if i have to be in there in rhe dark period, i use the blurple to see with
 
Top