MyNameIsEarl
Member
na i reveresed them to what they were when i purchased them
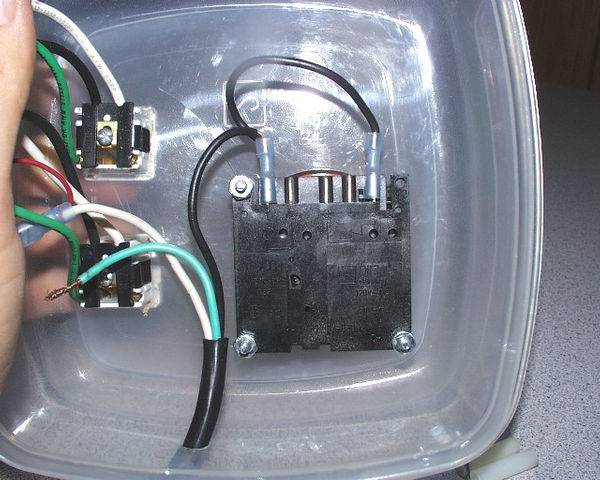
magnet at float end of switch not C" Clip end.
magnet at float end of switch not C" Clip end.
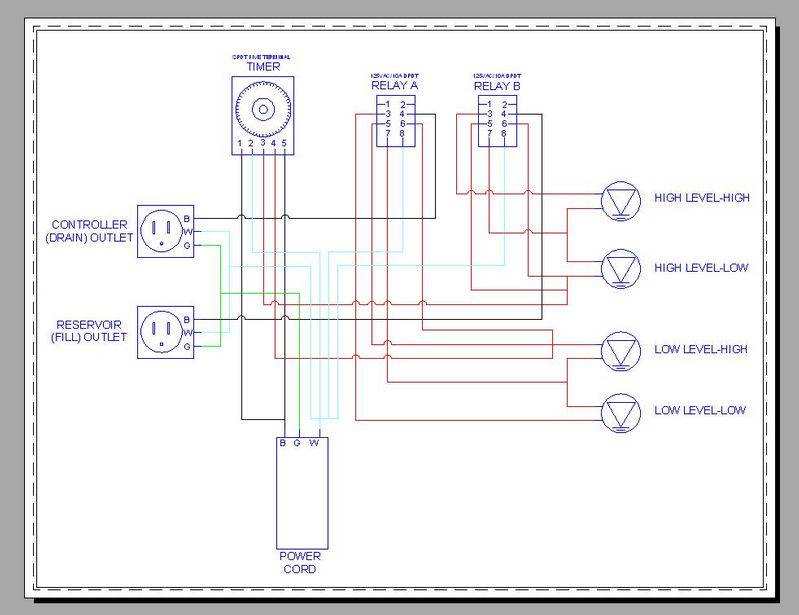
hay blind date i just tested the hair dryer on pin 4 and with the tabs reversed but the hair dryer will not turn on at all during the UP or DOWN phase!!!!

BlindDate said:so what does that mean ??? No power at all on pin 4.[/B]
So then what is pin 4 supposed to do?
imnotcrazy said:Correct Earl, if ALL the pins are pulled up, you reverse the operation of the timer by swapping pins 3 and 4