What's new
  • Happy Birthday ICMag! Been 20 years since Gypsy Nirvana created the forum! We are celebrating with a 4/20 Giveaway and by launching a new Patreon tier called "420club". You can read more here.
  • Important notice: ICMag's T.O.U. has been updated. Please review it here. For your convenience, it is also available in the main forum menu, under 'Quick Links"!

Dual 150w Stealth Cab Build + First Grow (Pics)

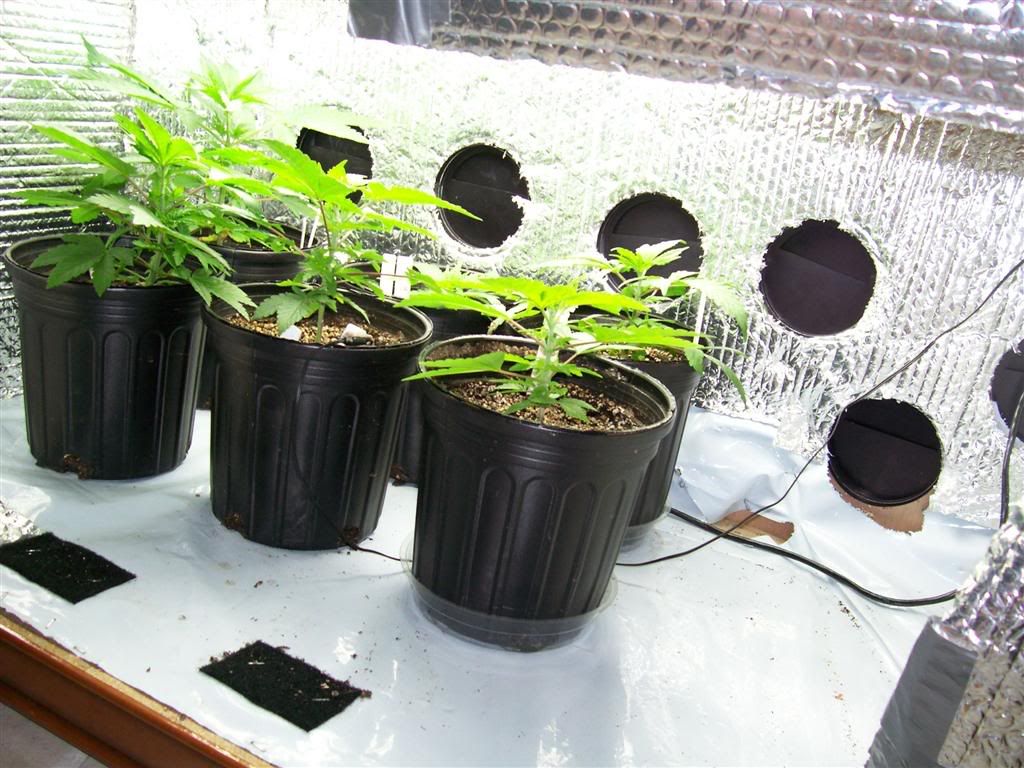
Definitely add those inake holes ASAP. You'll notice a huge difference. If that doesn't get you there, the cool tube should! I'm suprised with that $2k+ budget you didn't just spring for a vented reflector housing and a nice ballast, all your other stuff is top notch!

Thanks for the kudos!

Yeah, see, this all comes with me being a terribly inefficient stoner. This is spread out over a bazillion trips to different stores since the end of December. :joint: The 150's were an impulse buy, very very early in the process. They just seemed too good to pass up.

This includes any number of little and big things I didn't need, or used so inefficiently I had to go back and buy another, lol. Again: :joint::joint::joint:

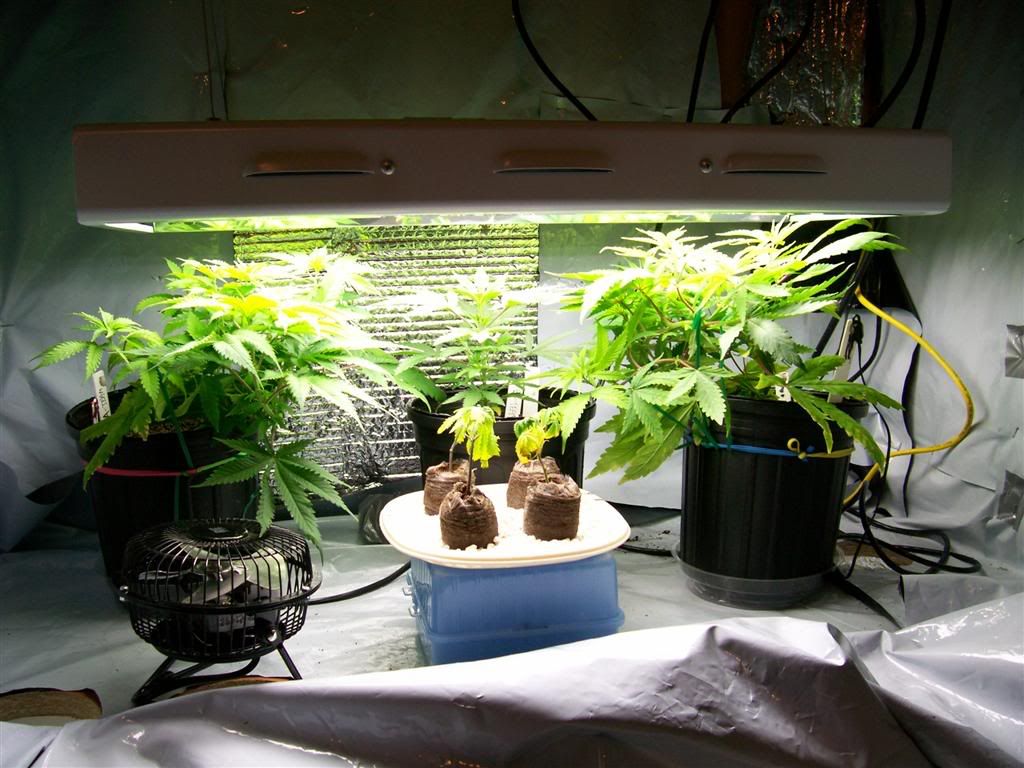
Now that I've hung up these 150's, with the home re-wired ballasts......eeeeeeeeeeeeehh.....I'm not feeling very enthused about the arrangement at ALL. I think....This is probably going to turn into a 400w air-cooled cabinet, if for no other reason than my piece of mind. I'll probably end up giving the 150's to friends, I guess.

Is that the S&P 100x? I'm debating between that and the 125... but I'll only be running 200w CFL, probably with lower intake temps.
Yep, yep. It really is nice and quiet, which was key for me. With the regular ducting though, it roars pretty good. Once I replace it with the insulated ducting, I'll let you know how much of a difference it makes.

Also, note: Insulated ducting = fiberglass. Yeah, I got a nice couple of lungfuls earlier, and some in my eye, trying to pack it back in the box. Not fun. Feel free to point and laugh.

nice clean set ya got goin here...im from the south to so i can understand your temp problems..more intake always seems to do the trick though..and i see where you say you are going to order some 4" darmroom louvers..well if they are the midget darkroom louvers like i have then i suggest maybe you order a few more then you think you would need because i ended up havin to make a second order because the air doesnt flow as good through them like it would a regular intake

Awww, man....where were you a week ago. I was so stoked when they got here today, then I read your post and I was all :yoinks: and then I thought on it for about five seconds and then I was all :frown: because I knew in my heart you were right.

Sooooo...I have a single 4" exhaust, powered, obviously. I ordered and received 2 louvers. Do you think I need to add 1 or two more?

I started thinking about it a little more, and now that I think about it....maybe the easiest thing to do is get even more, and use them for the passthrough from the veg to flower cabinets too. I guess I'd need the same amount of louvers there too. Frak man, 4 x 4" holes in the floor of the flower cab? That's a lot of floor space.

Seriously, thanks for the heads up, cause I know you are right.
 
if i understand correctly you are using them as intake for your flower cab??and possibly for your veg to flower transfer section?? if this is correct then man i would suggest you get at least 4 for intake on flower cab..at least cause ive found them to be quite restrictive..for example i have a 110 cfm pc fan in a speaker cab that is almost but not quite 1sq ft and before i installed the 4 louvers i had cut 4 4" intake holes and my temps with lights off were equal to and sometimes even a little lower then my room temp...when i put the louvers in the holes and got done caulkin gaps and what not my temps are at a steady 2 to 3 degrees higher than my room temp..so obviously there is some restriction..now as far as how many you should put for the veg flower transfer section...i dont have anything to offer there cause im not familiar with having to circulate air through two chamnbers with one exhaust fan so for me to give you a suggestion would be uneducated..hope this helps a little..keep it green bro and i cant wait to see that cab full o buds:joint:
 

K.J

Kief Junkie's inhaling the knowledge!
Veteran
Very nice, well organized work here. Kudos!

Oh, and doing things cheap isn't always a good idea. I think you were wise to spend a little extra cash and do it the right way for you. That's what we did, and though it didn't turn out perfect, we're sure happy with it so far!
 
if i understand correctly you are using them as intake for your flower cab??and possibly for your veg to flower transfer section?? if this is correct then man i would suggest you get at least 4 for intake on flower cab..at least cause ive found them to be quite restrictive..for example i have a 110 cfm pc fan in a speaker cab that is almost but not quite 1sq ft and before i installed the 4 louvers i had cut 4 4" intake holes and my temps with lights off were equal to and sometimes even a little lower then my room temp...when i put the louvers in the holes and got done caulkin gaps and what not my temps are at a steady 2 to 3 degrees higher than my room temp..so obviously there is some restriction..now as far as how many you should put for the veg flower transfer section...i dont have anything to offer there cause im not familiar with having to circulate air through two chamnbers with one exhaust fan so for me to give you a suggestion would be uneducated..hope this helps a little..keep it green bro and i cant wait to see that cab full o buds:joint:

Almost exactly what I'm doing, but the air intake is at the bottom, in the veg chamber. I went ahead and ordered enough....I hope.

Thanks for making me see the light!

Very nice, well organized work here. Kudos!

Oh, and doing things cheap isn't always a good idea. I think you were wise to spend a little extra cash and do it the right way for you. That's what we did, and though it didn't turn out perfect, we're sure happy with it so far!

Thanks a lot KJ, loving your build too, and I'm watching your grow anxiously too. :)

And now...for the post. Let me preface this by saying: :( :( :(


----

It's a little delayed, but here is a big, horrible, nasty no-good update.

Worst....weekend....ever....

See this beautiful group of young plants?


Yeah, that's the last time...Because I managed to completely DESTROY AND ANNIHALATE THEM WITH EXTREME accidental PREJUDICE!!!!

Here we are preparing to tansplant, making a nice cozy cup sized hole in the larger pot.


Oooh, and what have we here? Well, Borkborkbork is going to be all preventative and whatnot, spent good money on a bottle of Einstein Oil, gonna dip those babies when I transplant, two birds one stone, an ounce of prevention and all that....


Hmmm...this doesn't quite look like the picture I saw in the book....but whatever....and what's this? It smells like....I don't know....a steaming pile of bork?! I gag multiple times. Fun.


I make a terrible frakking mess...a terrible stinking smelly nasty frakking mess, the stank of which took DAYS to wear off my bedroom. Urk!

But I managed to dip and transplant EIGHT of the twelve original babies. Four weaklings/oddballs were culled to make room. I thought I would be able to fit them all under the T5's, but I was mistaken, so I had to hook up the 150w and take it for a spin for a couple of days.

One of the small pieces of good news for the weekend is that I do feel a little better about the light after having it run without incident for a few days.

By the next day, I knew something was horribly, terribly, awfully wrong.

The plants had a sick hue. They were....I don't know....slimy? Oily? Yeah...oily is the right word (GEE I WONDER WHY SHERLOCK YOU FRAKKING IMBECILE!).

The leaves were turning brittle, and transparent!


I'm tearing up writing this no lie :(

My poor babies...what had I done?!?


I tried to spray them down with water and wipe them off, but it was too late. They just crumbled in my hands. Horrid.

A near total and complete loss. I destroyed and tossed the dead plants. I tossed the soil too, I considered it all contaminated.

I was able to salvage three plants. Two of the South Africans, and one of my poor little Mango Bubblegum's.

The three survivors, as of Sunday:


So, have you guessed what went wrong yet?

If you guessed: "You got too stoned, and THOUGHT you read TABLESPOON when you actually read TEASPOON", you get a gold star!

I guess I will chalk this up as a learning experience. Betcha five bucks I never make the 'ol tablespoon/teaspoon mistake again, my friends!

I spent most of the weekend in a horrible depressed funk, contemplating the situation and what to do.

One thing was frakking sure: This train ain't got time for a derailment, ALL ABOARD!

By Sunday, I was moving again, scheming, planning, and cackling maniacally.

I popped the rest of my Mango Bubblegum in a glass, as well as half of my G13 x Hawaiian Butterscotch (sounds yummy, but the reviews are poor. Still don't want to use my good seeds, until my first harvest).

Did I mention I got some dark room louvers for the intake vents?


I had, like a fool, ordered two. After the discussion here, I ordered a bunch more. :) I also picked up a 4" hole-saw, and borrowed a heavy, heavy duty drill from a friend, that fortunately had an added handle for your left hand. It was definately needed. It worked out great, imo.

Most of the holes are just wide open now (except for two), but they are ready for the louvers when I get them.

I also took the piano hinges off the bottom of the veg door. That was just not working. I may leave it just completely removable in some fashion, or add the hinges on the right edge instead, so that it opens like a door. Either way would be fine.

Saw another cabinet build that has inspired me to drastically change my light baffles, but that will be another day.

My immediate goal was GET THE CABINET CLOSED! I've had to have it sitting open, and that sucks. Here are the pics of the cab after many hours of work tonight, mission accomplished!


Here is the veg compartment with vent holes visible.


And finally, here are the three survivors (one is still struggling pretty bad, and is still questioable)


GAH! Last picture won't upload, I'm out of space!

Do members get more space for pictures with x amount of posts, or...? Anyways.

Still to do:

Silence: Need quieter oscillating fans or alternative. Install insulated ducting.
Heat: Vent to attic, rather than room (long-term)
Light-seal; I am going to completely re-vamp the lightt baffling system for the front of the cab.

Oh, and the B batch of seeds have been moved to paper towels/baggies to sprout for a few days. Need to get to the nursery for some more EWC to make baby soil. Don't feel like trying something new (jiffy pods) just yet.

I'm sure there's more, but I'm getting REALLY tired.

Please give a moment of silence to my dead little babies. They will all be missed :(

P.S. Please let me know if the thumbnails are working right for you, i.e. they are properly clickable.

And how can I get more storage space for pics?

Peace,

Bork
 
well if they are the midget darkroom louvers like i have then i suggest maybe you order a few more then you think you would need because i ended up havin to make a second order because the air doesnt flow as good through them like it would a regular intake

Dude...you were not kidding.

I :cuss: Airflow

I got the louvers in, so I closed the two remaining holes. I also decided to move the cab against an interior wall closer to the a/c vent.

I closed up shop, the house is...well it's fracking cold.

But I open up and take a look earlier and it's like 87.5 at canopy height

:jerkit:

I have two extra...I'm not sure what to do....I'm leaning towards adding two more intake holes, and leaving it at 4 between the flower and veg areas.

I did a really shitty random placement job on the four holes I did put in. All 8 actually.

Ugh.

I have come to some conclusions.


  • Ventilation and heat are PRIORITY FRACKING ONE!
  • I need to put an air return in the room. Perhaps bottom of the door, but hopefully above the door.
  • I -have- to vent OUT of the room. Two options.
    • Ceiling. Most likely. Fairly camouflageable (cardboard box on top of cab, ta-da)
    • There is a wall access next to the cab. It allows access to the bathroom plumbing. Possibility which will be examined.
  • The lights are not gonna cut it. I have to get a real light + ballast + air-cooled reflector.
:laughing::laughing::laughing::laughing::laughing:


Nothing is ever easy.

I want to get it all done as soon as possible. It's only a matter of time before I will NEED the flower chamber operational.

I don't want to say that this project is over budget, because there was never a budget, per se. But I sure as shit have spent a lot more than I thought I would. I'm about to hit the price point of one of those pimp daddy grow boxes. Then again, I include EVERYTHING in my count, down to the 69c plastic pots, the nutes, the tools, the screws, the soil, the beans, everything. So there's that.

Point being, I'm about to drop another four hundo on lighting.

I'm getting a digital ballast, unless there's a strong reason not to.

400 HPS (I think)
Galaxy digital ballast
SuperSun reflector

This will help me sleep much better at night, I think. I chose to go digital, because they're supposed to be quieter and cooler. I'll see what the shop guy has to say.

Update on the survivors: One of the S.A's is probably toast. I'm waiting another day or so for signs of improvement before I kill it. The good news is that the remaining SA and MxB seem to be....I don't want to say "thriving", but they're doing ok.

If they survive, I may have created a new completely fungus and disease resistant strain of weed, which will also, as an added bonus, taste like shit. I'm preeeeeeeetty sure that with all the stress they've gone through in their little lives, they're gonna turn out to be fellas.

So onto the next try (whilst remaining hopeful)...

One of the seeds is visible over the soil as of right now. Hopefully a few more will make it into dirt in short order.

No more major construction likely until midweek next week, though I likely will add the two extra vent holes soon, if only so I can close the cab back up, I think I have to leave it open to vent again!!

:wallbash:

 
Life, post-Einstein Oil Disaster.

Life, post-Einstein Oil Disaster.

Things are humming along fairly well at the moment. In construction news:


  • Moved cabinet to inside wall.
  • Examined possible venting through wall. SCORE! Wall panel leads into back of bathtub and interior uh....wall spaceyness! This is now the venting target fo sho.
  • Added air return over bedroom door to improve circulation
  • Added new air deflector for a/c outlet to direct cold air toward the cabinet.
  • Still need to add 2 louvers, drill entry and exhaust holes for air-cooled reflector, and run insulated ducting into the wall. MAJOR construction. NOT DIGGING IT!
Sigh...this turned into a MUCH bigger and expensive project than I had planned (I use the word 'plan' very loosely here). I'm about to go drop 6 bills on a new light setup and a can filter. Word.

In plant news:


  • Have started training the two big plants (hereafter referred to as the A-Team)
  • Just culled the non-starters of the second set of seedlings (Mango x Bubblegum / G13 x Hawaiian Butterscotch) (hereafter referred to as the B-Team). 1 x MxB and 4 x G13xHB remain.
  • Trying out peat cups on the latest batch (hereafter referred to as the C-Team). Very low germ rates this last batch. 1 x MxB and 3 South Africans. 2 of the South Africans are above ground.
Pictures! (hope they work, had to make a pbucket account)


First, the survivor who ain't no survivor. Enough is enough, I put him outta his misery.


072.jpg


April 3rd. Day 21 since planting. The A-Team. First, Mango x Bubblegum


073.jpg

074.jpg


South African #7

075.jpg

076.jpg

077.jpg


Tanuvan

Member
I wish I would have seen this sooner. I would have warned you not to use those midget louvers. Those are not efficient at all. I had them, and opted for 2-3 of the 8x8 in square dark room louvers...MUCH better.

I'd suggest if you were using round holes to just go for black pvc elbows. They don't restrict airflow nearly as bad as those midgets.
 
I wish I would have seen this sooner. I would have warned you not to use those midget louvers.

:wallbash::wallbash::wallbash:

BUT THEY'RE SO NEAT, WHY DO THEY SUCK!?!?!

basterds :(

I'd suggest if you were using round holes to just go for black pvc elbows. They don't restrict airflow nearly as bad as those midgets.
Meh...I don't know what to do. I went and looked at the four inch PVC stuff at Lowes and it suuuuuuuuuucks. Big round bends, no 90 degree angles, it's just too big and won't work.

I have to do....something.

Right now I have 4 x 4" louvre's from outside cab to veg, and 4 more between the veg and flower. With JUST the T5's running, it's 10 degrees F hotter than ambient in the cab. Actually, correction, that's if I take 2 of the louvers between the veg and flower out. With all four closed, it's too hot, period.

I have 2 extra louvers that I have not drilled and installed...but I don't see how it's really going to help.

I am at a loss as to what to do, actually. Completely stumped. But I guess I'll start by adding one more intake and one more transfer, and...frak, I don't know.

:(
 
screw the PVC....4 inch will kill so much space and still not be light proof unless you make multiple bends, which will take up even more space.

Use some 3/8" OSB plywood to make a false floor 1" shorter than the depth of your cab.(get it cut at a home improvement place) Also pick up some 1"x3" wood and use it to support the floor.

Cover the hole in the back right of your cab and drill another front right.

Paint your current floor black.....along with the underside of the false floor.

Place the false floor so the 1" gap is at the back.

If this still lets too much light through, you can use more 1x3" to create a zig-zag airflow path that light cannot follow between the original floor and the elevated floor.

You will lose ~3" of headroom doing this, but it will blow away those restrictive darkroom louvers and will only run you <$20 including the paint and a cheap handsaw to cut the 1x3s.

This is a fantastic idea. I immediately started looking for a complete tutorial, and of course couldn't find one. :p I was heavily leaning towards doing this, or, using this idea with a new flower only cab in the closet, but then I did a complete 180 and went in a different direction which won't require so much labor. Read below.


Quick Update:

So I went to the hydro shop last weekend and got some new toys, including a Sun System 1 400HPS ballast and a yieldmaster aircooled reflector, which I was afraid would be too big for the cabinet....and it was.

Sooooooooooo....here's the plan (insert cash register noise on loop here)


  • Trade ballast for digital ballast
  • Trade reflector for a proper reflector with hinged glass and gaskets (this one has neither, hence the cheap price)
  • Get a 6" inline fan and ducting
  • Get an additional T5 array
  • Get a growtent
Yeah, you heard me right. A tent. I've had about as much construction as I can handle at this point. :wallbash: So I'm going the "throw money at the problem" route instead.

Here's the deal, the shop owner talked me out of the 4" cooled reflector. He's right, the 100cfm fan isn't going to cut it. With only the T5's running, the current fan is having a hard time keeping the cab cooled (granted, I still need to fix the intake).

So the current cab is going to be strictly veg, which will eliminate the need to lightproof the two halves of the cab. They'll be on the same timer. I'll just hang another T5 array in the top of the cab. There will be a lot of wasted space in that cab, but oh well. At some point, I'll probably end up moving this whole setup too.

I don't know exactly what size tents they have, since I wasn't really leaning in this direction when I was there, so I'm waiting to hear back from them.

I hope to fit a tent that will actually fit inside my shitty little closet (for what little stealth that will offer). Then, theoretically, all I would need to do construction wise would be to add some outlets there (debating calling an electrician to add a 20 amp circuit and put the outlet in the closet. I'm putting a server rack in there, sir!) and drill a 6" hole through the ceiling.

Right now, I don't even want to think about it, but I'll also somehow need to get into the attic to drop ducting, and to hang the 6" fan (it'll be waaaay too loud to have in my room). I am -not- looking forward to this.

So things have COMPLETELY changed. The only alternative is to go with like a 250 in a tiny hood, but even then...I really don't think I could properly cool it in the current cab, and I don't want to shoot myself in the foot here..I want the higher wattage for denser buds)

Whew.

Anyways, pics!

090.jpg

The B-Team

091.jpg
092.jpg

S.A. (A-Team)

093.jpg

094.jpg

MxB (A-Team)

Happy birthday A-Team! Today is one month since they were dropped in the dirt.

Unfortunately, I'm 80% sure it's "Happy Birthday, Fellas." :(

Since this is my first time, I will hold off until I am 150% sure before I do anything drastic.

At least the training seems to be going well.

Oh yeah, and the B-Team is ready to be transplanted (well, they could probably use at least a few more days anyways, which is good) and I have NO room for them in bigger pots, so I -have- to go drop some more cash this weekend whether I like it or not.
 
Time for an update:

You see what I'm doing?

*shuffle, shuffle, shuffle*

See that?

*shuffle, shuffle, shuffle*

That's me doing my happy dance, duh! Know why?

'Cause I got a giiiirl, I got a giiiirl, and I'm so haaapy!

*shuffle, shuffle, shuffle*

Ahem....sorry about that folks.

Yes, that's right, after many weeks of hemming and hawing and being absolutely positively positive that my hardy little survivors were boys, I can now confirm with certainty that one of them is indeed, a female!!!!!!

It's the lone surviving South African baby. A few days ago I took out the jewelers loupe and started examining her, and sure enough, found a few pistil pre-flowers!!

I'm just absolutely thrilled. I'd show you closeups, but my camera really blows, so you'll just have to take my word for it.

The Mango x Bubblegum survivor we're not sure of yet. Time will tell for sure.

103.jpg


South African Female!!!!

104.jpg


Mango x Bubblegum. Sex, currently unknown.


Here are the G13 x Hawaiian Butterscotch + Mango x Bubblegum + S.A that are about two weeks behind the other plants....wait...two weeks? That can't be right, can it? I'll have to check my calendar.

102.jpg


And this is my absolutely pitiful attempt at cloning. With that said, it's like a week in, and they ARE still alive!

105.jpg


Hahaha, man, those suckers look SAD. I need to pick up some B1 before my next attempt.

As for the project/op itself...man, this thing has careened out of control! What was originally going to be small, inconspicuous, quiet, and stealthy, has grown into a monster. Two seperate enclosures, double-leveled veg, tent, loud ass ventilation...good thing I had that lock put on my door.

100.jpg

101.jpg


Veg cab in full swing


096.jpg

097.jpg


Here is the future flowering cab.


The fan I got is a 6in behemoth that is LOUDER THAN A FRIGGEN JET ENGINE! So anti-stealth it's not even funny. But that is simple enough to remedy, I'm going to build a box for it and stick the whole shebang in the attic. If this all seems overkill to you, well, I live in a hot southern state, and I assure you, it's not overkill.

Here's the problem though....the damn shop sold me a carbon filter THAT IS TOO BIG FOR THE TENT THEY SOLD ME!!! Which means I can't finish the thing until I make it back to the hydro shop.

Sigh. I've said it before, and I'll say it again. NOTHING is EVER easy.

Anyways, my big 2 are in desperate need of transplant, so I need to do that ASAP. The tent probably won't be ready for another week, AT LEAST, since I'll need to get up to the store to get a new filter, and possibly fan, and then I'll still have to get all that shit mounted and stuff before I turn the ten on. I've got another batch of soil cooking now.

That's it for now. Probably no more updates until we are fully up and running, with the tent in operation and occupied, fan in the attic, etc, etc.

See ya in a week or two!
 
Damn, one problem after another. The money you have spent makes me feel extravagant in having thrown almost $300 at my own stealth grow cabinet :D

Best of luck in the future, hope it goes smoothly from now on. Amazing that even with many setbacks you're still doing all right on the actual plant growth part of the whole operation! Subscribed.
 

ScrubNinja

Grow like nobody is watching
Veteran
Great read, man. I sunk over $1500au into my cab and it was a failure, lol. It's in storage until I can complete it properly.

Do you mean that the carbon filter is physically too big to fit in the tent?
 

GMT

The Tri Guy
Veteran
Lol Bork, I've been chuckling my way through this thread, I have to compliment you on your thread and your commitment, you'll get there in the end, even if it is the long way round. Loving the nice clear pictures too.
 
Damn, one problem after another. The money you have spent makes me feel extravagant in having thrown almost $300 at my own stealth grow cabinet :D

Best of luck in the future, hope it goes smoothly from now on. Amazing that even with many setbacks you're still doing all right on the actual plant growth part of the whole operation! Subscribed.

I'm just dying to get my shit dialed in. It feels like once everything is all set (which is as far off as ever, hahaha) it'll be smooth sailing.

Thanks for hopping on board!

Great read, man. I sunk over $1500au into my cab and it was a failure, lol. It's in storage until I can complete it properly.

Do you mean that the carbon filter is physically too big to fit in the tent?

Oh no man! With so much already sunk into it, you've gotta dig it out of storage and finish it up!

And yes, it's too big! The DR-60 tent is 24" x 24", and the filter is 6" x ... 24"! LOL! So, technically, it's not too big.....I just can't connect the ducting to it. Either that, or it would have to hang vertically instead of horizontally, which wouldn't be good. Or it'd have to be outside the tent.

Fortunately, they do have the smaller 6" filter (6 x 16) and a speed regulator so I can slow the fan down for it (which is good, because that fucking thing is LOUD!)

Lol Bork, I've been chuckling my way through this thread, I have to compliment you on your thread and your commitment, you'll get there in the end, even if it is the long way round. Loving the nice clear pictures too.

It has been kind of a tragic comedy, hasn't it? :wallbash::wallbash::wallbash:

Yes, long way around.....very very very long way around, lol.

I'm the very picture of inefficiency and absentmindedness. That, plus I'm usually ripped. It takes me a loooong time to get anything done. And even longer to get it done right.

Glad you're enjoying the show. :)


---

Further update:

So a couple of things:


The temp / ventilation problem got so bad, that I mounted my other P & L 4" fan as an intake fan, and rigged it up with ducting to the top of the dresser, so that the air coming out of the a/c vent hits it.

/hangs head

It's so jerry rigged, and soooooooo un-stealthy. In fact, the whole damn shebang has become so unstealthy it's not even funny. More on that later. For now, I keep the bedroom door locked, period.

The whole cloning thing.....not working out so hot! I put the four that I had out of their misery tonight. Going to have to put some more study into this subject. It seemed so damn easy that I just glossed over it.

For reference, I used olivia's gel (snip, immediately into water until i'm ready, dip thoroughly in gel, into peat puck), but I didn't have any root juice / b1 stuff, so it's been either water, or water + lk.

I'll pick up some root juice stuff when I'm at the shop exchanging the filter.

The cabinet never did get 110% lightproof, and it's even less so now, from all my pulling and prodding and re-arranging.

Which brings me back to the point about the grow not being stealthy at all.

My plan is to get everything 100% up and running, all the major work complete, plants in all stages (mom's going, clones going, veg going, and flower going simultaneously) of growth....that's when I'll go back and redo all the stuff that needs redoing, such as lightproofing, soundproofing (this shit ain't quiet), hiding, and generally stealthifying. Ya dig?

My entry into the top portion SUCKS all in all and needs to be redone completely. The bottom section needs serious work too, accessibility sucks down there. Also, I picked up this 125w CFL growlamp while I was at the shop the last time, which is going to be a perfect fit next to the T5 in the bottom section (it's offset to the side, leaving enough room on the other side). I can use the extra growing space, it's going to waste right now. The thing was a bargain, so it was kind of an impulse buy.


I plan on sitting down very soon and catching up on my receipts in the spreadsheet. I quit keeping track at around $1800...and that was a loooong time ago. :mad:

Unfortunately....I don't know when in the hell I will make it to the shop to make the exchange, which I need to do desperatly to get this shit sowed up. The weekend is going to be full of family stuff...crap, yeah, I'm screwed....I don't know if I'll be.....crap....crap crap.....crap crap crap. I need to figure something out on this. I'm going out of town next Friday for the weekend.....I'll probably end up having to take a half day on Monday or somethng...and arrange a car.....UGH!

Oh, and one more final little thing about the cab. I tried a couple of DIY carbon scrubbers, none of which worked for me, at all. Either they restricted airflow too much, or they just fell apart. I've gone without, but the plants are starting to get pretty smelly, even just in veg, and a couple of time I've been in the bathroom and smelled them (the cab vents into the bathroom wall). I've got ONA in there now, but it seems a waste. I found some "odor cleaner" carbon house filter at lowes that I'm going to try.
 

CoonLover

Member
bump.

bump.

LST looks good and your setup is very interesting. Im going to keep an eye on the thread.
Great read and see..
 

GMT

The Tri Guy
Veteran
Hi Bork, One tip, I can see one problem with your cloning method straight off, too much light. A clone just can't handle that much light as it hasn't got a root system to feed it the sugars that it'll try to use when given enough light for a small plant to grow nicely. For clones I use a 12w cfl around 8 inches away, and that'll clone many cuttings around it.
 
too bad about the first cab it was looking really nice. :p could you comment more about the two fans and how much noise/air they produce/move in respect of comparason, not numbers, also the size of your first cab and how much the filter reduced flow. would really like to know because ventalation is a bitch... as previosly mentioned ... i will keep watching to see how this unfolds :)
 

K.J

Kief Junkie's inhaling the knowledge!
Veteran
The cabinet never did get 110% lightproof, and it's even less so now, from all my pulling and prodding and re-arranging.

Which brings me back to the point about the grow not being stealthy at all.

My plan is to get everything 100% up and running, all the major work complete, plants in all stages (mom's going, clones going, veg going, and flower going simultaneously) of growth....that's when I'll go back and redo all the stuff that needs redoing, such as lightproofing, soundproofing (this shit ain't quiet), hiding, and generally stealthifying. Ya dig?

Hang in there Bork! We too had many of our own issues and things didn't quite turn out the way we thought we had planned them, but in the end it looks like we'll still have a good harvest of medicine as payback. Just study these boards as much as you can, ask lots of questions, take lots of good advice where it can be found and you'll come out on the other side a happy gardener.
 
Top