
-
Happy Birthday ICMag! Been 20 years since Gypsy Nirvana created the forum! We are celebrating with a 4/20 Giveaway and by launching a new Patreon tier called "420club". You can read more here.
-
Important notice: ICMag's T.O.U. has been updated. Please review it here. For your convenience, it is also available in the main forum menu, under 'Quick Links"!
You are using an out of date browser. It may not display this or other websites correctly.
You should upgrade or use an alternative browser.
You should upgrade or use an alternative browser.
150w HPS Cabinet by Quazi
- Thread starter Quazi
- Start date
Quazi said:Well, my 150w HPS arrives tomorrow which is awesome. Going to be painting next and starting to figure out the wiring.
Expect to see some more DIY threads from me in the near future as I plan on making one for each of the following:
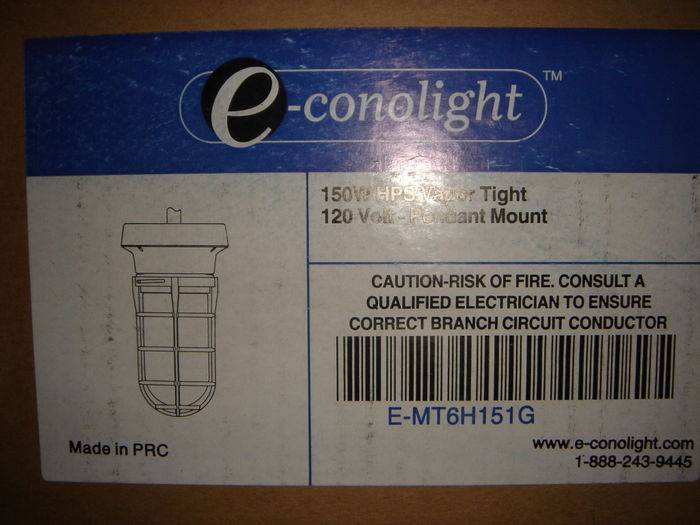
-Remote ballasting the e-conolight $20 150w HPS vapor tight.
-Creating a cool tube with reflector that can be adjusted (for height) within your cabinet
-Maybe more!
Stay tuned!
-Q
Yo Quazi. That would be awesome if you got that DIY thread up. I was just looking again into getting that econolight light. Still kind of unsure of wiring, even not including remote ballasting....I don't have it yet so hopefully you'll have something up by the time I do haha.
C
Cozy Amnesia
Man, it's sooooo simple. Honestly, the hardest part was screwing the lid back on.Rob547 said:Yo Quazi. That would be awesome if you got that DIY thread up. I was just looking again into getting that econolight light. Still kind of unsure of wiring, even not including remote ballasting....I don't have it yet so hopefully you'll have something up by the time I do haha.
Quazi
Member
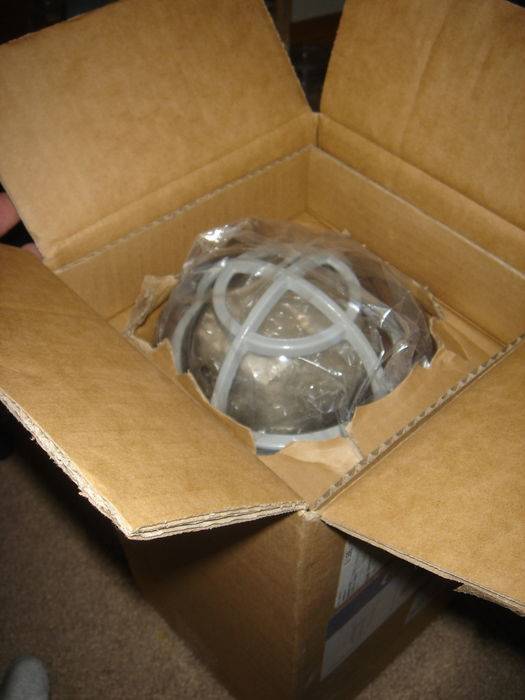
He's right. It's super simple. I got my lamp in the mail so woot.
Here's some for everyone to look at!
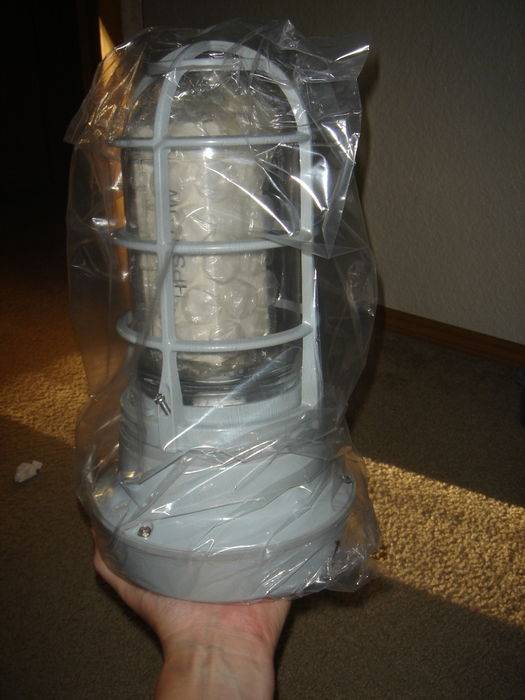
I will get the remote ballast DIY thread finished soon. But, here's what's going to make the magic happen. For $35.75 including shipping and handling, I present the 150w Pendant Mount Vapor Tight:

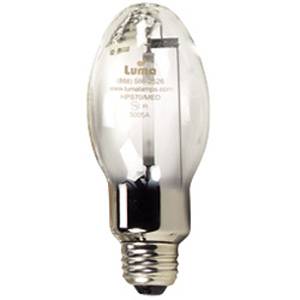
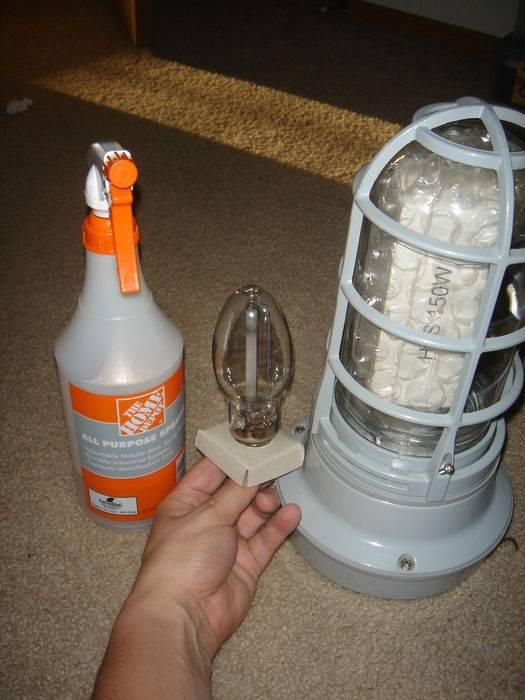
The price included an extra lamp:
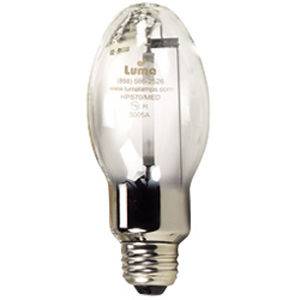
Here's a link to the company that the lamp came from. Since I can't directly link to the item, here's what you're looking for:
150w HPS Lamp - Medium Base
I realize it's not the greatest lamp in the world, but for the price? I'll take it.
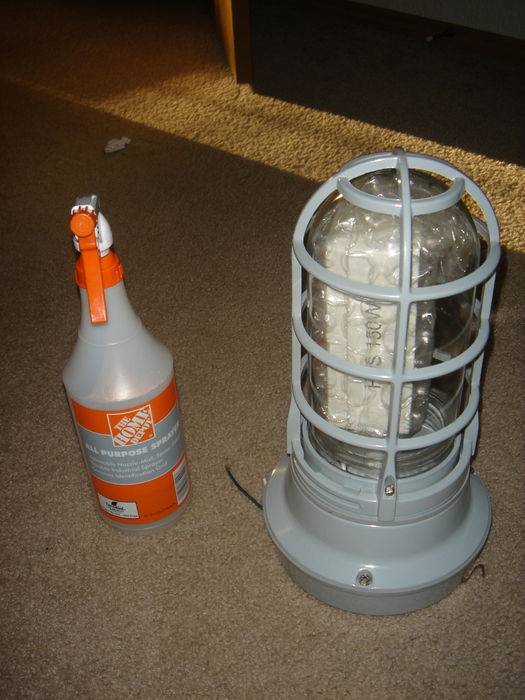
The vapor tight unit itself weighs about 8 pounds. There's a lot of metal and a lot of glass:

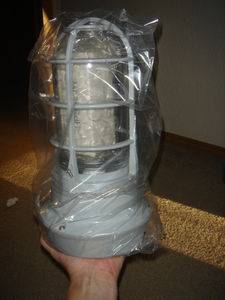
Here's some size comparisons with a standard spray bottle for reference:


As I said, I've already started working on the DIY guide to remote ballast this thing, but it's really easy.
More cabinet construction coming soon.
As far as the greenery is concerned:
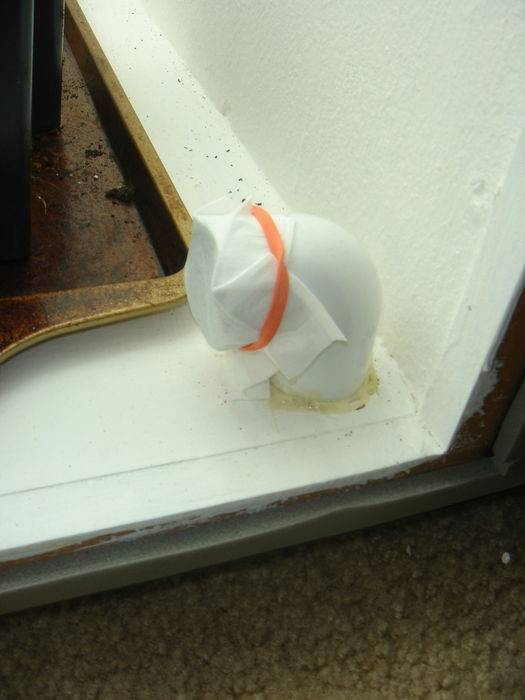
I've lost a couple of clones already. But that's okay, it's my first time and I'm using a DIY cloner. There are still plenty that look healthy. Also, I got a couple of beans that I just dropped in water. They'll be sleeping with wet paper towels tomorrow. Wish me luck!
-Q
Here's some
for everyone to look at! I will get the remote ballast DIY thread finished soon. But, here's what's going to make the magic happen. For $35.75 including shipping and handling, I present the 150w Pendant Mount Vapor Tight:
The price included an extra lamp:
Here's a link to the company that the lamp came from. Since I can't directly link to the item, here's what you're looking for:
150w HPS Lamp - Medium Base
I realize it's not the greatest lamp in the world, but for the price? I'll take it.
The vapor tight unit itself weighs about 8 pounds. There's a lot of metal and a lot of glass:
Here's some size comparisons with a standard spray bottle for reference:
As I said, I've already started working on the DIY guide to remote ballast this thing, but it's really easy.
More cabinet construction coming soon.
As far as the greenery is concerned:
I've lost a couple of clones already. But that's okay, it's my first time and I'm using a DIY cloner. There are still plenty that look healthy. Also, I got a couple of beans that I just dropped in water. They'll be sleeping with wet paper towels tomorrow. Wish me luck!
-Q
Last edited:
Quazi
Member
Yup.
I'll get my guide up and finished soon so you can just follow that. Or, you can just unscrew the base and you'll be able to figure it out.
It really is quite simple.
You need to attach a cable for power and extend two wires for the socket. That's it.
And yes: 8 lbs. At least that's what the shipping weight was.
-Q
Danger Mouse
Member
Quazi,
Dude, your cab is freakishly similar to mine--without the height extension (sorry, no pics). I'm using two 150w hps e-conolights just like yours and four 42w daylight cfls. Last grow I went on vacation and my girls had totally filled the cab by the time I got home. I had to turn it on it's side (and reposition the lights) to give them more height. Worked out OK, but was a major ass pain.
I'm now considering ditching the cab and building a dark room with Panda film and pvc.
Anyway, nice job and good luck with your grow. Pulling up a chair.
Stay safe,
DM
organicmunk
Member
man quazi im ready to see this thing up and running how much longer are we looking at until we see the finished product
Quazi
Member
I'm working as fast as I can! It's all DIY and it's on a budget. Trust me: if I had 2 or $300 dollars to drop on a cabinet and some equipment, I'd do it. As it is, I'm going to be painting it this weekend and putting it together. In addition, I am constructing it in a place that is not my own. So, I don't have the luxury of being able to work on it every day.
I've got two beans that are sleeping with some paper towels as we speak and my clones are still looking wonderful too. So, those are pushing me to move it along, trust me.
Assuming it's all fastened and painted and together by this weekend. I'll be able to move it into it's home (out of the place it's being constructed). Once it is in it's home, I gotta hook up the electrical, cool tube, and ventilation. I'm guessing by next week, this time, it'll be humming along in all of its glory. I wish I had some plants that would be ready for flower by then as the HPS is going to be sitting idly by and waiting. Oh well.
So, yea, that's where I'm at right now.
Patience my friend, there will be more pics and good things coming soon, I promise.
-Q
Quazi
Member
Big news!
Spent some more money at the hardware store today.
Tomorrow I'll be finishing up the major construction on the cab!

Supplies:
A bunch of stuff was on sale because it's the end of the season which made this a successful (meaning less expensive than normal) shopping trip.
By the way: it's amazing how many small and insignificant things you need to pull this off. I wish I would have made a shopping list.
-2 heavy duty replacement cords for wiring the lights
-1 4-way 60w bulb vanity light (good for damp environments, comes with all the wiring done for you - DIY fun for sure - cheaper, if not the same price as the parts alone)
-1 half gallon primer
-1 half gallon brilliant white paint (there's titanium white ingredient mixed in it already)
-2 light timers rated for close to 1200w
-1 heavy duty surge protector
-1 pair wire strippers
-1 box 8'x4" ducting
-Soil
-Food
-1 thermometer with indoor/outdoor switch which will allow me to keep temperature on both rooms
-Electrical tape
-Electrical screws
-Electrical box (housing for ballast/ignitor)
-1 paint brush
-4 small paint trays
-1 thing of caulk
-1 caulk gun
-1 package weather stripping
With all of that, there were still a few things I missed and I couldn't find the CFLs I wanted for veg.
Tomorrow, however, I am just eager to have the construction complete and the painting/sealing done. Then, I will finish wiring the veg chamber. Once wired, I'll bring the cabinet to it's home where I will have time to work on my solution for my cool tube and reflector.
Expect pictures by the end of the day tomorrow (or the afternoon of the next if I'm tired).
-Q
Spent some more money at the hardware store today.
Tomorrow I'll be finishing up the major construction on the cab!
Supplies:
A bunch of stuff was on sale because it's the end of the season which made this a successful (meaning less expensive than normal) shopping trip.
By the way: it's amazing how many small and insignificant things you need to pull this off. I wish I would have made a shopping list.
-2 heavy duty replacement cords for wiring the lights
-1 4-way 60w bulb vanity light (good for damp environments, comes with all the wiring done for you - DIY fun for sure - cheaper, if not the same price as the parts alone)
-1 half gallon primer
-1 half gallon brilliant white paint (there's titanium white ingredient mixed in it already)
-2 light timers rated for close to 1200w
-1 heavy duty surge protector
-1 pair wire strippers
-1 box 8'x4" ducting
-Soil
-Food
-1 thermometer with indoor/outdoor switch which will allow me to keep temperature on both rooms
-Electrical tape
-Electrical screws
-Electrical box (housing for ballast/ignitor)
-1 paint brush
-4 small paint trays
-1 thing of caulk
-1 caulk gun
-1 package weather stripping
With all of that, there were still a few things I missed and I couldn't find the CFLs I wanted for veg.
Tomorrow, however, I am just eager to have the construction complete and the painting/sealing done. Then, I will finish wiring the veg chamber. Once wired, I'll bring the cabinet to it's home where I will have time to work on my solution for my cool tube and reflector.
Expect pictures by the end of the day tomorrow (or the afternoon of the next if I'm tired).
-Q
Last edited:
Quazi
Member
Here ya go Rob547:Rob547 said:Yo Quazi. That would be awesome if you got that DIY thread up. I was just looking again into getting that econolight light. Still kind of unsure of wiring, even not including remote ballasting....I don't have it yet so hopefully you'll have something up by the time I do haha.
How To Remote Ballast a 150W HPS Vapor Tight Light
I finished the guide and did a bunch of work on the cabinet today.
I'm working on a post right now to show you guys the new construction, paint jobs, and lights.
It should be up in an hour or two.
-Q
Quazi
Member
Hello everyone! Construction is basically complete on the cabinet. I haven't uploaded the new pictures of the finished product -- but stay tuned.
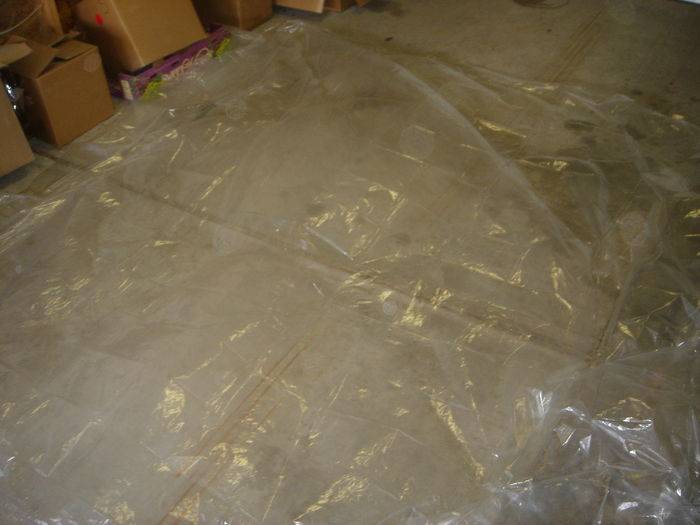
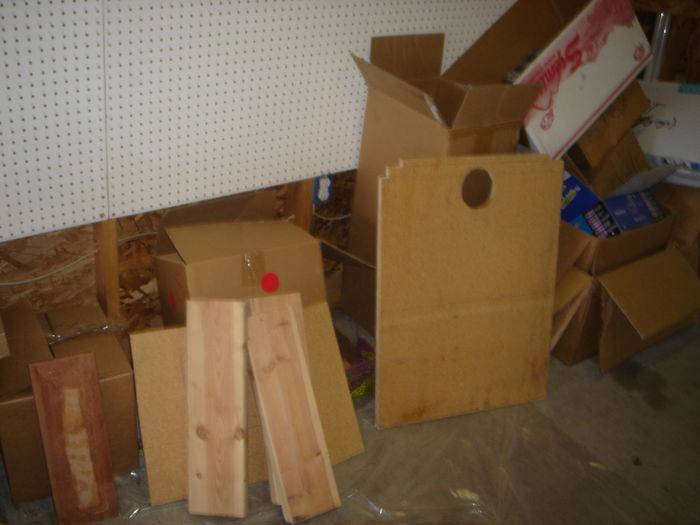
However, I promised pictures a couple nights ago. So, here are the pictures of that day of construction. First the drop cloth:

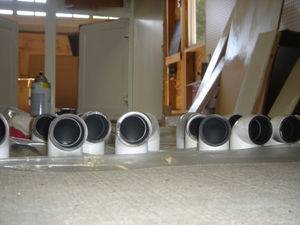
Painting was the big thing to do today. So the pieces and cabinet had to be primed and the intake PVC elbows sprayed black on the inside. Here are the PVC elbows:

A small army ready to be used:
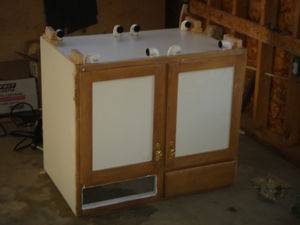
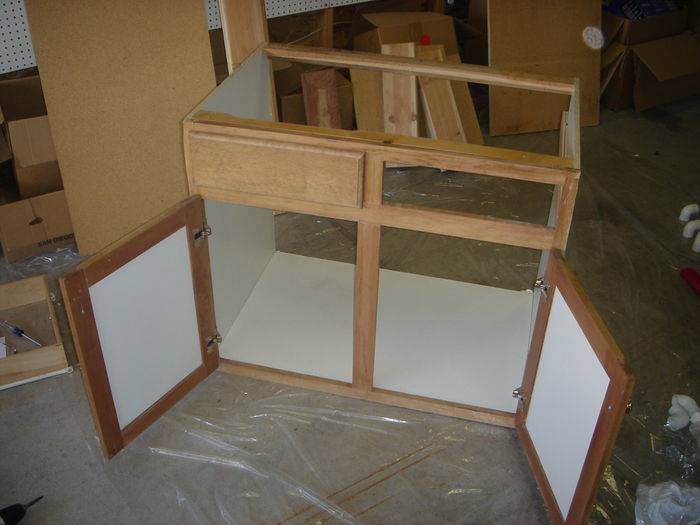
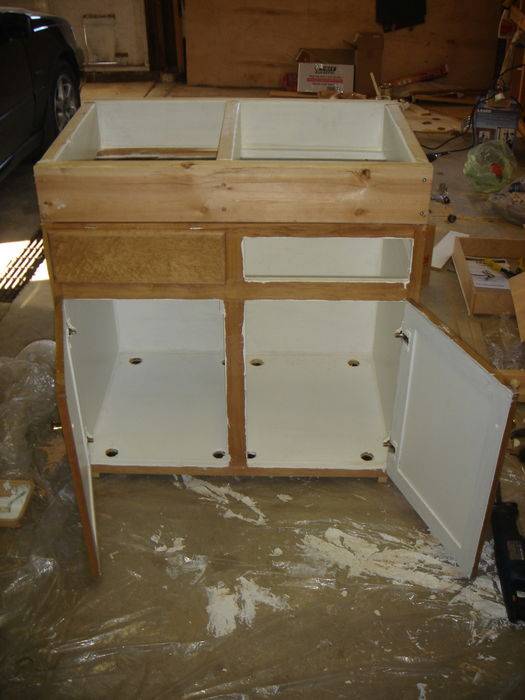
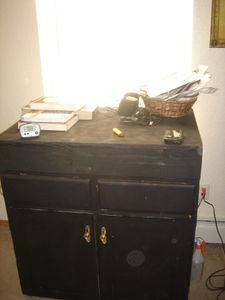
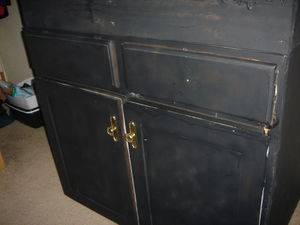
Here are the pieces and cabinet before:


...and after:

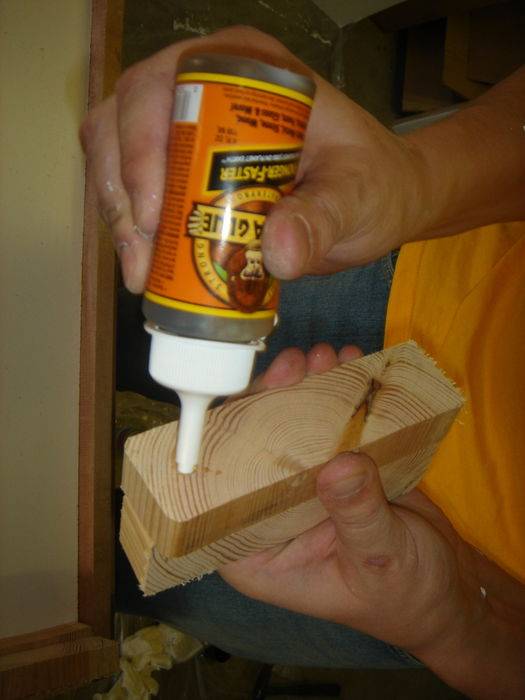
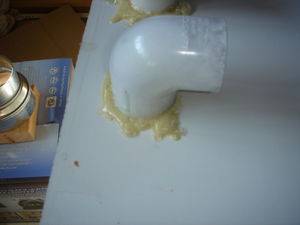
Had to install some additional height on the bottom for the intake elbows. I used Gorilla Glue and screws:


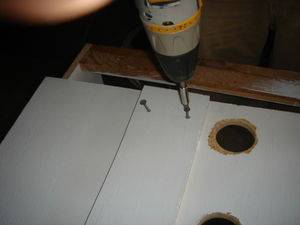
Drilled out the additional intake holes and left it to dry:

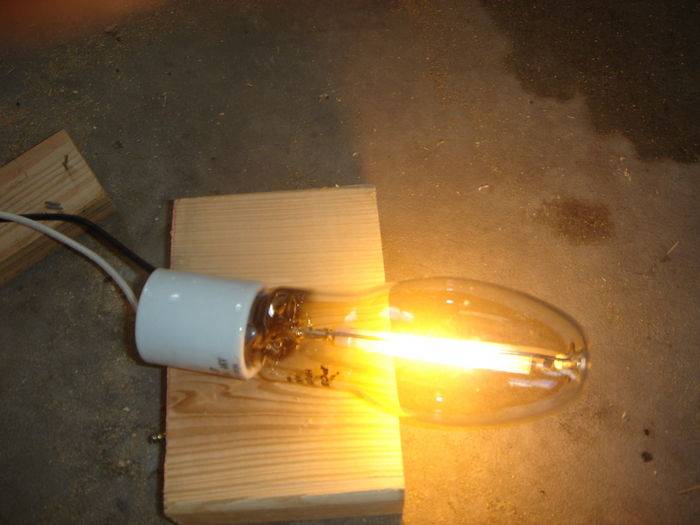
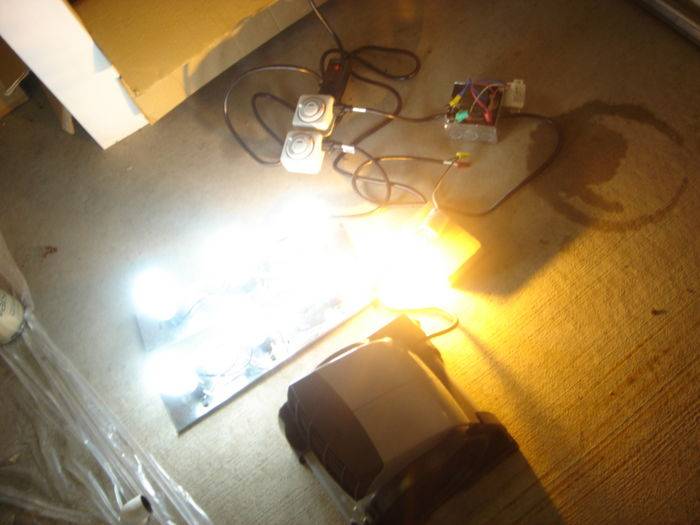
Also finished the electrics on this day of construction. Here's the 150W HPS lighting up for the first time. We were just hoping everything would go well. Hooray! It started up! That's awesome:
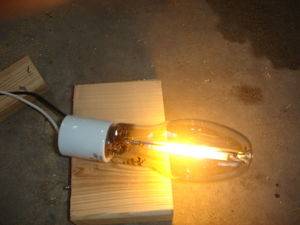
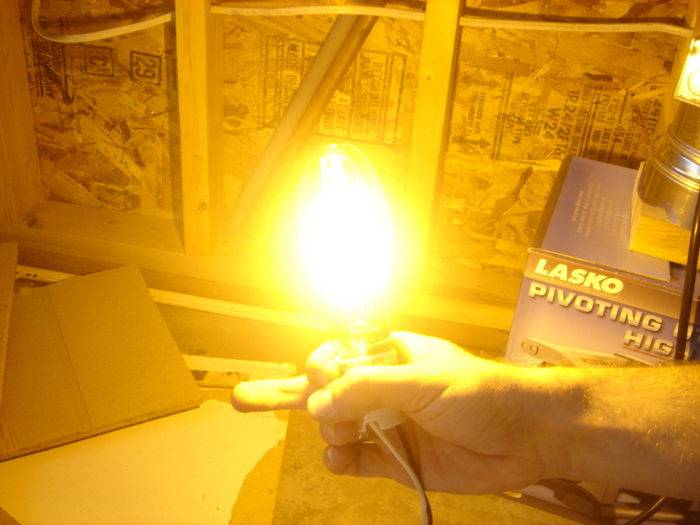
Wow! It's getting kinda bright, that's sweet:
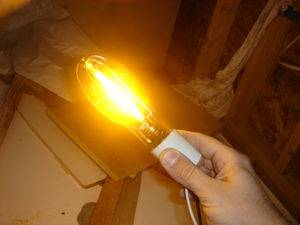
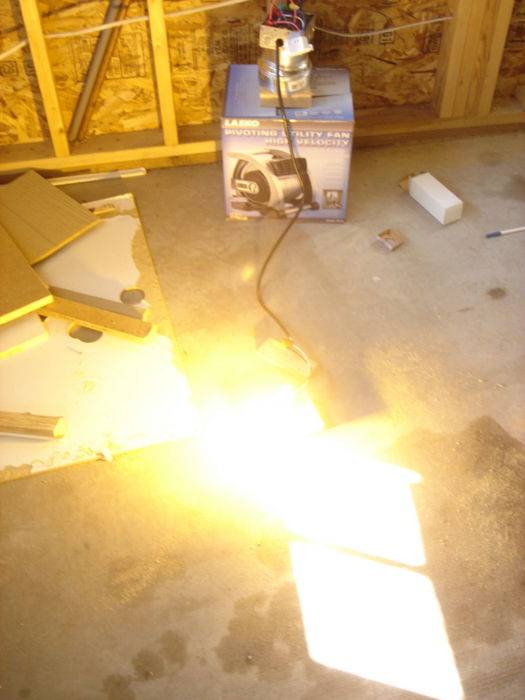
Hey look, it's getting really bright but I can still hold it. Wow, this is bright:

Okay, there's a small star on the ground:

If you are interested in how to remote ballast the 150W HPS light, check out the link in my signature.
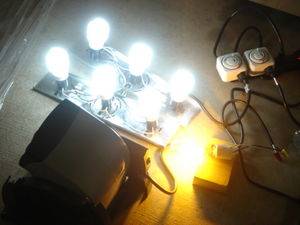
I decided to ditch the 4-fer vanity light and go with 2 3-fers. That way I could use bulbs that were cheaper and more readily available. Here's the HPS, CFLs and blower all being tested together. You can really see how the lights take a minute or two to warm up:

Well. That's it for now. More when I get it moved into it's home this evening.
-Q
However, I promised pictures a couple nights ago. So, here are the pictures of that day of construction. First the drop cloth:
Painting was the big thing to do today. So the pieces and cabinet had to be primed and the intake PVC elbows sprayed black on the inside. Here are the PVC elbows:
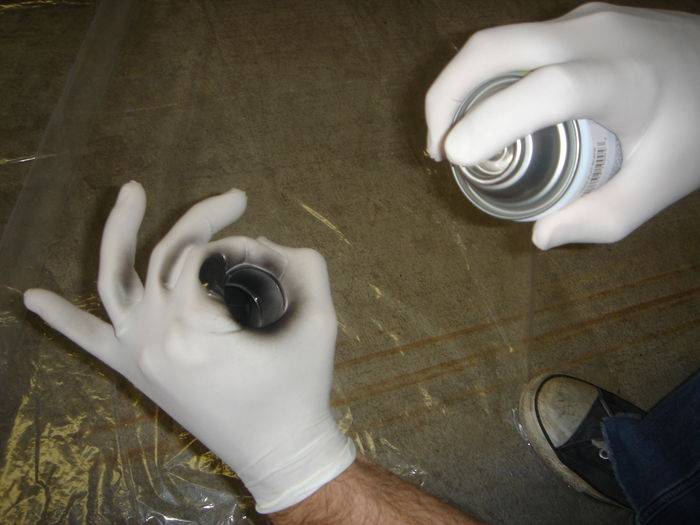
A small army ready to be used:

Here are the pieces and cabinet before:
...and after:

Had to install some additional height on the bottom for the intake elbows. I used Gorilla Glue and screws:
Drilled out the additional intake holes and left it to dry:


Also finished the electrics on this day of construction. Here's the 150W HPS lighting up for the first time. We were just hoping everything would go well. Hooray! It started up! That's awesome:
Wow! It's getting kinda bright, that's sweet:

Hey look, it's getting really bright but I can still hold it. Wow, this is bright:
Okay, there's a small star on the ground:
If you are interested in how to remote ballast the 150W HPS light, check out the link in my signature.
I decided to ditch the 4-fer vanity light and go with 2 3-fers. That way I could use bulbs that were cheaper and more readily available. Here's the HPS, CFLs and blower all being tested together. You can really see how the lights take a minute or two to warm up:

Well. That's it for now. More when I get it moved into it's home this evening.
-Q
Last edited:
BigBlack81
Member
Magnifico. I'm setting up my own box and your work is going to be used as a template for this endeavor. Please keep it up. This is just what I and I'm suspecting a lot of others need to show how this can be done well, safely and easily without breaking the bank.
L
lostinethereal
Damn dude, nice. Looks great. I'm going to have to borrow a few of your techniques for a cab I'm planning to setup. I already had a general idea but it's almost like you created what was in my mind, lol. I'll be keeping an eye on this one for sure.
Also thanks for the other thread, again I was going to do exactly this but now I have a very detailed and nicely done reference.
Also thanks for the other thread, again I was going to do exactly this but now I have a very detailed and nicely done reference.
Quazi
Member
Finishing Cabinet Construction
Finishing Cabinet Construction
Alright. So, the cabinet is only two steps away from being finished. Installing the cooltube and 150W HPS and putting on the air filters (because I forgot them at the place where the cabinet was being constructed).
First, I will show you the final steps that were taken to get the ventilation and electrics installed as well as the access door for the electrics.
Then you'll get to see it in action.
I want to say that Gorilla glue is an awesome application for a lot of the stuff that you may be doing so consider it. It takes a little while to dry. But it expands quite a bit when it does, providing an awesome seal:
Before installing the passive intakes on the inside, we wanted to paint. That way, the paint and the gorilla glue could dry at the same time. First, we wanted to get the electrical room shelf installed.
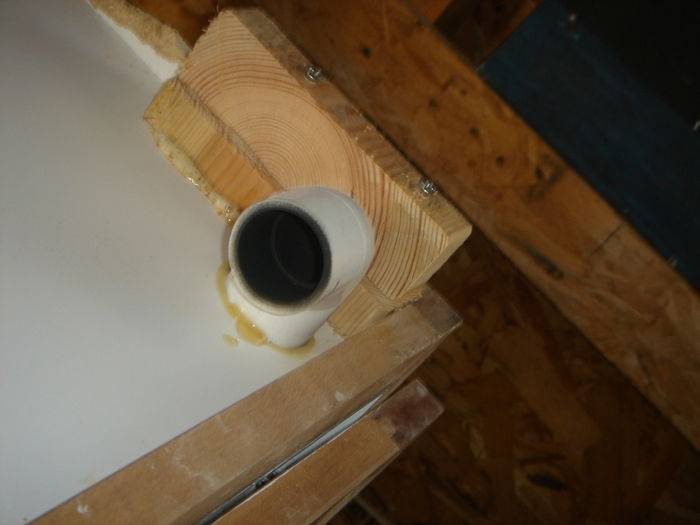
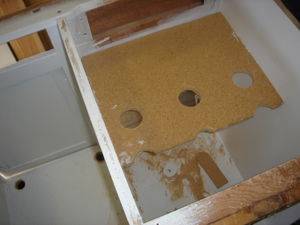
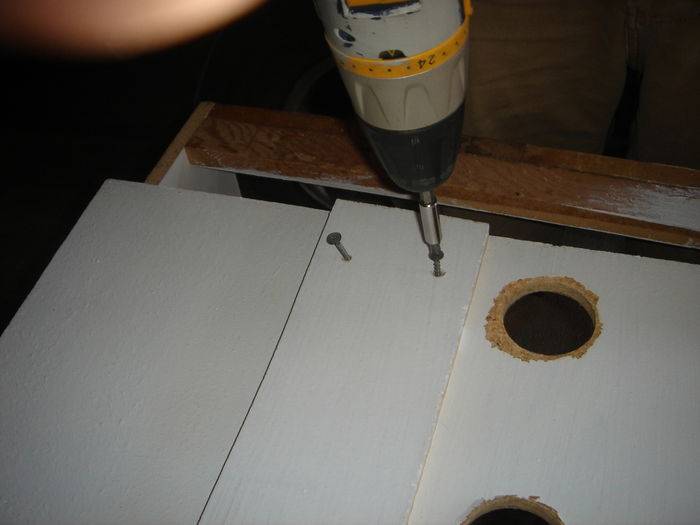
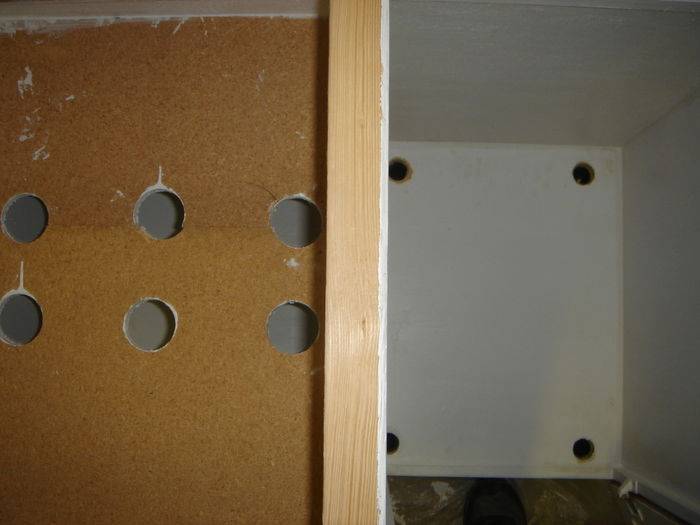
This is where things get interesting. Originally, I wanted to have some form of ventilation in the veg room because I thought I would be moving the lights up and down. Instead, I made holes that were too big around the lamp sockets. This means, the air intake is directly over the lamps and into the electrical room. Because the vanity lights are made for damp environments, and there is metal over the top, it is still easy to shield your electrics from moisture.
I also though I would need a support in the middle of the two cuts that were made. Once we started to cut the holes for the vanity sockets, however, we realized that it was just going to be in the way so we removed it:
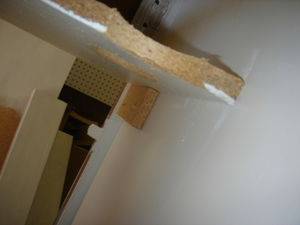
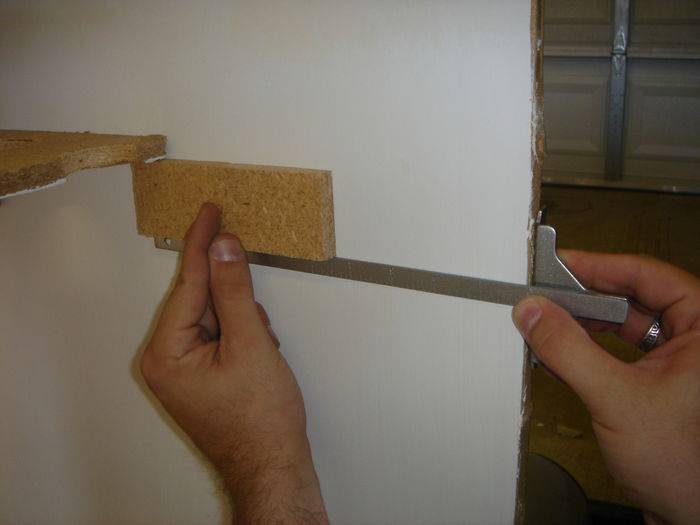
To install/support it, we screwed supports into the wall using scrap wood. We leveled it by using the following method:
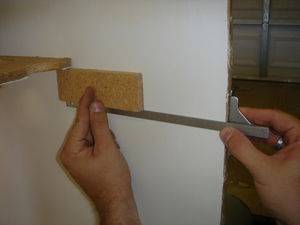
Here is what it looked like installed:
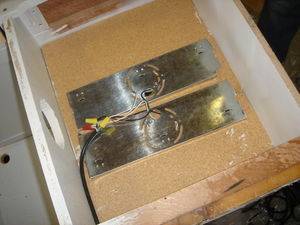
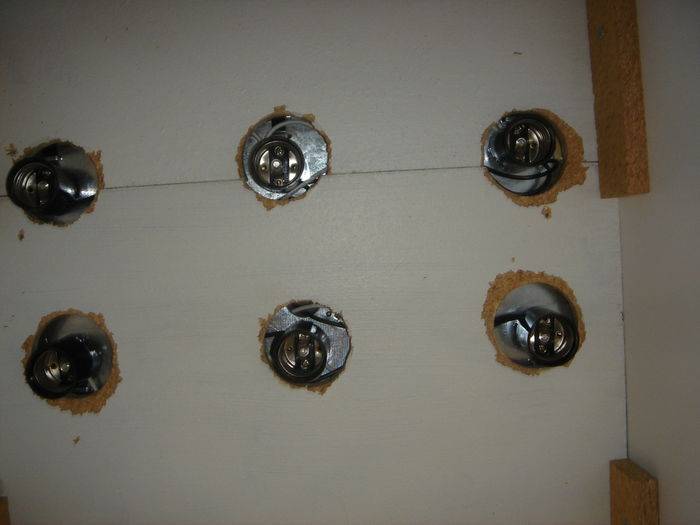
Now you can see what the lights look like so you can understand how the moisture will be blocked. In addition, the blower sits on top of this, so yea:

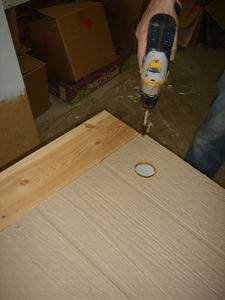
The last hole we wanted for now was the hole in the back for the surge protector cord:
Almost ready to be painted:


Part 2 below.
Finishing Cabinet Construction
Alright. So, the cabinet is only two steps away from being finished. Installing the cooltube and 150W HPS and putting on the air filters (because I forgot them at the place where the cabinet was being constructed).
First, I will show you the final steps that were taken to get the ventilation and electrics installed as well as the access door for the electrics.
Then you'll get to see it in action.
I want to say that Gorilla glue is an awesome application for a lot of the stuff that you may be doing so consider it. It takes a little while to dry. But it expands quite a bit when it does, providing an awesome seal:

Before installing the passive intakes on the inside, we wanted to paint. That way, the paint and the gorilla glue could dry at the same time. First, we wanted to get the electrical room shelf installed.
This is where things get interesting. Originally, I wanted to have some form of ventilation in the veg room because I thought I would be moving the lights up and down. Instead, I made holes that were too big around the lamp sockets. This means, the air intake is directly over the lamps and into the electrical room. Because the vanity lights are made for damp environments, and there is metal over the top, it is still easy to shield your electrics from moisture.
I also though I would need a support in the middle of the two cuts that were made. Once we started to cut the holes for the vanity sockets, however, we realized that it was just going to be in the way so we removed it:
To install/support it, we screwed supports into the wall using scrap wood. We leveled it by using the following method:
Here is what it looked like installed:


Now you can see what the lights look like so you can understand how the moisture will be blocked. In addition, the blower sits on top of this, so yea:

The last hole we wanted for now was the hole in the back for the surge protector cord:

Almost ready to be painted:
Part 2 below.
Quazi
Member
The Cabinet is Installed Huzzah!
The Cabinet is Installed Huzzah!
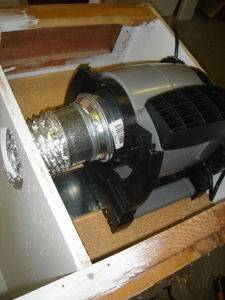
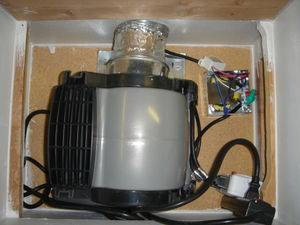
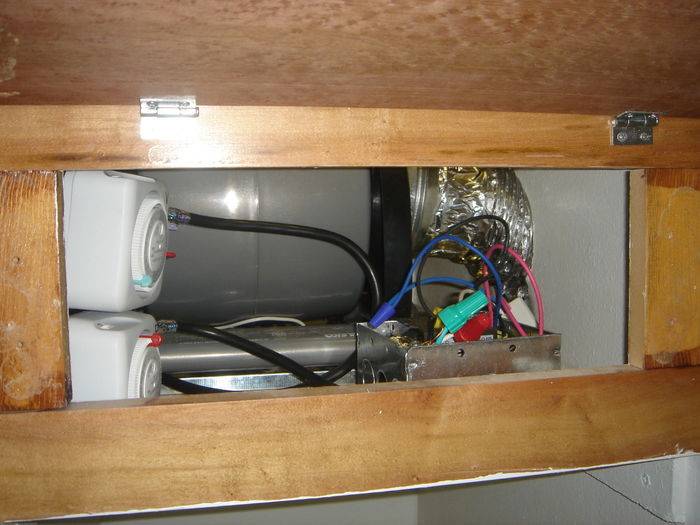
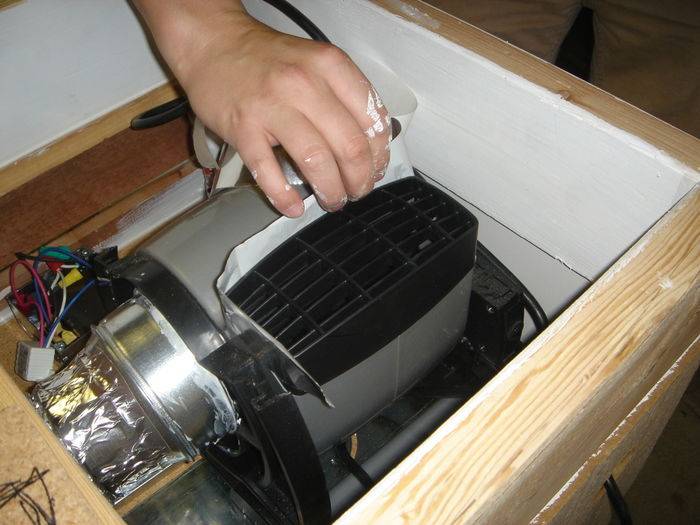
The last piece to put on was going to be the ceiling. We knew we would have to get the blower and electrics in there how we wanted now as it would be less accessible in the future. None of the pieces have been put together yet, but we placed them in there to get an idea:
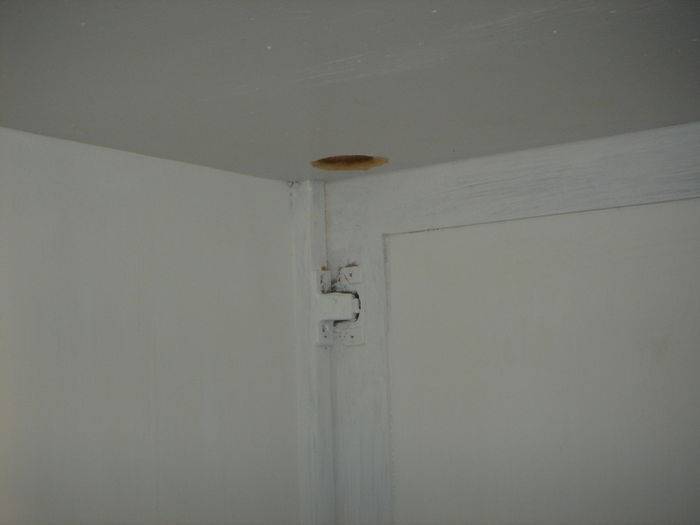
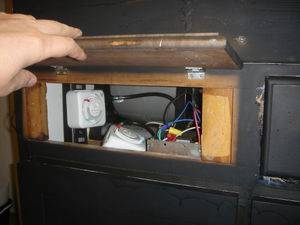
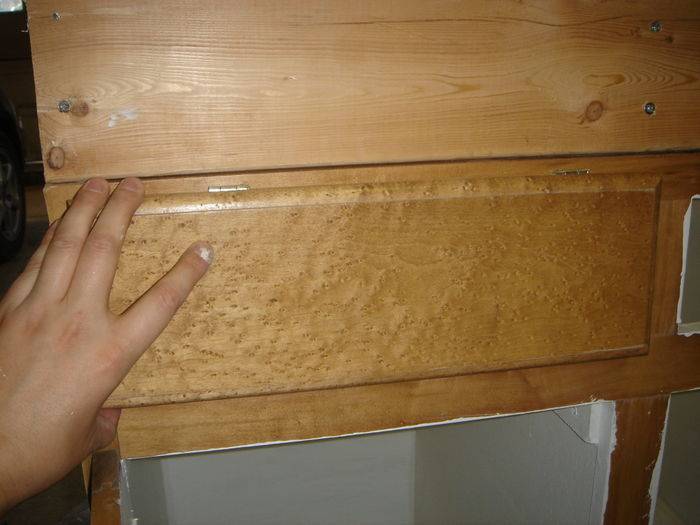
Then we installed the electrical access door:


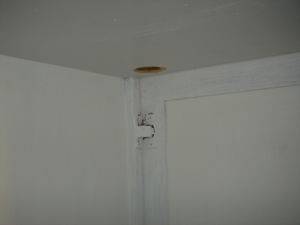
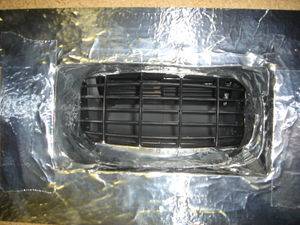
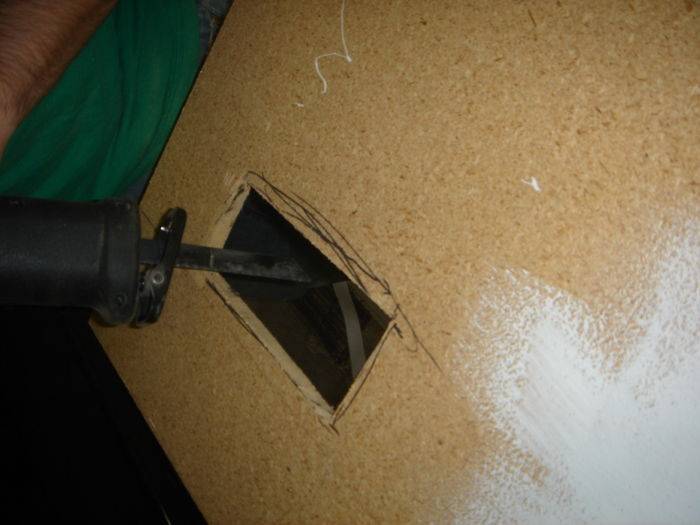
Then we removed the blower and traced/cut the exhaust hole in the ceiling of the cabinet:

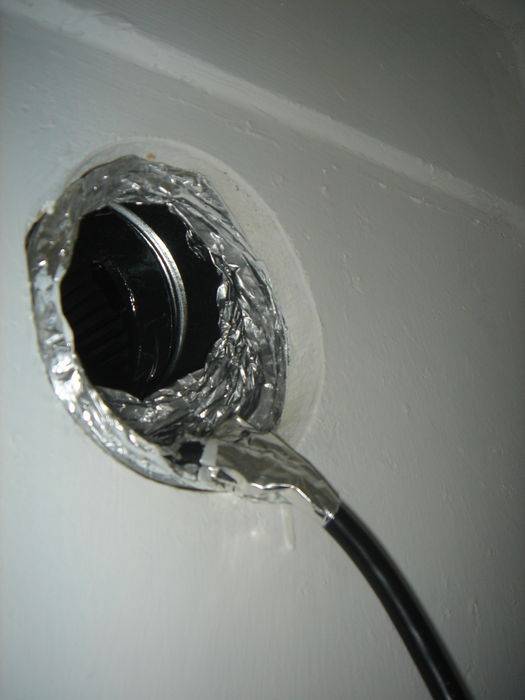
After that, we hooked up the blower to the ventilation. However, the pics for that will be in a DIY guide that I have yet to write. It will include how to hook up the ventilation on the blower and install the cool tube for the 150W HPS. So, stay tuned for that in my signature. However, here's a sneak peak at how the exhaust got hooked up:
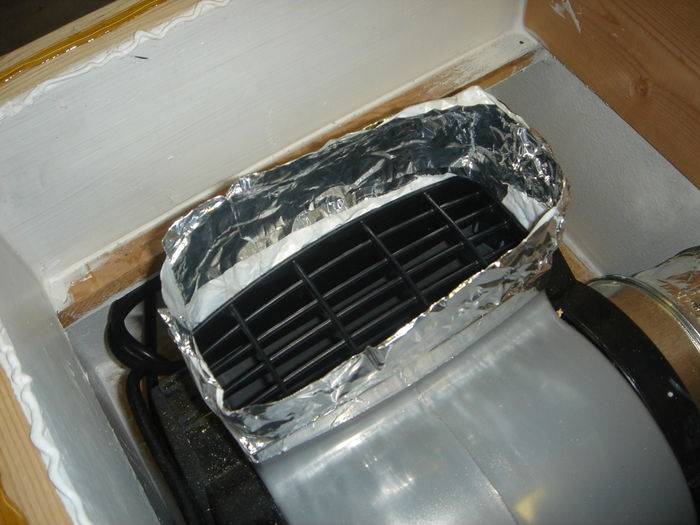
I looked around for an exhaust tube but could not find one that fit the size I wanted. So I used aluminum tape and made one. Wrapping a single strand around the outside provided a nice, sticky, secure inside:

Then I had a nice base. I built it up a but on the inside and out with more tape and pushed it all inwards just a bit:

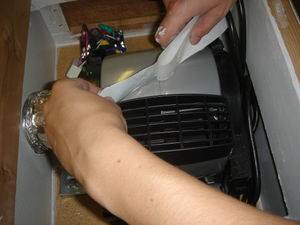
With the exhaust hole cut and the electrics in place, it was time to glue and put a line of caulk along the inside edge. I did this because I knew it would be hard to access once installed:

With the ceiling on, it was time to finish my custom ventilation. I cut small strips of aluminum tape and installed them to create a good seal:
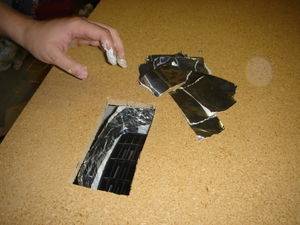

A few more strips on the inside for sealing and strength. In the end, I'm glad I didn't buy one because this is awesome:

The inside was painted... the inner PVC intake elbows installed...
I now present to you:
Let's take a peak inside:
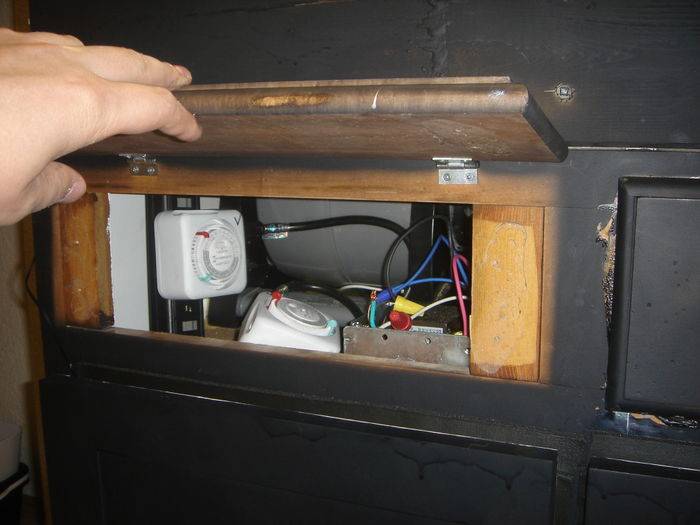
The electrics are easily accessible:
Temp in the veg room looks great:

This is with the fan on low mind you.
The one clone that sort of made it out of my first cloning attempt ever with two beans that were popped and planted:

Woot!
So, those will be vegging for a while. In the meantime, I will be working on the cool tube for the 150W HPS so it will be ready in time for flowering.
Thanks to everyone for their help and support so far. It's just about done.
-Q
The Cabinet is Installed Huzzah!
The last piece to put on was going to be the ceiling. We knew we would have to get the blower and electrics in there how we wanted now as it would be less accessible in the future. None of the pieces have been put together yet, but we placed them in there to get an idea:


Then we installed the electrical access door:
Then we removed the blower and traced/cut the exhaust hole in the ceiling of the cabinet:
After that, we hooked up the blower to the ventilation. However, the pics for that will be in a DIY guide that I have yet to write. It will include how to hook up the ventilation on the blower and install the cool tube for the 150W HPS. So, stay tuned for that in my signature. However, here's a sneak peak at how the exhaust got hooked up:
I looked around for an exhaust tube but could not find one that fit the size I wanted. So I used aluminum tape and made one. Wrapping a single strand around the outside provided a nice, sticky, secure inside:

Then I had a nice base. I built it up a but on the inside and out with more tape and pushed it all inwards just a bit:
With the exhaust hole cut and the electrics in place, it was time to glue and put a line of caulk along the inside edge. I did this because I knew it would be hard to access once installed:

With the ceiling on, it was time to finish my custom ventilation. I cut small strips of aluminum tape and installed them to create a good seal:


A few more strips on the inside for sealing and strength. In the end, I'm glad I didn't buy one because this is awesome:
The inside was painted... the inner PVC intake elbows installed...
I now present to you:

Let's take a peak inside:

The electrics are easily accessible:
Temp in the veg room looks great:
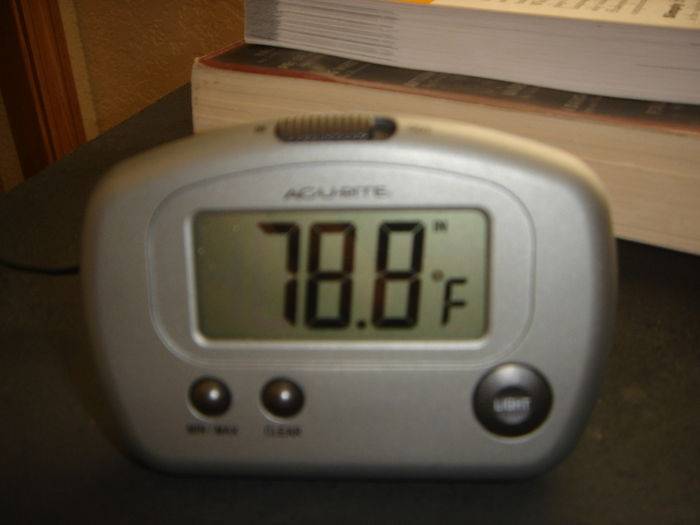
This is with the fan on low mind you.
The one clone that sort of made it out of my first cloning attempt ever with two beans that were popped and planted:

Woot!
So, those will be vegging for a while. In the meantime, I will be working on the cool tube for the 150W HPS so it will be ready in time for flowering.
Thanks to everyone for their help and support so far. It's just about done.
-Q
Last edited:
Thanks Quazi, going to look at the DIY now!
Truly amazing and well thought out cab, I can't believe you fit all the stuff in that little cab, especially the blower, it looked huge, even in that DIY thread. Awesome work, I'm sure your plants will love their new home.
Truly amazing and well thought out cab, I can't believe you fit all the stuff in that little cab, especially the blower, it looked huge, even in that DIY thread. Awesome work, I'm sure your plants will love their new home.
C
Cozy Amnesia
Great work quazi! I really dig your style. I would have much rather preferred to build something like this for myself, but I don't have a garage or any tools, not even a drill...But rubbermaids you can just slice up with a knife. I also wish I would have bought a fan like yours. I looked for one at my home depot but they didn't have any lasko or stanely blowers (i think they're the same really).
Trust me, it'll fill up with buds quicker than you might think!
EDIT: why in the hell do all my posts start a new page!?
Trust me, it'll fill up with buds quicker than you might think!
EDIT: why in the hell do all my posts start a new page!?
Last edited:
Quazi
Member
A New Addition to the Family
A New Addition to the Family
Cozy: I don't know how you end up at the top all the time. Luck I guess?
Rob547: Thanks for the encouragement! Glad you like the cab. Lemme know how your build goes!
Barnt: I plan on building a DIY push-through carbon scrubber for the exhaust. I'm barely starting veg at this point, so I'm not too worried about the smell. But, it will be coming in the future.
Another DIY guide maybe?..
Alright, so here we go with the good news and pics:
UPDATE
Everything is going quite well. Temperatures have been a bit warm (no AC here) but everything seems to be going good.
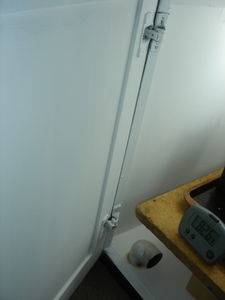
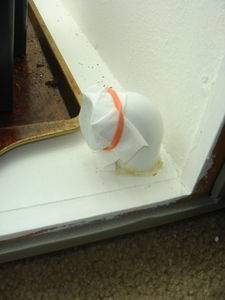
I redid the weather stripping around the doors and electrical access. I cannot emphasize the importance of this enough. To get a good seal for your ventilation and light control, put the weatherstripping around:

I also got around to installing the air filters to make sure there's nothing nasty coming in. I used 1250 rated air filters as recommended by some reading:
The flowering side of the cabinet is eagerly awaiting a cool tube and some greenery:

...speaking of greenery...
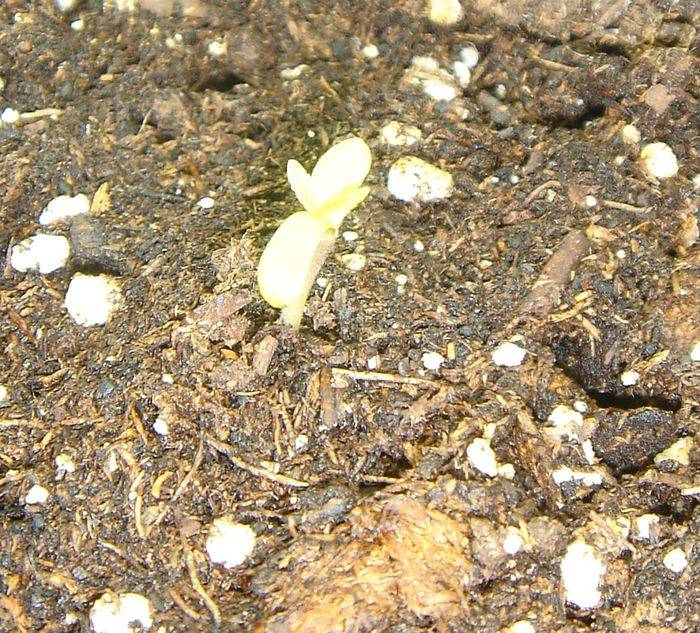
A new addition to the family popped out while I had everything in the 4 hours of darkness. I call her Dorothy (optimistic I know). She's actually much greener than these pictures give her credit for:
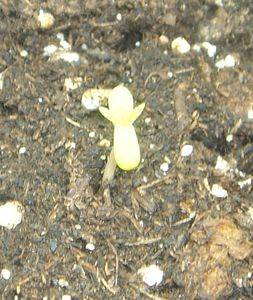
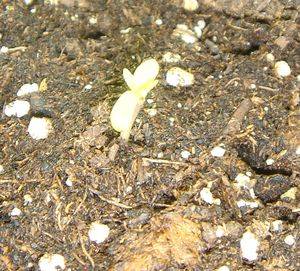
Surprised to see that pop out after only being in there for a day. Guess the plants are happy! The clone is exhibiting characteristics of being transplanted. I ripped the root in transport but it appears to be hanging in there okay. No pictures until it looks good again.
Anyway, that's how things are going. I've got another bean taking 24 hour bath and then it's into the paper towel nap. So, that will be 4 plants (hopefully) going. The clone will be female and the beans are up in the air at this point.
Thanks again to everyone for your support. It feels really good to be finally going with this.
-Q
A New Addition to the Family
Cozy: I don't know how you end up at the top all the time. Luck I guess?
Rob547: Thanks for the encouragement! Glad you like the cab. Lemme know how your build goes!
Barnt: I plan on building a DIY push-through carbon scrubber for the exhaust. I'm barely starting veg at this point, so I'm not too worried about the smell. But, it will be coming in the future.
Another DIY guide maybe?..
Alright, so here we go with the good news and pics:
UPDATE
Everything is going quite well. Temperatures have been a bit warm (no AC here) but everything seems to be going good.
I redid the weather stripping around the doors and electrical access. I cannot emphasize the importance of this enough. To get a good seal for your ventilation and light control, put the weatherstripping around:
I also got around to installing the air filters to make sure there's nothing nasty coming in. I used 1250 rated air filters as recommended by some reading:
The flowering side of the cabinet is eagerly awaiting a cool tube and some greenery:
...speaking of greenery...
A new addition to the family popped out while I had everything in the 4 hours of darkness. I call her Dorothy (optimistic I know). She's actually much greener than these pictures give her credit for:

Surprised to see that pop out after only being in there for a day. Guess the plants are happy! The clone is exhibiting characteristics of being transplanted. I ripped the root in transport but it appears to be hanging in there okay. No pictures until it looks good again.
Anyway, that's how things are going. I've got another bean taking 24 hour bath and then it's into the paper towel nap. So, that will be 4 plants (hopefully) going. The clone will be female and the beans are up in the air at this point.
Thanks again to everyone for your support. It feels really good to be finally going with this.
-Q
Last edited:

