What's new
  • Happy Birthday ICMag! Been 20 years since Gypsy Nirvana created the forum! We are celebrating with a 4/20 Giveaway and by launching a new Patreon tier called "420club". You can read more here.
  • Important notice: ICMag's T.O.U. has been updated. Please review it here. For your convenience, it is also available in the main forum menu, under 'Quick Links"!

hush's micro vert experiment

5th

Active member
Veteran
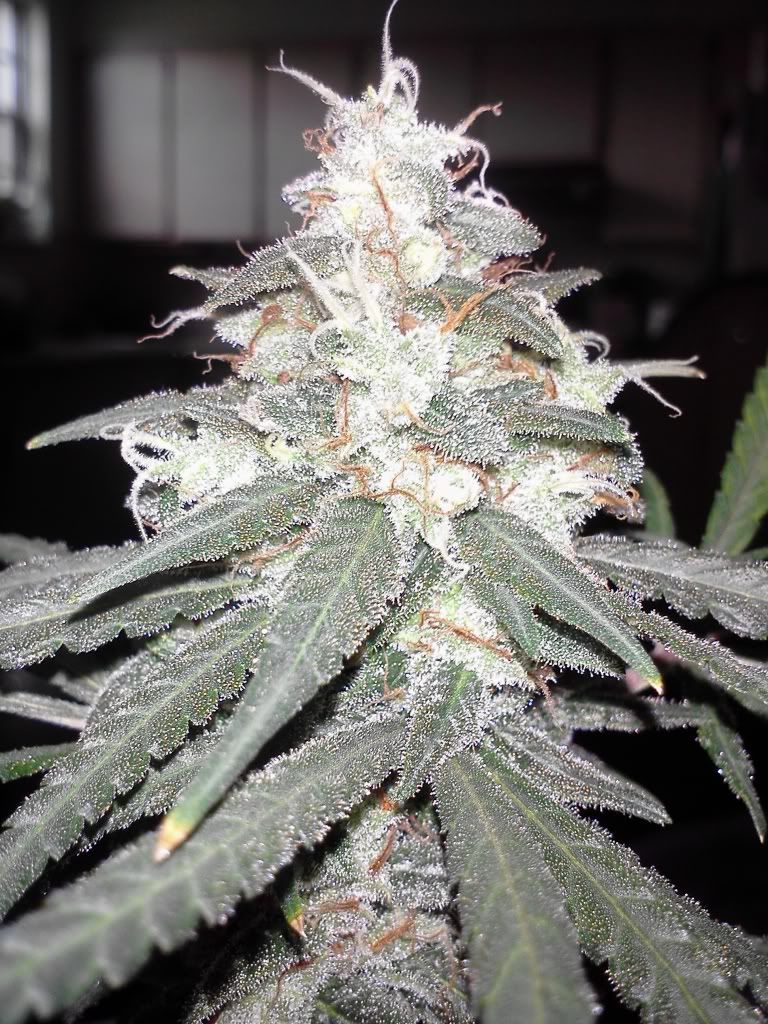
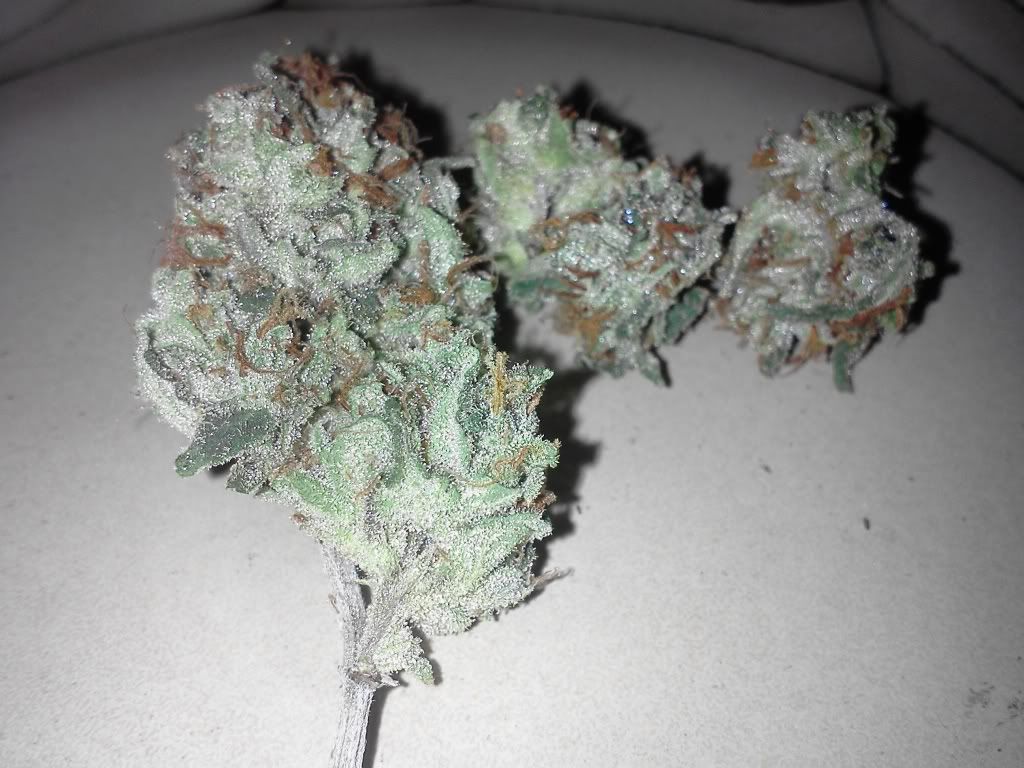
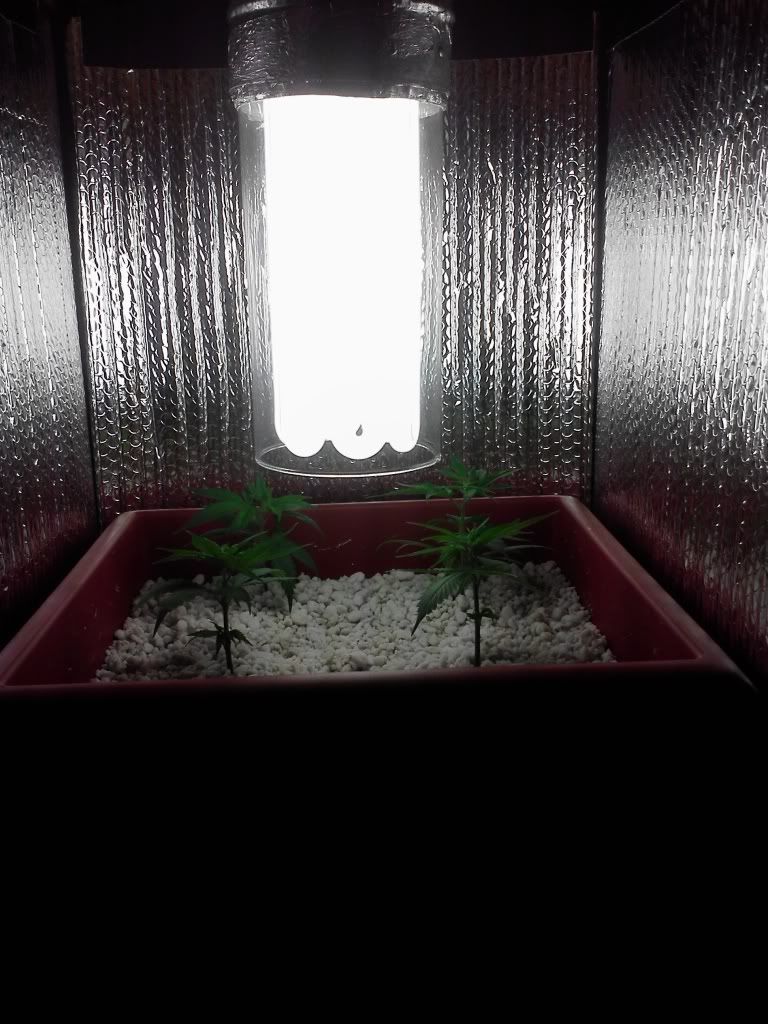
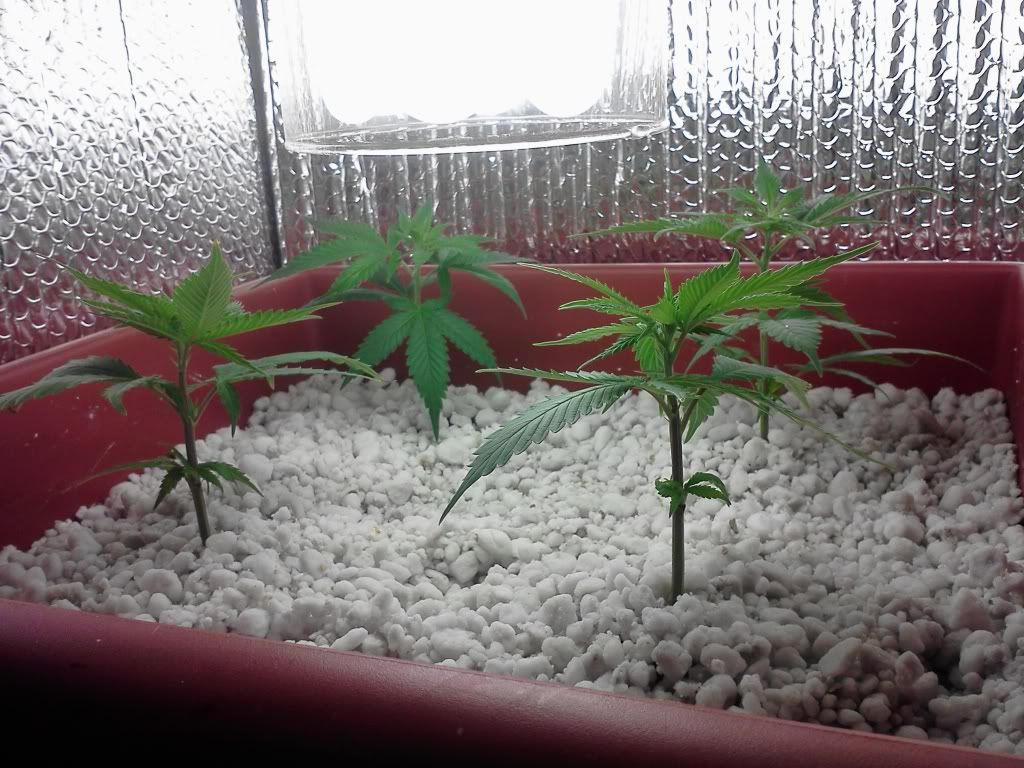
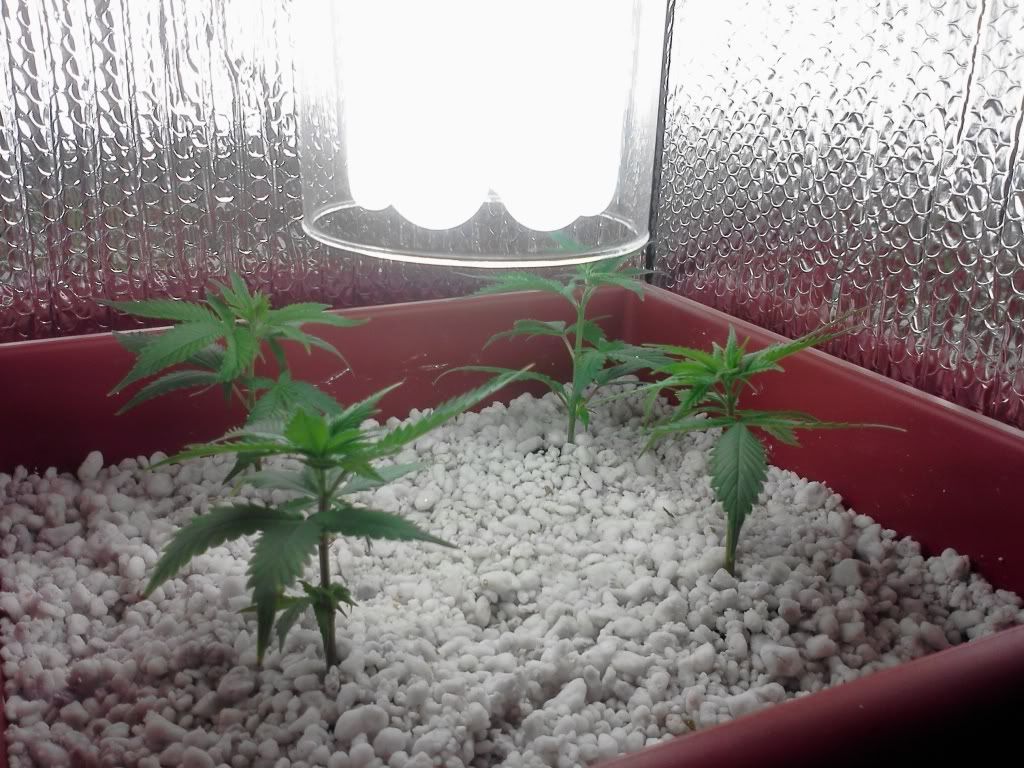
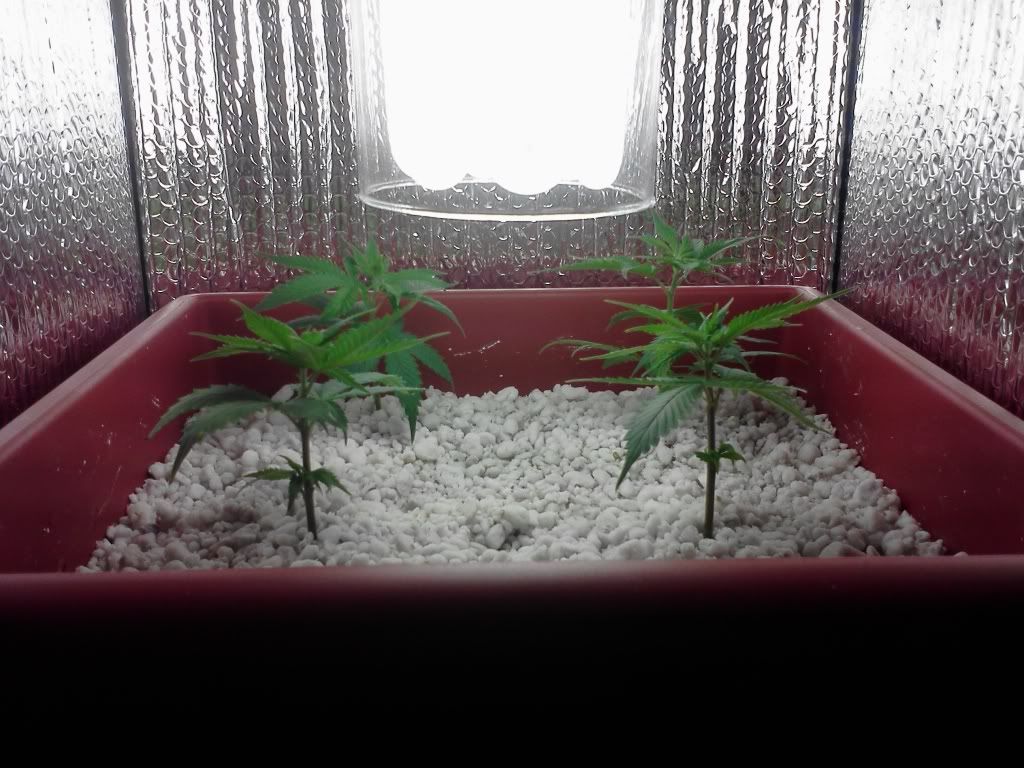
Great lookin' sticks of bud hush.

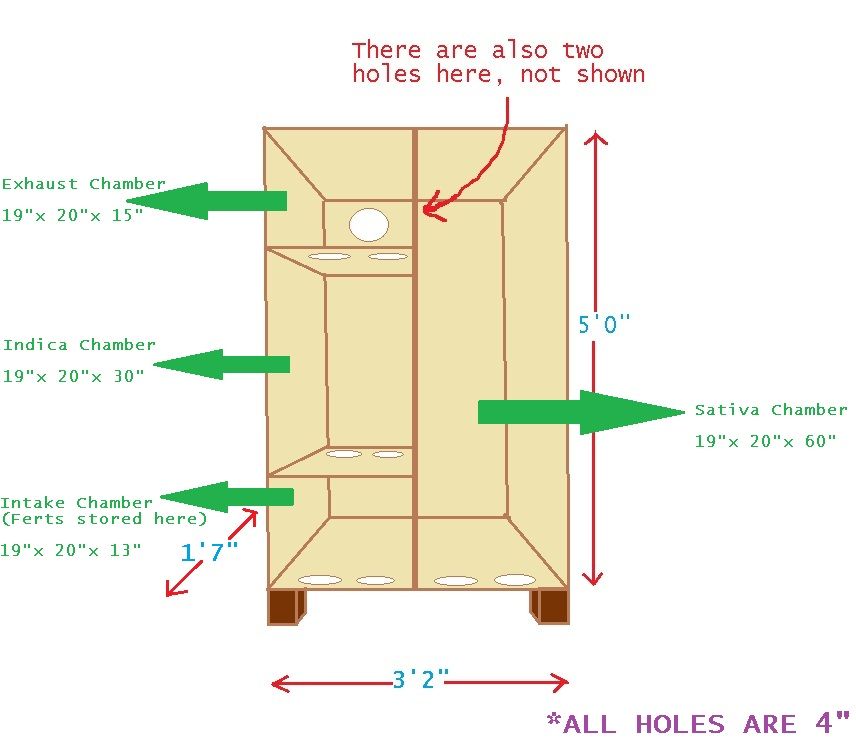
Got up nice n' early today to build something like this so I thought I'd reread the thread...I see no mention of your fan or filter. Maybe a pic or a quick explanation of how you have the exhaust set up?

I'd planned on using my 4" typhoon with a controller.....might be over kill...but I'd rather use what I have on hand instead of buying more stuff.

Make like the buds n' stay frosty. :tiphat:
 

hush

Señor Member
Veteran
Right on man, this was built with found stuff too, mostly. I started off with a large armoire that had previously been converted into a dual chamber grow cabinet, like 4 years ago. I brought it out of storage, dusted it off, and decided to use it entirely for flowering. So, I wasn't going to bother light proofing one half of it from the other half, which meant I could use one large fan to exhaust the whole entire armoire.

Here's an amazing highly technical diagram of the armoire, that I used to plan out my idea ahead of time:

vertcab_zpsc6c1d12e.jpg


So what I did was I hooked up a 4 inch inline fan (200cfm) to this thing, in a top chamber of the armoire, then cut necessary holes all throughout it, for air flow. After the fan was installed, the negative pressure inside the armoire was crazy strong. I couldn't even open the doors easily. So I bought a fan speed controller, and I'm running it on half speed.

Now remember, this is inside of an armoire, and I'm currently only using half of it. I'm still slowly piecing together what I need to start up the other half, which will be a micro HPS scrog, but the airflow is already there, going through the entire armoire, so it's ready.

I actually believe this type of setup could be done on a smaller scale, using a cabinet that is only the size of half of my armoire. The important thing, in my opinion, is using a cabinet that has a built in shelf up above the area you will be growing in. This is what makes it easy to suspend a vertical light... By simply cutting a 4 inch hole in the shelf, and then shoving a 5 inch to 4 inch reducer into that hole. Then, from below, the 5" hurricane glass tube is wedged into the reducer, with the help of foil tape around the rim. The actual socket can be easily just "hung" through the hole, but there are nicer ways to secure it.

Anyway, just because I did it inside of a armoire doesn't mean it can't be done in a single chamber cabinet. In fact, after seeing how well this is working out, I plan on doing just that!
 

5th

Active member
Veteran
Puts everything into perspective it does. Thank you :tiphat:

I'm going cheap n' easy single chamber for the moment. Going to top my outdoor plants this week and flower the clones to detemine sex.

I was thinking of splitting the armoire into four flowering areas. 2x150w HPS, flip flopped between the chambers and using a night stand/table as my bonzai mom/clone area....but that won't be until November probly...

Ahh stoned n' rambling again....thanks again for the diagram n' explanation.
 

hush

Señor Member
Veteran
:tiphat:

Here is a picture of the remaining Lemon Skunk, the sexy pheno. She gets the chop this Saturday.

IMG225_zps6c9a1e6b.jpg
 

hush

Señor Member
Veteran
I've been smoking the few grams I got off of the chunky pheno last week... No cure, but finally dry... And I have to say the smoke tastes just the way it smells... like lemons.

The high is pretty nice... Kind of a blend of sativa and indica qualities. I feel pretty relaxed, but not heavy. My eyes are droopy, and dry. My teeth are a grinding a little, kind of like amphetamines, lol. A little elevated pulse, and my body feels like it should be active, although my mind is relaxed and would rather just not have to think at the moment. It would give me energy if I were already outside doing some kind of activity. This is really good wake and bake bud. But I only got like 3 grams out of it. It didn't stretch at all, in flowering. So next time I know these clones need to be vegged for a long time first. This will be smoked in entirety by the end of tonight. Here's all that's left:

IMG223_zpsa8182446.jpg
 

hush

Señor Member
Veteran
Well thanks for watching!

So I am still waiting for new clones to root, but once that happens, I will plant 4 of them in one hempy tub, and put that in here. The two sadhus that are in here will go under the 400w in order to free up space, and I will start from scratch in here at that point.

It will be like phase 2 of this experiment... I already know this setup is effective, but now I'm fine tuning it. The new plan will be to have 4 plants in there, and I will be tying them down in order to branch out. They will be vegged for anywhere from 2 to 4 weeks before flowering is forced.

In this manner, I expect to be able to quadruple the yield per plant. Starting off with sadhu, I expect each clone will end up giving about 20 grams, so my goal is now going to be about 3 ounces from the next experiment.

So stay tuned, everyone... This is about to get more productive. :D
 

hush

Señor Member
Veteran
Here's a pic of the sexy pheno Lemon Skunk that I've been smoking on all morning:

IMG007_zps55f507d6.jpg


This is honestly the most "bag appeal" weed I've ever grown, hands down! It's so freaking beautiful and it smells like candy. I can't wait to grow this one again. This was the one I always called my keeper, back since the beginning of flowering. Yes, it takes a week longer than the 8 week chunky pheno, but the bud is superb. Greenhouse Seeds came through for me, that's all I gotta say...
 

hush

Señor Member
Veteran
Well, I setup a hempy bed in here today!

IMG031_zps37c5c44d.jpg


I moved the sadhus to the 400w tent so I could start from scratch in here. I took my old Garden of Ease container and drilled a hole for the drain. I then inserted a grommet and a piece of half inch tubing, for controlled drainage. Then, I routed the tubing down below, into an old 2.5 gallon aquarium I had sitting around.

IMG032_zps0f5cd0f5.jpg


Eventually I'll automate this thing, but for now I'll hand water. The plan is to LST these girls for a few weeks before flipping them to 12/12.

IMG027_zps9d41d30a.jpg


IMG026_zpsdf276d14.jpg


IMG033_zpse0897bed.jpg
 

Avinash.miles

Caregiver Extraordinaire
Moderator
ICMag Donor
Veteran
Nice, glad to see you switching up your grow and experimenting with diff media & techniques.
best of luck this round hush, I'll be tuning in.

:tiphat:
 
Killer minimal grow!! Its great to see this work so well. That's really all I would need personally.
Too bad I go ballz-out in everything I do. :/
Sweet tiny cab(in) bro. :)
 

NKOTS

follow the pink rabbit!
Veteran
hello hush :wave:

so good to see you kick off with a new project. that single CFL really proved to work good for you.
according to recent experience, in your opinion what would be the optimistic expected yield from this setup?

is that 100% perlite in your hempy bed or you mixed it with vermiculite? all i can see at the top is pure perlite, eh?
 

hush

Señor Member
Veteran
hello hush :wave:

so good to see you kick off with a new project. that single CFL really proved to work good for you.
according to recent experience, in your opinion what would be the optimistic expected yield from this setup?

is that 100% perlite in your hempy bed or you mixed it with vermiculite? all i can see at the top is pure perlite, eh?


Good eye, I forgot to mention that it is 100% perlite. Other people have luck with pure perlite, I didn't have any vermiculite, so here we are.

In terms of yield, it's still a little hard to say... This time I will let them veg a while before flowering. I think, though, that if I LST the plants and get them nice and bushy first, i should be able to get around 3 ounces or so. That's my optimistic guess... I really don't think I'll yield any less than 2 ounces this time around though, if I can get about 4 growing tops from each clone. 4 tops times 4 plants equals 16 buds surrounding the light. If each bud weighs at least 3.5g, that's 2 ounces right there. This time around, the sexy pheno Lemon Skunk with no veg time whatsoever ended up weighing about 3 or 4 grams, so I know what's possible now!

The concept is solid. It's just a matter of not wasting any light, which is what happened last time because of the lack of any veg time.

:tiphat:
 

hush

Señor Member
Veteran
LOL, no I've decided that I want to overload myself with a bunch of Sadhu first, but then yes, Lemon Skunk will get center stage. Besides I've been vegging the shit out of the Sadhu mom for months now, and she's really giving up the cuts lately, so much that I don't have room for them all, and some are going into the compost heap!

I need to update the lighting in my mother cab, so that I can veg more plants at a time. Right now I can only give one mother plant the primary light, and the other mothers are in suspended animation off to the sides. Pretty soon I'll let the Sadhu rest, and I am definitely going to go with the sexy LS before the chunky one. The chunky one was good, and finished in 8 weeks, but the sexy one is total candy. In every way.
 

5th

Active member
Veteran
Good lookin' hush.

Gonna be nice to see you bending n' twisting away.

Love the hempy bed. Is it raised up a lil' bit? I see your drainage hose coming out the bottom, through your intake hole(s)....just wondering how you dealt with the reduction in intake air. Maybe heat wasn't that big of an issue in the first place....

:tiphat:
 

hush

Señor Member
Veteran
The air is not being blocked at all, actually. The addition of the hempy bed didn't change anything in terms of airflow because the base of the tub I am using is only about 12" x 12". The holes that bring air into this chamber are all lined up along the back wall, and they aren't being covered by the tub.

As far as it being raised up a bit, check the diagram I posted on the previous page, and you'll see that I am using a large armoire, only the left half of it, which is three separate vertical chambers. So all I did was route the drainage tube through one of the intake holes down to the chamber below, where it empties into the small aquarium. The aquarium itself can just barely fit into this chamber, but it fits comfortably along the back wall of the bottom chamber. The only other thing down there is the intake filter that filters out all the dust and cat hair coming into the armoire. Oh, and also the power strip and light timer.

Up in the top chamber is a carbon filter, an inline fan, and the socket of the 125w CFL being suspended from there. There is still room for a small digital HPS ballast, which is my plan for the right half of the armoire.
 
Top