What's new

My 8ft 24 Bulb 624 Watt CFL Hood/Fixture For Under $150

Elite

Active member
Greetings,
Bare in mind I'm a professional Electrician with many other equally impressive qualities. So I have alot of materials laying around. The rest I purchased. I'm not really going to do a step-by-step
verbal (typing :wink:) I'll let my pictures do the talking. Bare in mind, none of my "impressive" qualities are photography :tongue:. Plus because all the stuff I have, my work space is very limited. Unfortunately, due to the nature of the build, I couldn't exactly take it out to the driveway for professional shots :D

Materials:
2x5'-Straight/Round 8" Ducting (Had)
12/2 UF Wire (Standard Romex is fine)(Had)
Misc Materials....$40
(Plug ends, Mounting Hardware, Ect.)((Hardware Stores))
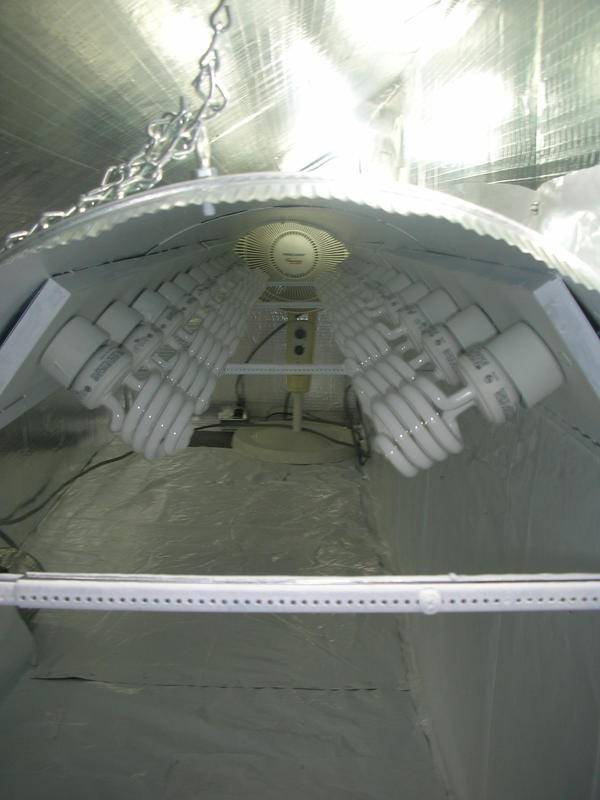
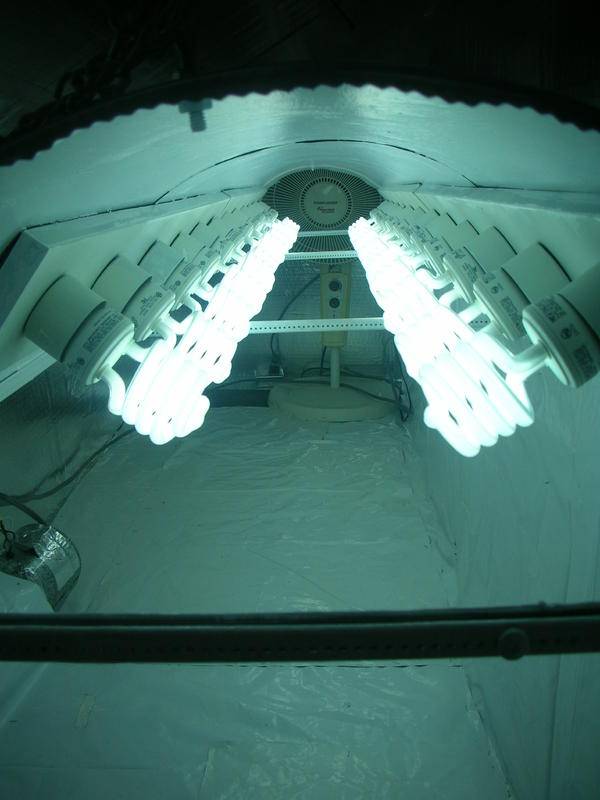
Fixtures............$35(Lowes 6 Bulb Vanity Lights)
Bulbs...............$55(Wal-Mart 26 Watt CFL's 6500K x 24)
Paints..............$20(Wal-Mart Rustoleum White Primer x 4-6 Cans)


:cool:Elite
 

Elite

Active member


Basic Hardware, I used two 5'x8" round ducts...turned them so both ends the except the flex ducting (ribbed or male end) overlapped them and screwed them together. I use nice little self tapping screw (I call the text screws) that are perfect for duct work. They make the job alot easier because your going to use a bunch.

:cool:Elite
 

Elite

Active member


I Attached metal brackets, mine where made to hold plumbing pipes, However those duct work straps (stud to stud) would've worked fine too. It was a matter of availability. I then installed the mounting hardware. Washers on both sides...don't half ass things :noway:

:DElite
 

Elite

Active member

Measuring for mounting


Painting Parts (3 Coats because I'm a bit of a perfectionist:smile:)


Mounting the fixtures. I off-set each side so the the bulbs will cover every 3" instead of the 6" that the fixture was designed for. Equals much more coverage...Definitely a plus in my book!!

:cool:Elite
 

Elite

Active member

This is how your wiring should look before you even attach the fixture wires. Tip, Use "Linesman" Pliers to get a good twist (clockwise) on your 12/2 (Solid wires) Overlap the smaller stranded wires past the tip of the solid wire and insert wirenut. Twist until tight (Not until it strips the small stranded wire out)


Professional with pride


Last step of wiring is the plug end. I just used 8' of the 12/2 UF. Short wires suck, so I figured 8' Fixture, 8' Cord. I'll be able to make that work for multi-applications.

:cool:Elite
 

Elite

Active member
Back to work...

Plenty more where these came from!!


$4.44 a Pack at Wal-mart. One of their cheaper priced CFL bulbs


Finished Painting Fixtures, I managed to lose 4 of the round fixture pieces (surrounds the bulb base) :confused: Luckly, I have spares :joint:
Because the fixtures I needed didn't come in white, it cost me $20 in paint, and was a pain in the ass:badday:
I suggest you take the time/money to get white fixtures, I know they exist. I'm just limited to what I can get and have to make the best of it...
You ask me, I'm doing alright...
I need to pick up more paint and a couple more bulbs before I can go any farther...

:cool:Elite
 

Elite

Active member
BTW, I don't recommend plugging in something that draws 624 watts just anywhere. However if you know what your doing you could for example :wink: Run a portable A/C unit that draws 830 watts, on a single "dedicated" circuit. I would still only be drawing a little over 12 amps. Well within the safe draw on a 15 amp breaker. But I wouldn't run anything else on that line.
Heres the math, its simpler than it seems:

624 watts plus 830 watts = 1,454 watts total, divided by the volts(120) = 12.11 Amps

So its Watts divided by Volts equals Amps

:cool:Elite
 

madpenguin

Member
Ah, but your .11A over your continuous load rating.... :muahaha:

You could turn it off every 2 hours and 59 minutes.... Or unscrew a lamp. :smoke:

That is pretty cool. Fire it up and post a pic of it in action.
 

Elite

Active member
Well, I didn't make it out to get my paints. :badday: I'm going with brush on primer this time (better control, and cheaper). So I installed all the bulbs. I don't typically test my connections by testing as soon as its safe. The nature of my experience level and I would've painted and mounted it before I even plug it in. However since its 4/20 and I have no paint...

Fixture with bulbs installed ready for power (Sorry about the smoke in the pic...its 4/20:D)

I'm going to fire this bitch up!!
:cool:Elite
 

Elite

Active member

Unfortunately my "Point and Shot Digi" doesn't do the light intensity justice!! This Bitch LIT up the Garage!!


Once I have it mounted in veg room (coming up) I'll make sure I get pics with a better camera to capture the light intensity (difficult to do, but my GF's a photographer :wink:)

Theres a chance my paints will get dropped off tonight, plus I have work in the veg room to support this mammoth!! So I don't get a break, even on 4/20
:cool:Elite
 

Elite

Active member
I'll take this opportunity to give you all a top view


Once I get these painted and mounted you won't be able to see the top


I had to run a jumper between rows of lights, I figured over the top was the best move for many reasons. 12/2 UF (UF=Underground Feed= Direct Burial) was used. Its a bitch to work with unless you have a lot of "practice" with it.


Just the cord entering the fixure...

:cool:Elite
 

Elite

Active member
Thanks!!
I'd thought I'd turn things over to the environment and the electrical and mounting aspects.


Receptacle I'll be plugging my fixture into. I could've gone with a quad (4 outlets) But as I stated, I'll be plugging in a portable AC unit too. That is all I'll have on the circuit, so no need for extra outlets. I have other circuits for that (Pictured below)


Always use the screws, not the "stab locks" when connecting the wires. That is my advice to the novice or professional.
Because this is a metal box and requires by code a green ground screw. You need to know the rules and why they exist before you can break them.


Finished Product!!

:cool:Elite
 

Elite

Active member
A Few shots of my veg room. It was designed for that. It has rubber (rooftop thick expensive shit) floor, and is very well insulated. I know it may look decent. But I need to lay down the thick white plastic and clean up before I show the whole room.


More Electrical, 2 Circuits one duplex (2) switched receptacle outlet


Mounting Hook and chain strategically placed


Back of the room, to show you shape. Room dimensions are:
18' Wide x 3' Deep
The highest point is 3'6", The lowest is 2':yoinks:

I can do a lot with that space, just not much room to maneuver:rolleyes:

:cool:Elite
 

+Vibes

Member
mad respect on your wiring skills man! you obviously know what you're doing and take pride in it! awesome... looking forward to seeing it above some plants :) ++
 

Elite

Active member
Thanks for the positivity Guys!!

I take great pride in EVERYTHING I do...If you follow my threads, you'll see that.

Due to the economy I'm an unemployed, Electrician, :badday:

But it gives me the free time to use all my skills to pull off a Huge Yield!!

:cool:Elite
 

Latest posts

Latest posts

Top