Mr_Micro
Member
Thank you again for all the wonderful replies everyone! 
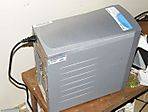
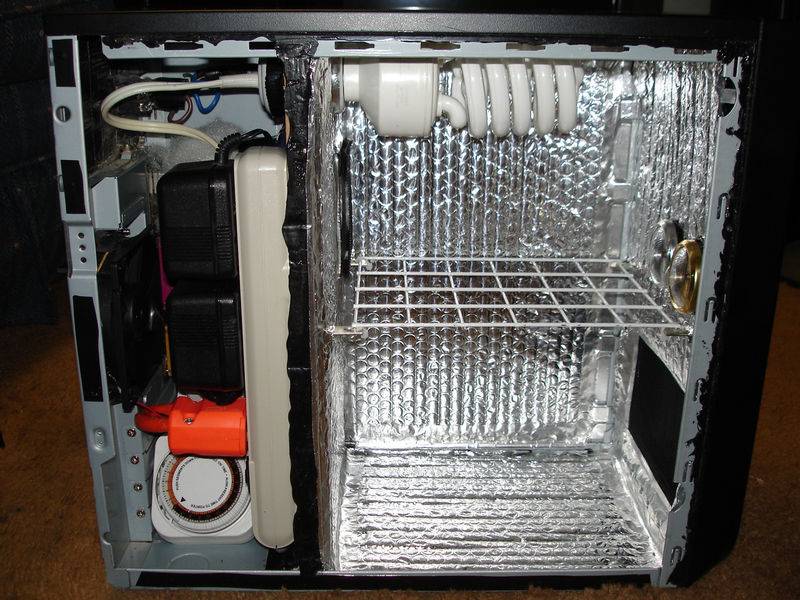
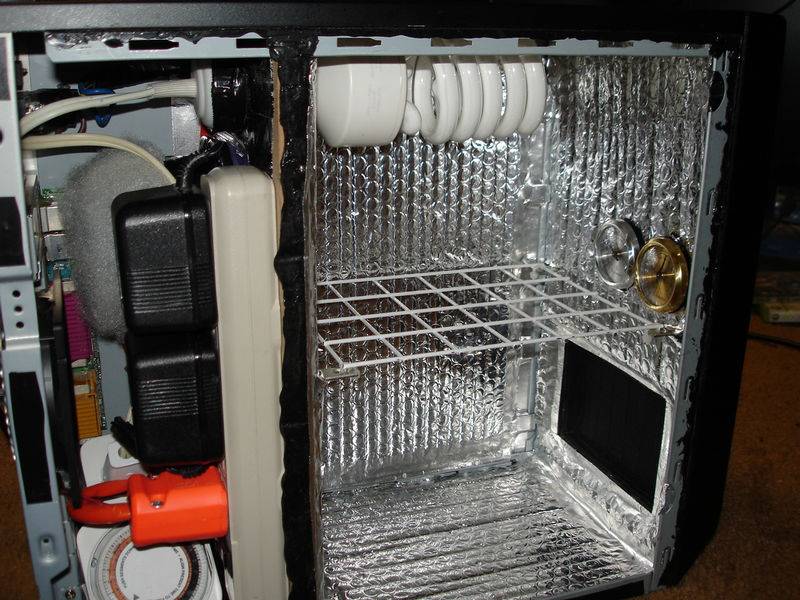
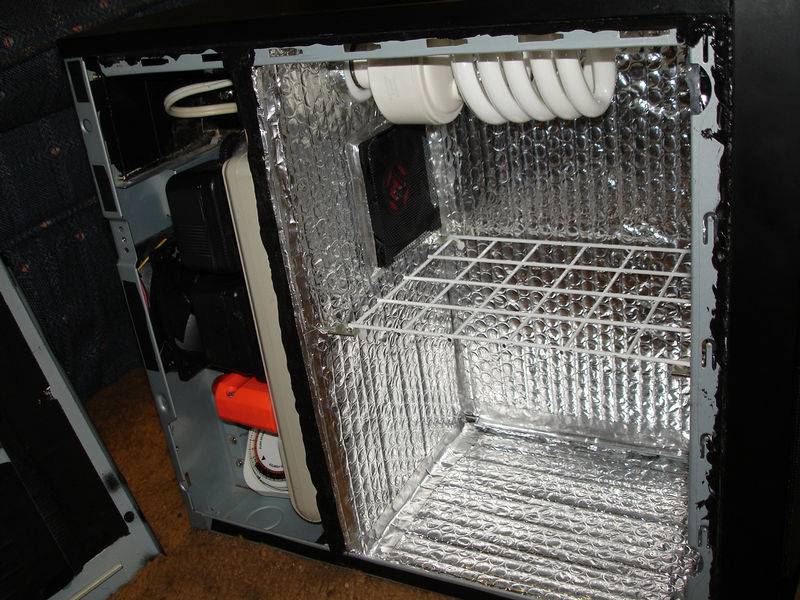
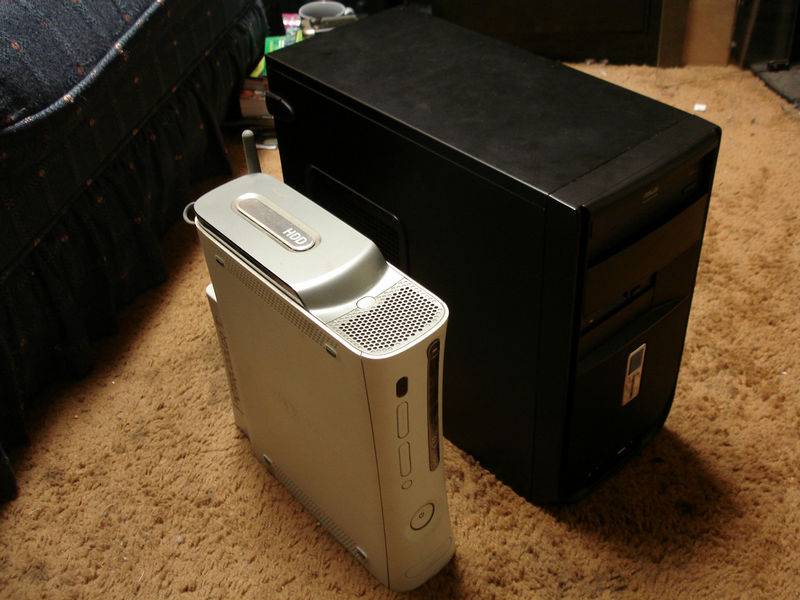
Purp, I do still pop in from time to time. So far I've built 4 PC case grow boxes, done a grow in each one, and then sold the box for a small profit later down the line when money got tight.
So I'm not growing right now, but hopefully come spring I'll have the funds to build another PC case box (I'm thinking a slightly scaled up in size Nanomachine type design this time around) and get back to growing again. I don't smoke much these days, but I sure do love to grow and to see the smiles on people's faces when I plop a big bag of fine home grown in their hands for free after the grow is done :mrgreen:
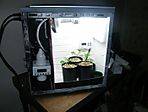
But anyhoo, the midget louvers can be very effective in the right application and I would highly recommend them for slightly larger boxes. They worked really well for intakes in my most recent PC case grow (that I still need to update with harvest info and pics) seen here --->http://www.icmag.com/ic/showthread.php?t=86694
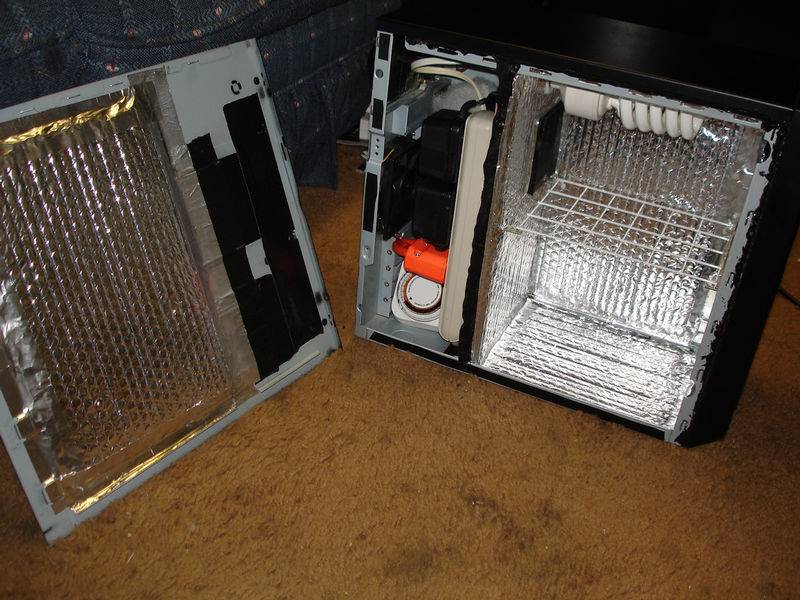
The reason I didn't use them in my Nanomachine is that the growing chamber was just so small that the amount of airflow needed to cool the 42 watt CFL in that little space just couldn't be provided by a single midget louver intake, and I didn't have the vertical space (or the means to stealthily hide) a second louver. So in lieu of using a midget louver I took the same basic louver design concept and made my own louver out of window screen for the front, sheets of plastic cut out from a storage tub for the walls, and a plastic coat hanger to reinforce the sides.
The design was the same as the midget louver, but with a wider surface area fitted to the maximum size my box could hide inside the grating on the front of the case.
But unless you're working with a space as tiny as the Nanomachine where you don't have room for 2 or more midget louvers than they should work just fine and will be a lot easier to work with (not to mention more professional looking) than trying to make your own light traps. I plan to use these handy little midget louvers in all my future micro growbox builds
Hope that helps!
Purp, I do still pop in from time to time. So far I've built 4 PC case grow boxes, done a grow in each one, and then sold the box for a small profit later down the line when money got tight.
So I'm not growing right now, but hopefully come spring I'll have the funds to build another PC case box (I'm thinking a slightly scaled up in size Nanomachine type design this time around) and get back to growing again. I don't smoke much these days, but I sure do love to grow and to see the smiles on people's faces when I plop a big bag of fine home grown in their hands for free after the grow is done :mrgreen:
But anyhoo, the midget louvers can be very effective in the right application and I would highly recommend them for slightly larger boxes. They worked really well for intakes in my most recent PC case grow (that I still need to update with harvest info and pics) seen here --->http://www.icmag.com/ic/showthread.php?t=86694
The reason I didn't use them in my Nanomachine is that the growing chamber was just so small that the amount of airflow needed to cool the 42 watt CFL in that little space just couldn't be provided by a single midget louver intake, and I didn't have the vertical space (or the means to stealthily hide) a second louver. So in lieu of using a midget louver I took the same basic louver design concept and made my own louver out of window screen for the front, sheets of plastic cut out from a storage tub for the walls, and a plastic coat hanger to reinforce the sides.
The design was the same as the midget louver, but with a wider surface area fitted to the maximum size my box could hide inside the grating on the front of the case.
But unless you're working with a space as tiny as the Nanomachine where you don't have room for 2 or more midget louvers than they should work just fine and will be a lot easier to work with (not to mention more professional looking) than trying to make your own light traps. I plan to use these handy little midget louvers in all my future micro growbox builds
Hope that helps!
 keep it green
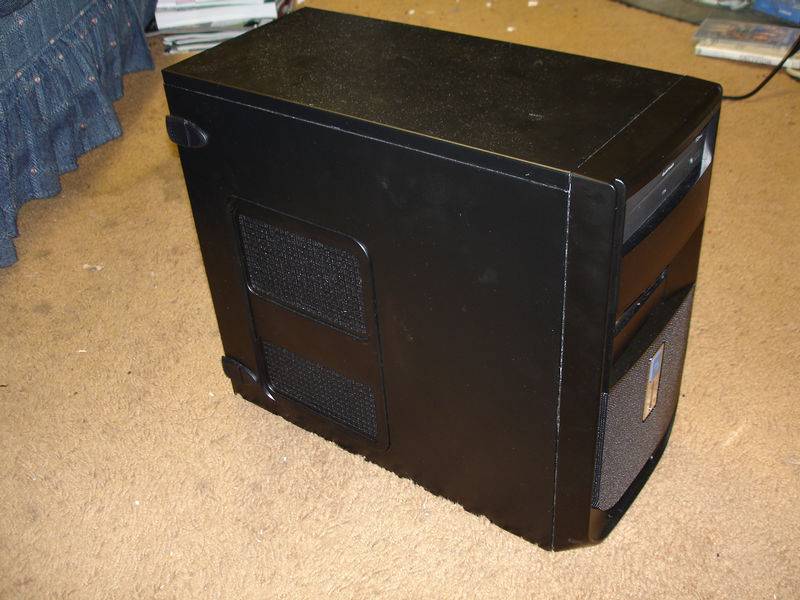


")