Greetings guys/gals,
This thread is an extension of my first thread - Team Microbe's Living Soil Laboratory where you can find the answers to a lot of the questions I've been getting, like the soil mix I use along with my watering regimen, and cloning routine. Very stoked to see how much attention the first thread got, hopefully this will one will also document this dive into no-till well enough for others to follow along and benefit from as well. These threads I make are not only for my own documentation, but as a platform for other like-minded growers to teach and learn from each other on. So feel free to pull up a chair, smoke somethin and join in on this one
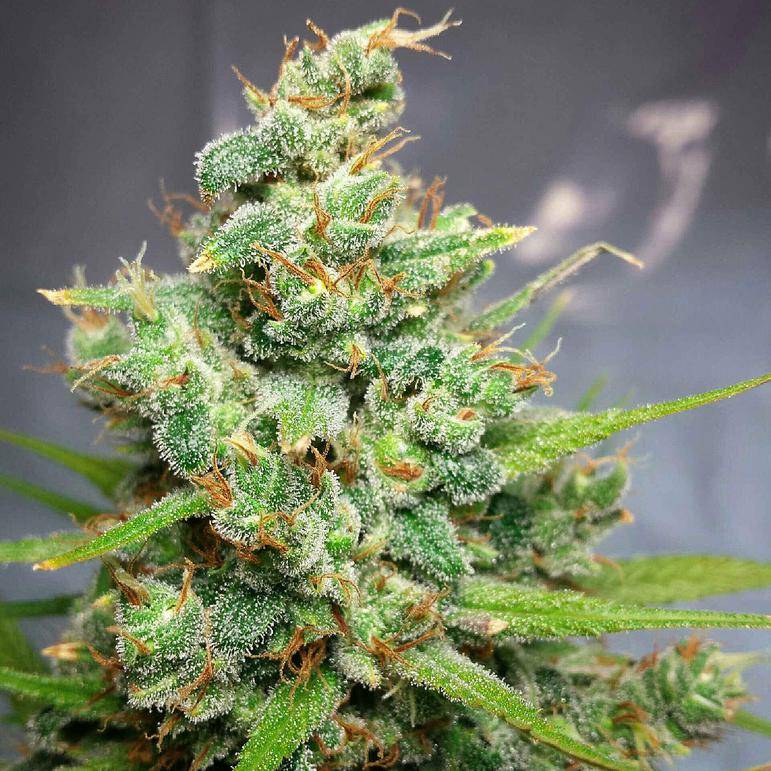
Silver Lotus #1 - 1st cycle no-till - chopped at Day 84
SO - This new thread will begin with the 2nd cycle in the same pots I just harvested from, all without tilling. I'll be documenting everything I do for the most part, and hopefully some useful side discussion is had along the way...
I'll be honest, I was skeptical when I first heard about this style of growing. I couldn't imagine how it could be done... the idea of leaving the same soil in the same pots run after run sounded like some deficiencies were just bound to pop up. Once I researched more into it, and watched others in my circle come out with success... I needed to give it a go. I found out that the more microbes present in your media, the less the amount of nutrients are needed to carry that plant through to full maturity. Since soil biology only grows with time, it would seem that plants only get healthier and higher performing as time goes on. A few of my mentors have proven this theory true, as they're on their 13th & 14th cycles as of now and are absolutely killing it in terms of quality and yield (Blue Jay over at Grasscity, Invocation, Permalos, and a few others). I've also been inspired by gardeners like John Kempf (found over at BioNutrient.org), Elaine Ingham, Coots, Jeremy from BAS, and Microbe Man here in IC.
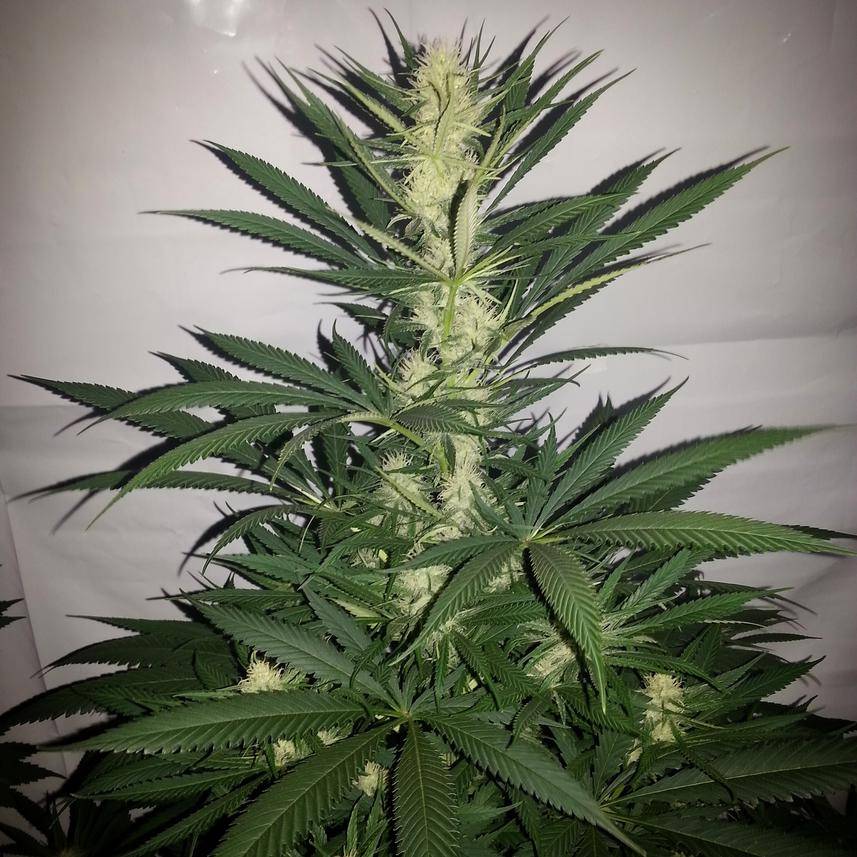
Living soil pushing this Silver Lotus to peak health (week 3)
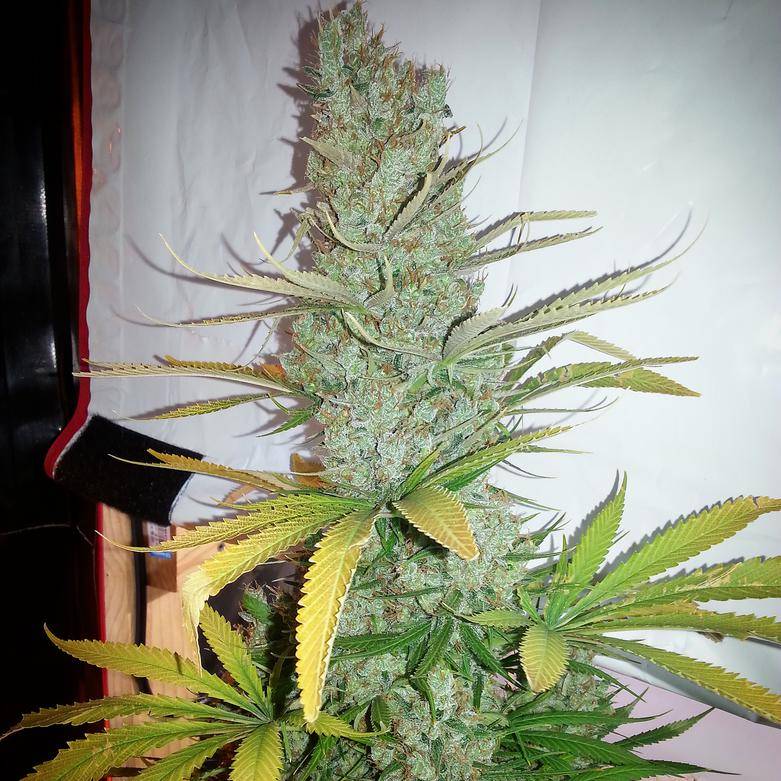
Same plant now at week 11
It's pretty fascinating how the entire process works, and the funniest part is that it's very quite simple once the basics are covered and understood. For anyone lost out in left field right now, it's ok - all you need to know is that it's all thanks to the:
Soil microbiology
Soil microbiology is the study of organisms in soil, their functions, and how they affect soil properties. It is believed that between two and four billion years ago, the first ancient bacteria and microorganisms came about in Earth's primitive seas. These bacteria could fix nitrogen, in time multiplied and as a result released oxygen into the atmosphere. This release of oxygen led to more advanced microorganisms. Microorganisms in soil are important because they affect the structure and fertility of different soils. Soil microorganisms can be classified as bacteria, actinomycetes, fungi, algae, and protozoa. Each of these groups has different characteristics that define the organisms and different functions in the soil it lives in.
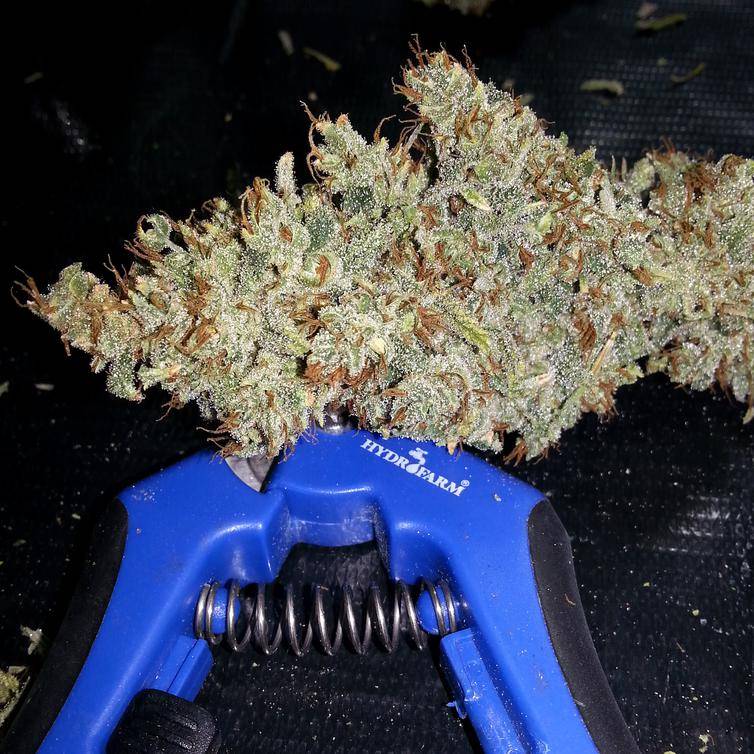
Some Silver Lotus #2 post-trim
So I suppose you could say that no-till gardening harvests the power of nature. It not only reduces the amount of work needed in order for a grower to see full health in their garden, but reduce input costs as well (I only paid $50 to begin this run with 12 pots). Instead of tilling up the soil, previous crop's leaf litter and stems/branches are simply dropped to the floor, and recycled back into top layer. The majority of all soil microbes reside here, and naturally ingest the carbon that is produced from the bacteria and fungi found in that soil. Just like in the forest, mature trees fall to the ground and become broken down by bacteria and fungi on the top layer of the forest floor, which are later food for the next generation to feed upon. It's a self-sufficient process that has the potential to operate infinitely if left undisturbed; no tilling needed. This is no different, we're literally bio-mimicking to the fullest extent possible being indoor gardeners. New doors have opened for me by practicing this style of growing, and it makes a lot of sense to me. It's really a beautiful sight to see... let alone observe as a grower. Bug identification becomes more prevalent, and even exciting at times - especially when you realize that creepy crawly thing you lost sleep over is actually beneficial to your soil system... phew lol
This thread is an extension of my first thread - Team Microbe's Living Soil Laboratory where you can find the answers to a lot of the questions I've been getting, like the soil mix I use along with my watering regimen, and cloning routine. Very stoked to see how much attention the first thread got, hopefully this will one will also document this dive into no-till well enough for others to follow along and benefit from as well. These threads I make are not only for my own documentation, but as a platform for other like-minded growers to teach and learn from each other on. So feel free to pull up a chair, smoke somethin and join in on this one
Silver Lotus #1 - 1st cycle no-till - chopped at Day 84
SO - This new thread will begin with the 2nd cycle in the same pots I just harvested from, all without tilling. I'll be documenting everything I do for the most part, and hopefully some useful side discussion is had along the way...
I'll be honest, I was skeptical when I first heard about this style of growing. I couldn't imagine how it could be done... the idea of leaving the same soil in the same pots run after run sounded like some deficiencies were just bound to pop up. Once I researched more into it, and watched others in my circle come out with success... I needed to give it a go. I found out that the more microbes present in your media, the less the amount of nutrients are needed to carry that plant through to full maturity. Since soil biology only grows with time, it would seem that plants only get healthier and higher performing as time goes on. A few of my mentors have proven this theory true, as they're on their 13th & 14th cycles as of now and are absolutely killing it in terms of quality and yield (Blue Jay over at Grasscity, Invocation, Permalos, and a few others). I've also been inspired by gardeners like John Kempf (found over at BioNutrient.org), Elaine Ingham, Coots, Jeremy from BAS, and Microbe Man here in IC.
Living soil pushing this Silver Lotus to peak health (week 3)
Same plant now at week 11
It's pretty fascinating how the entire process works, and the funniest part is that it's very quite simple once the basics are covered and understood. For anyone lost out in left field right now, it's ok - all you need to know is that it's all thanks to the:
Soil microbiology
Soil microbiology is the study of organisms in soil, their functions, and how they affect soil properties. It is believed that between two and four billion years ago, the first ancient bacteria and microorganisms came about in Earth's primitive seas. These bacteria could fix nitrogen, in time multiplied and as a result released oxygen into the atmosphere. This release of oxygen led to more advanced microorganisms. Microorganisms in soil are important because they affect the structure and fertility of different soils. Soil microorganisms can be classified as bacteria, actinomycetes, fungi, algae, and protozoa. Each of these groups has different characteristics that define the organisms and different functions in the soil it lives in.
Some Silver Lotus #2 post-trim
So I suppose you could say that no-till gardening harvests the power of nature. It not only reduces the amount of work needed in order for a grower to see full health in their garden, but reduce input costs as well (I only paid $50 to begin this run with 12 pots). Instead of tilling up the soil, previous crop's leaf litter and stems/branches are simply dropped to the floor, and recycled back into top layer. The majority of all soil microbes reside here, and naturally ingest the carbon that is produced from the bacteria and fungi found in that soil. Just like in the forest, mature trees fall to the ground and become broken down by bacteria and fungi on the top layer of the forest floor, which are later food for the next generation to feed upon. It's a self-sufficient process that has the potential to operate infinitely if left undisturbed; no tilling needed. This is no different, we're literally bio-mimicking to the fullest extent possible being indoor gardeners. New doors have opened for me by practicing this style of growing, and it makes a lot of sense to me. It's really a beautiful sight to see... let alone observe as a grower. Bug identification becomes more prevalent, and even exciting at times - especially when you realize that creepy crawly thing you lost sleep over is actually beneficial to your soil system... phew lol