welcome back red!

You are using an out of date browser. It may not display this or other websites correctly.
You should upgrade or use an alternative browser.
You should upgrade or use an alternative browser.
G
guest 77721
I've got all 4 Ultimate Thai seeds to germinate and they are now in the soil.
The 5 DTXSB seeds are still waiting. I'm beginning to think these 5 year old seeds aren't viable anymore. I'm going to prepare 4 of the Shiskaberry seeds.
The 5 DTXSB seeds are still waiting. I'm beginning to think these 5 year old seeds aren't viable anymore. I'm going to prepare 4 of the Shiskaberry seeds.
G
guest 77721
Happy New Year!
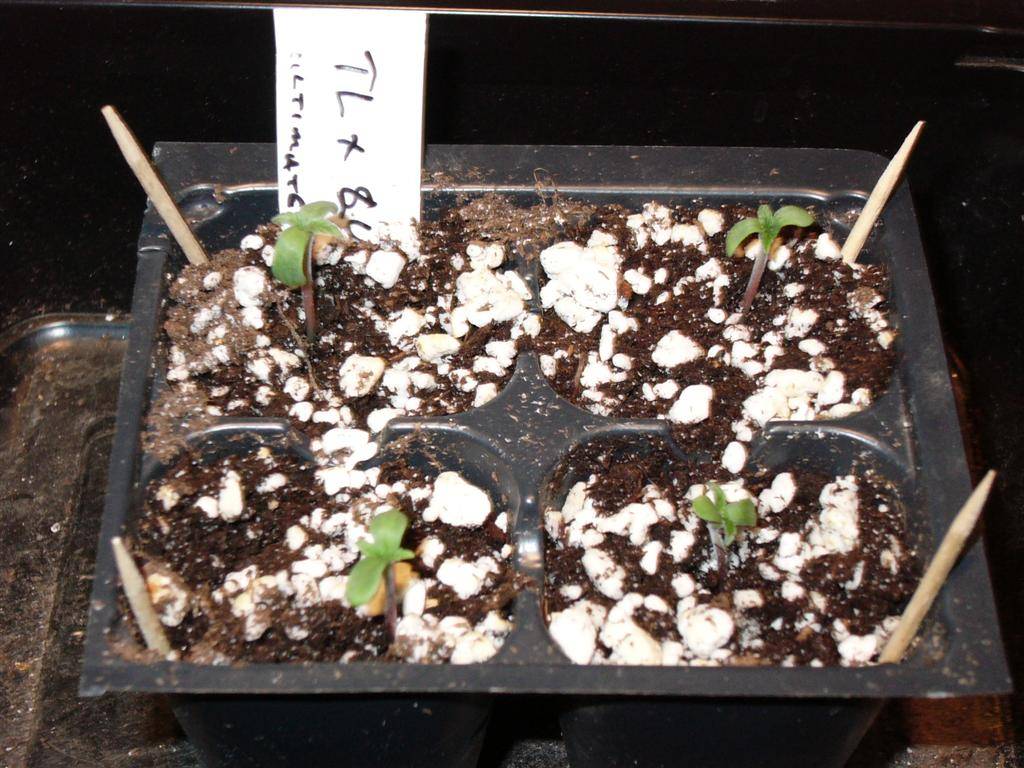
here's some New Year's babies. My Ultimate Thai seedlings popped out of the soil last night. I'm 4/4 for germination.
 [/URL]
I'm still waiting on my DTxSB and SB seeds to germinate.
here's some New Year's babies. My Ultimate Thai seedlings popped out of the soil last night. I'm 4/4 for germination.
I'm still waiting on my DTxSB and SB seeds to germinate.
 Hey Red: Long time lurker in your threads & a big fan of your R2D2 set up. Very mobile which is great for those that rent. Looking forward to tagging along on this next run. Keep it green
G
guest 77721
Thanks man, I'm happy you like the R2D2. It's the right size for a closet in an appartment.
Well, my 4 Ultimate Thai seedlings are doing real good. Not much to see though.
My seed collection is getting pretty old now. My 5 original ShiskaberryxDutch treat seeds still haven't popped after 12 days now. I just checked my Shiskaberry and have 1 popped out of 4 and that's after 4 days.
Well, my 4 Ultimate Thai seedlings are doing real good. Not much to see though.
My seed collection is getting pretty old now. My 5 original ShiskaberryxDutch treat seeds still haven't popped after 12 days now. I just checked my Shiskaberry and have 1 popped out of 4 and that's after 4 days.
G
guest 77721
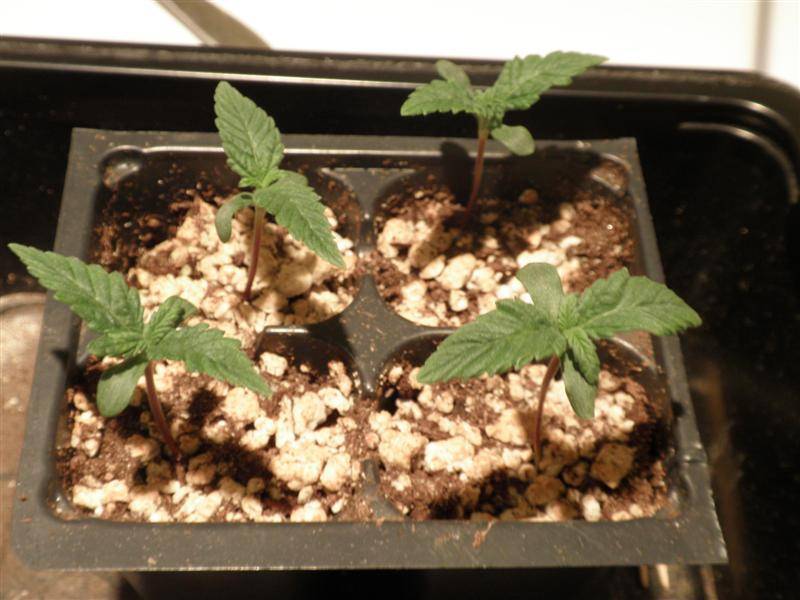
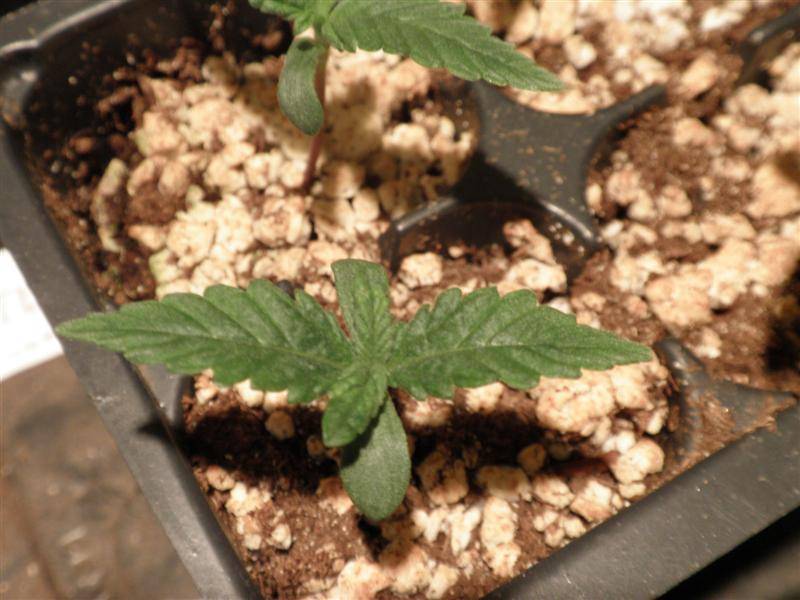
My Ultimate Thai seedlings are doing great.
I gave up on the Cash Crop Ken - Dutch Treat x Shiskaberry seeds as non viable. These were over 6 years old. I sure did get some good mileage out of that $30 investment for 15 seeds.
I've got 2/4 to germinate from my Shiskaberrys which are all in the soil right now. These seeds are 3 years old too.
I was taking a good look at my records the other day and I found that there is a big disadvantage to going 12/12 from seed and it actually extended the grow time considerably for the mostly sativa strains.
My Thai-Lights 75% Sativa ran 15 weeks of flowering from seed with 2 weeks of vegging and 11 weeks after revegging. With the 100% Indica strain, it took the same 93 days of 12/12 as a 1 month veg plant. Both plants took over 21 days to show sex where 8 days is normal.
My conclusion is that I'm going to wait for all my plants to mature to develop alternating nodes before flipping to 12/12. I haven't been able to figure out until now why my Shiskaberry went 15 weeks then went 9 weeks in reveg. Same thing with the Thai-Lights.
It's funny sometimes you have to make 2 steps forward and 1 step backwards. I think this is the case with my last grow as I dropped the lighting and did small pot sizes and 12/12 from seed.
The 12/12 from seed technique is only useful for making stunted indica plants. I have enough space in my growbox in both horizontal and vertical directions that I don't have to stunt my plants.
G
guest 77721
Hey guys,
it's been a while since I've posted so I'll have to get you caught up to date with my current grow.
My seedlings popped out and were doing just great. Sadly they started to do poorly because of the cold temps down my basement. I figured out that the lights were making the tops grow but the roots weren't developing due to the low temps. I really should have moved my operation upstairs but decided to run minimal lighting and wait until things improved.
Anyway I lost one seedling and got three plants growing nicely and took cuttings. I had a week long ski trip planned so I decided to hold off flowering until I got back. I trimmed the plants down and ran minimal lighting @ 13 w/sqft.
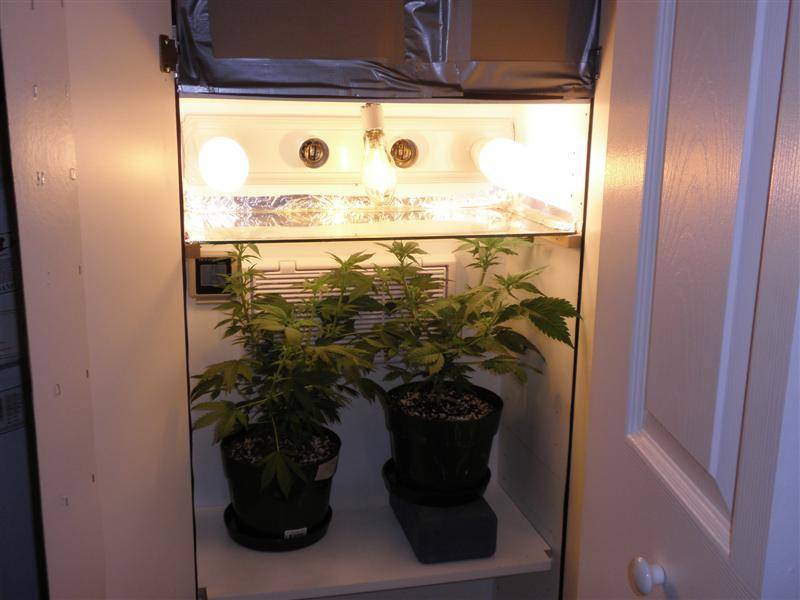
I had a great trip and returned to find my plants in great shape. One week of vegging under 50w/sqft cfls and now they are in the second week of flowering. Had to toss out one of the nicest plants which showed male. I was surprised that the plants showed sex in 3-4 days but they were pretty mature.

it's been a while since I've posted so I'll have to get you caught up to date with my current grow.
My seedlings popped out and were doing just great. Sadly they started to do poorly because of the cold temps down my basement. I figured out that the lights were making the tops grow but the roots weren't developing due to the low temps. I really should have moved my operation upstairs but decided to run minimal lighting and wait until things improved.
Anyway I lost one seedling and got three plants growing nicely and took cuttings. I had a week long ski trip planned so I decided to hold off flowering until I got back. I trimmed the plants down and ran minimal lighting @ 13 w/sqft.
I had a great trip and returned to find my plants in great shape. One week of vegging under 50w/sqft cfls and now they are in the second week of flowering. Had to toss out one of the nicest plants which showed male. I was surprised that the plants showed sex in 3-4 days but they were pretty mature.
G
guest 77721
Just installed my final lighting setup with a 150HPS and 2x42W for 21,400 lumens in 2sqft or 10700 lumens/sqft. This puts my setup at the top end of the optimal range of 8000-10000 lumens / sqft comparable to a 600 - 1000 HPS setup. Woohoo!!!
I did a little bit of trimming last night and took all the big indica fan leaves to open up the top of the plants better.
Here's my nute schedule on this run. I'm running the light feeding schedule that maxes out at 1200 ppm. This was just perfect for the LUI so I'm expecting it to turn out great for the Ultimate Thai which is behaving like a mostly indica strain.
I do a weekly feeding and use plain water as needed in between. I also watch my plants closely and may feed twice or water twice if I see the plants are needy or are getting overfertilized.
My feeding advice is always look to the leaf tips at the top of the plant for tip burn. This means nute buildup.
Look at the health of the bottom leaves. This is where the plant shows deficiencies or nute lockout.
 Looks like you've got plenty of head space to work with as well. Looks like some quality smoke in the makings.
  Keep it green.
G
guest 77721
Hey Stupidboy, thanks for popping by the Lodge. It's been a bit quiet around here.
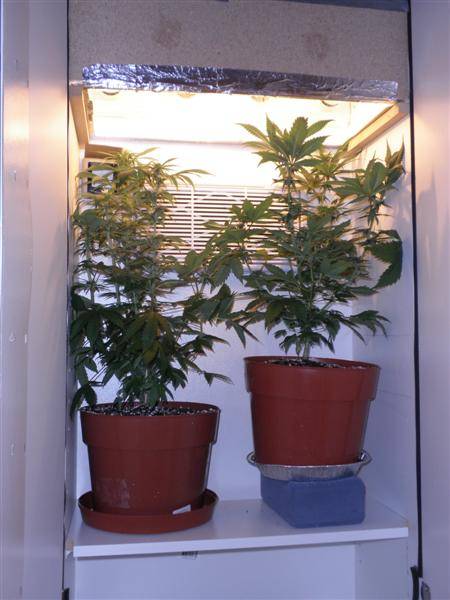
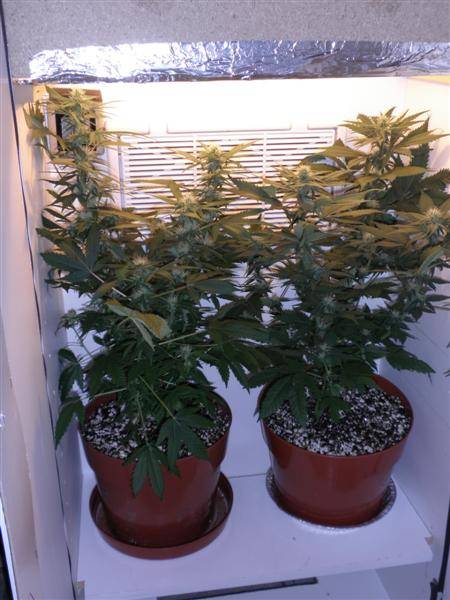
Here's my two girls in week 3 of flowering. They are just starting to bud up. Both are in great shape and I'm happy the way things are going so far.
Here's my two girls in week 3 of flowering. They are just starting to bud up. Both are in great shape and I'm happy the way things are going so far.
G
guest 77721
Hey LogbPoop, welcome to the Lodge.
My temps are a bit higher at 30*C at the top of the box since I put the 150 and the 2x42W cfl's when I started flowering. Having the remote ballast stuck in the intake space didn't help and I had the intake and exhaust coming out the back so I'm sure there's a bit of cycling of the hot air between them. I also had the airflow blocked a bit with that furnace filter material that I was using as a light block.
I did a little mod to the cabinet that I've been wanting to do for a while. A nice piece of hard cardboard was supplied with the cabinet as a cheap backing board that I didn't use in the cab build.
Today I made an intake and exhaust duct out of it. It as fun to build because I scored all the bends on one side and folded the corners so it's a lot like a duct made out of sheet metal. Now I have the intake air coming in from below and the exhaust directed straight up.
In the future, I want to get some black water based piant and paint all the insides cause it leaks a bit of light now.
One other mod that's on the back burner is to put the 150HPS ballast in a metal box and mount it on the back. I've got a box for it out in the garage somewhere.
I'm sure enjoying having weekends free now that skiing is over with and I'm a few weeks away from playing golf seriously.
G
guest 77721
Here's an update of all my cab mods together...
I'm pretty happy with the ducting mod I did yesterday. It brought the temps back to 28*C or 5* above ambient right at the top of the growbox.
This is my HPS/CFL cabinet tucked away down in the utility room. It's in the back of the laundry room so it's out of sight out of mind.

The top part of the cab is an intake and exhaust ports with fans and muffling.
The lights are in the next section with a glass sheet separating them from the grow area.
The bottom area is the grow section.
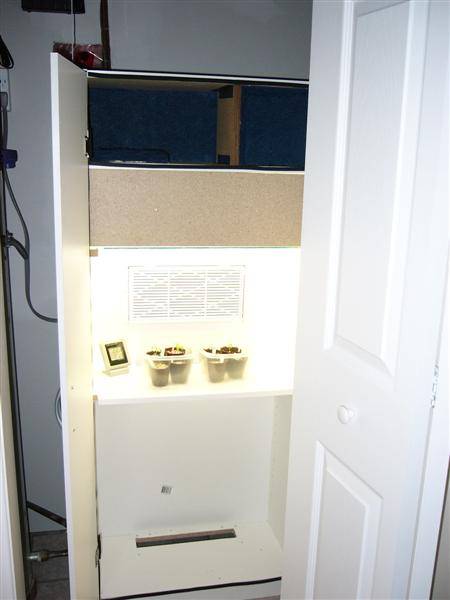
I can grow nice tall plants with 39 inches of head room. It's 2' wide by 1' deep with a moveable shelf.
You can see the intake at the floor of the cab with the air exhausting through the vent/scrubber.
The light section contains a 4 fixture lamp, $16 from Home Despot. I have a 150W HPS that will be going in here later.
I misplaced the mogul socket and can't find a replacement at the local hardware stores. This view is looking through the glass sheet.
These lights are sealed inside the light section with the intake and exhaust on the top.
Currently there is 4 x 26W CFL for 50 W/Sqft.
I can stick 4 x 42W for 75 W/Sqft. There's room for a 150 HPS with 2 x 42 W for something like 117W/sqft.
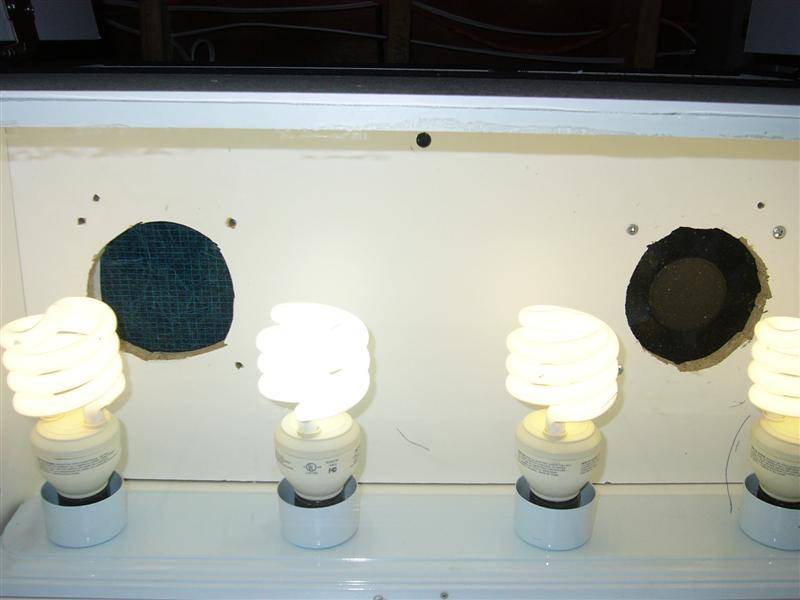

Here is the light section ventilation. I use a single 65CFM AC computer fan from Radioshack.
I've lined the inside and the back with a fiber furnace filter to act as a light trap and a muffler.
The intake is just light trapped out the back and the hole itself.


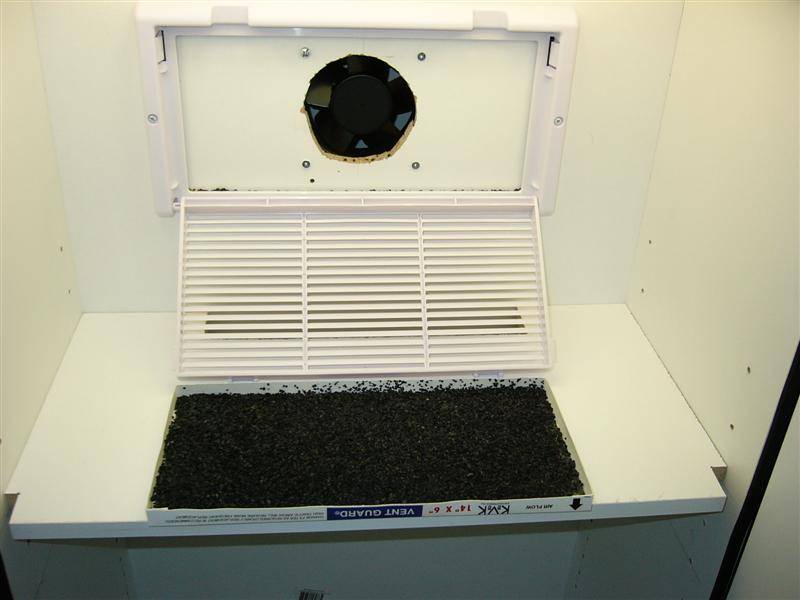
This is the grow section scrubber with a 65CFM fan mounted on the outside of the cab.
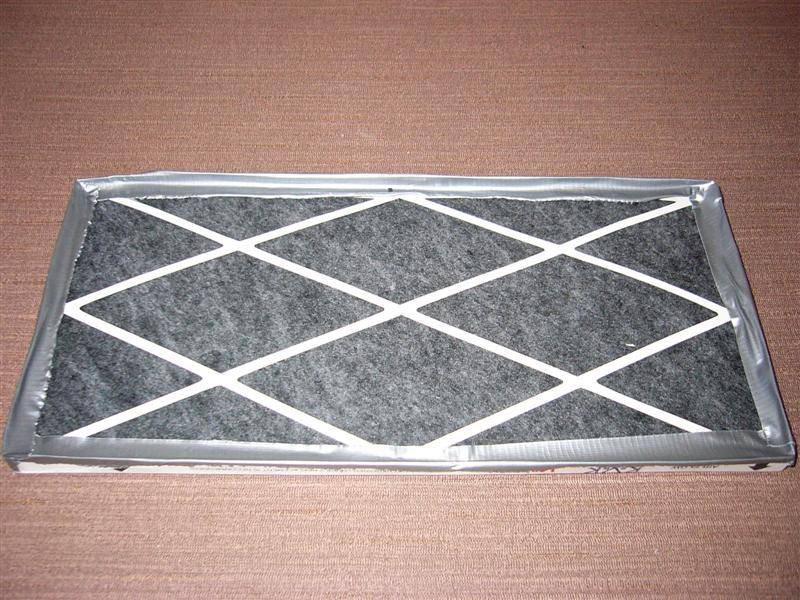
I just found this cold air return duct filter which comes with replaceable filter cartridges.
I took some spray glue and sprinkled aquarium carbon onto the filter.
If this proves to be not enough carbon, I can fill the cartridge and tape another one ontop of it.
This is a recent change to my air intake to the grow section. On the first build of this cabinet I was using a 4" duct adapter with flexible ducting on both the intake and exhaust. Since I changed the space in the top cabinet to a muffler/light trap, I needed to increase the intake size to double the exhaust size. You and see that the intake is now 5"x5".
My design separates the light cooling and the scrubbing using separate fans.
If you really think about it, you want a high airflow over the lights so the fan has to be as unrestricted as possible.
The air exchange rate in the grow box doesn't have to be all that high so it can be blocked with a carbon filter.
That's the trick to my design.
I'm pretty happy with the ducting mod I did yesterday. It brought the temps back to 28*C or 5* above ambient right at the top of the growbox.
This is my HPS/CFL cabinet tucked away down in the utility room. It's in the back of the laundry room so it's out of sight out of mind.
The top part of the cab is an intake and exhaust ports with fans and muffling.
The lights are in the next section with a glass sheet separating them from the grow area.
The bottom area is the grow section.
I can grow nice tall plants with 39 inches of head room. It's 2' wide by 1' deep with a moveable shelf.
You can see the intake at the floor of the cab with the air exhausting through the vent/scrubber.
The light section contains a 4 fixture lamp, $16 from Home Despot. I have a 150W HPS that will be going in here later.
I misplaced the mogul socket and can't find a replacement at the local hardware stores. This view is looking through the glass sheet.
These lights are sealed inside the light section with the intake and exhaust on the top.
Currently there is 4 x 26W CFL for 50 W/Sqft.
I can stick 4 x 42W for 75 W/Sqft. There's room for a 150 HPS with 2 x 42 W for something like 117W/sqft.
Here is the light section ventilation. I use a single 65CFM AC computer fan from Radioshack.
I've lined the inside and the back with a fiber furnace filter to act as a light trap and a muffler.
The intake is just light trapped out the back and the hole itself.
This is the grow section scrubber with a 65CFM fan mounted on the outside of the cab.
I just found this cold air return duct filter which comes with replaceable filter cartridges.
I took some spray glue and sprinkled aquarium carbon onto the filter.
If this proves to be not enough carbon, I can fill the cartridge and tape another one ontop of it.
This is a recent change to my air intake to the grow section. On the first build of this cabinet I was using a 4" duct adapter with flexible ducting on both the intake and exhaust. Since I changed the space in the top cabinet to a muffler/light trap, I needed to increase the intake size to double the exhaust size. You and see that the intake is now 5"x5".
My design separates the light cooling and the scrubbing using separate fans.
If you really think about it, you want a high airflow over the lights so the fan has to be as unrestricted as possible.
The air exchange rate in the grow box doesn't have to be all that high so it can be blocked with a carbon filter.
That's the trick to my design.
My girls started to stink through the scrubber so I made up a fresh cartridge today. I didn't document how I made my scrubber so here it is from scratch.
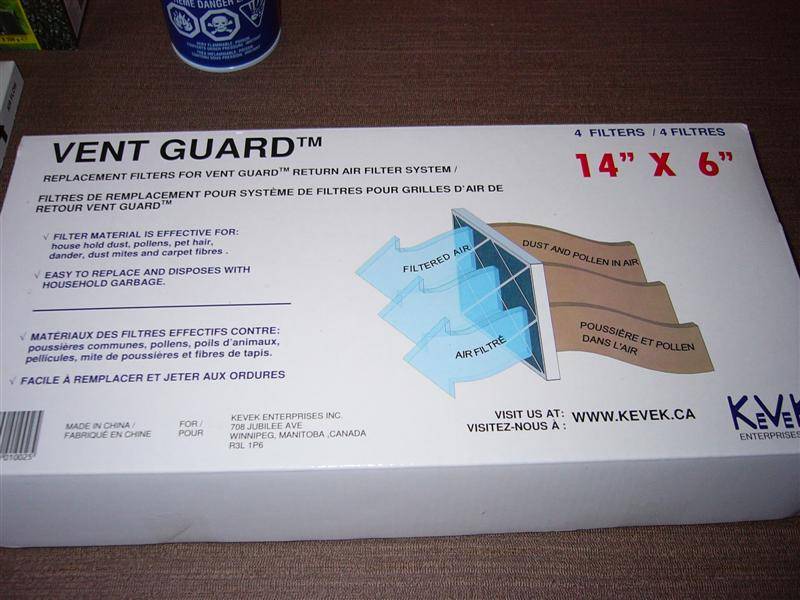
I'm using a Vent Guard brand vent cover with a filter that I found at the local hardware store. The cover flips open to take a replaceable filter which is just some felt like material on a paper frame.
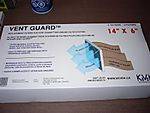

What I do is cut the outside off of one filter so it fits inside the other piece.
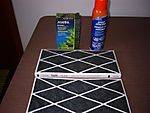
I use Elmers Spray adhesive which I think is contact cement in a can. Each filter piece gets a light coating, just enough to make a layer of carbon stick to it.
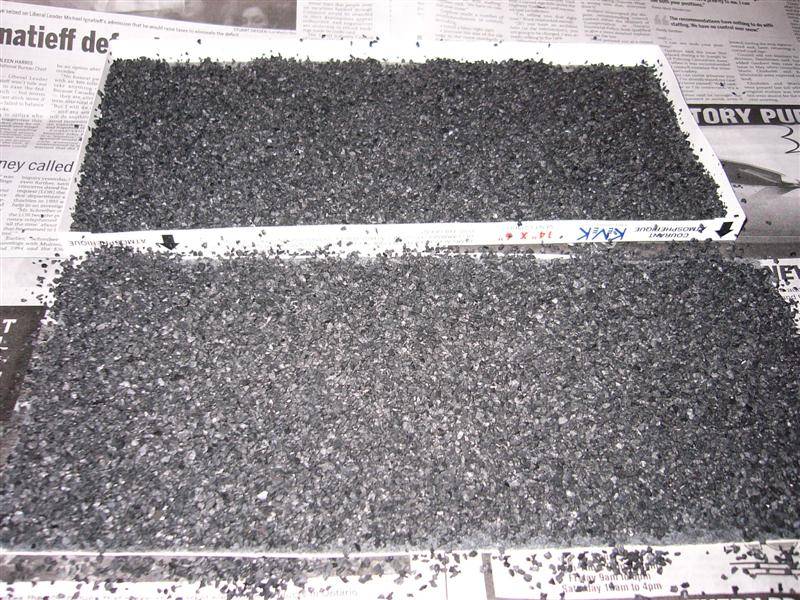
I sprinkle aquarium activated carbon evenly on both pieces and fill the bottom piece with the sides about 1/4". What I'm trying to do is make it so the carbon doesn't slide inside the filter when it's verticle.
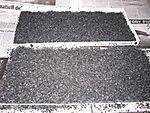
Here's the bottom piece with 1/4" of carbon and the top with about 1/8" that has been lightly shaken off.

Put the top piece on the bottom piece and tape it up.
Now I took the "spent" cartrige out and got the tape off without wrecking it. The carbon was still stuck to both sides and came off with a light rub. It's now been refilled and I have a standby ready to go.

My temps are a bit higher at 30*C at the top of the box since I put the 150 and the 2x42W cfl's when I started flowering. Having the remote ballast stuck in the intake space didn't help and I had the intake and exhaust coming out the back so I'm sure there's a bit of cycling of the hot air between them. I also had the airflow blocked a bit with that furnace filter material that I was using as a light block.
I did a little mod to the cabinet that I've been wanting to do for a while. A nice piece of hard cardboard was supplied with the cabinet as a cheap backing board that I didn't use in the cab build.
Today I made an intake and exhaust duct out of it. It as fun to build because I scored all the bends on one side and folded the corners so it's a lot like a duct made out of sheet metal. Now I have the intake air coming in from below and the exhaust directed straight up.

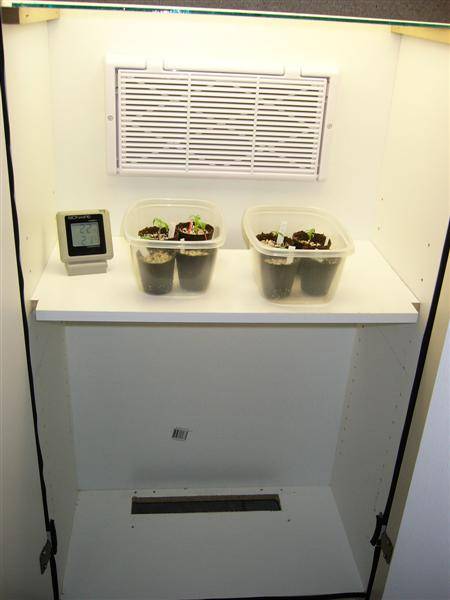
Hey fellahs,
It's been a while since my last grow and I'm getting the urge to get one going again. I've been off work sick with a cold so I've had a chance to work on the old growbox.
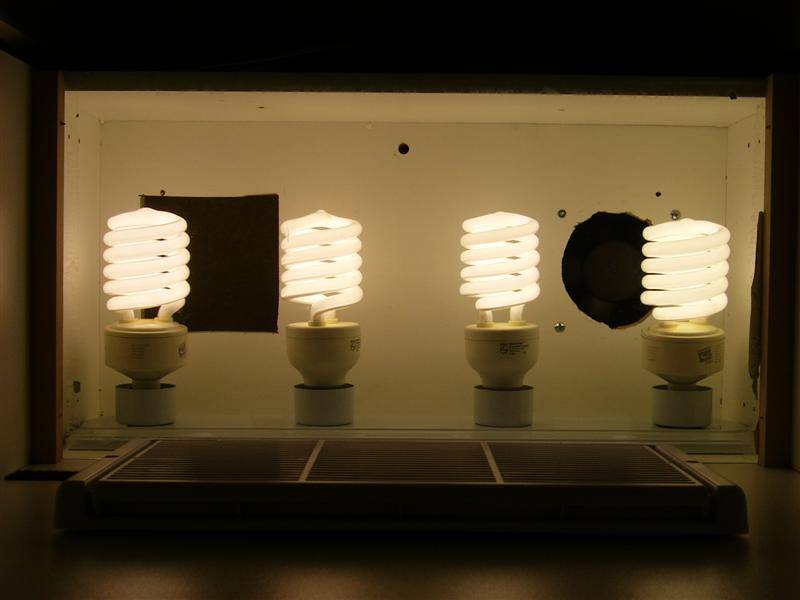
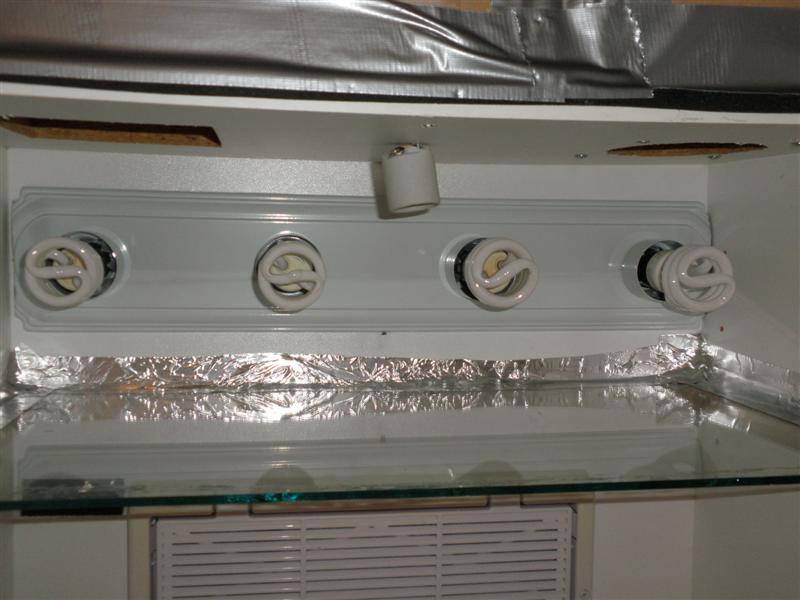
I mounted a medium socket base for my 150 HPS light. Now I can run a mixture of HPS and CFL's. Here's a pic of 238W of lights in a 2 square foot area. I plan to run the 150 with 2x42 CFL's for a total of 21,400 Lumens. This puts my growbox at the top end of the optimal lighting range of 8000-10000 L/sqft.
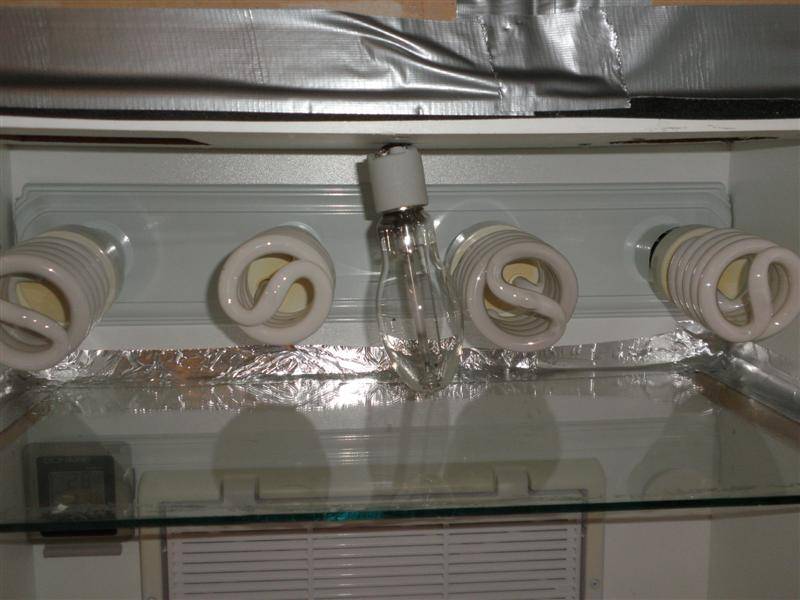
Now I'm getting ready for seedlings and have 4 x 13W CFL's installed. I sure like the easy access to the lighting chamber for swapping out bulbs!
G
guest 77721
I'm going away for a few days. The plants needed watering and my water cycle is now down to two days. Boy these plants are growing like weeds.
I was thinking about reducing the lighting for a few days like I did when I went away when they were vegging but then decided to repot. I watered them in the small pots this morning and will give a going away watering tomorrow morning before I leave.
I was thinking about reducing the lighting for a few days like I did when I went away when they were vegging but then decided to repot. I watered them in the small pots this morning and will give a going away watering tomorrow morning before I leave.
G
guest 77721
Hey guys,
I just got back from my 3 day golf trip and the plants are in super condition. Repotting them was the trick. They can still go a day or two on the watering and it looked like they grew 2" or more.
I just got back from my 3 day golf trip and the plants are in super condition. Repotting them was the trick. They can still go a day or two on the watering and it looked like they grew 2" or more.
G
guest 77721
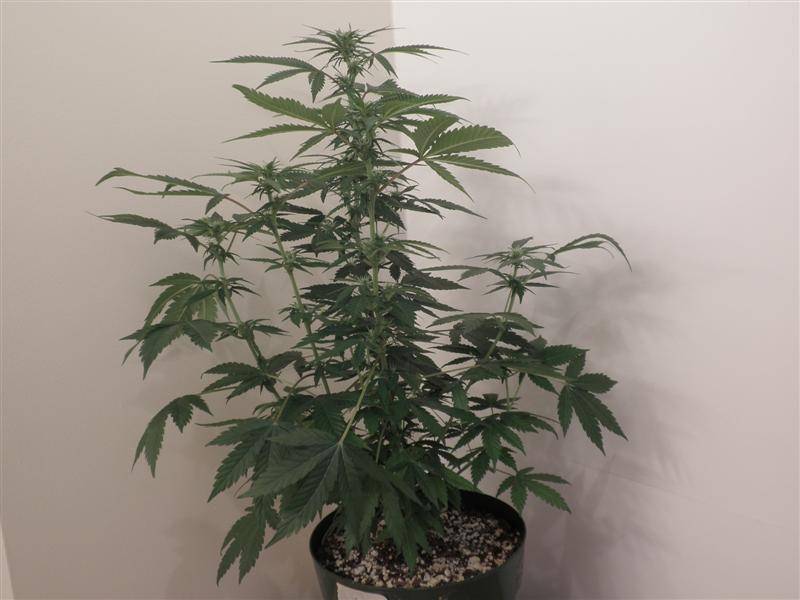
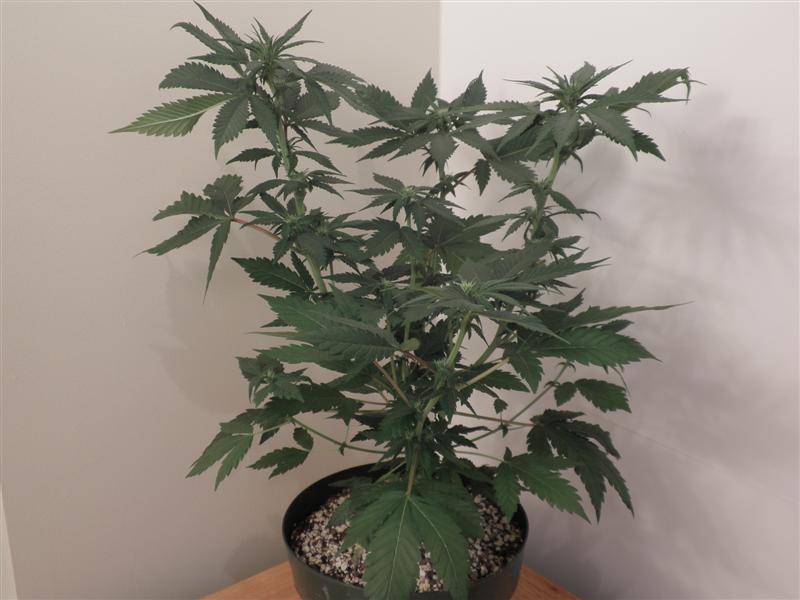
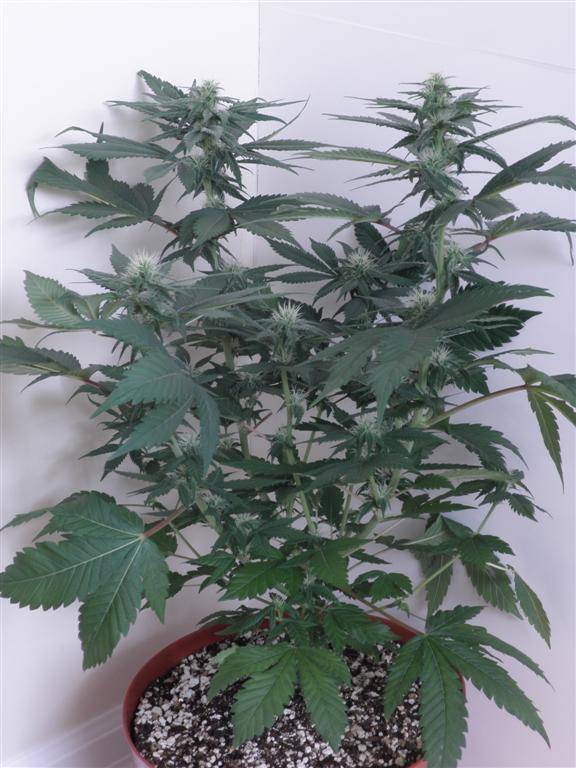
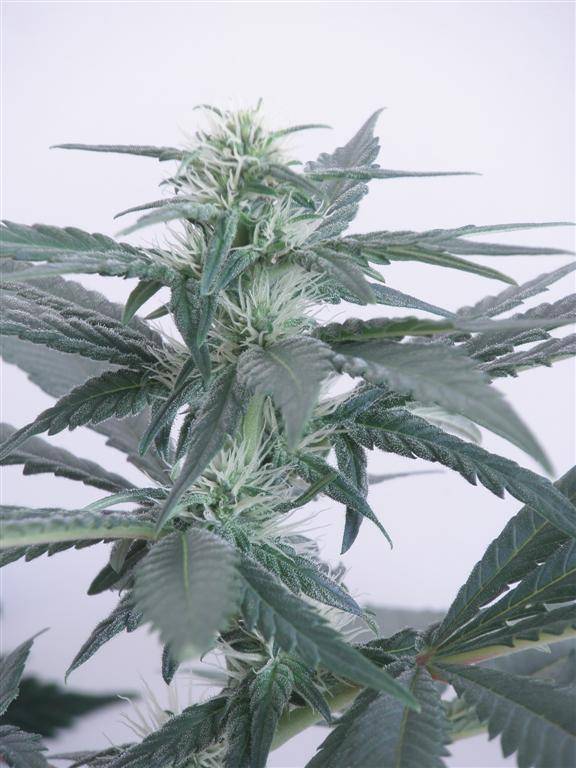
Here's some better pics out of the growbox of my Ultimate Thai ladies at the end of week 4, day 25 of flowering.
This is Anna, she's a bit more leggy of the two girls.
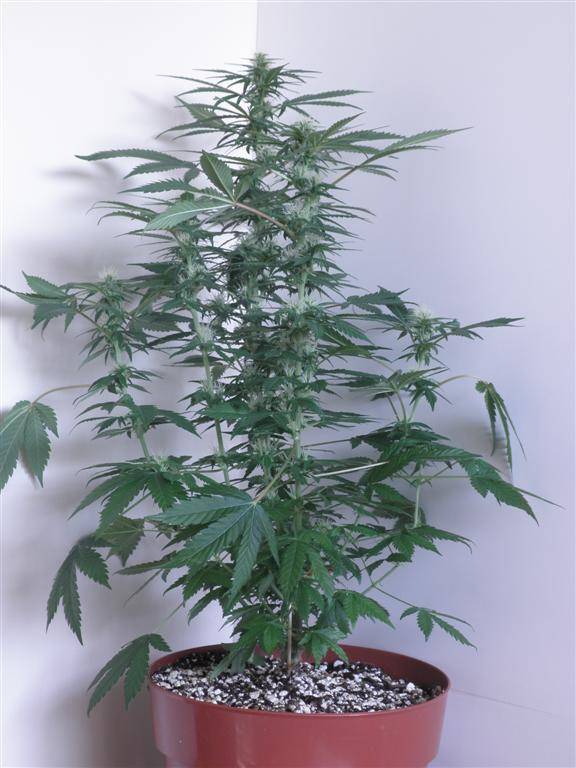
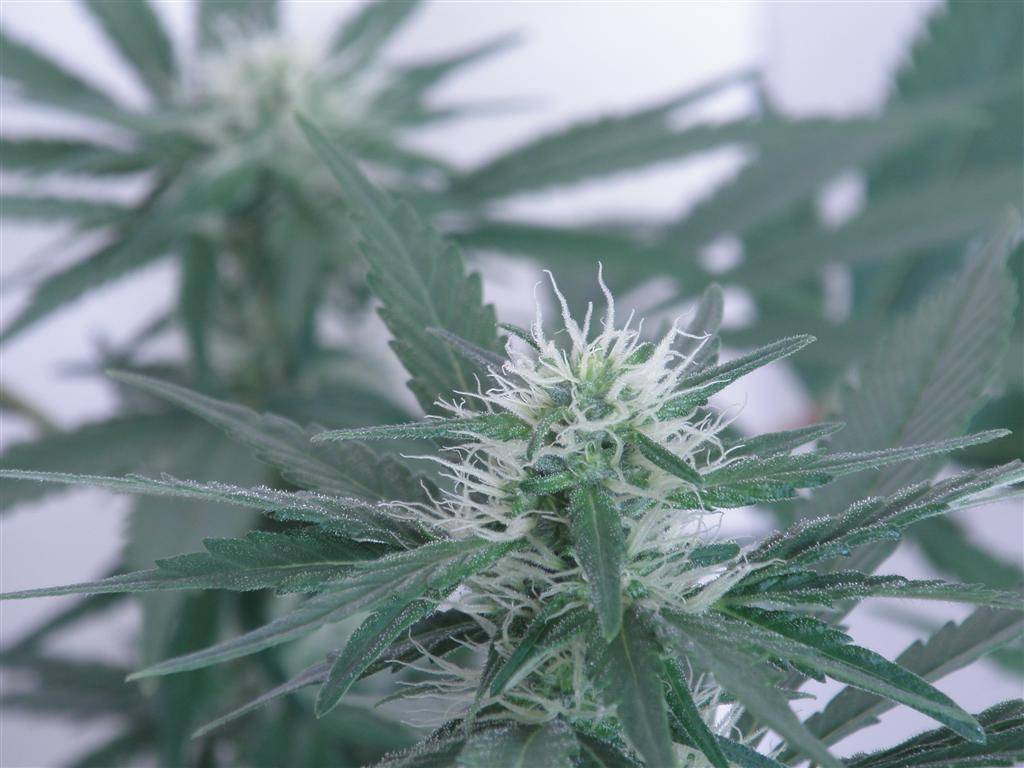
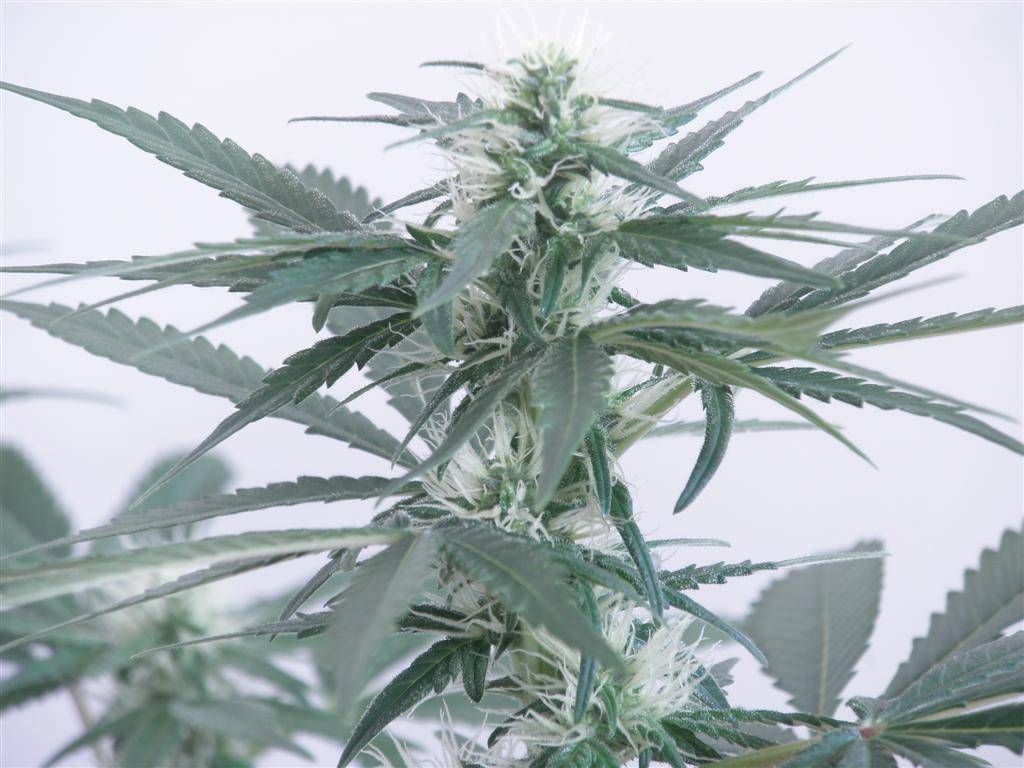
Here's Charlene. She's a bit more indica than Anna.
This is Anna, she's a bit more leggy of the two girls.
Here's Charlene. She's a bit more indica than Anna.
")

