
You are using an out of date browser. It may not display this or other websites correctly.
You should upgrade or use an alternative browser.
You should upgrade or use an alternative browser.
Super Easy, Super PIMP 400w Box!
- Thread starter killabrown420
- Start date
D
d4.
Impressive box.
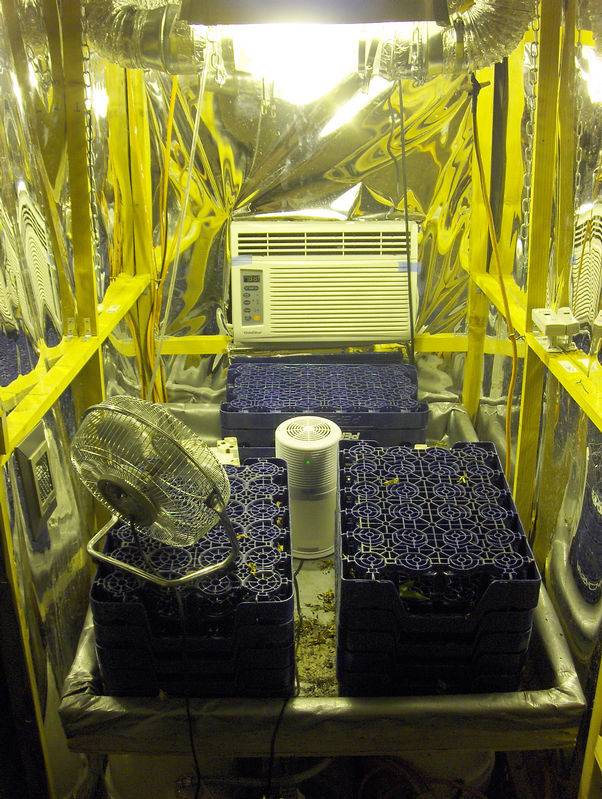
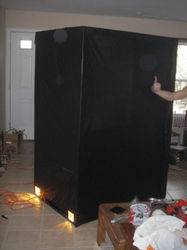
killabrown420 said:Just putting the finishing touches on this cab...making it grow-worthy year long. The hot summer months completely kill anything I put in there up to now. The humidity has been super high w/ the cab sealed w/ co2...and it was either buy a new fan and a co2 controller to vent the cab when the humidity and heat reached a certain temp, but that would be expensive and time consuming. I decided a little a/c would work perfect for cooling the cab, and I decided to deal w/ humidity using a small portable dehumidifier that is used in campers, small closets, etc...
So here is an updated pic, just about done installing the a/c, still have to seal it up tight and tape up the LED displays as to not hermie my ladies. I got some girls going in there tonight to start the next batch. I'm really gonna try and do everything right this grow..no missed waterings, more feedings of nutes, co2 in veg and flower, etc. I've let myself down the past couple grows and i'm paying the price...turning what should be A+++ into butter and hash b/c of humidity and high temps...what a bummer
the box has progressed nicely for you killa - I think maybe it needs a cleaning - a clean box is a good box I always say

bigdaredevil418
Member
nice box.....doing it right pays off...
killabrown420
Active member
gnarly said:i wanna see the budporn from this box!!!
ok if you really wanna.... thanks to all who posted

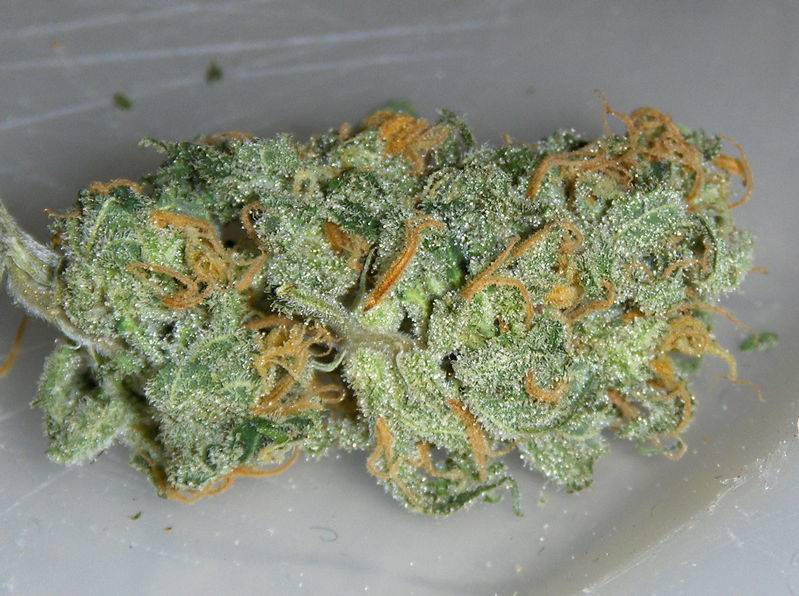
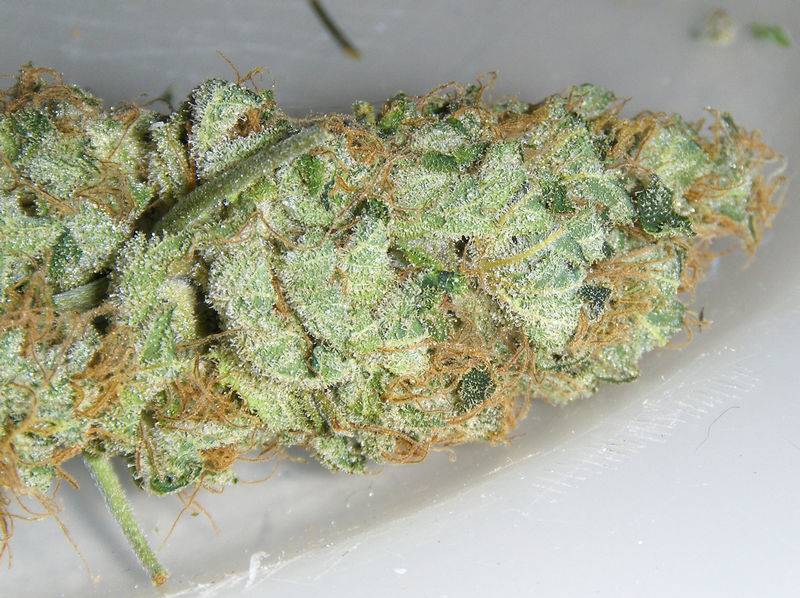
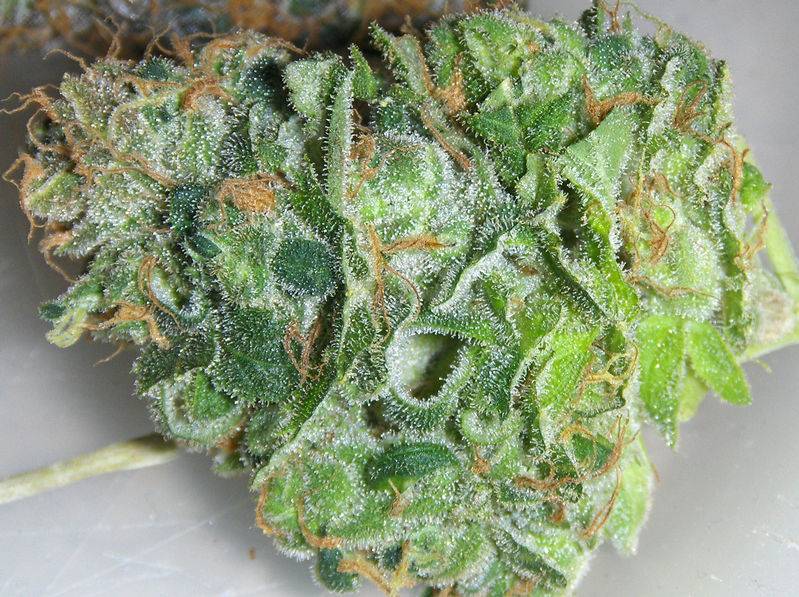
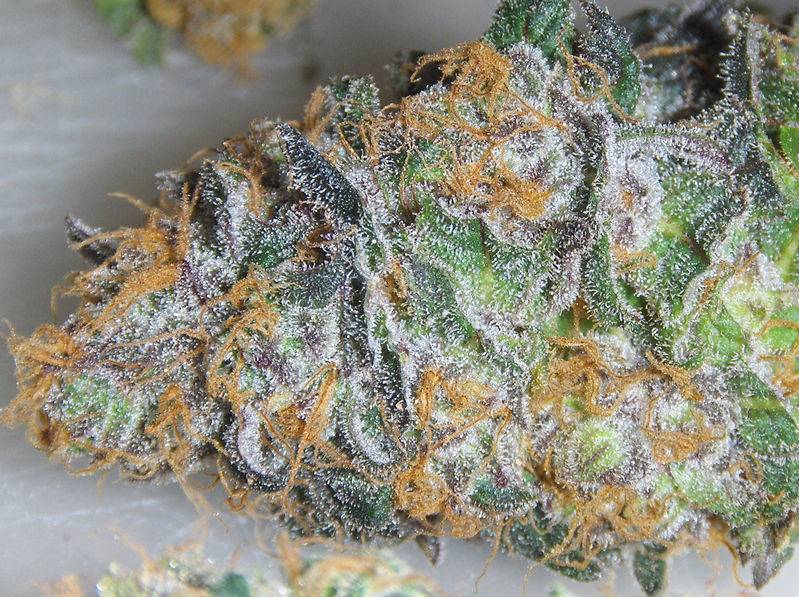
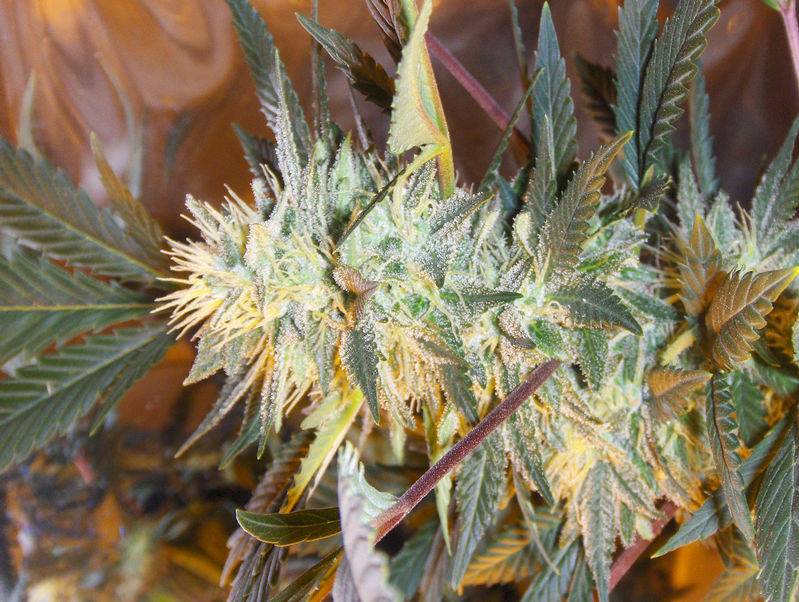
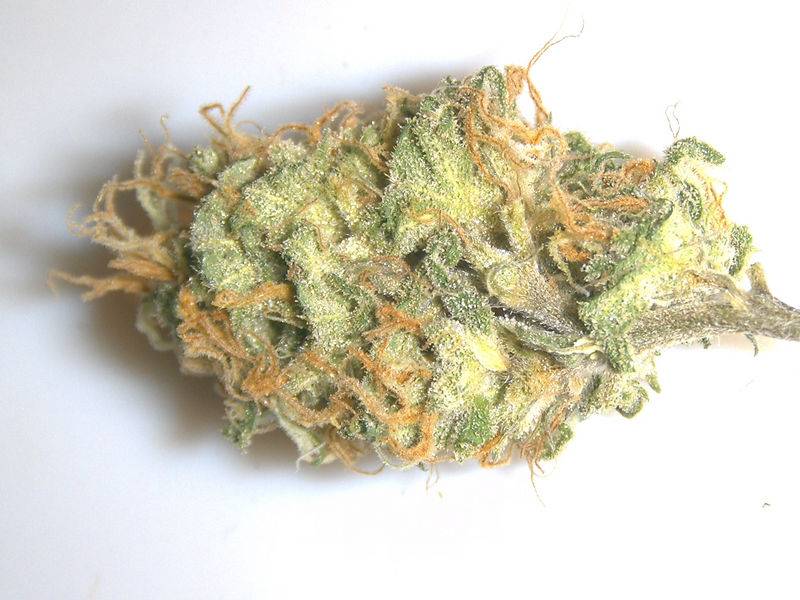
hell, you might as well just look in the gallery, all my pics are in there
thehammer85
New member
thats what i used for a box. identical pretty much. my dimesnions were 3x3x2 though and i used a 200 cfm inline.
it was ridiculous. since then ive moved up to a 4x2x5 closet with two 400's
it was ridiculous. since then ive moved up to a 4x2x5 closet with two 400's
we built one pretty much the same. We just collected wood from the side of the road. All up we paid about the same to in au$. You even have the exact same filter as us. I think it makes you feel more proud when you've built a cosy home for ya babies. We are in the middle of building our 2nd room now. Good luck on the restHello everyone!
This thread goes out to john64 over @ OG, for his "cost of growing" thread. I picked up an enormous amount of info there, and I hope I can re-create it the best I can, but he really did an excellent job documenting just how much it costs to build one of these things from scratch. So here we go,
Lets go over some of the things I already had:
400 watt hps light
265 cfm dayton blower
dryer vent
bungee cord
Screw in hangers for light
some hemp rope for hanging light *duh don't use hemp rope, i've switched to chains
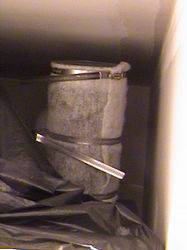
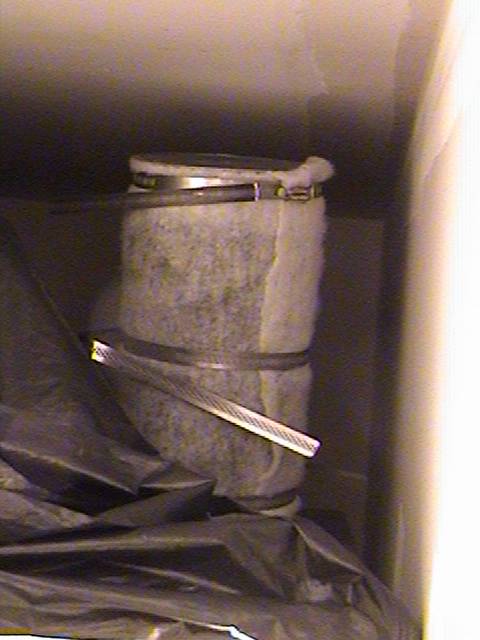
Black carbon filter cloth (for covering intake)
Things I had to buy from Lowes: ~130bucks
BUNCH of L brackets for frame, I mean A LOT!
wood screws
1x6 and 1x8 wood for frame, cheapest stuff they have
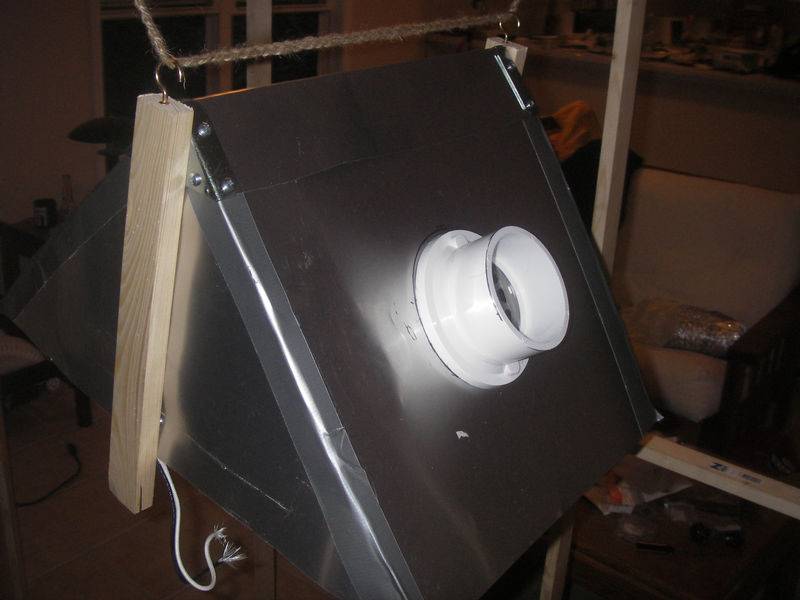
Metal roofing stuff for air-cooled hood
Triangle brace for hood (no idea what they call this)
4" plumbing grate for hood
2- 4" clamps
Velcro
Staple gun w/ staples
Black poly-wrap
Soil Mix
From hydro store: ~50 bucks
Bat guano
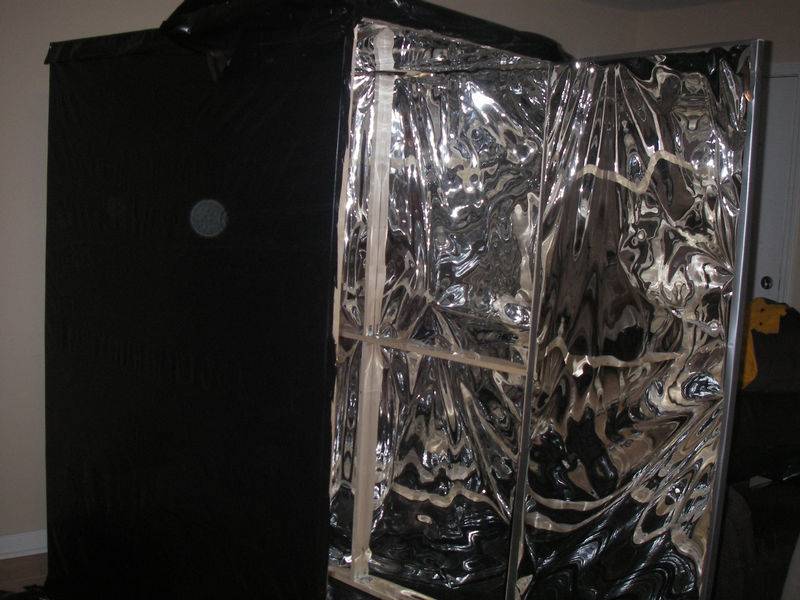
Mylar 2-mil
Advice!!!
Now to construction
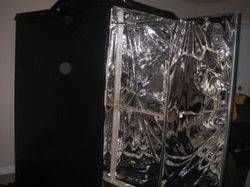
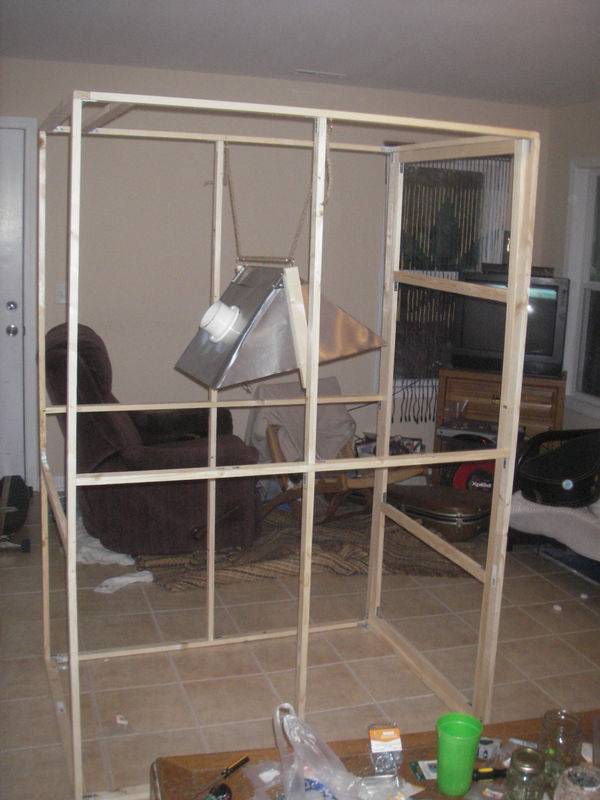
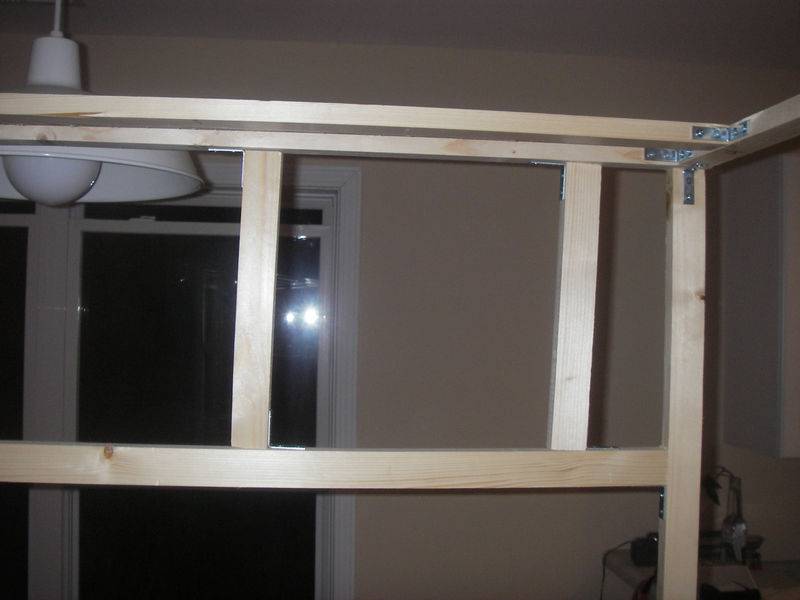
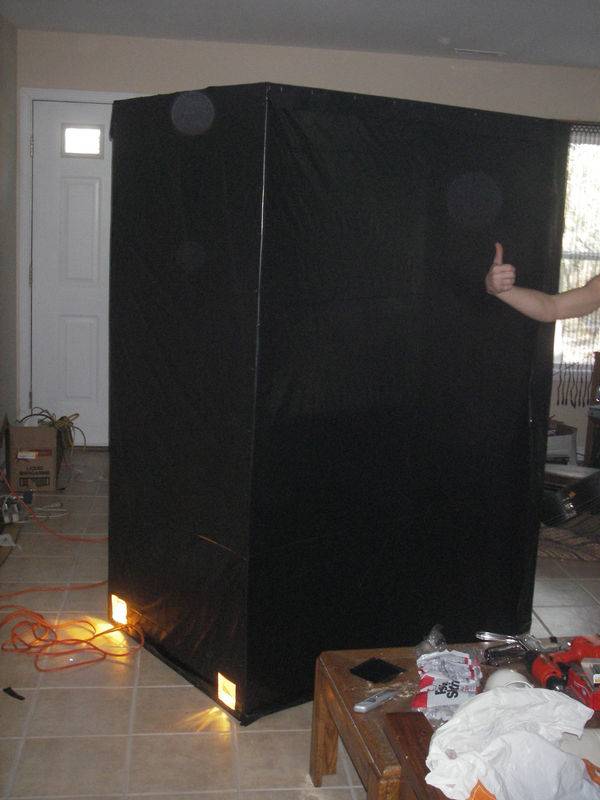
First off we took measurements, our cab stands 3ftx4ftx6ft
So you measure out all your wood, line up the L brackets the way you want and drill little starter holes in each corner, so the wood won't split when you start screwing
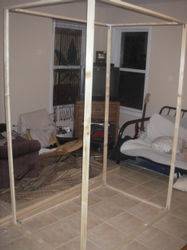
Ok so now you got yourself a little frame...now just add some support, measure out the center, where you'll hang the light like so:
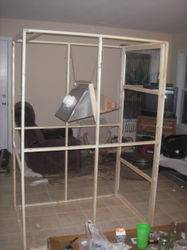
Now add some extra support for where the blower and ballast will be
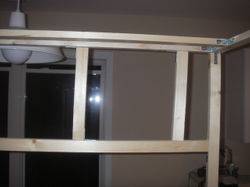
Build yourself a little door, make sure you make the door a bit smaller than the frame, so it can open and shut right, we don't have to have it completely light-proof or airtight, that will be taken care of later.
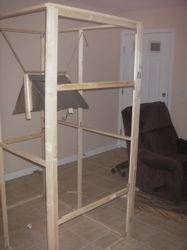
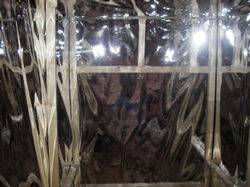
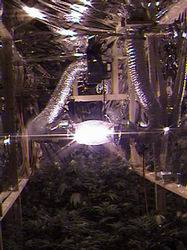
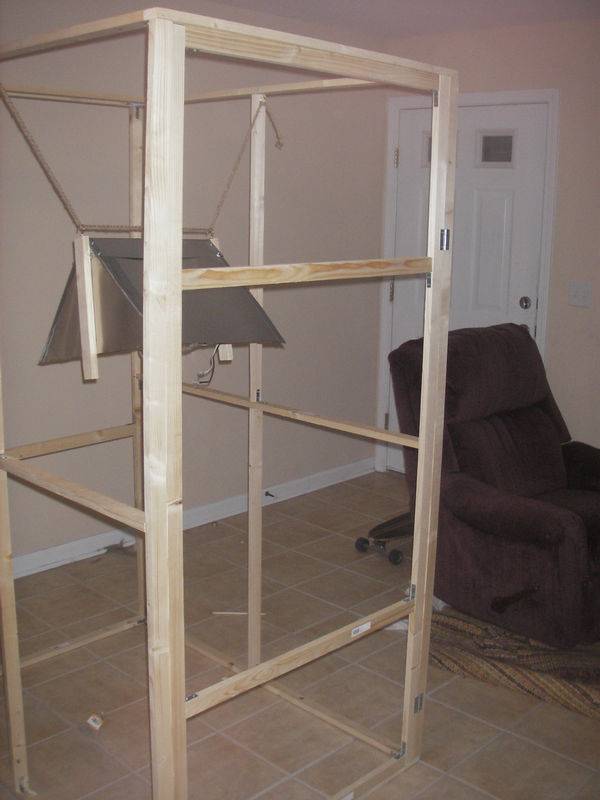
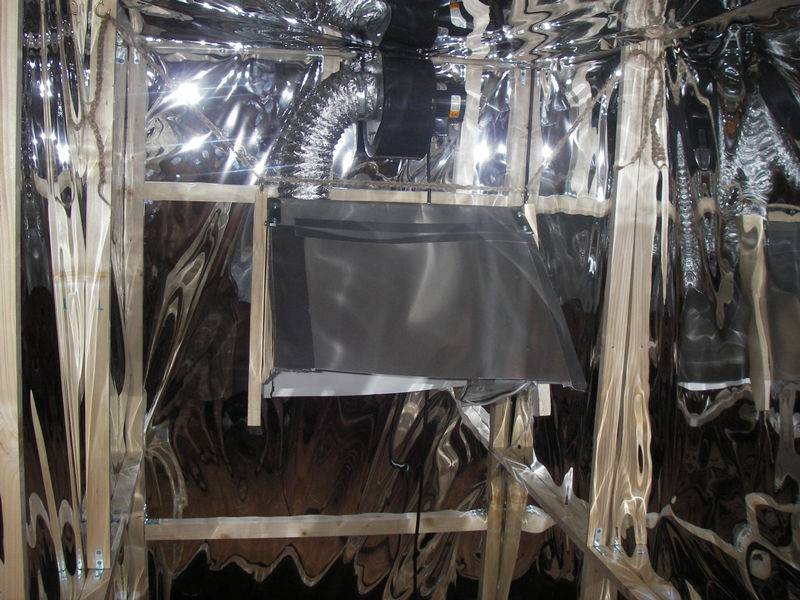
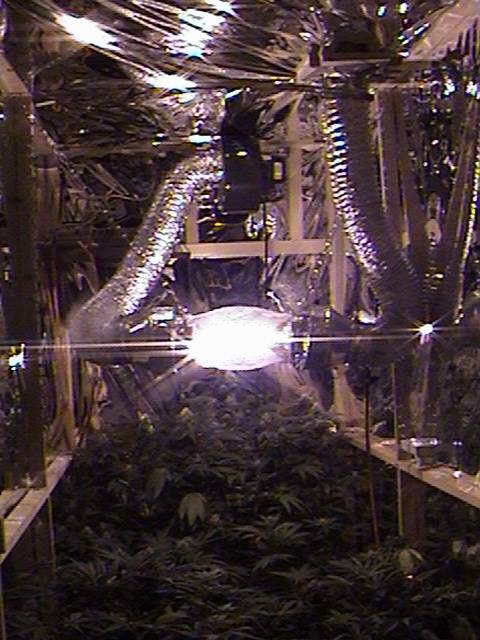
So now we need to hang the mylar. Take your staple gun and tack that sucker up, we figured out the less staples the better, its best if the mylar hangs freely, you'll see why later.
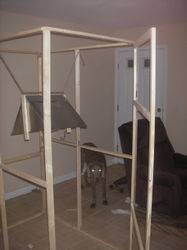
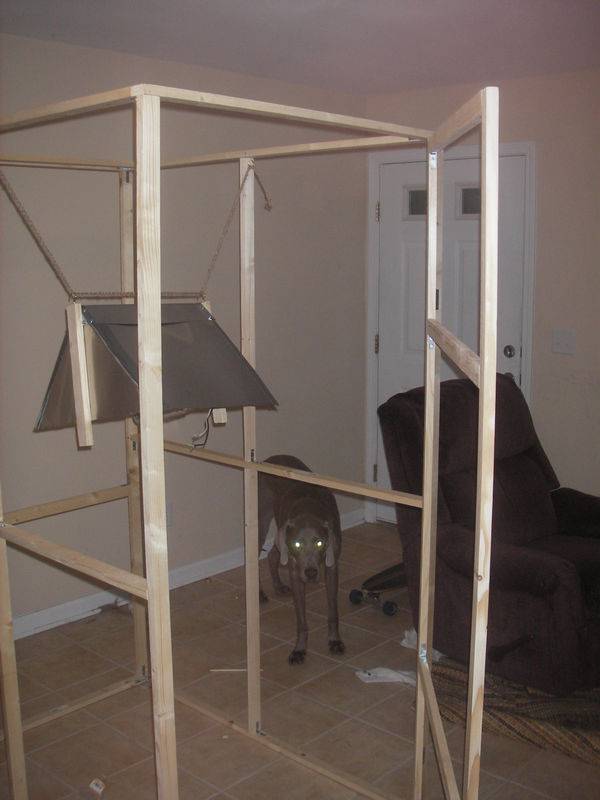
By this time I had finished the air-cooled hood, hey looky there!


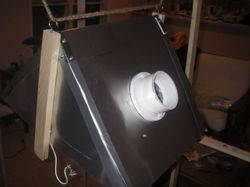
Lets mount the blower and light up there and try it out! We screwed the blower directly to the wooden support, made it light/airproof by cutting small pieces of scrap wood and glueing them to the frame. I'll have to get a better picture of this, its hard to describe
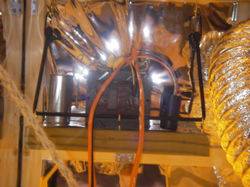
Now we got the ballast to take care of. We just built a little wood shelf, took some of the scrap metal sheeting from the light and screwed it down on top so the ballast could rest on something metallic. Then we just used a single L bracket, a couple screw in hangers and a bungee cord to finish the job...plenty of support to hold that heavy sumofabitch
Ok almost there! Now we wrapped the cab w/ black poly. We decided to layer it up so there would be no light leaks whatsover. We did this by wrapping the plastic around the sides, then again from the floor around the back, up over the ceiling, and then we just pull it down over the door and attach velcro to the sides so it stays put.
When the door is shut, the walls suck in, meaning the cab is airtight. The mylar is pulled tight by the pressure, so its ok if there are a few ruffles when your stapling it up.
*EDIT
The total cost depends on what bells and whistles you choose, but lets say for the base model it costs a little under 200 dollars.
Since then we switched the hood to the DIY cool tube which cost about 30 dollars, added co2 regulator tank solenoid flow valve and timer all together about $150.
Also switched growing style to SOG using 5" 1 gallon pots. I try to utilize my space like TICK from OG. I pretty much copied his guide on vegging and flowering...only top nuggets for me from now on. I use the same amount of soil just higher plant #'s, which means higher variety in strains which is what I'm all about.


QuantumFizz
New member
beautiful box. I just got materials to build a similar one. I'm checking for a good guide to make that air hood.


