What's new

Tribulations of an Absentee Gardener

Boocoodinkydow

Active member
LET’S GET IT OPERATIONAL.....

Of course the key ingredient is the perlite. I live in a judicially intolerate state with no grow shops available. Perlite isn’t real popular in my little podunck town so sources are limited. I was initially ordering through amazon but only small quantities were available and shipping was expensive (prior to prime). About a year ago my local Home Depot started stocking this 2 cubic feet bags at a reasonable price.

picture.php


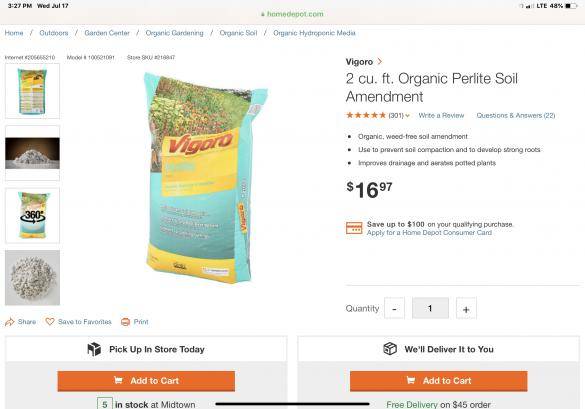
I’ve found it to be of acceptable quality and size. It’s not excessively dusty but do take proper precautions when pouring it up. Inhaling dust from perlite is not healthy for children and other living things. I’ve seen some actually rinsing perlite prior to use but I’ve never seen the necessity of this. Perhaps someone can enlighten me. When using a large amount, however, I generally slowly moisten it in the bag prior to pouring it up.

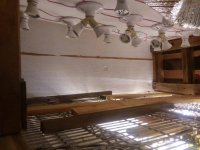
My basin is roughly 3 cubic feet so I initially pour one bag in and add premixed water/nutrient solution at full strength. The perlite will float until it reaches full saturation so I let it rest overnight. The next day I top the basin off with more perlite.

At this point, I fill my drum reservoir with premixed nutrient and activate the float to bring the solution up to operating level. I’ve found that the 6” depth for the perlite is to my liking with the solution level of 4” as the sweet spot. Many Swick users are bringing water level up to within 1” of the top of the perlite level for soil mediums. I’ve found my coco/perlite grow medium more proficient in wicking moisture so the 2” barrier region is necessary to avoid excessive moisture content in my rag bags.

I’m really anal about preventing light infiltration of my perlite. I’ve only cleaned my basin and reservoir once, after 6 months of use. It was remarkably absent of any slime, discoloration, unpleasant odors or evidence of buildup of salts and I feel keeping it covered may be largely responsible for this.

picture.php


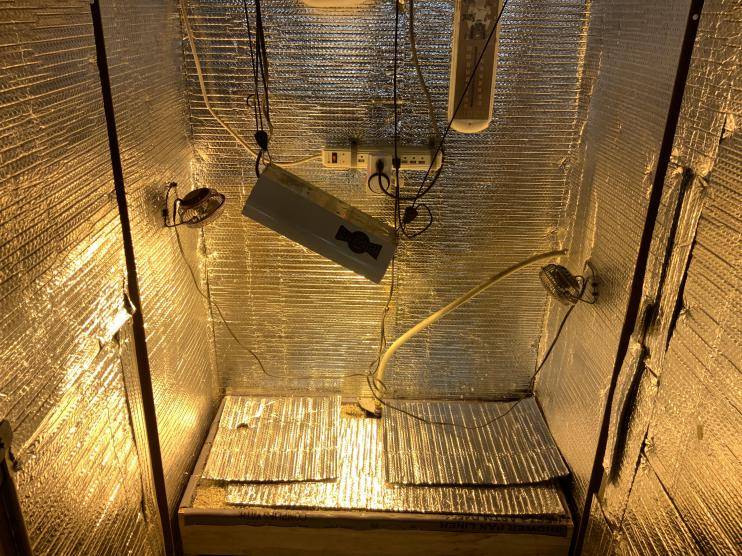
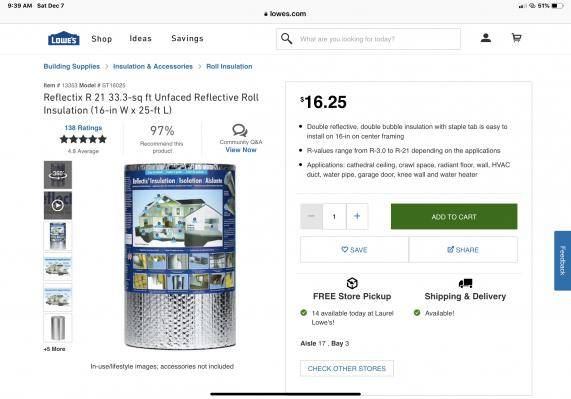
The Reflectix is a good choice for this chore. It’s durable, moisture proof and highly reflective. I simply cut a hole in the covering to accommodate full contact between my rag bags and the perlite in the Swick basin. All of this is salvage from an experimental 6’ diameter grow box I built using Reflectix for the walls. It was an attempt at a donut style vertical grow that failed miserably.

picture.php


So there she is, ready to go to work!

Next we’ll explore the bumpy road that has brought me to this point. It ain’t been pretty!!

To be continued.....
 

Chevy cHaze

Out Of Dankness Cometh Light
ICMag Donor
Veteran
Nice one all the best of luck man.
We are very similar in terms of how much we travel and still grow weed mostly on autopilot.
I'm using organic soil and water only mostly and tropf blumats for watering. A 5gal reservoir takes about 3 weeks to be drained between 4 flowering plants, so looking for a bigger one. Good stuff with the barrel, thanks.
CC
 

DunHav`nFun

Well-known member
Veteran
I cropped HARD for a solid decade with Coco DTW wastin assloads of juice down the drain for the almighty dohraymee before retirement due to security issues back in `09 , and let me say that always and from the get NEVER were any type grows with coco and perlite fed from beneath without problems due to residual salt buildup and ultimate crop failure if not flushed regularly from the top , kinda defeating the purpose of said flood and drain setups with ultimately DTW going the way of the industry standard for yrs and yrs now....that said.....

You`re absolutely the first person I EVER saw that has a sub irrigated planter that uses coco with bottle nutrients and not organic soil fully amended with only water being used in the reservoir underneath due to the same innate problems described above about residual salt buildup in the upper medium in the containers....so....

Hook an old fart up.....My headies grows for stash in dirt THAT I THOUGHT were just gonna be easy peasy water water feed pick buds , smoke when dry , have been some of the most miserable in my life due to deficiency issues I never dealt with in hydro or coco , so If I can set up my lil basement spot with a couple SIP`s/Swicks with coco and perlite that I know backwards and forwards if somethin tries to go sideways , just puts me back ahead of the ballgame instead of suckin hind tit like a dumbass that cant dial dirt and bottle nutes nor do I want to....aight....

I`ll stop bitchin and say thanks again for your time and killer show and tell ….Attention to detail and going thru the growing pains of dialing a new setup with learning curves teaches the best lessons that makes you a better grower....Here`s hopin the time you`ve waited for this evil sativa bitch to finish has been worth it....she looks awesome.....Good luck and …..

Peace....DHF...…:ying: …….
 

Boocoodinkydow

Active member
Nice one all the best of luck man.
We are very similar in terms of how much we travel and still grow weed mostly on autopilot.
I'm using organic soil and water only mostly and tropf blumats for watering. A 5gal reservoir takes about 3 weeks to be drained between 4 flowering plants, so looking for a bigger one. Good stuff with the barrel, thanks.
CC

Thanx for stopping by, Chevy. Good to hear from a fellow absentee gardener. I’m going to guess you probably share my elation and relief each time we return home to see everything is still alive and well.
 

Boocoodinkydow

Active member
I cropped HARD for a solid decade with Coco DTW wastin assloads of juice down the drain for the almighty dohraymee before retirement due to security issues back in `09 , and let me say that always and from the get NEVER were any type grows with coco and perlite fed from beneath without problems due to residual salt buildup and ultimate crop failure if not flushed regularly from the top , kinda defeating the purpose of said flood and drain setups with ultimately DTW going the way of the industry standard for yrs and yrs now....that said.....

You`re absolutely the first person I EVER saw that has a sub irrigated planter that uses coco with bottle nutrients and not organic soil fully amended with only water being used in the reservoir underneath due to the same innate problems described above about residual salt buildup in the upper medium in the containers....so....

Hook an old fart up.....My headies grows for stash in dirt THAT I THOUGHT were just gonna be easy peasy water water feed pick buds , smoke when dry , have been some of the most miserable in my life due to deficiency issues I never dealt with in hydro or coco , so If I can set up my lil basement spot with a couple SIP`s/Swicks with coco and perlite that I know backwards and forwards if somethin tries to go sideways , just puts me back ahead of the ballgame instead of suckin hind tit like a dumbass that cant dial dirt and bottle nutes nor do I want to....aight....

I`ll stop bitchin and say thanks again for your time and killer show and tell ….Attention to detail and going thru the growing pains of dialing a new setup with learning curves teaches the best lessons that makes you a better grower....Here`s hopin the time you`ve waited for this evil sativa bitch to finish has been worth it....she looks awesome.....Good luck and …..

Peace....DHF...…:ying: …….

Hello DHF.

Your experience is just another among a unanimous consensus from everyone I’ve heard of that has tried bottom feeding coco. You can see some build up on the bottom portions of my bags but it doesn’t seem to be effecting the plants growth so far (knock on wood). Not sure what the magic is but I hope it continues. :dance013:
 

Boocoodinkydow

Active member
QUICK UPDATE

MISS HONDURAS
Week 14 from seed
Week 8 in flower stage

picture.php


Buds are really getting dense. The stems are bowing under the weight and are definitely going to need a bit of support within the next few days. I noticed a random yellowing leaf or two but at this stage I’m not concerned. Probably the beginning of natural necrosis.

picture.php


Nice trichome coverage. In the pix, they all look milky but it’s due to reflection from the flash and the shit camera on my iPad! They’re 100% clear still.

MISS PANAMA

Week 6 from seed
Week 1 in flower stage

picture.php


It’s hard to tell much about her because I’ve got her tied down low to keep her from impeding the light to the Honduras. First pistils started showing up last week and she’s looking healthy. However, with the ridiculously long germination period, the alternating nodal growth and the abusive LST I’m having to use to keep her out of the way, I have tempered expectations for this one.

picture.php


I now have a full compliment of bulbs in two frames, 14 bulbs offering about 250w.

To be continued.....
 

hayday

Well-known member
Veteran
What a great cabinet and also great tutorial. I'm in a simular
situation with my grow not being where I want to be. My retirement home is 4 hours from my work and garden area.
I dont get to stay as much as I want or need to. You might just help with that in the future:biggrin:
Nice and clean...Thanks for sharing
 

DunHav`nFun

Well-known member
Veteran
Fuck it......I`m on board.....Been wrackin my pore `ol head about it and come up with some conclusions.....first off.....The major issue with ebb and flow/flood and drain/coco fed from beneath back in the day was that the horizontal HID lights were drying out the medium in the upper containers from the sheer heat gain and intense light between timed feed sequences......that in turn was creating a "strata/layer" on top of the plants where the medium dried out faster than the plants could eat their food/suck juice thus concentrating EC and causing PH imbalances and lockouts that called for much needed regular top flushes with 1/2 strength nutrients and start over , or shit would go sideways......fast.....Seen it many many times......now.....

Here we are with this Rube Goldberg contraption of Dinky`s where the upper container "stays moist" 24/7 from the sub irrigated rez on a float valve where the container`s medium can NEVER dry out throughout the cycle , and that I believe is gonna be the main reason why this works , on top of him being anal retentive over keepin light out of the sub irrigated rez to prevent all kinds of nasty shit forming if light gets into that wet perlite......that`ll be mandatory in my lil setup.....also.....

I seriously doubt it`ll be 7 more weeks before that big bitch finishes Bro , that 14 week flowering time seems a bit much for as far along as that plant has gotten so far IME , but I guess anything`s possible.....time will tell....better get em restrained before limbs start snappin from being overweight.....lol.....anyways.....Here`s wishin yas nuthin but a heavy harvey with no hiccups till end of cycle.....can`t wait ta see what comes from 252 watts of LED fluorescent tube replacements.....

Peace.....DHF...…:ying: …….
 

Boocoodinkydow

Active member
What a great cabinet and also great tutorial. I'm in a simular
situation with my grow not being where I want to be. My retirement home is 4 hours from my work and garden area.
I dont get to stay as much as I want or need to. You might just help with that in the future:biggrin:
Nice and clean...Thanks for sharing

Thanx for the kind words, Hayday. Greatly appreciated.

Interesting to find other absentee gardeners.

Thanx for joining in.

BCDD
 

Boocoodinkydow

Active member
Fuck it......I`m on board.....Been wrackin my pore `ol head about it and come up with some conclusions.....first off.....The major issue with ebb and flow/flood and drain/coco fed from beneath back in the day was that the horizontal HID lights were drying out the medium in the upper containers from the sheer heat gain and intense light between timed feed sequences......that in turn was creating a "strata/layer" on top of the plants where the medium dried out faster than the plants could eat their food/suck juice thus concentrating EC and causing PH imbalances and lockouts that called for much needed regular top flushes with 1/2 strength nutrients and start over , or shit would go sideways......fast.....Seen it many many times......now.....

Here we are with this Rube Goldberg contraption of Dinky`s where the upper container "stays moist" 24/7 from the sub irrigated rez on a float valve where the container`s medium can NEVER dry out throughout the cycle , and that I believe is gonna be the main reason why this works , on top of him being anal retentive over keepin light out of the sub irrigated rez to prevent all kinds of nasty shit forming if light gets into that wet perlite......that`ll be mandatory in my lil setup.....also.....

I seriously doubt it`ll be 7 more weeks before that big bitch finishes Bro , that 14 week flowering time seems a bit much for as far along as that plant has gotten so far IME , but I guess anything`s possible.....time will tell....better get em restrained before limbs start snappin from being overweight.....lol.....anyways.....Here`s wishin yas nuthin but a heavy harvey with no hiccups till end of cycle.....can`t wait ta see what comes from 252 watts of LED fluorescent tube replacements.....

Peace.....DHF...…:ying: …….

Very viable analytical hypothesis!! Thanx for thinking that through. I don’t remember if I mentioned it or not, but I also use a “disc” of Reflectix to cover the top of the grow medium for the first 6 weeks to impede evaporation, just cutting out a hole for the plant. I’ve found the plants seem to be the happiest when the exterior of the pot is damp 1/3-1/2 way up the pot. I occasionally probe the top of the the medium with my finger and if I feel cool moisture at a depth of first to second knuckle, I’m happy.

And you’re right; the float system keeps moisture content dead constant and has no opportunity to dry out and create salt build up. Good catch. I’m impressed!!

Adding support to the sagging buds is on my agenda for today. There’s about 18 that measure between 9-12”.

I think you’re right on the timing, also. Unfortunately, we’re leaving for the hill this weekend for the holidays. I think the optimum harvest date is going to occur during our absence. Hope it will hold. I like to harvest sativas a little late anyway.
 

DunHav`nFun

Well-known member
Veteran
Nuthin wrong with lettin shit go for extra couple weeks IME......makes for more narcotic tendencies that I`m fond of , although that`s most certainly not the intention of racy ass sativas…... I know , I know , lol.....but.....Guess we`ll see since it`s already written that these will go longer.....Hardta believe that`s a seed plant from straight 12/12.....Killer job Bro.....and hey.....Have fun in the mtns…..Sent my `ol lady and mother-in-law to the mtns for the holidays , but they came back.....Oh well.....

Peace....DHF....:ying: …….
 

gorilla ganja

Well-known member
Well done Boocoodinkydow.
Love the simple K.I.S.S set up you have going.
Thanks for sharing the details. I like when someone does what others say can't be done.
The results speak for themselves.

Peace
GG
 

Boocoodinkydow

Active member
Well done Boocoodinkydow.
Love the simple K.I.S.S set up you have going.
Thanks for sharing the details. I like when someone does what others say can't be done.
The results speak for themselves.

Peace
GG

Thanx, gorilla ganja. Appreciate you dropping in.

For years, I’ve been in awe of the many superior gardening results with enviable grow setups I’ve seen on various forums. Very admirable! But what has really peeked my interests are the occasional “ghetto gardeners” that are reaping nice results with modest expenditures of cash and time. They are my kindred spirits!

I’m a micro-doser and massive bounties have never been my goal. I’ve simply been in search of a simplistic gardening method that wouldn’t break the bank but yet produce acceptable results. I’m surely not going to complain, however, if a low budget simplistic technique reaps better than expected yields!!

BCDD
 

Lotto

Well-known member
There are many more “ghetto gardeners” or what I call low budget folk who get decent results on a shoestring. I run cheap A 19 base screw ins. First picture shows 1600W of SIL's consuming 160 watts. This does not include the 250W HPS in the rear. Second picture is a veg area putting out 1800W and using just 192 watts. I also veg. and clone under T8's.
Between hunting, fishing, travel in the cold months and chasing family in other states, my plants also lack attention at times. I count on friends to keep things going. I've been a plant nut my whole life and would grow weed just for the sake of growing it. Boo,I love your methods and forgive me for hijacking your thread.
 

Attachments

  • 20191210_114014.jpg
    20191210_114014.jpg
    88.3 KB · Views: 25
  • 20191210_114155.jpg
    20191210_114155.jpg
    51.9 KB · Views: 25

Boocoodinkydow

Active member
There are many more “ghetto gardeners” or what I call low budget folk who get decent results on a shoestring. I run cheap A 19 base screw ins. First picture shows 1600W of SIL's consuming 160 watts. This does not include the 250W HPS in the rear. Second picture is a veg area putting out 1800W and using just 192 watts. I also veg. and clone under T8's.
Between hunting, fishing, travel in the cold months and chasing family in other states, my plants also lack attention at times. I count on friends to keep things going. I've been a plant nut my whole life and would grow weed just for the sake of growing it. Boo,I love your methods and forgive me for hijacking your thread.

You’ll never have to apologize for posting here!! Love to see and hear of innovations from other growers of like mind. Thanx for sharing.

I feel your passion for gardening. The only thing I’ve found addictive about cannabis is the growing process! Nothing more relaxing than pulling up a comfy chair, putting on some good music and just watching the garden grow!!

FWIW: When a photo is taken in portrait format, (phone or tablet held in the upright position) it loads here 90 degrees askew. You can crop it ever so slightly prior to loading to your album and it will be oriented properly. That’s thanx to Hookahhead.
 
Last edited:

Boocoodinkydow

Active member
Let’s see, now, where was I? Ahh yeah, failures!

YOU CAN ONLY ESTABLISH PARAMETERS OF SUCCESS BY FIRST FINDING THE POINTS OF FAILURE!!!.....

I seldom view failures in a negative aspect. Failures are simply the base upon which we build future successes!

At the onset of this venture, I’ll have to admit I sensed a good bit of trepidation. Bottom feeding coco/perlite through a Swick system was virgin territory. The only recommendations I could glean were “don’t do it, it won’t work”! Nonetheless, here we go!!

My first attempt got off to a roaring start. The plants bounded up with surprisingly fast growth. At 3-4 weeks, however, they initially took on the appearance of being overwatered but the medium didn’t confirm that. The top layer seemed normally dry and the sides of the bags weren’t overly moist. I isolated the bottom of the rag bags from the Swick surface to cut off moisture but the plants continued to succumb to an unknown malady. As a last resort, I sat them on my deck in hopes natural sunlight may work some magic.

picture.php

But no glory. Sad looking sight, huh?? I took a look at the roots and found nothing to give me a clue to the problem. Everything looked healthy albeit the root systems were abnormally disproportionately small. (Turned out not to be a contributing factor and I’ll delve into this anomaly later.)

I foolishly risked 3 plants when 1 would have done. Lesson learned.

For this first go, I had abandoned my coco/perlite mix for Bush Doctor Coco Loco. It’s still coco but with a lot of good nutrients in it. Grasping at straws, could this have been my downfall?

For take 2, I returned to my trusty ol’ straight coco/perlite medium. Again, the plant got off to a fast start but, alas, it followed the same pattern.

picture.php


This time I decided to dissect this plant down to a cellular level if I had to. Something had to be apparent!

I placed the plant on my work bench and grabbed the stem and started to dislodge the root system. To my surprise the stem easily separated at ground level. There it was! Stem rot. It was mushy rotten. But still a mystery was the fact that the coco wasn’t showing evidence of being excessively wet.

I reached down around the remaining stem to extract the root and the problem jumped out at me!

picture.php


I’ve always used rapid rooters with great success. In this case, however, when I pulled it up out of the coco, it was so wet I actually squeezed water out of it. In spite of the fact that the surrounding coco was at an acceptable moisture level, the dense composite of the rapid rooter was wicking and holding excessive moisture which induced stem rot. Easy peasy, omit rapid rooter and eliminate stem rot!

Take III. Absent was the rapid rooter and the new plant shot up over 4’ tall and developed no problems. I did struggle, however, to keep a consistent moisture level. As I mentioned before, my goal was to keep the bottom 1/3-1/2 of the bag moist and being able to reach moisture from the top at less than a finger depth. I was constantly having to adjust the float level as well as isolate the the contact area between the bag bottom and Swick surface. In mid flower stage, I had to actually burrow the bag down into the Swick to obtain enough moisture.

Take IV. Replacing the 1 gal bag with a 7 gal took care of the inconsistent moisture level. I set the float level at 2” below the surface of the Swick and moisture content in the bag remained dead steady throughout the grow. Again, I had a really large, healthy plant although it wasn’t as productive as it could have been.

Time to make some adjustments to the lighting system but that’ll be fodder for the next section.

To be continued.....
 
Last edited:

gorilla ganja

Well-known member
Similar idea to a swamp tube that I have used in the bush.
80% Cocco 20% native soil, with a handful of slow-release nutrients.
Thanks for the info on rapid rooters.

picture.php
 

Boocoodinkydow

Active member
QUICK UPDATE.....

MISS HONDURAS
WEEK 15 FROM GERMINATION
WEEK 9 FROM START OF FLOWER STAGE
picture.php


Not much to report. Buds are still thickening and getting heavy. I did some random tying for support of the ones that were drooping. Shortly after taking these pix yesterday, I closed the doors and left town. I’m hoping this big girl will be ripe for the harvest when I return after the holidays.

MISS PANAMA
WEEK 7 FROM GERMINATION
WEEK 2 FROM START OF FLOWERING STAGE
picture.php


Still very spacey and sparse but quite healthy looking. If you remember this one germinated 7-8 weeks after I planted the seed, long after I’d given up on it. I made no plans for this gal and she’s been about as inconvenient as an expected pregnancy! I remember my girlfriend fell victim to this during my youthful years. WOW, was my wife pissed!! Turned out not to be mine; seems the girlfriend was a two-timing hussy! (That’s me being a male chauvinist pig with double standards!) Wife was pissed anyway!
 

Latest posts

Latest posts

Top