I know I didn't frame the doorway properly. I thought no one would ever know... The angle of the room allows for two 8' sections of walls, without taking much room away from the flowering room. I decided to go with plywood because I was planning on allowing the occasional controleld flood.


-
Happy Birthday ICMag! Been 20 years since Gypsy Nirvana created the forum! We are celebrating with a 4/20 Giveaway and by launching a new Patreon tier called "420club". You can read more here.
-
Important notice: ICMag's T.O.U. has been updated. Please review it here. For your convenience, it is also available in the main forum menu, under 'Quick Links"!
You are using an out of date browser. It may not display this or other websites correctly.
You should upgrade or use an alternative browser.
You should upgrade or use an alternative browser.
The CannaBunker Begins
- Thread starter CannaBunkerMan
- Start date
The 1st picture is for reference. I cut out a 3' section of the back to use as the door. Inside looking out, the outside looking in. I removed the bottom 3 stairs in a way that they can easily be replaced.
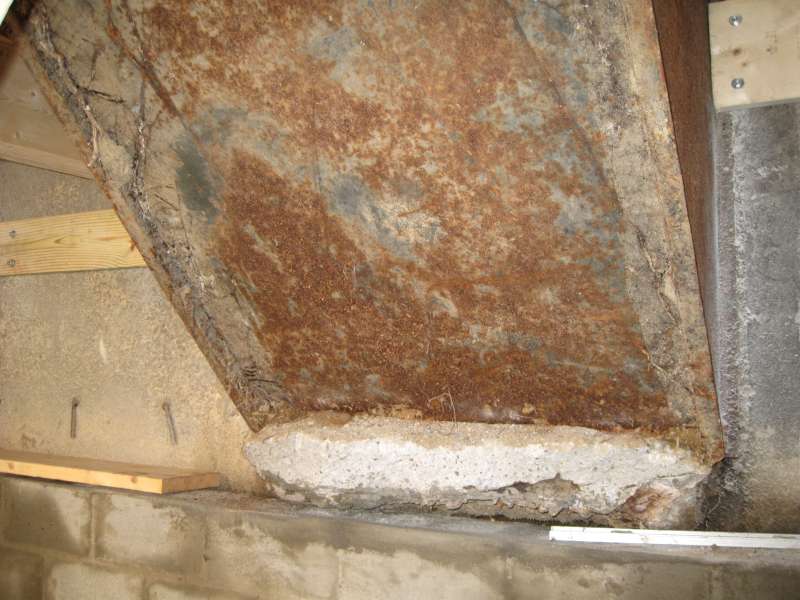


As with everything else, this door had multiple incarnations before I found something that would work reliably. My first idea was to model the door after a garage door. The bulkhead panel was welded with brackets to hold 4 garage door casters, one on each corner. The 1st picture shows the 1st of 4 tracks, one track per wheel. This would allow me to stow the door ahead and out of the way.
I also welded a bracket on the top of the panel to be the pull point powered by a garage door opener.
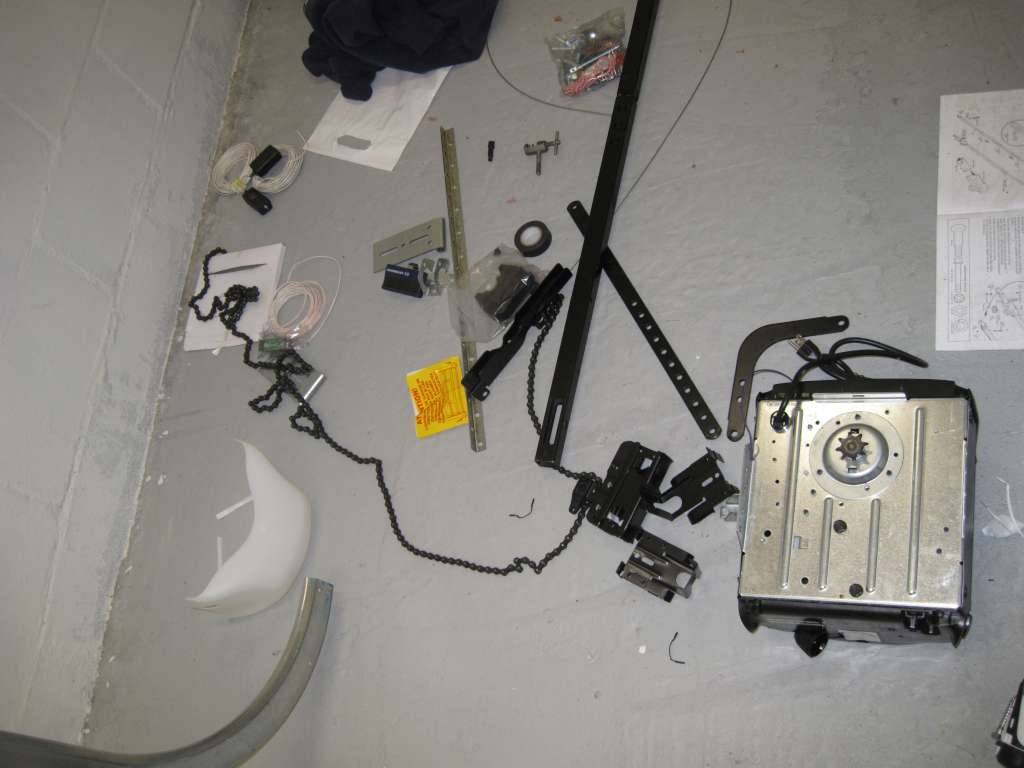


I also welded a bracket on the top of the panel to be the pull point powered by a garage door opener.
The problem with the rails and casters was that I couldn't get it to close the same way reliably. I worked on it for a few days, and decided that going simpler would probably be better, as is true in most cases. Another bonus of scrapping the rails was that I no longer needed to worry about knocking myself out on it.
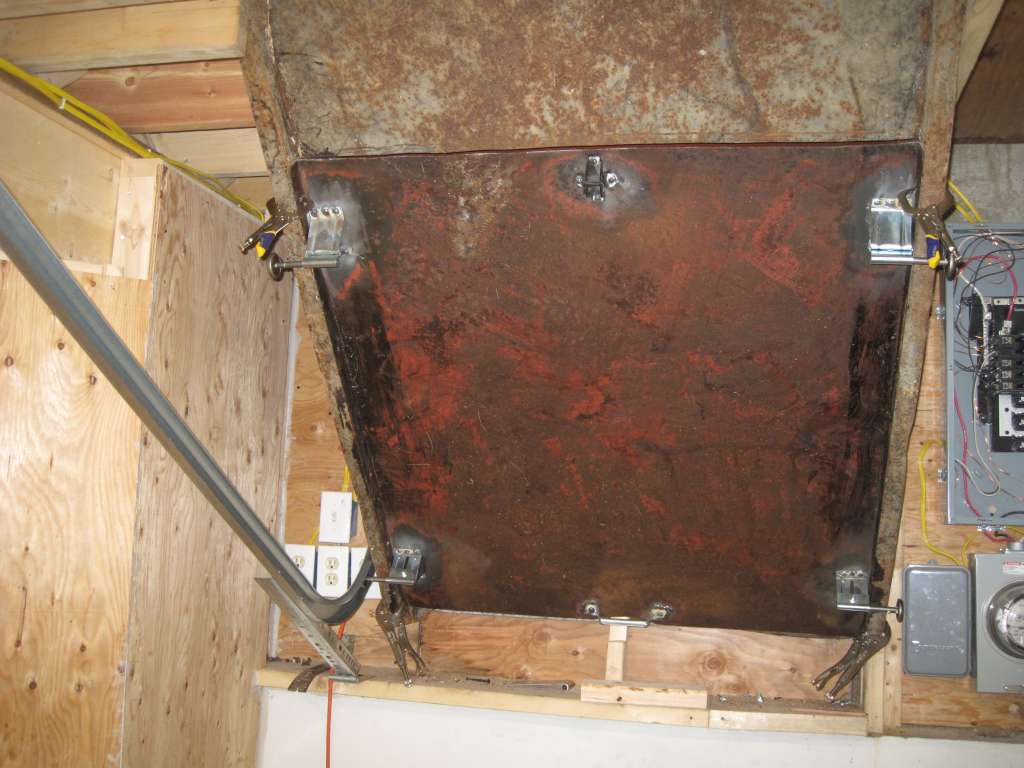
I added the support frame to give some extra rigidity to the 1/8" steel bulkhead backing. The ice and water shield was added to hopefully dampen sounds through mass loading. I don't think it really worked though. The noise isn't horrible, just some whirring if you open the door to the bulkhead from the outside of the room.
There are 2 attachment points on either side of the bottom of the metal "door" that I cut out. These attach to the garage door springs using a pulley to redirect the spring's force. I did this so that the springs were up and out of my giant mellon's way.
After uploading all of my pictures, I realize that I'm a little lacking in showing how the main door works. I'll post some more pictures of that momentarily.
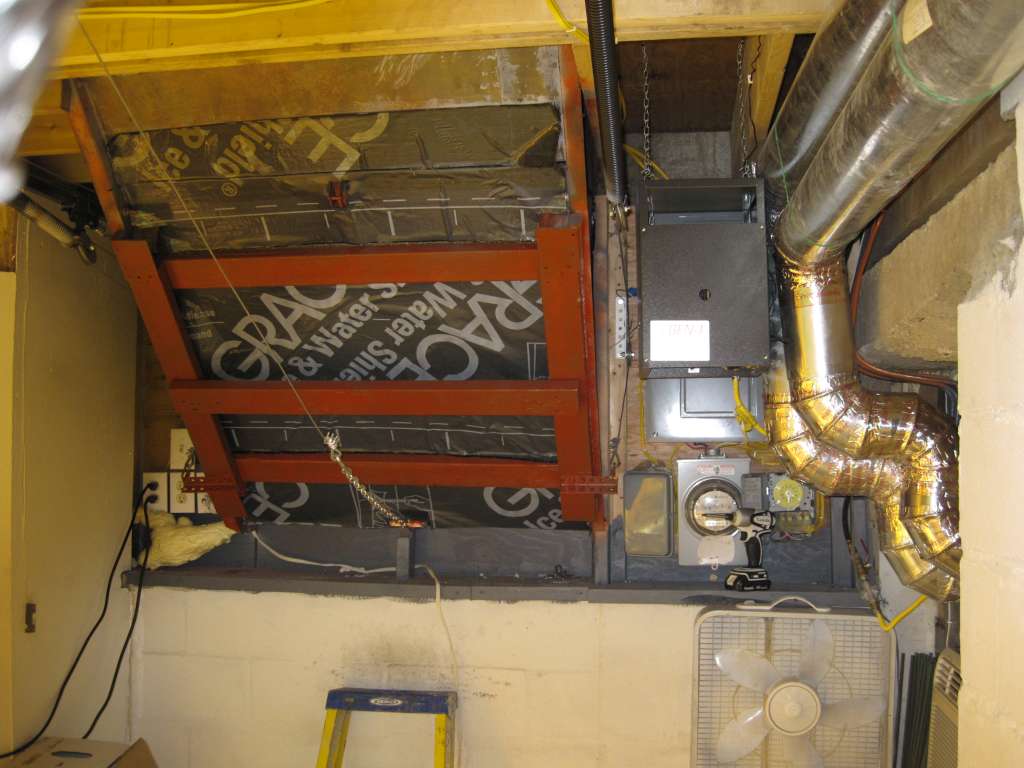
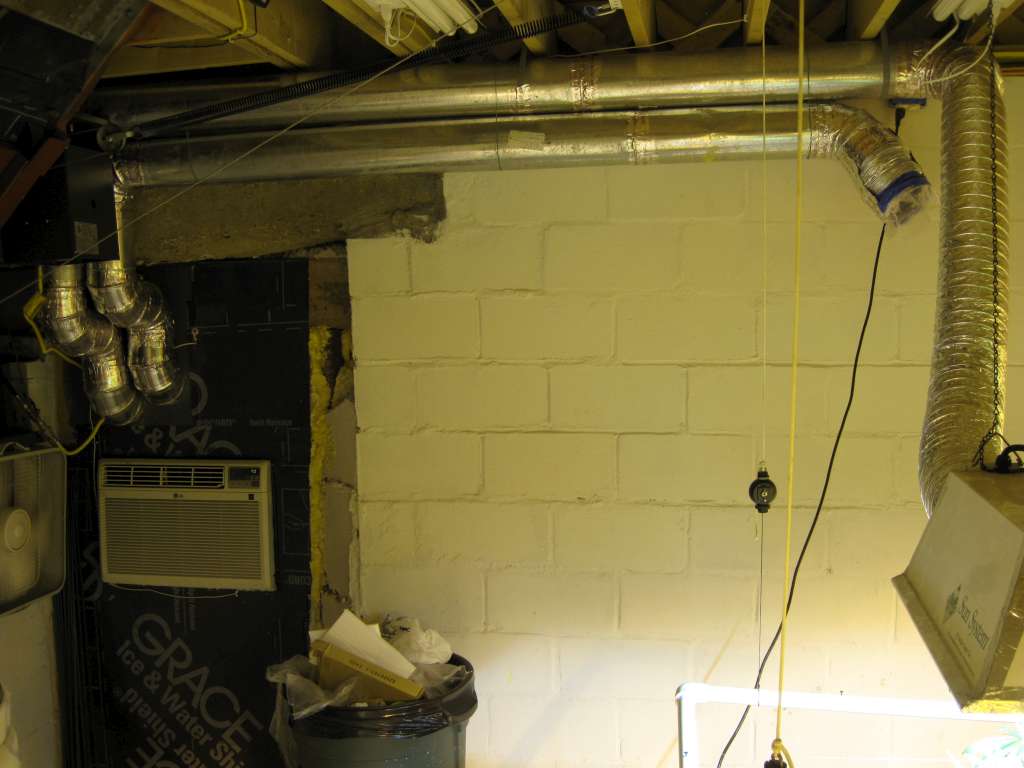
The top of the two ducts that you see is the exhaust end of the series of air cooled lights. The bottom duct was originally used to exhaust the air from the main carbon filter. Doing tihs left a nice negative pressure in the room. Any air escaping had to go through the carbon filter to get out. This method is bad for HVAC efficiency, but good for odor control. Once you go CO2, this method is no longer ideal, since it will vent any that collects in the room. That's why you can see that I taped a bag over the vent. This had a nice side effect of showing me what the relative pressures inbetween the hot room and the grow room is. If the bag is being blown up, that's good, if it's being sucked in, that's bad.
The last two pictures show how my second generation hydro system was set up. All of the buckets are connected to each other, so their water levels are at the same height. There is a catch basin attached inline that also shares the same water height. There is a pump in the catch basin that is on a cycle timer. It only took me a few days to dial in the catch basin's cycle timer to work with the main reservoir's feed pump. I wanted to feed, but not overflow. Recirculate, but not burn the pumps up or heat the reservoir. I found that if I had my catch pump on for one minute, and off for an hour. The feed pump worked best being on for 5 minutes, and off for 2 hours. Times will vary, depending on your particular pump, but the dual timers with a catch basin is a nice way to keep the system flowing and oxygenated.
The pvc pipe picture shows 3 different things. The 1" drain line with the bulkhead fittings, the air-line distribution manifold, and the drip line manifold. The black vinyl tubing is water, and the tan is air. Each bucket had its own airstone. This wasn't a bad setup at all, but there were some real problems with it.
First of all, there's too many buckets, too many fittings, too many everything. After the first batch was finished, two of the lids had already broken.
Secondly, there is no real way to automate the water top offs. How much water you need depends on how much water is in the system, which varies all of the time. To help a little with this problem, I put risers under the buckets. That would allow the catch basin to be below the main level, and therefore collect more water before needing to be emptied.
Another problem was that it was very difficult to work underneath the canopy with this setup. Crawling inbetween rows of buckets through the stickiest of ickiest, wasn't in the contract. On a side note, anyone looking for the best, strongest, no-leakiest bulkhead fittings, check out usplastics.com. They're expensive at $20 a pop, but if you've ever bought fittings that didn't work, you'll know that a little more money is worth not having to do it all over again.
definetly the best build ive ever read bro mad 
only thing i cant figure out,and i know its not because of lack of pics
just cant seem to understand the way the door opens and closes from them pics.
either way,this is one of them threads im glad i clicked yo.
peace-T-
only thing i cant figure out,and i know its not because of lack of pics
just cant seem to understand the way the door opens and closes from them pics.
either way,this is one of them threads im glad i clicked yo.
peace-T-
Thanks mang! I changed how it worked a few times. It started on a track, then ended up on a hinge. I'll post more pictures soon.
K
krest
Where is the tail end of your through-wall AC unit expelling heat? I've tried to put in an AC like that with the tail end going into another room but I had major issues with the heat radiating back into the room and into the rest of the house.
If you could explain to me how you set up your AC and remove heat I would be very grateful
If you could explain to me how you set up your AC and remove heat I would be very grateful
Where is the tail end of your through-wall AC unit expelling heat? I've tried to put in an AC like that with the tail end going into another room but I had major issues with the heat radiating back into the room and into the rest of the house.
If you could explain to me how you set up your AC and remove heat I would be very grateful
The stairwell area is an enclosed area. I like to call it the "hot" room, some people call it a lung room. I have a thermostat controlling the exhaust vent fan that will kick on, and expel the hot air, while at the same another fan will pull air in cool air through the other vent. I sealed the inside of the AC unit so as little air as possible would be exchanged inbetween the front and the back.
The only problem with this setup is that you need to keep an eye on the relative pressures between the hot room and the main growing room. If the hot room is expelling more air than it's taking in, that will create a negative relative pressure, and pull stinky air from the flower room into the hot room, then expel it outside.
To solve that problem, I added a couple of carbon filters to recirculate the air in the hot room. This gets the odor somewhat under control. Nothing outside, and only the occasional whiff inside. Smell is extremely hard to completely get rid of. I made sure that the intake fan had a higher cfm rating than the exhaust fan . This makes sure that air is always leaking into the room, instead of the other way around.
At least you'll be ready when the Chinese or the Russians come.
It used to be the Russians, now it's definitely the Chinese.
L
laylow
amazed at the pace of work..... 
skyhigh35
Member
Bunker, mad respect brother. its like you took the idea out of my head & used it at your place. only difference is have been thinkin aboot a garage bunker underneath a new 3 bay garage. same exact principle. i can appreciate the hard work you done being in the GC world. i just need to buck up & buy a place. i just cant seem to let go of the convenience of being able to pack up & hall ass if needed. Well done bro, well done.
amazed at the pace of work.....
Maybe for you... From start to this point was about a year. A pro team could have done it in a week.
Under the porch? That was a ventilation duct from the stairwell. I think I refered to it as vent #2. It's just a wooden box, about 18"x12", where each individual piece of wood is wrapped a few times with poly sheeting before being nailed together. After assembeled, I wrapped the whole thing a few times more. I wanted a vent that I could burry, that would also stay nice and dry.

