
-
Happy Birthday ICMag! Been 20 years since Gypsy Nirvana created the forum! We are celebrating with a 4/20 Giveaway and by launching a new Patreon tier called "420club". You can read more here.
-
Important notice: ICMag's T.O.U. has been updated. Please review it here. For your convenience, it is also available in the main forum menu, under 'Quick Links"!
You are using an out of date browser. It may not display this or other websites correctly.
You should upgrade or use an alternative browser.
You should upgrade or use an alternative browser.
The CannaBunker Begins
- Thread starter CannaBunkerMan
- Start date
Maybe I can use the next couple of days to ask a few questions of my own. One thing that has been troubling me is that during full flower, when everything is humming away, the main breaker can trip. Well, not exactly "trip", but half of the panel will die, even though the main switch hasn't flipped. When I turn off main, and then on again, the dead half of the panel will be fine again. It's troubling, since my whole house is only pushing 70 amps, and I should have 120 amp service.
My diagnosis is a faulty main breaker. Ha! However, the panel is from the late 60's, and I don't know how to buy a replacement main without gutting and replacing the entire panel. I tried McMasterCarr, but I couldn't find anything. Any suggestions?
I don't know the answer but look up "Tilt" in the member search and he can tell you exactly what to do. As for ICF this will probably explain as well as anything: http://www.youtube.com/watch?v=ycSA8l6l820&feature=grec_index
You can do other searches on youtube for icf and find alot of information. You can also go to concretenetwork.com and find out a good bit.
ICF has got to be more expensive, but in a time-is-money world... I couldn't tell from the video if the core was filled, or if it's hollow. Were those the forms, or was that the final exterior? That didn't look so painful though.
EDIT- reading through the comments on that video makes it a little more clear. Is the concrete pumped into the forms? It almost looks too easy to be true. Well, in all, it wasn't a huge structure, and it didn't take very long to block out. I think I had it the blocks laid and filled in less than a week. The slabs were the beasts, each taking me about a week to complete.
EDIT- reading through the comments on that video makes it a little more clear. Is the concrete pumped into the forms? It almost looks too easy to be true. Well, in all, it wasn't a huge structure, and it didn't take very long to block out. I think I had it the blocks laid and filled in less than a week. The slabs were the beasts, each taking me about a week to complete.
dude if you ever have to sell the place just let to prospective buyers the house has a custom built root cellar
A root celler that was built with no permit. I'd probably need some kind of exemption where the buyer would sign off on something "as-is". Who knows, hopefully I won't need to sell it.
awright434
New member
Just read through this and im seriously impressed. This may be the coolest thing ive ever seen. Your hard work and determination inspires me.
It really interests me that you had such rapid growth with that high rh in the room... Do you think it was definitely the rh that caused the growth?
+rep
It really interests me that you had such rapid growth with that high rh in the room... Do you think it was definitely the rh that caused the growth?
+rep
Tilt
Member
Maybe I can use the next couple of days to ask a few questions of my own. One thing that has been troubling me is that during full flower, when everything is humming away, the main breaker can trip. Well, not exactly "trip", but half of the panel will die, even though the main switch hasn't flipped. When I turn off main, and then on again, the dead half of the panel will be fine again. It's troubling, since my whole house is only pushing 70 amps, and I should have 120 amp service.
My diagnosis is a faulty main breaker. Ha! However, the panel is from the late 60's, and I don't know how to buy a replacement main without gutting and replacing the entire panel. I tried McMasterCarr, but I couldn't find anything. Any suggestions?
Sounds like you have an unbalanced load. The panel has 2 poles A & B for simplicity you are probably have to many amps on one pole more than the other. The best way to check is get a multimeter with a clamp on amp meter check the main wires or bus coming to each side of the breaker while it is under full load and find out. If the meter shows more than 80% of the breakers ampacity on one of the poles most likely. You can sometimes move circuits around in the panel to balance the load across the 2 poles. Depends on the situation.
Sounds like you have an unbalanced load. The panel has 2 poles A & B for simplicity you are probably have to many amps on one pole more than the other. The best way to check is get a multimeter with a clamp on amp meter check the main wires or bus coming to each side of the breaker while it is under full load and find out. If the meter shows more than 80% of the breakers ampacity on one of the poles most likely. You can sometimes move circuits around in the panel to balance the load across the 2 poles. Depends on the situation.
Wouldn't anything 240v (double pole?) span both poles and create a balanced load? I have a 4 gague 3 wire run from a 100 amp circuit on my main panel to my bunker's panel.
It seems that someone out there helped the process along, and now I can show you the rest of my pictures. In higher-HD. AWESOME!
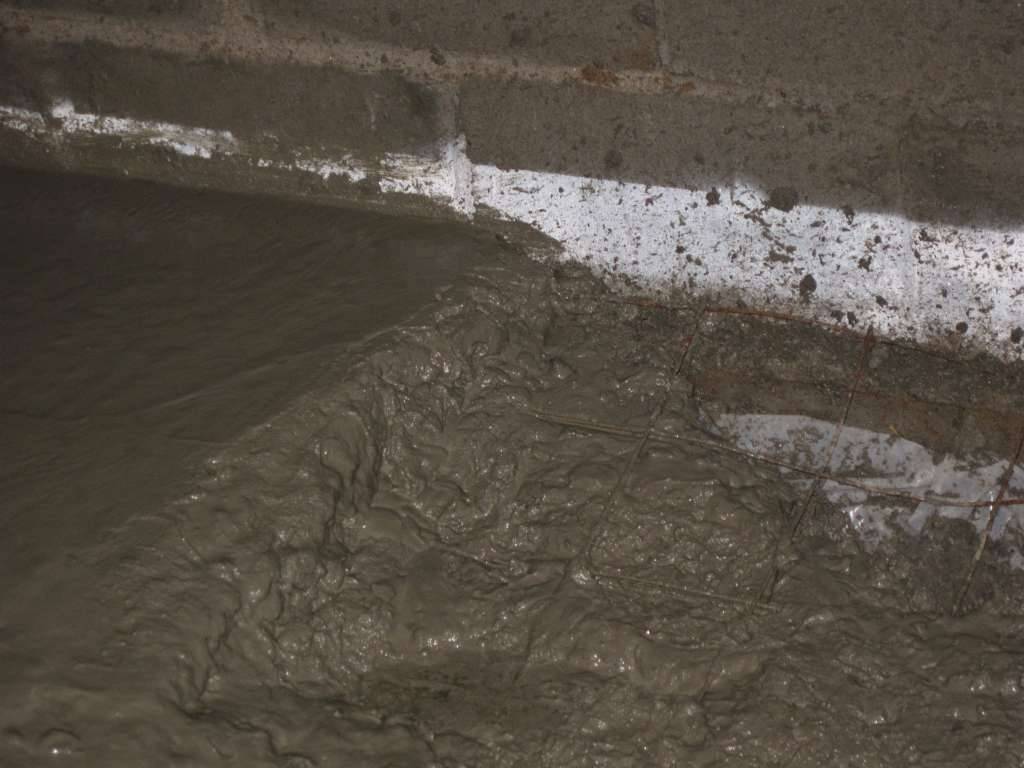
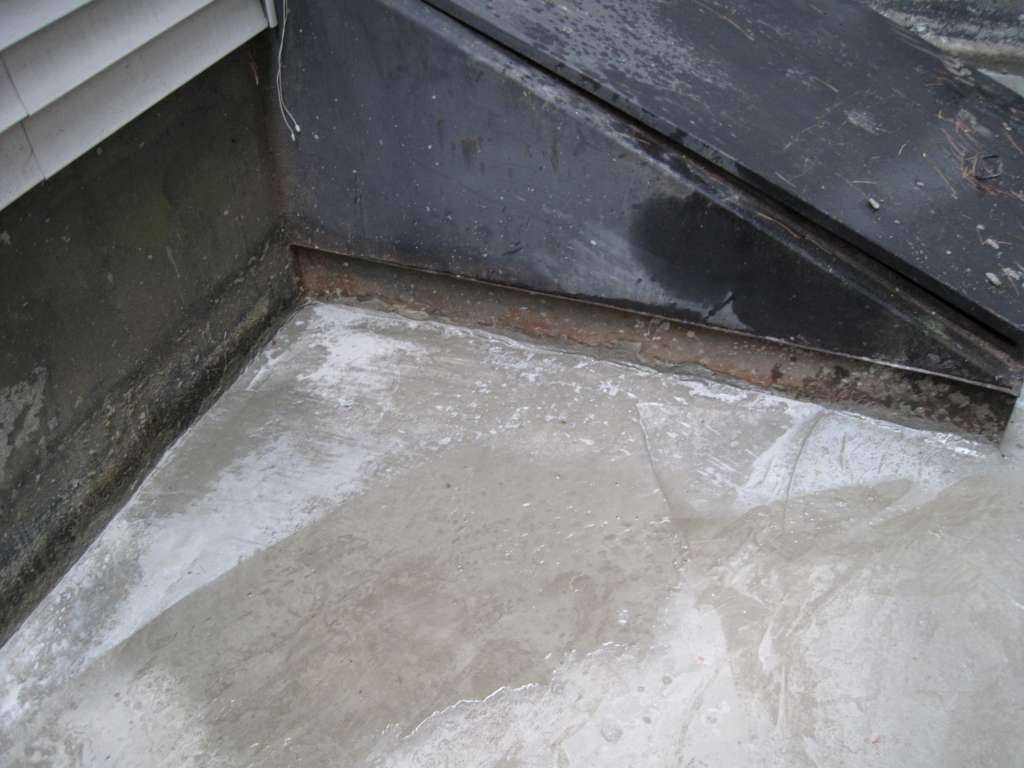
See that huge piece of shit concrete below the bulkhead? Well, right now I don't realize it, but that's about to turn into almost a full week's headache. It ends up being in the way of the door opening. I'm trying as well as I can to leave a nice steep seam to making finishing them easier. In that third picture you can see the daily progress. The drier concrete is from the day before.


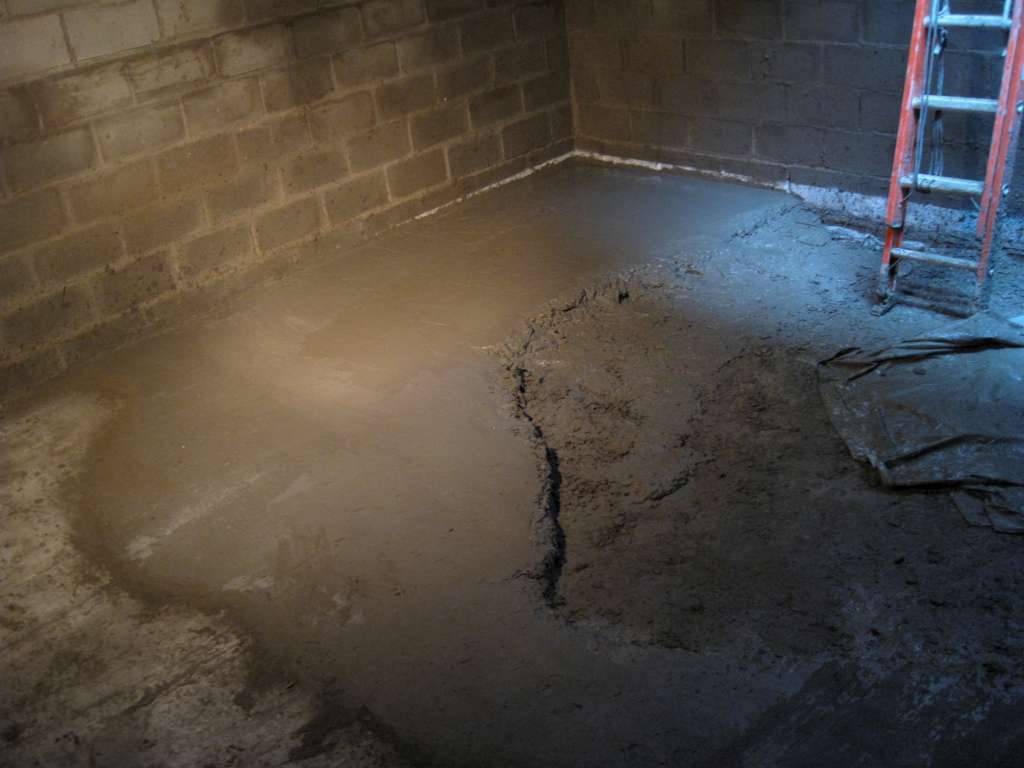

See that huge piece of shit concrete below the bulkhead? Well, right now I don't realize it, but that's about to turn into almost a full week's headache. It ends up being in the way of the door opening. I'm trying as well as I can to leave a nice steep seam to making finishing them easier. In that third picture you can see the daily progress. The drier concrete is from the day before.
Trowelling the concrete smooth ended up being a lot easier than I had thought. You can hardly notice the seams now. Especially after I painted the floors.
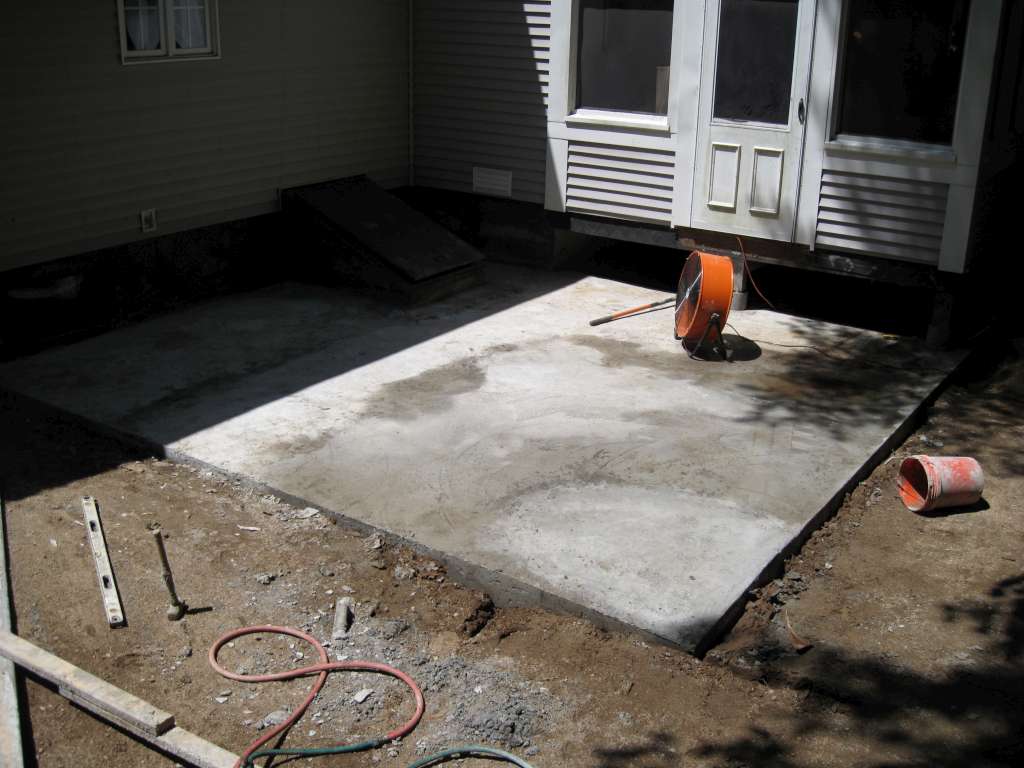
The last day's pour was in the drain corner. It's about 4 inches thinner here, and the work went noticeably faster due to that.
The 3rd and 4th image have some of the last sunlight this area will see for a long time.


The last day's pour was in the drain corner. It's about 4 inches thinner here, and the work went noticeably faster due to that.
The 3rd and 4th image have some of the last sunlight this area will see for a long time.
I KNEW that fucker would show up sooner or later. It is the devil's machinery. This machine had two lifetimes of work on it when I got it, and I abused the hell out if it. It still lives. Maybe I can post some videos now.
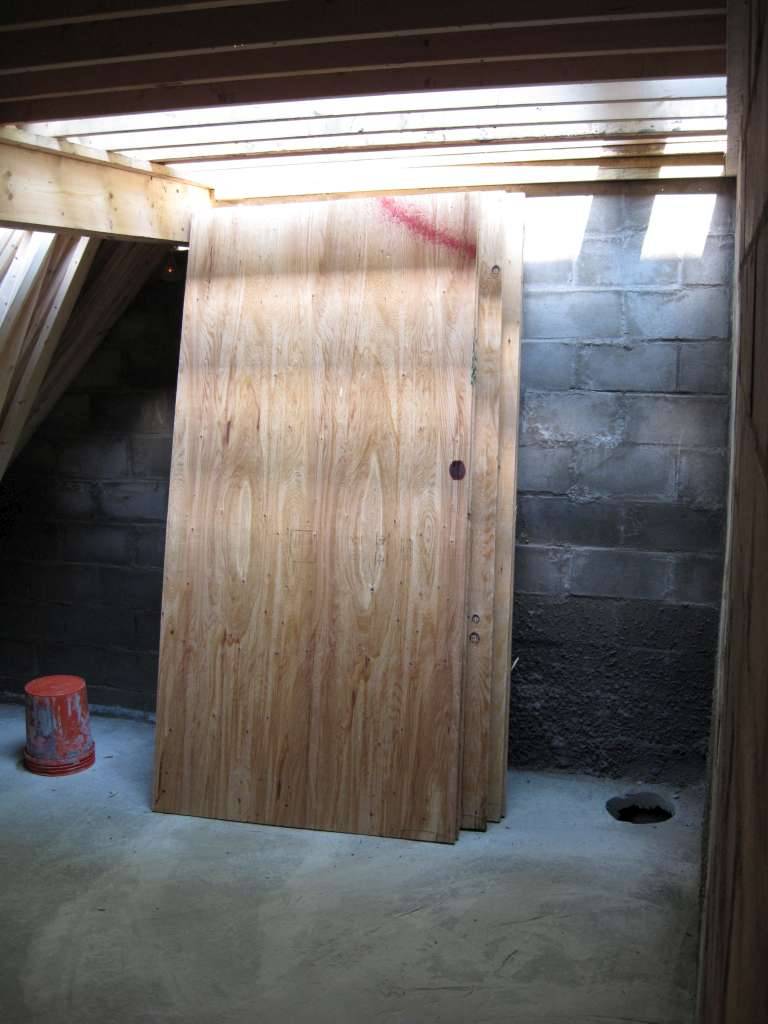
Now that the floor has set and hardened, I can start loading in all of the lumber that I'll need for the walls and shelves. I plan on using plywood instead of drywall, since moisture will be prevelent.
2nd picture - Goodbye Sun. Hello moon.
The last picture is finally backfilled to the level of the ceiling. No more threat of imminent collapse, or regular collapse, and imminent death. Sweet. I have another 10 mil vapor barrier here that will underlay the concrete.
NOTE- This is a point where I should have done things a little differently. I wish that I had of went overkill on the vapor barrier on this step. If redone, I'd use Ice+Water shield, and cover the entire thing, overlapping in correct direction. Then I'd use 3 vapor barriers on top of that. I actually dug up the patio that I build on top of this so that I could re-tar and waterproof the area inbetween the bulkhead and the stairs. I could have done that ahead of time to save some time.
I wanted to have the ceiling slab overlap the structure, to allow it to "cap" it, with a 6" lip that goes down another 6" below the plywood top. I have nothing to back this up with, but I thought it might help with the water.
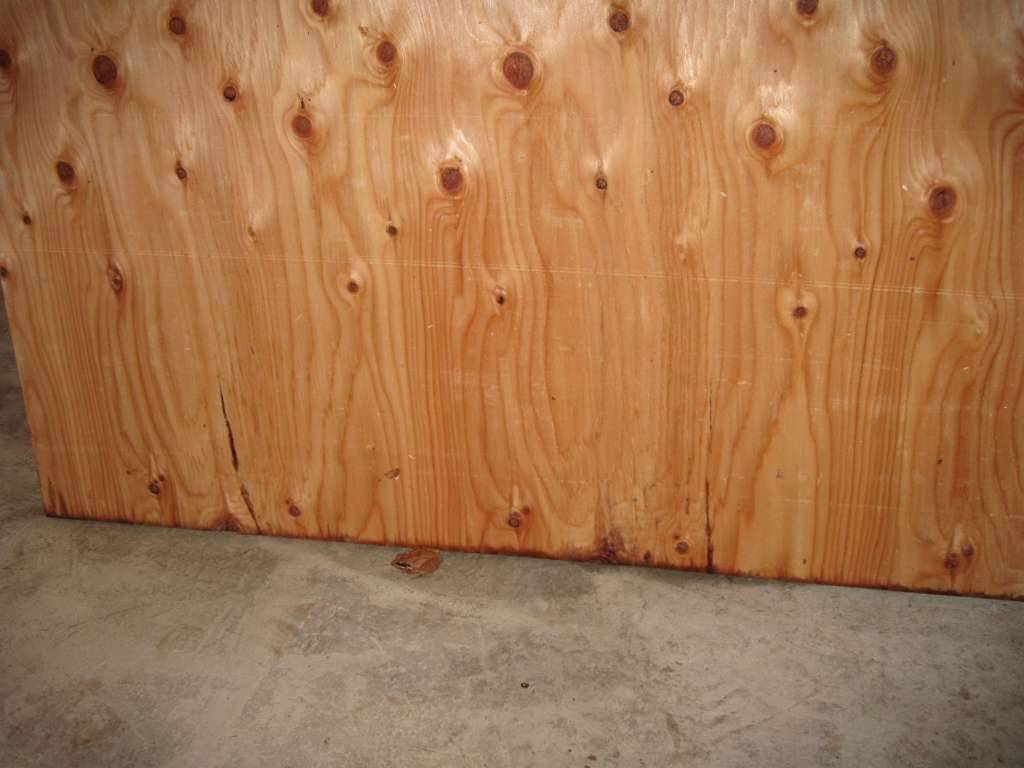
It's amazing how much life still kept on hopping up, even after everything had a top on it. I think this guy might have come with the plywood. Either that, or it's a goverment nano frog sent to spy on me.


ICF has got to be more expensive, but in a time-is-money world... I couldn't tell from the video if the core was filled, or if it's hollow. Were those the forms, or was that the final exterior? That didn't look so painful though.
EDIT- reading through the comments on that video makes it a little more clear. Is the concrete pumped into the forms? It almost looks too easy to be true. Well, in all, it wasn't a huge structure, and it didn't take very long to block out. I think I had it the blocks laid and filled in less than a week. The slabs were the beasts, each taking me about a week to complete.
The concrete is pumped into the forms several inches thick. You can paint a water proofing material on the exterior. The structures are truly bullet proof. Google "insulated concrete form hurricane Katrina" and you will see pictures of 1 icf house surrounded by a flattened neighborhood. I haven't researched it but the chases for the wiring are inside the form. I've read for an entire house you are looking at a 4-8% premium to stick construction for an incredibly strong super insulated home.
Really inspiring stuff CBM, you're probably spawning ideas in a few heads with this information. That concrete shoot is intense and really gives a good idea of the effort that must've gone into shimmying the slurry into the bunker. Eagerly awaiting more pictures, but your stories are good too. I think there are a few of us around here that gave up the corp. life for a shot at the green dream - keep up the good work, you done us proud.
The concrete is pumped into the forms several inches thick. You can paint a water proofing material on the exterior. The structures are truly bullet proof. Google "insulated concrete form hurricane Katrina" and you will see pictures of 1 icf house surrounded by a flattened neighborhood. I haven't researched it but the chases for the wiring are inside the form. I've read for an entire house you are looking at a 4-8% premium to stick construction for an incredibly strong super insulated home.
If you can use rebar with ICF, it'll be strong enough to burry. The strength is all in the rebar.
More hindsight, but this looks like a promising avenue. I had never seen anything like this before now. Pretty cool.
The origiinal plan was to have a third emergency exit with an escape hatch going straight up, just to the right of the bulkhead.
For the longest time, the only power that I had down there was the extension cord coming from the old sewer pipe hole.
You can see some of the mess the concrete splatter made. I had to chisel is off. I'd much rather have brushed it off.


For the longest time, the only power that I had down there was the extension cord coming from the old sewer pipe hole.
You can see some of the mess the concrete splatter made. I had to chisel is off. I'd much rather have brushed it off.
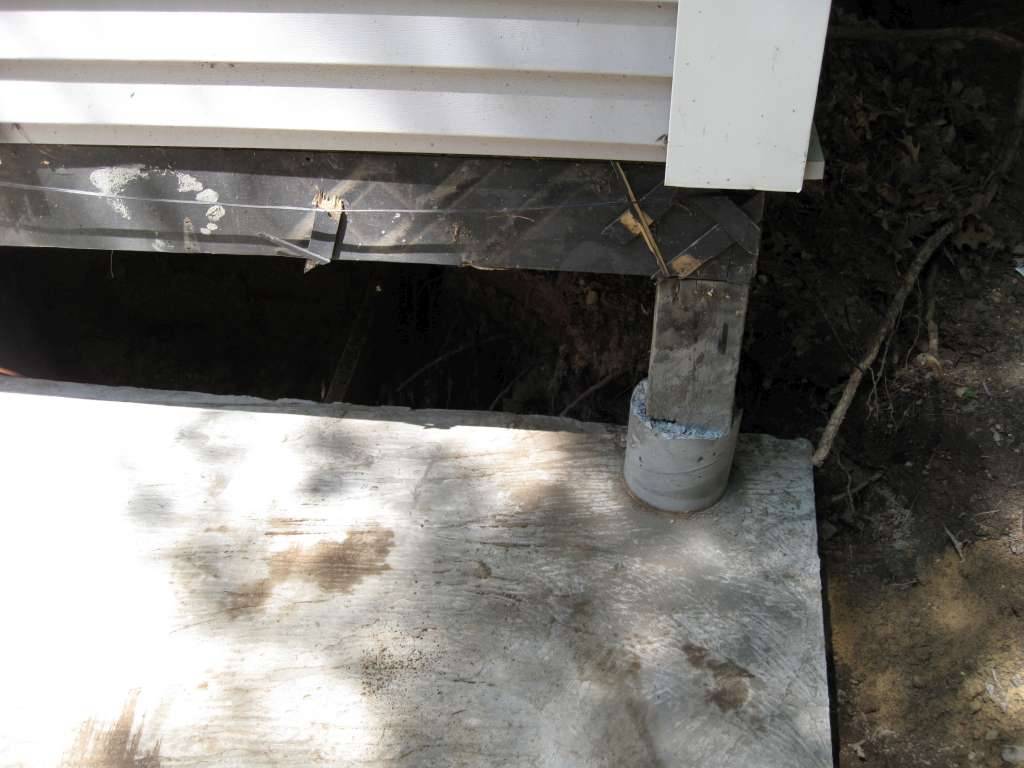
The second picture shows the secondary entrance's point of entry from the crawl space. There is also a ventilation duct on the left hand side of the image. This vent empties into the house. The vent on the right, that you can't see, empties underneath the porch outside. This way I can vent hot air into the house during the winter, and outside during the summer. Theheating bills were cut by almost 50% by venting the air-cooled reflectors into the house. One of my current tasks over the next week is to swap the ventilation ducts so that the hot air goes outside now that the weather is warming up.
Another ramification of the King of Rust's decission to cut 2' from the height is that I wasn't able to make the ceiling slab as thick as I had wanted. I was planning on 12" concrete, 2 feet of sand, then the patio. I was only able to have 4"-8" of reinforced concrete, and about 8" dirt. Still plenty, but maybe NOT bomb proof.
The 3rd and 4th pictures are of how much concrete I was able ot mix during an 8 hour day.
The last image is of how I boxed the ceiling around the bulkhead. I wanted to double up on the supports here to support the bulkhead.
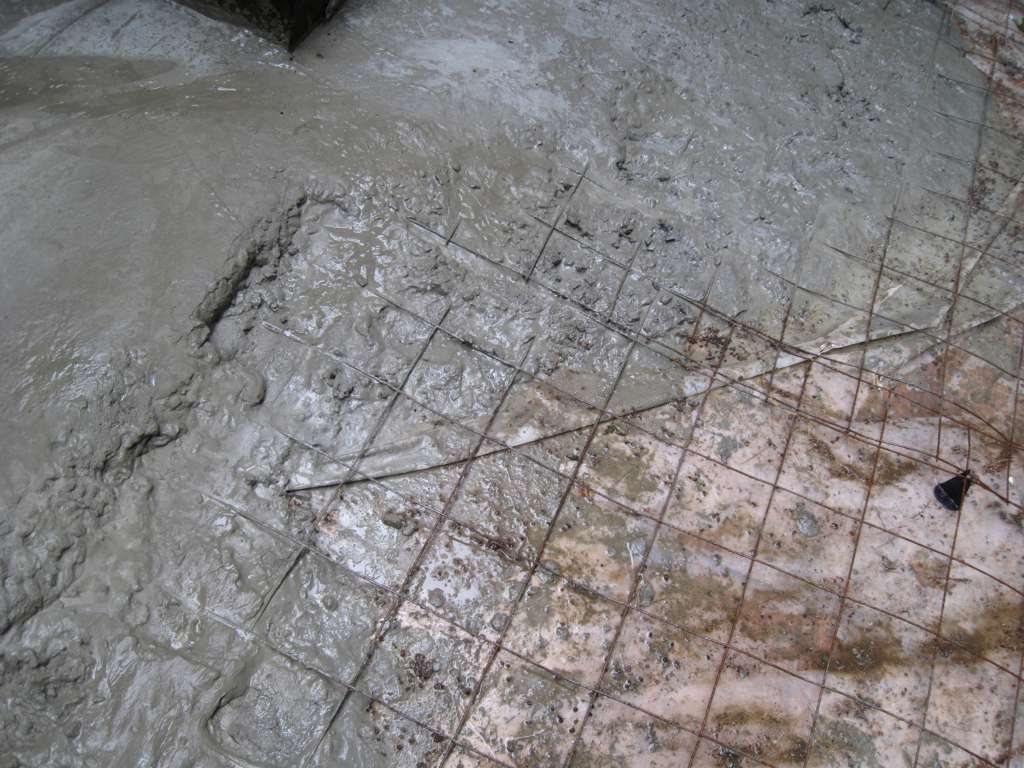
A lot of things that I did were a little overkill, but there it one important thing that is necessary for a structure burried so deep. That's rebar. It makes the concrete a lot stronger, and able to withstand the dirt weight.


Another ramification of the King of Rust's decission to cut 2' from the height is that I wasn't able to make the ceiling slab as thick as I had wanted. I was planning on 12" concrete, 2 feet of sand, then the patio. I was only able to have 4"-8" of reinforced concrete, and about 8" dirt. Still plenty, but maybe NOT bomb proof.
The 3rd and 4th pictures are of how much concrete I was able ot mix during an 8 hour day.
The last image is of how I boxed the ceiling around the bulkhead. I wanted to double up on the supports here to support the bulkhead.
A lot of things that I did were a little overkill, but there it one important thing that is necessary for a structure burried so deep. That's rebar. It makes the concrete a lot stronger, and able to withstand the dirt weight.
The wire reinforcement makes the slab much stronger.
These next three pictures are the second day's worth of pouring. This slab has a relatively high grade, to help shed any water that might seep through the patio above.
The last image was the view that I had for the entire summer. Mosquitos are really giant party-poopers. There's really nothing you can do, minus spraying. I had friends that couldn't stay outside for more than a few minutes before they started squirming.
The first image does a great job of showing each day's worth of mixing. I think the slab is made up of 5 seperate pours.
I added more concrete to the area around the bulkhead so that no water would pool there to leak inside.
The concrete posts holding up the deck were poured directly on top of the slab. 10" of sono tube and I was golden.
The 3rd vent into the bunker flows directly into the main structure. The last picture is where this comes out.
Really inspiring stuff CBM, you're probably spawning ideas in a few heads with this information. That concrete shoot is intense and really gives a good idea of the effort that must've gone into shimmying the slurry into the bunker. Eagerly awaiting more pictures, but your stories are good too. I think there are a few of us around here that gave up the corp. life for a shot at the green dream - keep up the good work, you done us proud.
The moment everyone decides to ignore unjust laws, they cease to have power over us. Civil disobedience is the most patriotic thing that you can do.

