
-
Happy Birthday ICMag! Been 20 years since Gypsy Nirvana created the forum! We are celebrating with a 4/20 Giveaway and by launching a new Patreon tier called "420club". You can read more here.
-
Important notice: ICMag's T.O.U. has been updated. Please review it here. For your convenience, it is also available in the main forum menu, under 'Quick Links"!
You are using an out of date browser. It may not display this or other websites correctly.
You should upgrade or use an alternative browser.
You should upgrade or use an alternative browser.
G
Guest
Grat3fulH3ad said:Hey Guys, just thought I'd post up my mass cloning method, and equipment. I have been cloning this way for a couple of years now, and due to the ease, low maintanance, effectiveness, and cost effective material, have decided to upgrade myself to my new deluxe version. I have used a pair of smaller units, which will hold about 30 cuttings each, for a long time, and will take this upgrade as an opportunity to share with you guys. The new cloner should do 50 - 60 depending on cutting size.
Hey cool idea very inspiring....so I can just put holes in wicks and then insert a cutting, and everything is good from there, after applying rooting hormone?
Do you have to change the water every day, or something?
Also - do you fill the perlite-filled reservoir with 2 inches of water total, or do you fill it within 2 inches within the top?
And - Would it help to run air lines under the cuttings/wicks so that they get oxygen?
Last edited:
G
Guest
Shibby Dobbins said:Hey cool idea very inspiring....so I can just put holes in wicks and then insert a cutting, and everything is good from there, after applying rooting hormone?
Do you have to change the water every day, or something?
Also - do you fill the perlite-filled reservoir with 2 inches of water total, or do you fill it within 2 inches within the top?
And - Would it help to run air lines under the cuttings/wicks so that they get oxygen?
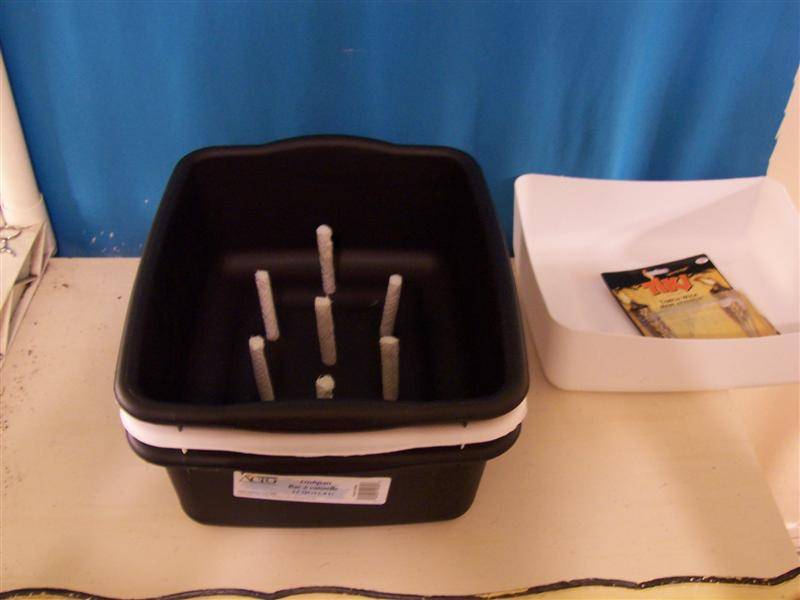
The top container has holes in the bottom and the wicks pass through the holes into the pearlite in the top container and into the water in the bottom container. just poke some holes in the pearlite and insert cuttings, NO Hormones or Chemicals need be used.
Usually once the pearlite is damp, and I have filled the rez up to the bottom of the top container, I don't have to bother it until there are roots. My rez holds roughly a gallon of water, and needs to be refilled every 10 days or so.
The Wick system provides oxygen by its design, The pearlite is not sitting in water or anything, and only wicks up enough moisture to stay damp.
and..
The chlorine in the tap water does help knock down the pathogens, dc...
G
Guest
What the....I can't believe I'm confused..
But I dont get it. You have a top tupperware and a bottom.
All I see on others' is the bottom, filled with perlite, and presumably wicks, that have been stuck into the perlite.
Are you saying the wicks come from the top tupperware, in order to bring oxygen in or something?
I thought the wicks were what you put the cuttings in!? This seems impossible with them being in the top tupperware, so, do you put the cuttings in the perlite or something?
Sorry for being so dumb
G
Guest
Sjibby... Look at the pics below. All the wicks do is transport moisture to the pearlite. The pearlite is the cloning medium.
Grat3fulH3ad said:Hey Guys, just thought I'd post up my mass cloning method, and equipment. I have been cloning this way for a couple of years now, and due to the ease, low maintanance, effectiveness, and cost effective material, have decided to upgrade myself to my new deluxe version. I have used a pair of smaller units, which will hold about 30 cuttings each, for a long time, and will take this upgrade as an opportunity to share with you guys. The new cloner should do 50 - 60 depending on cutting size.

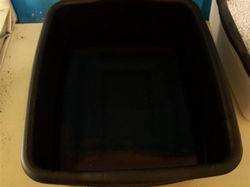
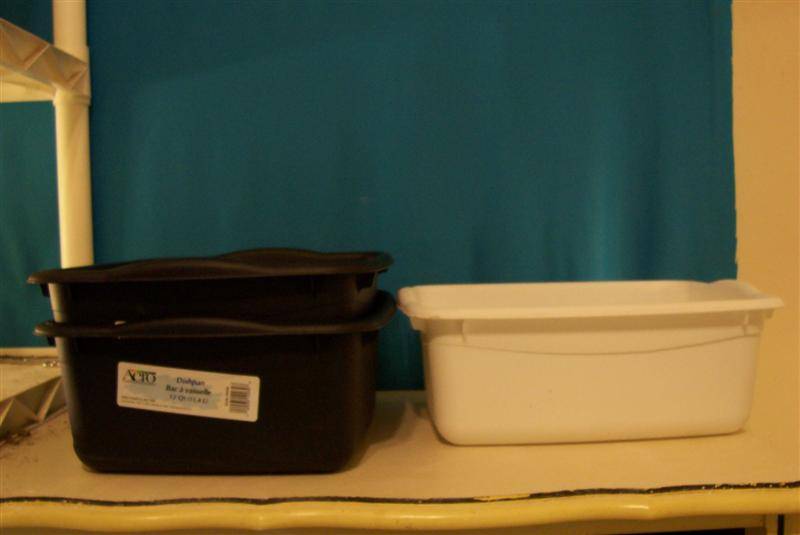
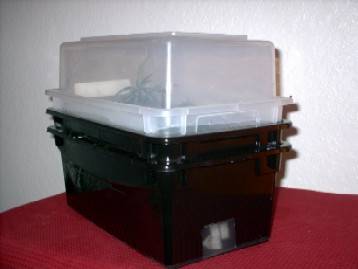
My wife found these containers at the dollar store. The black ones are lightproof, and they nest with about 3/4" between container bottoms. They are 12qt dishpans, and are about 12" x 16" x 7" roughly. They were $1.00 each.
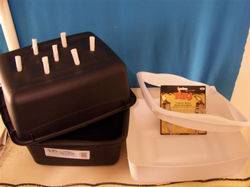
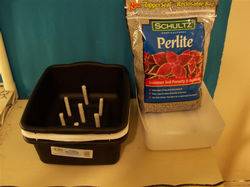
I bought 2 packages of tiki torch wicks for about $1.50 each. I cut each of the four wicks in half, drilled 7 equally spaced 1/2" holes in the bottom of one black container and inserted the wicks. Also, to increase the depth of the resivoir, I cut the top ring from the white dishpan to use as a lift, giving an 1 1/2" deep res.

This is how it nests together. I adjusted the wicks to touch the bottom of the unit.
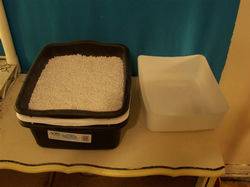
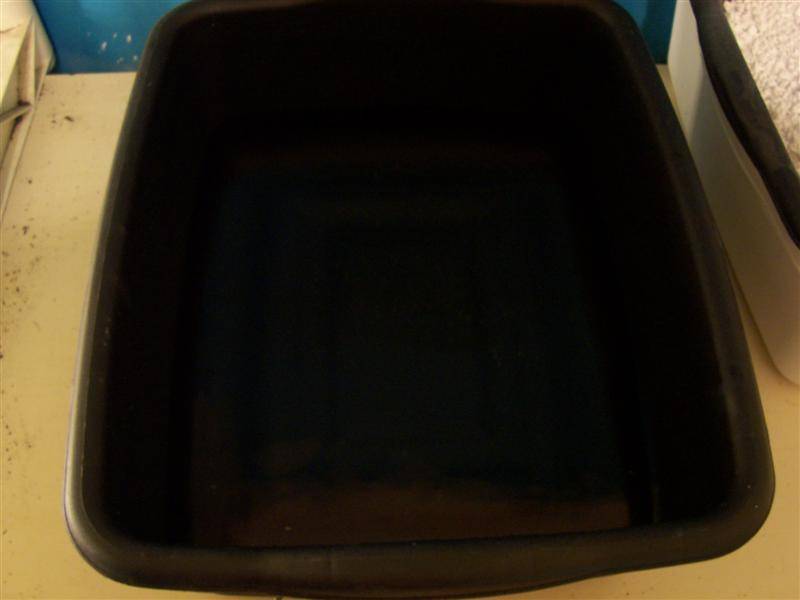
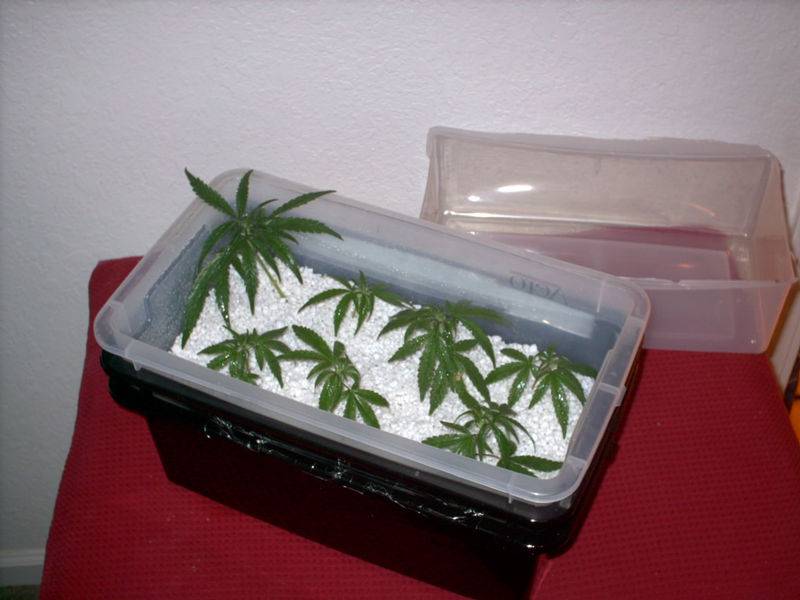
Next I filled the bottom res 2"deep with water, re-nested the unit and filled with pearlite to the tops of the wicks. I waited for the water to all wick into the pearlite ( an hour or two) and refill the res to 1 1/2". I am now ready to poke holes with a small dowell and insert cuttings. I use plain tapwater, the chlorine keeps bacteria down. Top off the res to 1 1/2" every 5 - 7 days, change or clean pearlite between batches, and she will be fairly 'hands free'. I gently tug the cuttings every couple of days after the first 5 and if they have rooted, I work it out gently using the point of a shis-ka-bob skewer. Then I have cuttings ready for soil or hydro.
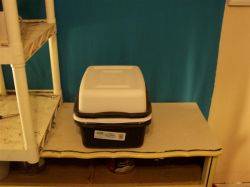
The white tub can be inverted and inserted snugly as a humidity dome and light diffuser.
This has long worked well for me, with about 98% of the hundreds of cuttings I have made rooting within 14 days.
The tubs were $3.00
The wicks $3.00
The pearlite $3.00
The 50 site wick cloner for under $10.00


G
Guest
oh, ok. wow i feel even dumber now. makes sense though. cool
G
Guest
So couldn't you just do it this way?:
Get 2 tupperware instead of 3
Use one as the bottom, one as the top.
Fill the bottom one w/ perlite
Stick wicks in till they hit the bottom
This way, you don't have to deal with a third tupperware to catch the water (that would have went through the wick holes). Instead you can just fill the bottom one and stick some wicks into the perlite. That'd work just as well, right?
G
Guest
If you look closely at the second and third pic in the tutoral, You will see that only the rim of the 3rd container is used, and only as a spacer to increae rez capacity.
G
Guest
ohh ok thats what you meant by raising it up to gain water space...interesting, thanks! i think i got it all sorted out now! ;l)
Last edited:
xxthexonesxx
Member
Hey H3ad,
Is it critical that the tubs be lightproof? I found some dark brown clear tubs at wallyworld for cheap, but couldn't find black, or any non-translucent tubs.
P.S. Great job on the guide, and great technique! I can't wait to try this, being new to clones, I'm always up for easier and more effective cloning. thanks a ton.
G
Guest
No it is not critical, However Light will grow algae in the rez, and in the wicks, and around the edges of the pearlite. This will shorten the life of the disposable components of the system.
xxthexonesxx
Member
Grat3fulH3ad said:No it is not critical, However Light will grow algae in the rez, and in the wicks, and around the edges of the pearlite. This will shorten the life of the disposable components of the system.
ok, thanks for the info. I'll keep looking.
On a side note, I have two clones in soil right now, if I got this up and running, would it be safe to transfer them to this system, or will that stunt what little root growth they have developed (only been in soil for about 5 days)?
G
Guest
If all else fails... Go to wal-mart Get some balck fusion(sticks to plastics) spraypaint, and paint the outside of the rez only.
Wash all the dirt off well if you move them, so as not to transfer any pathogens.
Wash all the dirt off well if you move them, so as not to transfer any pathogens.
xxthexonesxx
Member
Sorry about all of the questions, but I have one more.
With this method is rooting hormone used as it would be in any other method?
Thanks again for all your time and assistance!
With this method is rooting hormone used as it would be in any other method?
Thanks again for all your time and assistance!
G
Guest
No, only pearlite, tap water, and cuttings.
TokenBlackGuy
Active member
---PLEASE READ SOIL GROWERS!!---
When i first started using this cloner, i would get roots but when i transplanted to soil the clones would die.. It was hard for my water roots to become soil roots... So i decided to use Grat3fulH3ad's wick cloner with Rapid Rooters.. the cloner keeps the RRs perfect moisture for about a week and roots the cutting in 7-14 days...I also use RRs and this cloner to germinate my seeds and keep them MAINTENANCE FREE for awhile..
Only problem i have now is that some of my clones turn yellow on the bottom before they root.. I only use (2) 7 watt flouro tubes for lighting cause i heard less light is more for clones...
TokenBlackGuy
Active member
mpro said:Where are your plants in relation to your light? I have used 1 43watt and 1 23 watt about 1' from plants, now I have them ~3' from the light as I don't need them to root quickly.
the 7 watt lights are 3 inches away from the top of the clones...

sysprog
Member
Nice one ickster! Great job and xxthexonesxx notice how he ickster used tape to light proof the clear tupperware containers! The little window to see the H2O level is a nice touch 
xxthexonesxx you can use rooting hormones and anything else you like, but you will probably have to discard your perlite after each use. I find perlite a bitchin pita to clean!
Grat3fulH3ad, (and all)
I had plenty of PVC tubing leftover so I just used that to hold the top container a little higher for extra water. Plus if you wait till it dries out a little, the top one floats in the bottom one.
I send everyone to Grat3fulH3ad's wick/perlite cloner!

Latest posts
-
 Australian Dead Head (mullumbimby madness x Neville's haze)?
- Latest: Maria Sanchez
-

-

-

Latest posts
-
Australian Dead Head (mullumbimby madness x Neville's haze)?
- Latest: Maria Sanchez
-
-
-
