What's new

New Warehouse Growrooms

JG's Ghost

Active member
Hey guys:

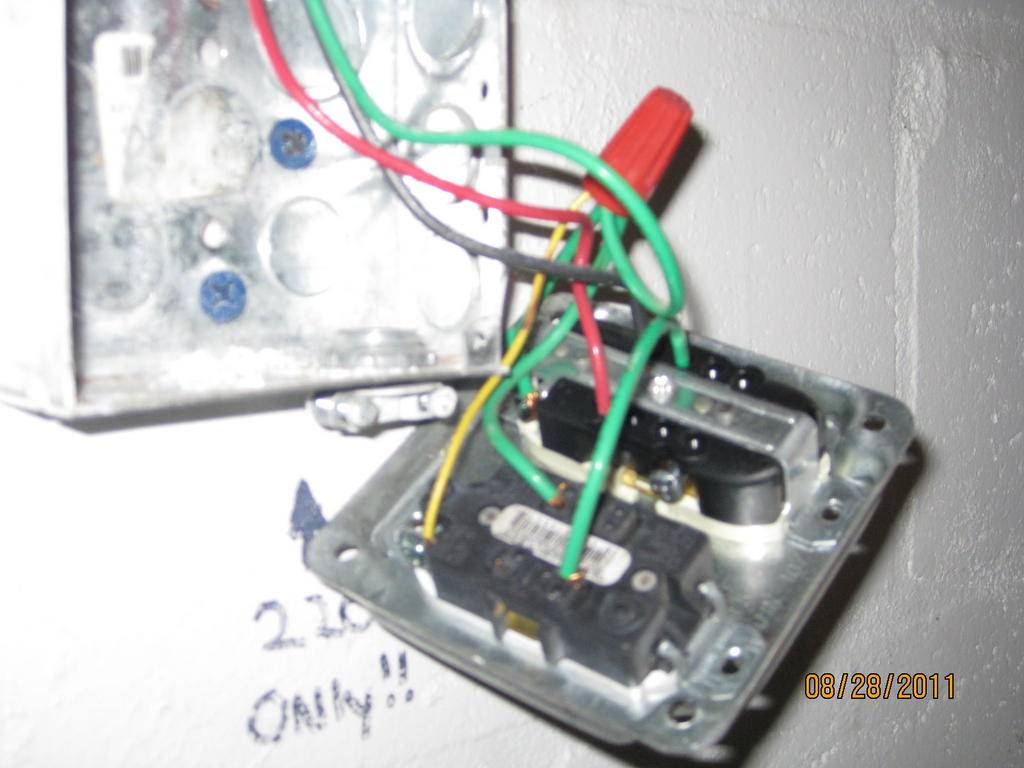
Remember this mess?...


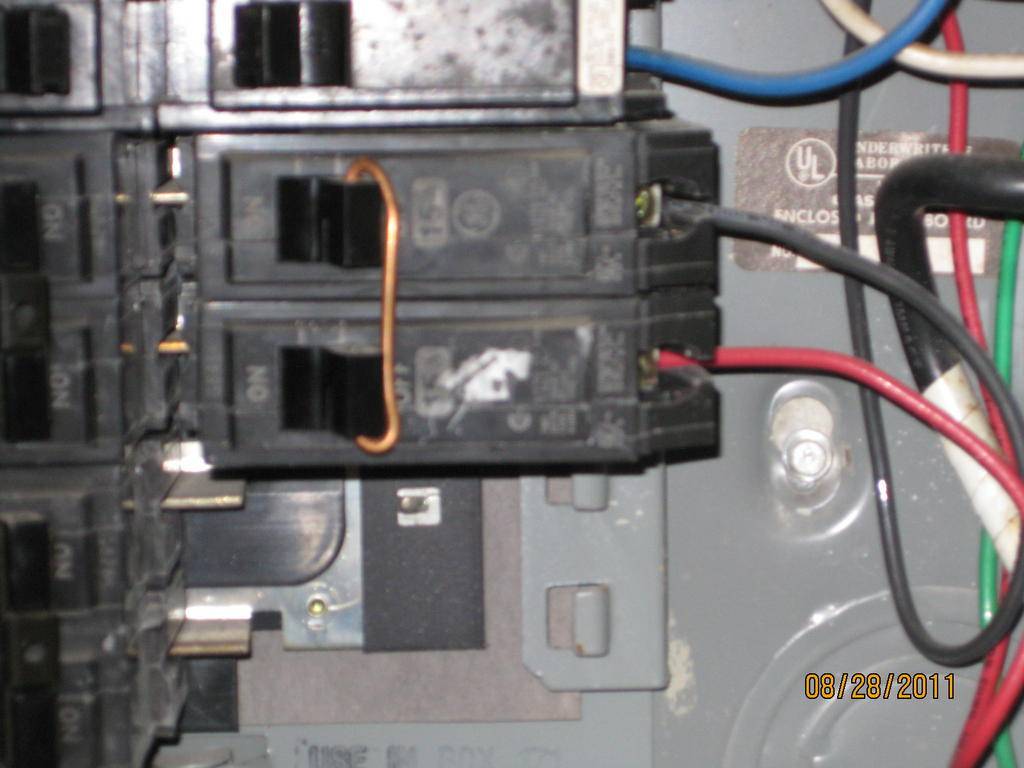
Well now it looks like this.......


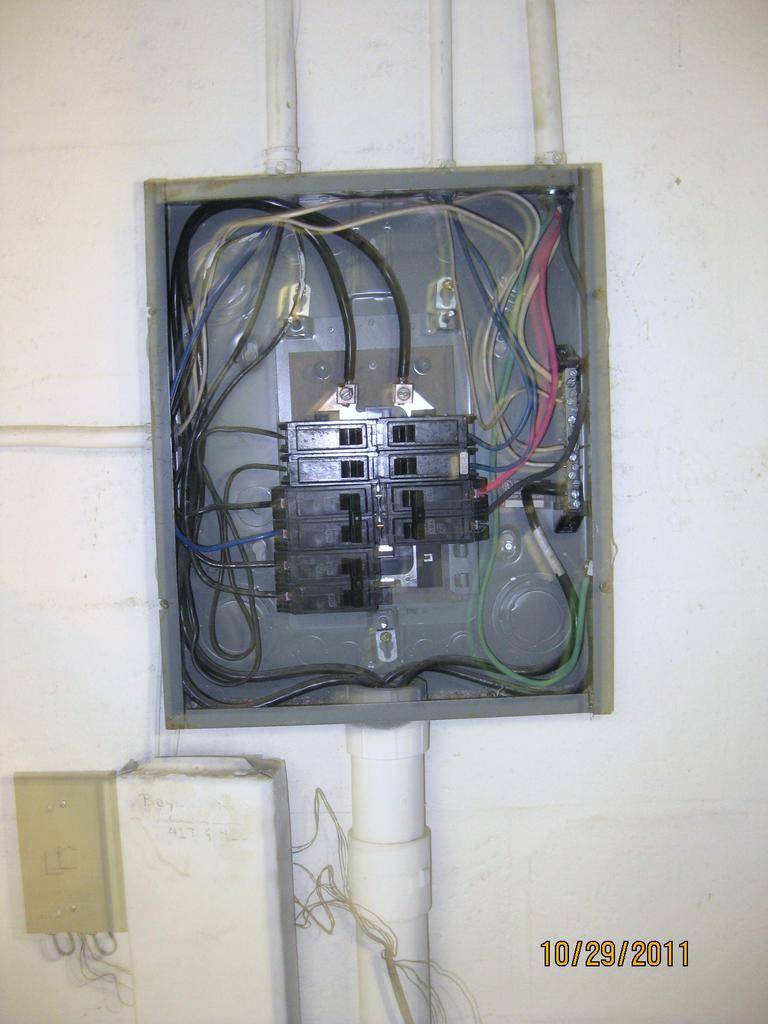
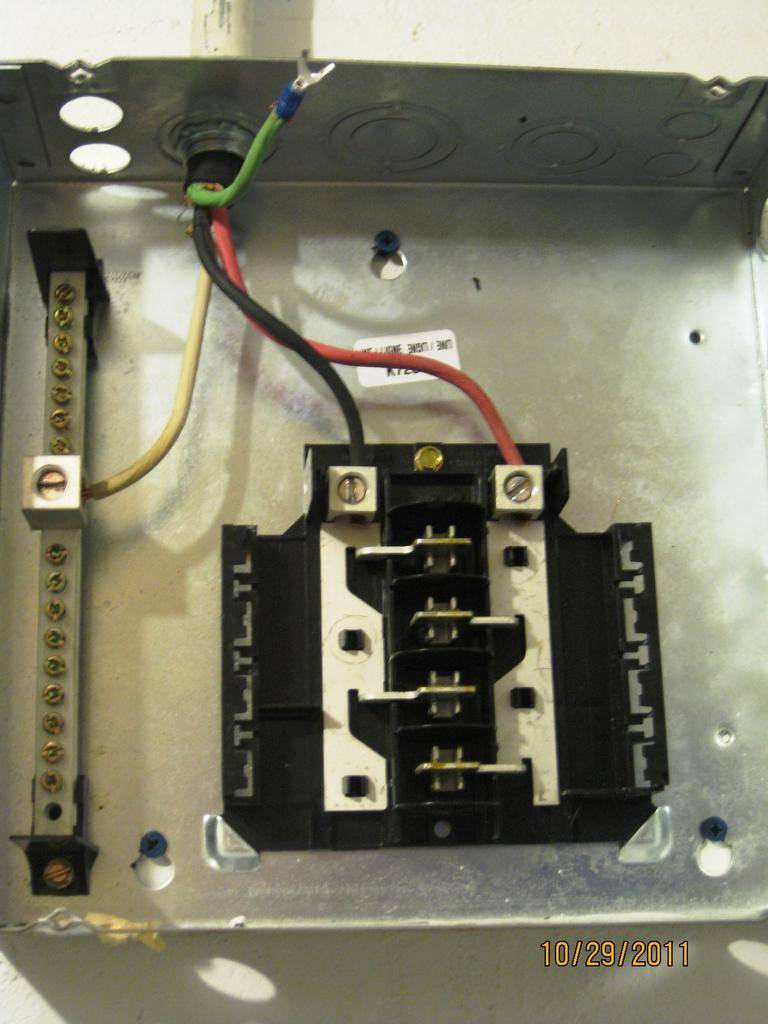
A little better. Don't you think?

As you can see in the sub panel the green ground is not attached because there is nowhere to attach it. I'm just gonna drill a small hole, and use a self tapping screw.

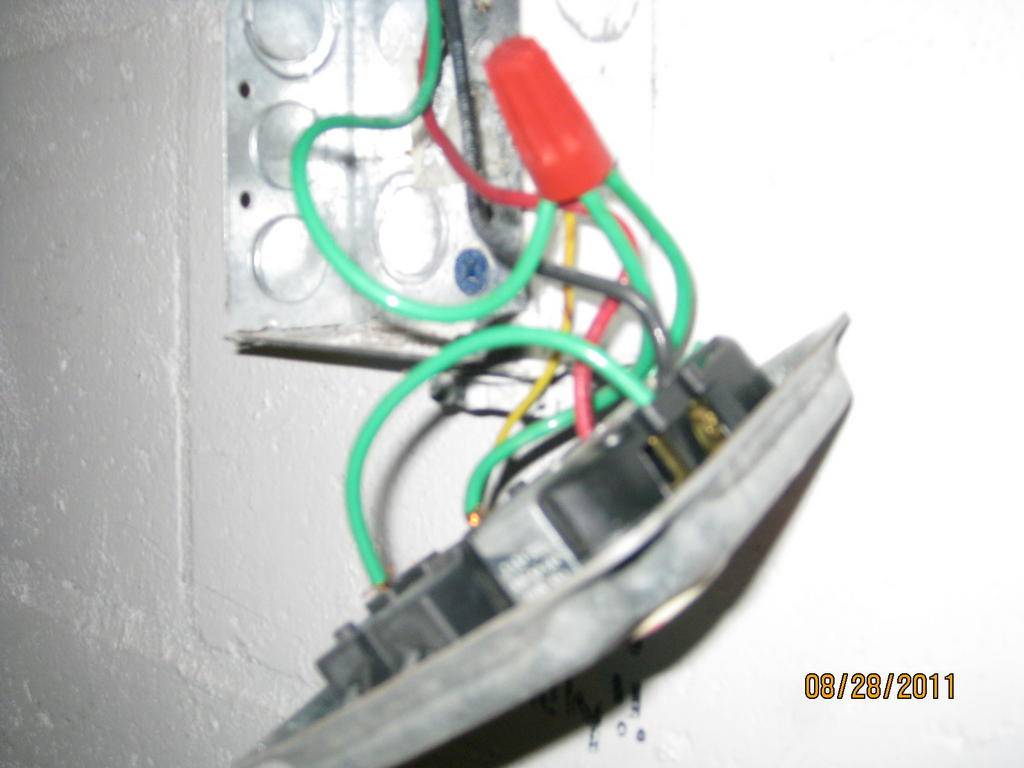
I was finally able to get to the cool tubes, and they have no power wire at all. So I will need to run my own, but the ballasts have these weird assed plugs.


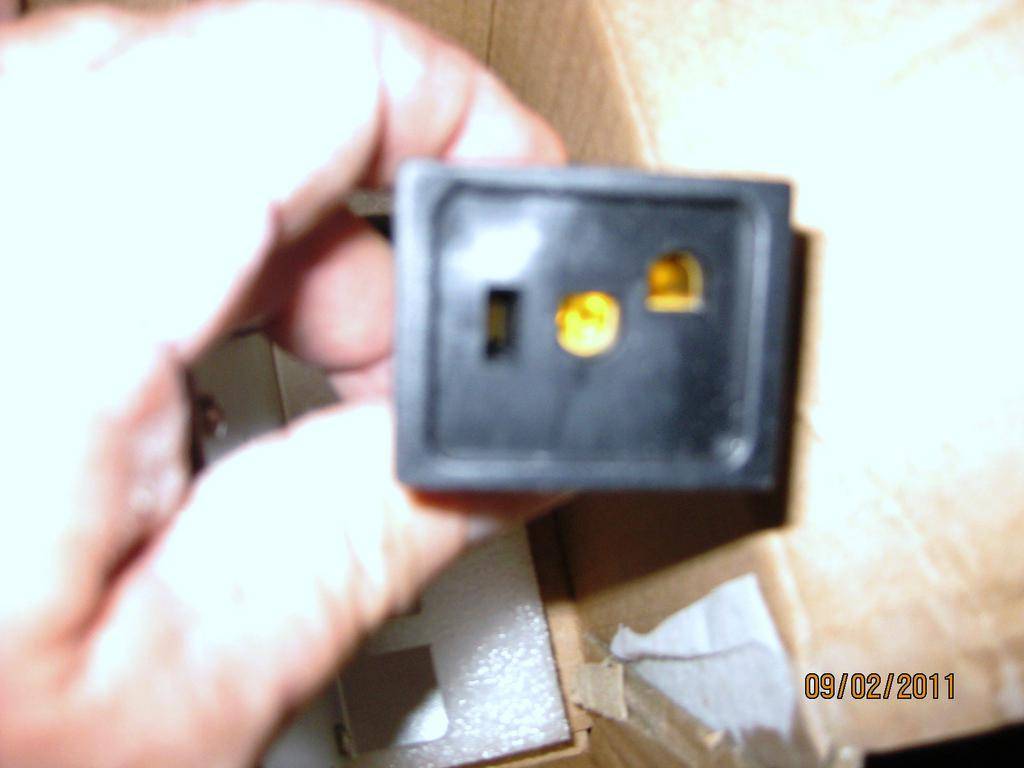
Anyone know where I can get the matching male side of this thing?


Thanks

JG
 

JG's Ghost

Active member
Thanks Wayne. Though not exactly what I was looking for, I wanted just the plug, but those look like they will work. They look awful short, and I'm gonna have to cut them, and extend the length.
 
@JG, make sure to grind off the paint around the self tapper that you put in for the ground, or better yet, get a ground bus bar, the Depot carries them. Again, grind the paint on install.

And what type of wire is feeding the sub? It looks like stranded? Pictures aren't always all telling for details tho lol!
 

JG's Ghost

Active member
Thanks Rom:

The entire inside of the sub panel is unpainted, and I used this panel with no green ground for two years. Just figured I'd do everything right this time.

Yeah the wire is 8/4 stranded. I had a hell of a time getting it through the tubing I pulled the old stuff out of, and then ran into an electrician at HD who told me if I was running through a raceway I could have used single wires instead of the ganged, and insulated black stuff. Duh.
Anyway its done. Now I gotta get those male plugs, finsh the rooms, and do the plumbing.
Still a lot to do, and the Hep C treatment kept me up all last night so today was a wasted day. Oh well. There is always tomorrow until there isn't.

JG
 

JG's Ghost

Active member
LilWayne:

I talked to Jason West at Plant Lighting Hydro. Not only was I able to get the male plug, but they had them with 25' cords attached. I ordered two at $9.90 each.

Rom:

I got the ground bus bar from HD as you suggested. Will be installing that, and finishing most of the electrical tomorrow. Plumbing, the last of the framing on Friday, and drywall this weekend. I'll even have some help over the weekend with the drywall.

JG
 

JG's Ghost

Active member
Check my wiring

Check my wiring

Hey guys:

Just finishing up the wiring of the sub panel, and from there to the timers. Just want to be sure I've got this all right

This is the Main panel with the new 60A breaker. Using 8/4 wire. Red, and Black to the breaker, white to the hot bar, and green to ground


Then to the sub panel. Black on left, Red on Right, White to the hot bar, and Green to the grounding bar I bought, and installed yesterday.


The Sub Panel with breakers installed, and switching to 14/3 wire
For the 20A 240 breaker Black, and white to the breaker, and green ground to the hot bar. The two 120 20A breakers. Black to breaker, white to hot bar, and green to ground bar.


Then to the timer from the 240 20A breaker.


This is where I get a little confused. Should the white go to 'A', or to 3 Line? Right now I have it going to 3 Line.


Will be wiring the second timer today, and installing the jacks, and the ballasts.

Wanna make sure I've got this all wired correctly before flipping the switch at the main panel.

So. What do you think guys?

JG
 

JG's Ghost

Active member
He guys.

OK. Ive gotten the electrical done, all of the drywall is up on the walls. I'll get some pics up tonight. Also got the A/C ducting installed, and am beginning to put the drywall up on the ceiling. Have to stop that until I get the plumbing for the water cooling laid in. That should not be that much work. Then I have the plumbing for the sink I'm installing in the control room. Once those are done I'll line the two veg/flower room with reflective film, mount the lights, and fans, set up a seedling/clone station in the control room, line the floors of the v/f rooms with pond liner, and set up the growing systems. Oh yeah. I also have to mud, and paint the drywall, but I can start some seeds while I'm doing that.

Jesus. I still have a lot to do.

JG
 

JG's Ghost

Active member
Hi Guys:

Here's some pics of the progress that's been made.


This is a look down the hallway. Looks a lot different with drywall on it.


Got all the ceiling trusses up,, and the A/C ducting that is not being used in the grow area. You can also see the wire for the lights has been installed, and the reinforcement for the fans as well.


These are all pics of the ballasts, and timers. The power comes up from directly below where the sub panel is.

Tomorrow I'll get pics of the water chiller setup, and the finishing touches of the veg/flower rooms before I put up the ceiling, and line the room with reflective film.

JG
 

bigsby

New member
Hey nice build. I did a basement unit @ 5'W x 10L x 6.5'H. One room with a 5'x3' scrog and a cab + worktop for veg/clone. Framing/drywall was a bitch but the rest was just some basic wiring and no plumbing. It's a hobby more than anything. But I did the build and so I know what a KILLER it is to do alone and yours was 3x work, if not more. Well done.

Here is something I wish I had come across during planning that may help others viewing this for ideas. I'm no sparky and panel installation is not something I like to tinker with unless I have too... check out these units: http://www.dxsoundco.com/#Lighting_Controllers. Now I don't know anyone running them so I can't vouch for quality but so reasonably priced considering the time and stress these units would save on a build like yours. Plus they have integrated timers. Sweet!

Anyway, I'm pulling up a seat for the show. Keep it coming!
 

JG's Ghost

Active member
My big problem now is the water chiller. Every fucking hole where the cooling coils goes into the chiller chamber leaks water. First it was the two inlet/outlet holes. I fixed those, and discovered these. I can't really do anything else until I get this fixed. I'm going to use gorilla glue for the threaded part going into the chamber. It's made of PVC. Then plumbers putty for the caps that screw onto them. If it leaks after that I'll just coat the whole area with two part epoxy. This is driving me nuts. I expected to have a crop half finished by now.

JG
 

bigsby

New member
Don't use epoxy - it will make any future repair total bullshit and you would have to start from scratch. If I could visualize the problem with a pic I may be able to offer some advice. I've done plenty of basic plumbing...
 

JG's Ghost

Active member
Too late for that. I've epoxied two of the four chiller tube holes, but now cannot get #3 to screw back into the chiller chamber. I'm going to take the whole thing to an A/C specialist, and have him replace the chamber, and all fittings. He is going to have to cut the chiller coil somewhere so it will need to be recharged as well.

Man this pisses me off. Don't buy one of those chillers from perfecttemp on Ebay.

JG
 
I thought they offered a 2 year warranty on those chillers.

Here's what you need to replace that coil with, although it is copper so it can't be used in direct contact with nutrient solution.

picture.php


they come in many sizes and can be cut in fairly easily. I would guess about an hour of time and a full recharge of R22.


Here's a picture of a 100. walmart AC with a surplus coil cut in I made last year.

picture.php
 

Attachments

  • coil.gif
    coil.gif
    6 KB · Views: 8

JG's Ghost

Active member
I'm not using it as a nute chiller, but as a light cooler in combination with two hydro innovations 6" Ice boxes. I made a diy chiller once before with a small window shake, and a 6" Icebox, and a 360 cfm fan in a 5' x 7' room, and it worked great.

I'll get this problem solved one way , or another

JG
 

JG's Ghost

Active member
As you guys know I'm using water with HI Iceboxes to cool the veg/flowering rooms.

Well. I had a situation that stumped me for over a week. I have a water chiller on the ground
floor that will chill the water with a pump in a 55 gal drum to move the water from there to the chiller, and back. Then I have another pump to distribute the cold water to the iceboxes. I set up a distribution line that goes from the drum through one icebox, and then to the other in the second room, then back to the drum. When I first fired it up I had a few small leaks, fixed them, but the water was not making it back to the drum.
I tried a bigger pump, and still no flow. There was no way this pump was not powerful enough to go up 6 feet, laterally for 40 feet, and back to the drum. So I started thinking clogged line, and sure enough after 4 hours of searching, and isolating each area I found a clog at the first 90 degree bend in the line. It was a perfectly round piece of PVC cement that had covered the end of the elbow. I cut that section out, replaced it with a new elbow, and now everything works great.

JG
 

JG's Ghost

Active member
I thought they offered a 2 year warranty on those chillers.

Here's what you need to replace that coil with, although it is copper so it can't be used in direct contact with nutrient solution.

picture.php


they come in many sizes and can be cut in fairly easily. I would guess about an hour of time and a full recharge of R22.


Here's a picture of a 100. walmart AC with a surplus coil cut in I made last year.

picture.php

Dudley. That looks interesting. Wish I had seen it a week ago. How much contact with the chiller lines does the water have. I looked inside the chamber of mine, and there were 16 tubes 8 high pressure, and 8 low. Anyway its back at perfecttemp being repaired. I tild them I needed at least 10 to 15 PSI at any of the weak spots so they are fixing it to handle the load. The originally has it set up for 5 psi, and used silicone sealant to seal the fittings.
No wonder it leaked.

JG
 

Latest posts

Latest posts

Top