
You are using an out of date browser. It may not display this or other websites correctly.
You should upgrade or use an alternative browser.
You should upgrade or use an alternative browser.
New Day New Grow
- Thread starter mpd
- Start date
Third and final coat was applied an hour ago and the faux dresser drawer panels are now drying.
Cabinet Faux Dresser Drawer Fronts - Final Polyurethane Finish Coat Applied.
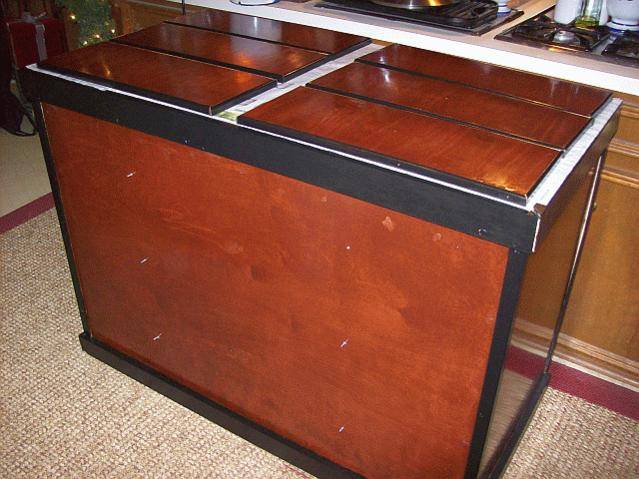
You can see the studs sticking out for attaching the dresser drawer fronts but these are too short and I will have to get longer ones at Casa DePot (figures) after the holiday people leave. Then I will move the cabinet back inside for photos and for the video to demonstrate the cabinet's working parts.
Cabinet Faux Dresser Drawer Fronts - Final Polyurethane Finish Coat Applied.
You can see the studs sticking out for attaching the dresser drawer fronts but these are too short and I will have to get longer ones at Casa DePot (figures) after the holiday people leave. Then I will move the cabinet back inside for photos and for the video to demonstrate the cabinet's working parts.
It gets nicer by the post!
Keep it a'coming
Keep it a'coming
The Debut of The Ultimate Stealth Growing Cabinet
The Debut of The Ultimate Stealth Growing Cabinet
MPD Presents The Presidio - The Complete Growing Environment for Discriminating Heads
Yes, you have waited for it. I have struggled to produce it. We have taken almost a month to put together this first prototype and now the payoff comes. The Presidio is complete and ready to show her stuff. Crisp, European trim in semi-gloss black that frames real rosewood VB grade exterior panels stained in a rich, reddish-brown chestnut with four hand-rubbed coats of polyurethane to bring up the glow of real quality are the hallmarks of this MPD creation.
Ladies and gentlemen, I have the honor to present The Presidio.
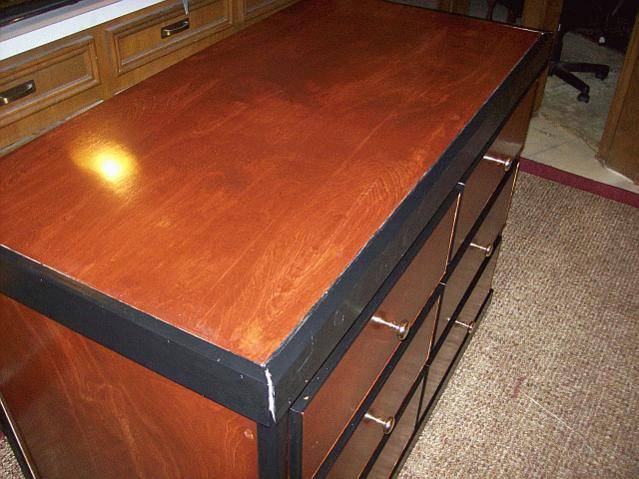
Cabinet Complete - Front/Right Perspective Photo.
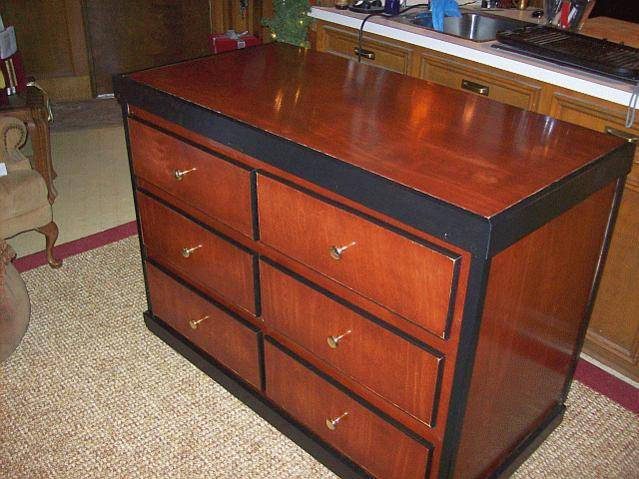
Cabinet Complete - Front Perspective Photo.
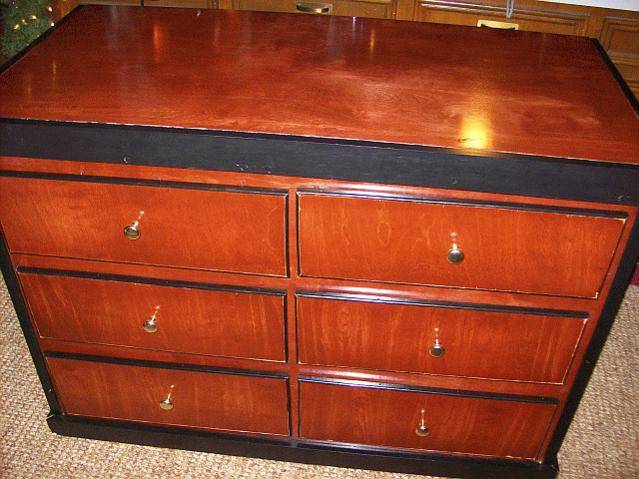
Cabinet Complete - Left/Front Perspective Photo.
This is the future for hobby gardeners; a self-contained gardening environment that is completely stealthy. The quality of the construction says this is a piece of furniture and for the price of a fine piece of furniture you get a complete vegging, cloning, moms cabinet plus a separate blooming chamber specifically designed to flower 24" plants using the bush-style or SCROG approach with adjustable shelves and over 70 watts per square foot of blooming wattage to provide the full canopy penetration and give you the bud masses you have been dreaming about in a smart looking package that the landlord will never suspect is a professional growing operation that features a perpetual garden that puts out new bud every 15 days.
This is it. This is where it all starts. The second generation cabinet will be completely self-contained and completely self-sufficient. There will be no noise because there will be no exhaust fans, just a quiet cabinet that sits there and looks like a high-boy dresser. This is my goal. This is what it is all about.
Everything else is just polite conversation.
I think that's enough blowing my own horn but you have to admit she looks pretty darn good...")
The Debut of The Ultimate Stealth Growing Cabinet
MPD Presents The Presidio - The Complete Growing Environment for Discriminating Heads
Yes, you have waited for it. I have struggled to produce it. We have taken almost a month to put together this first prototype and now the payoff comes. The Presidio is complete and ready to show her stuff. Crisp, European trim in semi-gloss black that frames real rosewood VB grade exterior panels stained in a rich, reddish-brown chestnut with four hand-rubbed coats of polyurethane to bring up the glow of real quality are the hallmarks of this MPD creation.
Ladies and gentlemen, I have the honor to present The Presidio.
Cabinet Complete - Front/Right Perspective Photo.
Cabinet Complete - Front Perspective Photo.
Cabinet Complete - Left/Front Perspective Photo.
This is the future for hobby gardeners; a self-contained gardening environment that is completely stealthy. The quality of the construction says this is a piece of furniture and for the price of a fine piece of furniture you get a complete vegging, cloning, moms cabinet plus a separate blooming chamber specifically designed to flower 24" plants using the bush-style or SCROG approach with adjustable shelves and over 70 watts per square foot of blooming wattage to provide the full canopy penetration and give you the bud masses you have been dreaming about in a smart looking package that the landlord will never suspect is a professional growing operation that features a perpetual garden that puts out new bud every 15 days.
This is it. This is where it all starts. The second generation cabinet will be completely self-contained and completely self-sufficient. There will be no noise because there will be no exhaust fans, just a quiet cabinet that sits there and looks like a high-boy dresser. This is my goal. This is what it is all about.
Everything else is just polite conversation.
I think that's enough blowing my own horn but you have to admit she looks pretty darn good...
Beautiful cabinet And yes she does look pretty darn good!!
Thanks for sharing and all the pictures!
And yes she does look pretty darn good!!Thanks for sharing and all the pictures!
Buick455gs
Member
Looks very nice. Can't wait to see it in action.
Thanks. I have the beast out in the garage and we are going through an unseasonable cold snap, so growth is being retarded all to hell. After I get rid of our last holiday guest today I am going to transfer them into the blooming chamber and turn up the sunshine so it is nice and warm in there all the time.
kushkid420
Member
mpd, this is quite possibly the most impressive growbox I have ever seen.
I wish you a good grow. I WILL be watching this thread!!
I wish you a good grow. I WILL be watching this thread!!
Thanks, but I'm facing my first big test. The temperatures are headed south tonight and it will be unseasonably cold. In fact, it might freeze and my precious little plants may be frozen out as the garage is not heated. Ugh... I will bring them in, but the next few days will be cold, so there will be nothing to sustain them other than the heat of the lamps and that will keep things warm, but...
The cold snap has set me back. No growth for the past few days as the plants are just struggling to survive. Last night it was supposed to get down to freezing so I took them out of the box and set them in the house. I also set up the bloom chamber and placed the digital thermometer in it to see how warm it would get. I set the timer to turn on the fan once an hour at night and checked it this morning. It didn't get colder than 68F and didn't get warmer than 85F so I put the plants in there turned on both batteries of lights and am hoping for the best. No pictures until I see if the seedlings have made it through the cold snap which is supposed to last at least another few days.
HighTech
Member
Hi MPD very impressive carpentry..
Just a point regarding your intake and exhaust holes, they need to be literally 10 times bigger, or more. Did you actually drill them out after this? if you did ignore what i'm saying.
The reason you needed to use so much over the top air sealing was probably this. The rule of thumb is you should have twice as much intake area as you do exhaust , at least 1 4" exhaust and 2 4" diameter intake for something like that.
The tighter your air pathways the higher pressure/noisier they will be.
HT
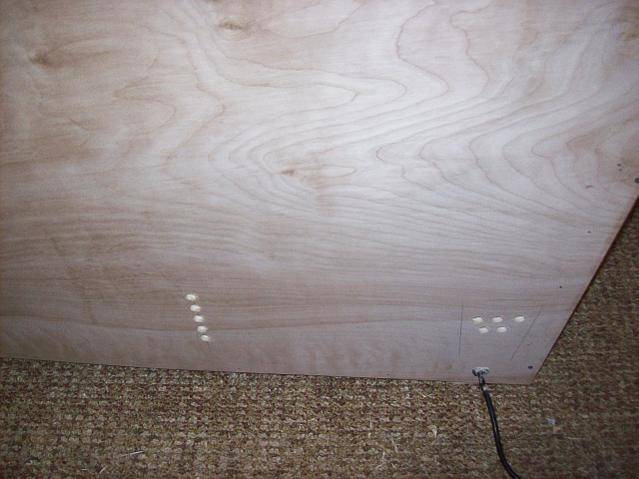
So now the interior construction is
The exhaust holes are the line on the left. The v-shape/wedge of holes on the right are for intake.
I ran the ventilation system and nothing was happening. This meant the air in the fan chamber was simply recirculating and would eventually overhead the fan and burn up the unit, while the lighting system sat and fried the box. You guessed it. Now we have the third time we have to take apart the plenum box (good thing we used wood screws). The throat of the beast has to be sealed to the plenum chamber. This will reduce the exhaust noise, but it will increase vibrations in the cabinet shell. I decided to go ahead and tape the throat into the plenum and come back to this problem after I pondered on the possible solutions for the production models.
Thanks Hi-Tech. No, the noise is the fan itself. The noise is down to a hum that is lower than that of the chest freezer it is next too, but you can still feel the vibration of the fan through the cabinet. I have knocked it down considerably, but if it is on and someone touches the cabinet they will know something is up unless there is a stereo, aquarium or other device that would serve to explain it. That's what I am working on now. It may be solved by trading out the huge vortex fan for a duct booster that runs all the time. At 170 cfm, the vortex is overkill, so the duct booster may be the resolution for the issue if it can pump through the air filter. The potential problem of these axial duct booster fans is that they are not designed to work against any amount of static pressure.
Hi-Tech has a point. If I can lower the pressure there may be a side benefit in it for reducing the sound waves even further and I would be a fool not to take honest advice that is honestly given.
You are right as well HH. Wisdom is ageless, but there is no fool like an old fool.
You are right as well HH. Wisdom is ageless, but there is no fool like an old fool.
Great thread mpd attention to detail i like it very much i was going to ask were all the air from your exhuast fan is well exhausted i couldn't see any holes or vents other than that i am very very impressed with this cab i just built one myself bout 1/4 the size of yours for my clones...
Nice job m8 keep up the great work..!!!
Peace,,,Benji...
Nice job m8 keep up the great work..!!!
Peace,,,Benji...
Yesterday we took down the holiday decorations and I looked in on our young charges only to find the cold snap had delivered a death blow to the plants. Everyone was dead. Oh well, these things are to be expected to happen, though not foretold, foreseen or exactly welcome.
I got a break; my wife showed some sympathy, gave me back my balls (out of the jar where she keeps them on the shelf in her closet) and said we should move the cabinet into the living room. We did and it looks magnificent in there. I must say I was pleasantly surprised that it looked so nice.
Isn't that special?
Today I am going to work on the punch list of outstanding issues. I have to cut out the ventilation system so that I eliminate the excessive system pressure. This will require me to also increase the ventilation between the two chambers of the box, so I have at least an hour's worth of work awaiting me to get that done. The reduction of system pressure will make sure that the tape and sealing of the edges is indeed a matter of permanence and the temperature control of the box will be much improved.
In the meantime, I have some seeds sitting in some wet paper towels germinating and I am hoping they will pop tomorrow.
There are some other little details I will have to deal with as well. As soon as everyone is awake the construction will begin.

