What's new

New Day New Grow

mpd

Lammen Gorthaur
Veteran
This morning I painted out the shelves and painted out the plenum only to find the plenum sits up 1/2" to high, so I have to take it back apart and cut it down. While I'm doing it I will add an additional baffle to the exhaust side to quite it down a little more.

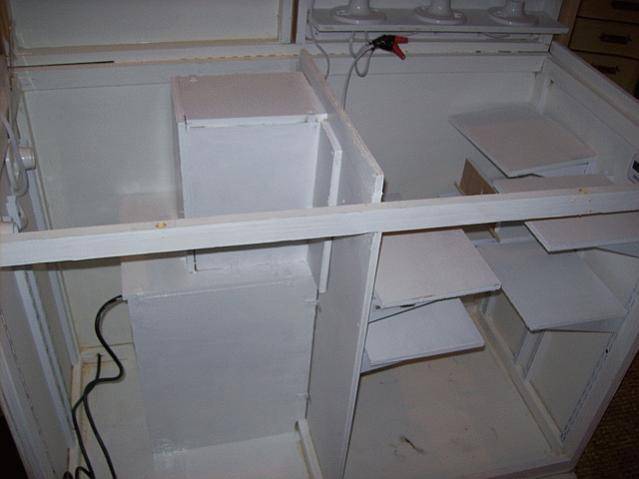
So this is how we add some white paint.
picture.php


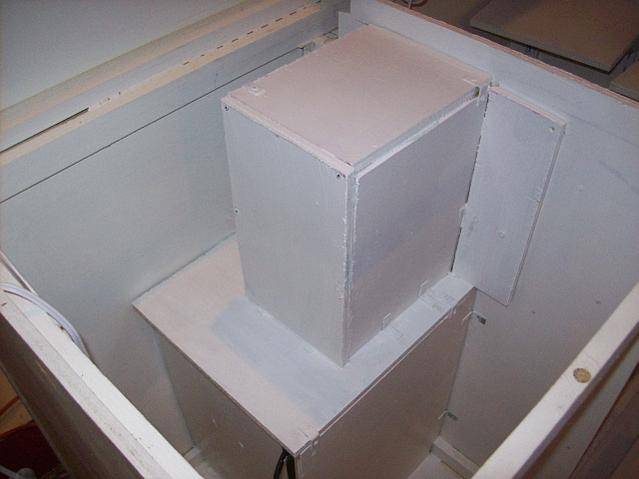
Now we have the plenum painted. Looks like a computer drive from hell...
picture.php


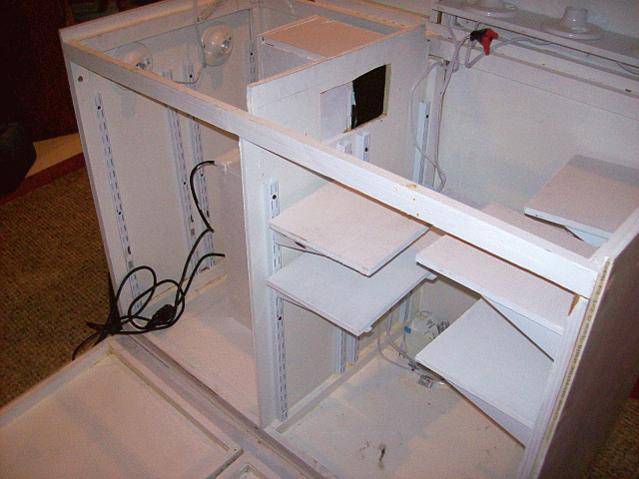
And not to forget the other side...
picture.php


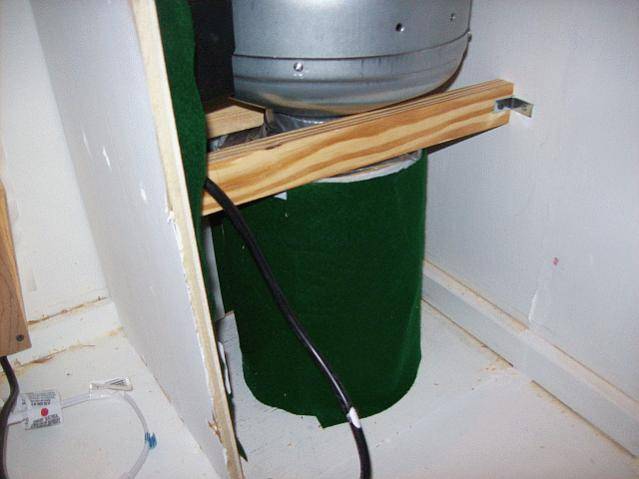
Now we add some silencing action. I decided to see how things would look if I added a wrap of felt around the filter instead of another baffle. We'll try it until I think about something better...
picture.php
 

mpd

Lammen Gorthaur
Veteran
Okay. Still waiting for that last coat of elastomeric paint to dry (it takes 4-ever!) I went ahead and put the sliders on the bottom of the cabinet (good thing, it ways a damn ton!) and mounted the last set of shelves, having painted them out this morning and they are still drying.

Tomorrow I will cut down the plenum box, add another baffle to the exhaust side (consisting of an additional felt wrapping around the filter) and then start sanding the exterior in preparation of receiving the stain!
 

mpd

Lammen Gorthaur
Veteran
They are unusually unusual, sleepy. I bought the set that included a table of three elephants that support a glass top my wife had cut for it and the four chairs. We also picked up a screen that is 11'-8" by 5'-2" that sits in my living room. Some day it will become a conference table. It's a monkeypod trunk that has four huge bengal tigers carved into it and is a real mellow dark caramel stain. Very dramatic piece. That was the most expensive piece - I paid $2,900 for it 15 years ago and my son wanted me to sell it to one of his friends last year for $7,500 but I thought that was a little light, so I'm holding out for a better offer. Generally, if you buy good quality pieces and focus on rare or exotic woods you can see 20% to 25% per annum appreciation in the value without much of a stretch. We also have a saddled horse, mini-elephant rocking toy for a child and another table. All told, I have about $8,000 in total outlays for the collection and it would probably go for around $25,000 if I took the time to list and sell it all properly (which I won't). My wife has a serious flair for interior decorating even though she has always refused to pursue it, so we have some real interesting furniture in the house and in the various storage units. When I retire I'll run an antique shop like every other MAWG who has no clue but nothing but time on their hands.
 

mpd

Lammen Gorthaur
Veteran
So now the interior construction is complete.

That must mean it is time to clean up the messes.

The first mess was to add ventilation (intake side) to the box...

The exhaust holes are the line on the left. The v-shape/wedge of holes on the right are for intake.
picture.php


I ran the ventilation system and nothing was happening. This meant the air in the fan chamber was simply recirculating and would eventually overhead the fan and burn up the unit, while the lighting system sat and fried the box. You guessed it. Now we have the third time we have to take apart the plenum box (good thing we used wood screws). The throat of the beast has to be sealed to the plenum chamber. This will reduce the exhaust noise, but it will increase vibrations in the cabinet shell. I decided to go ahead and tape the throat into the plenum and come back to this problem after I pondered on the possible solutions for the production models.

Here we go with the taping...
picture.php


And now the throat is taped to the plenum chamber.
picture.php


This means the exhaust port should have a noticeable stream of air coming out of it and the intake side of the plenum box should show stronger suction when my hand is placed over it (which it does).

Now we have working ventilation.

I've been hatching some Russian Roulette seeds and two have popped, while the others look to be a bust. We'll not worry too much, as I have over 100 still left from the seed run.

The issue is the the 6" by 6" Biotanic Cocogro Boss cubes are too big at 1-gallon, so I traded for 1/2-gallon bags (glad I bought some!) and now we have three popped seeds under the lights warming up for a great grow.
 

mpd

Lammen Gorthaur
Veteran
Today I went ahead and disassembled the ventilation unit for the third time (and let it be the last!). In the end, there was no way around this issue because the ventilation system had too much vibration and too much noise for my tastes. The goal is zero noise and zero vibration and I knew that I could better serve everyone's interests by continuing my experiments with this "bench test model" and see where things came out.

The issue is that I am using a 170 cfm Vortex fan and that is way over the top in terms of output, but also noise and vibration. There's a two-pronged approach to handling this issue: first, the fan will only run a couple of minutes every hour so that the temperatures stay (more or less) within a consistent range; and second, the system needs additional baffles placed in it.

In short terms, I owed it to the future production model to see what would happen if I put an additional wall baffle in on the exhaust side and then added bat insulation to the equation for both the exhaust and intake baffling systems.

The first step was to take apart the entire ventilation unit and then use the elastic strapping that holds the filter batting onto the air filter to snug up the felt cover surrounding its girth and add a felt bottom to dampen those vibrations! Here's what it looks like once that was done.
picture.php


Having done that I had to cut another wall baffle for the exhaust side and added some bat insulation to the equation using an electric stapling gun and 3/8" staples. Here's what the extra baffle looked like when I was done with it...
picture.php


Then I did a check fit to see how it would look in the set-up. Here's the picture of the extra wall.
picture.php


Then I assembled the unit. The tight spaces meant I couldn't get the walls screwed together in situ, so I screwed together the walls (with the correct spacing) outside the box and then slid the entire assembly into the box once I had everything tight and right. Here's what it looked like once I was done with that task.
picture.php


Now we come to some of my hard-won wisdom that I am sharing with you; pure stoner engineering experience that I am passing along to you at no charge - just part of the value of being part of the greatest online community formed since Algore invented the Internet.

When you have a high-output fan and you are setting it up with plenum chambers (the way I am) to reduce fan noise, there is the opportunity for air leaks between the exhaust side plenum and the surrounding box. This will drive you stark raving loony if you let it because your temperatures will be abnormally high in the box (the result of constantly recirculating your own exhaust air that is leaking out of the exhaust side plenum) and your grow will be a mess of shit in no time at all. So sealing it real important. With any fan that is putting out more than 100 cfm. you have to take a real interest in your leakproofing and you cannot rely upon duct tape alone. Duct taped seams will slowly fail and then the tape will vibrate and create a humming sound that will ruin your box's stealth profile. You have to use duct sealant. This is a hard putty that you can buy at Casa DePot that is black and sticky. When you go to handle it, coat your hands with vegetable oil and wipe the excess off on a napkin and then the material will not stick to your fingers (remember this and you will thank your lucky stars you are a member of IC when you do your box seals). Then you roll the material in your hands like a pencil to make it into a snake. Don't try to make excessively long lines - it doesn't work and you end up wasting material. I roll out a piece about as long as a No.2 pencil and then I press that in place. Do all the seams and this is what you get when you are done.
picture.php


Now you are ready to tape OVER the sealant and take your time getting it extra tight and this is what it looks like when you do it right (you may also note how I sealed the throat of the fan to the upper plenum chamber so there would be no excessive vibration or exhaust-side "bleed-thru" of exhausted air that can heat up and eventually burnout your fan).
picture.php


Having completed this task, I went and completed the rest of the assembly of the upper/intake-side plenum chamber. Once again, I used the bat insulation to line the walls and both sides of the top cover of the bottom/exhaust-side plenum intake manifold. This is what it all looked like when I was done - a ready rig waiting to be painted.
picture.php


And here we are all painted out. It will get two more coats tomorrow.
picture.php


Once the painting is complete, the shelving systems go back in. I have to shave down some shelving supports as the change in the ventilation system mandates shorter support rails. This will take me all of five minutes with the grinder tomorrow (I'm dying to throw some sparks just like the real metalworkers do) and then that will be it on the interior construction of the "bench test model" of The Presidio Stealth Growing Cabinet available exclusively from MPD Productions.

Next up, the completion of the exterior finish. Time to trick out this box and make it a piece you will be dying to shell out some cake to have in your house. :)

I don't know about you, but I'm holding out for whirled peas. ;)
 

mpd

Lammen Gorthaur
Veteran
This morning I started on the timers and things only to get sidetracked with trimming issues and the sanding in preparation for the staining. I did the first pass of 150-grit sanding only to realize I don't have any 225-grit paper in the house to finish with (ugh!). It still looks good. Filled those countersunk screw and nail holes.

Then it was time to go back over the trim to make it fit as tightly as possible while still allowing the top to move (flip open/up) and the front to move (flip down/out). That's when I realized the best solution for the front trim board was to attach it to the flip-down front instead of the top. The result was a much better fit than I previously had. There is still a slight gap at the miter joints, but I will cover that with a false trim plate/angle brace where the screw for the side that doesn't move is just a screw head glued into the socket of the angle.

Pictures would explain this a lot better and I will look into that shortly...
 

mpd

Lammen Gorthaur
Veteran
So today was about getting the exterior "in battery" as the saying goes.

I started with the dark stain. This is the Minwax #232 Red Chestnut I talked about earlier being applied to the rosewood veneered plywood.

First Coat Being Applied to Top.
picture.php


First Coat Almost Done for the Top.
picture.php


First Coat Done for the Top.
picture.php


First Coat Done for the Top & Front.
picture.php


Close-Up of Front & Top Finish - First Coat.
album.php
 

mpd

Lammen Gorthaur
Veteran
So today was a bit more leisurely as it is the weekend. I cranked up The Rolling Stones and got right to work though.

First, I had to sand down the ends of the cabinet in preparation of the staining process. Then I taped off the areas I didn't want the stain to bleed over into and stained both ends of the cabinet.

Here's the left end of the cabinet.
picture.php


One of our dogs decided to jump in and help. He's a golden retriever who steals anything laying around and just walks around holding it in his mouth as if it were a duck blasted out of the sky; except he doesn't let go of it like his working cousins would.

Here he is keeping watch over me after having stolen my staining rag (got that back after chasing his ass throughout the house) and me completing the right side of the cabinet.

Right End Cabinet Staining Photo.
picture.php
 

mpd

Lammen Gorthaur
Veteran
Last night and today I began cutting pieces for the SCROG units. Each horizontal SCROG screen unit would be adjusted to the correct height (6" to 8" depending upon the height of the plant being put into the bloom chamber and the expected stretch multiplier being taken into consideration). The SCROG units themselves would be adjusted to the exact height required by virtue of the adjustable shelves in the bloom chamber.

Bloom Chamber Shelving System.
picture.php


So, I first cut out 10" by 10" sections of the 1/2" hardware cloth I bought at Casa DePot for $6.95. Then used the snips to de-burr the ends on each side.

Prototypical SCROG Screen Cut (Hortizontal SCROG System).
picture.php


Having gotten the screens cut, I had to cut some 1/2" by 1/2" moulding strips from scrap 1/2" plywood. I don't have the means to set up a bench saw, so I had to use a jigsaw to cut all these units and it was a PITA, but in the end it was all done.

I drilled out each of the resulting pieces as these crack apart fairly easily and that meant I had to pre-drill all the holes and that was a bit of work, but it was also knocked out in the end and I start assembling the individual screens.

SCROG Screens Being Assembled.
picture.php


Complete SCROG Screen
picture.php


These are fairly sturdy and will work perfectly for cultivating a certain kind of herb we all enjoy.

Next time on Building a Smoke Screen...

Putting on the Ritz - urethane finish being applied to the completed cabinet.
 

mpd

Lammen Gorthaur
Veteran
This is Post #1,000 for me!!!!
:window:
+++++++++++++++++++++++++++++++++++++++++++++++++
This morning I got up and put a third coat of stain on the entire cabinet and it is now drying as I write this up. I want a deep, rich color so that when I put the drawers on it the look is very dramatic with the trim on the drawers, corners, top and bottom providing a nice offset to the red chestnut that is coming through in the stain.

Here's the frontal shot and it is ready for the urethane (when it dries) and then the faux dresser drawer fronts.

Cabinet Frontal View Photo - Third Stain Coat.
picture.php


Here's the view from the top. I wanted it to be extra deep to hide the wood putty that the lying-ass mo-fo at Home Depot said would blend right in. May the wood gods shit in his sander.

Cabinet Top View Photo - Third Stain Coat.
picture.php


Now we have our first seedlet up and with a nice tap root system going and in a drink cup up to its little neck in moist coco coir courtesy of Botanicare.

Next up will be the urethane finishing of the cabinet (not the trim). I want the cabinet completely finished before I start staining and applying urethane to the faux dresser drawer fronts; box, drawers and then the grow. That seems to be the way of it. :tree:
 

mpd

Lammen Gorthaur
Veteran
I hope it meets your expectations. I'm continuing the mission. I think things will get a bit more exciting once we get to the cabinet porn (finished cabinets) and plant porn (plants dripping with resin); at least I'll be excited.
 

mpd

Lammen Gorthaur
Veteran
I started out this morning with opening the cabinet up and ripping out all that standard (bargain price) duct tape and replaced it with Gorilla Tape. Once again, I have experienced the glorious lesson that a penny saved is shown to be a pound foolish. Quality, quality, quality... That should be every builder's mantra. Don't cut corners, don't be tempted by cheap alternatives, pay the price and be done with it. I'm a commercial real estate development finance consultant and my fees are high. Clients ask why they should pay more and I tell them of the special danger their shareholders' are placed in if the alternative is taken that proves to be insufficient to the task, while the more expensive measure comes with the assurance of the highest and best use efforts and reporting being provided. Yes, it is overkill but do they dare risk their fortunes on anything less than slaying the beast once and for all?

In the poem Beowulf, the poet says, "wealth is shaped with the sword." I agree. If you don't completely slay the beast then you risk its return (or the return of irate relatives in the case of King Beowulf).

Tough lesson, but now we have Gorilla Tape in place and there will be no worries about global warming inside my cabinets.

The next stage was to start finishing that stained wood with Minwax Polyurethane. Yesterday I put a third and final coat of Minwax #232 Red Chestnut stain on the exterior body panels of the cabinet and it is indeed a rich, reddish-brown look that promises to be very dramatic with the contrasting trim. Now I am going to put three coats of the polyurethane finish on the cabinet. I'll sand the box (gently) with a 320 grit sanding sponge between the coats to smooth it out and then I will evaluate the cabinet (and you can give your opinions on this too) tomorrow for perhaps three (3) more coats. In the end, a quality look is what counts for production, so if that means we have to use 3, 6 or even 9 coats to get that high-end look, then so be it.

Finish Coat of Polyurethane #1 - Top View Perspective.
picture.php


Finish Coat of Polyurethane #1 - Front View Perspective.
picture.php


I like the way it looks already, so I am hopeful we can get the box done today, but I am in no hurry to make another quality error. In the meantime, I have a picture of a Russian Roulette seedling to share with you.

Russian Roulette Seedling in Bar Cup.
picture.php


This is a growing idea... :smokeit:
 
Last edited:

mpd

Lammen Gorthaur
Veteran
Okay, so I sanded down the first coat using a 320 grit sanding sponge I picked up at Wal-mart. The coat took a little more than four hours to dry and I had client phone calls so that is the way the buggy bounces.

I just finished the second coat of polyurethane and the look is starting to be quite glossy even though the pictures are a bit suspect.

Polyurethane Finish Coat #2 - Front View.
picture.php


Polyurethane Finish Coat #2 - Top View.
picture.php
 

mpd

Lammen Gorthaur
Veteran
Well, I didn't get the third coat on the cabinet yesterday; my wife came home and the fumes were killing her (she has emphysema) so I had to stop work. Got up this morning and started working. Sanded down the second coat real nicely and then wiped down the box with a rag dampened with mineral spirits - this is in strict comformance with the directions on the can. Once that was done I then applied the third coat that is called for on the directions.

Polyurethane Finish Coat #3 - Frontal Perspective View.
picture.php


This should be dry by this afternoon and then I can evaluate whether another round of coats would be worthwhile.

On the growing front, another seed cracked (finally) and was placed in a drink cup and is now ensconced in the cabinet under a 26 watt CFL of its very own.
 
Top