
-
Happy Birthday ICMag! Been 20 years since Gypsy Nirvana created the forum! We are celebrating with a 4/20 Giveaway and by launching a new Patreon tier called "420club". You can read more here.
-
Important notice: ICMag's T.O.U. has been updated. Please review it here. For your convenience, it is also available in the main forum menu, under 'Quick Links"!
You are using an out of date browser. It may not display this or other websites correctly.
You should upgrade or use an alternative browser.
You should upgrade or use an alternative browser.
My Cabinet (w/DIY's and lots of love)
- Thread starter hoosierdaddy
- Start date
Thanks mucho, Murph!
Although some of my sketches are as-builts, that came along after some of my own trial and error.
Btw...
The AC unit I used is from Lowes.
http://www.lowes.com/lowes/lkn?action=productDetail&productId=23647-54629-AW05NCM8&lpage=none
The description states the unit has no fan only mode, but it does indeed have that feature.
There is no problem with light leaks of any sort with this model, as there are two completely separate plastic compartments for the compressing/heat removal side and the cooling/air recirc side.
This unit would be ideal for many different DIY configurations for closets and boxes.
Less than $100.
I second the mad drafting skills.
Is there no condensation going on with the AC? I'd have thought you'd need to drain.
Is there no condensation going on with the AC? I'd have thought you'd need to drain.
I also wondered about the condensation issue, and I was completely ready to run a run-off line from the unit to outside the cab. However, there is not one word on condensation in any of the literature. Nor is there a drain hole.
I ran the unit for several days during very high RH and there is for sure water gathering at the bottom of the case pan, but it seems to only get so high. I have to assume that the amount of air running over top of this water is causing enough evaporation and blowing it back out the exhaust to keep the level down.
I am not going to run a drain of any sort at this time. I am going to monitor the water collection issue for awhile and see how it goes. I did take out a couple of the vent rungs on the side so I can easily get to the low point of water collection.
The water that was in there since inception was sucked up with 4 regular paper towels. I wrung two times to get all the water. Volume wise maybe an ounce or two.
With the side opened up a bit, I can service the thing on a regular basis. If it creates lots of water (doesn't look like it's going to) I will drill in a drain fitting and run a line outside the cab.
I wanted to add a little bit on my DIY Stanley blower fan.
Most are familiar with the Stanley blower from Walmart. My prep of this fan is similar to other DIY's you see for it, but I wanted to touch on a couple of issues.
First, my prep only takes three additional items.
A 6" starter collar
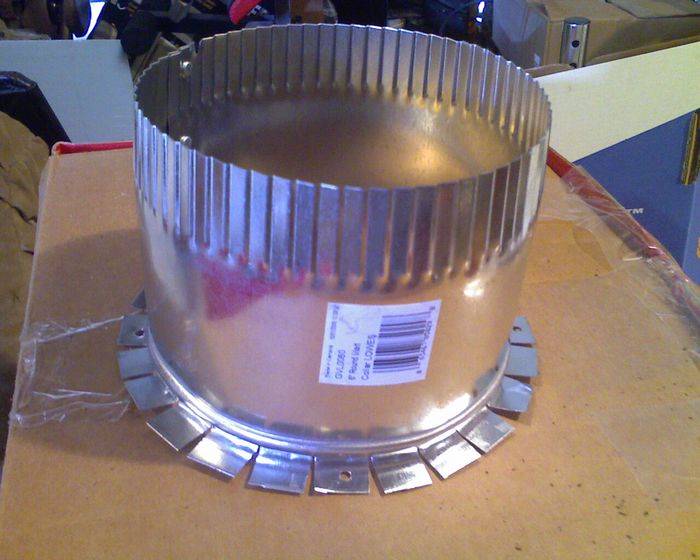
Some silicone caulk and small wood screws.

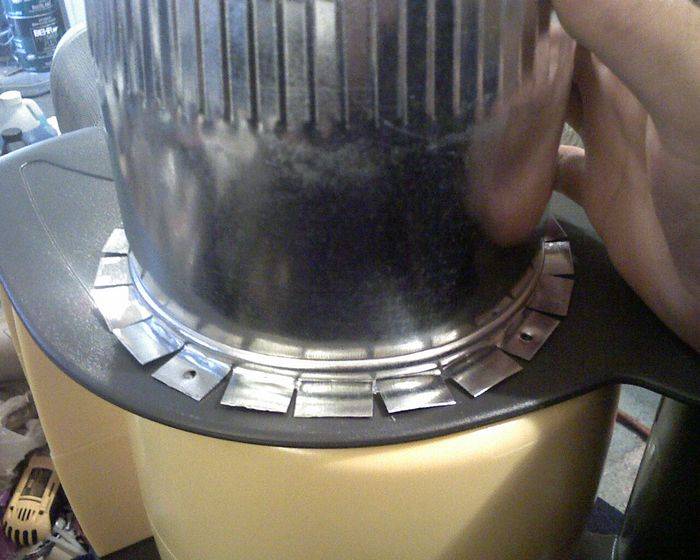
I bend all the tabs of the starter collar up, and drill 4 small holes in 4 of the tabs equally spaced.
I then mark the holes with a very small pilot drill, then remove the collar and drill the holes out.
I then run a bead of caulk and mount the collar right to the plastic of the fan.
Be sure you have the fan exit pointing the direction you will want it because the wood screws may penetrate through to the moveable housing. I did this on purpose to get a deeper grip with the screws.
Now, the important part that I wanted to touch on was this...
I did some measuring of the grill on the intake side. The grill takes up a full 7.5 sq inches of space. This is some serious blockage, especially when the total hole without the grill is only 19.6 sq inches.
These grills must come out!
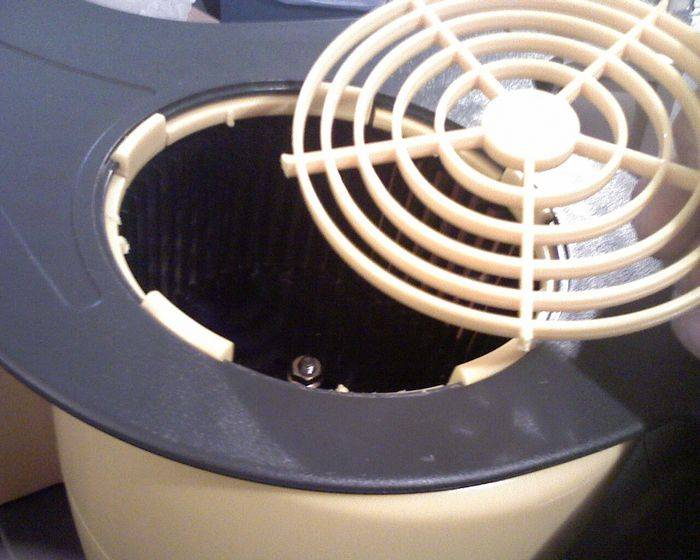
When you have the grill snipped out and the collar caulked and mounted, run a bead of caulk on the inside of the fan/collar area to make sure of that seal.
Then, run caulk all around where the fan previously rotated. You don't need it to rotate, and there is lots of air loss in that area.
Do these things and your Stanley blower will kick ass!

Most are familiar with the Stanley blower from Walmart. My prep of this fan is similar to other DIY's you see for it, but I wanted to touch on a couple of issues.
First, my prep only takes three additional items.
A 6" starter collar
Some silicone caulk and small wood screws.
I bend all the tabs of the starter collar up, and drill 4 small holes in 4 of the tabs equally spaced.
I then mark the holes with a very small pilot drill, then remove the collar and drill the holes out.
I then run a bead of caulk and mount the collar right to the plastic of the fan.
Be sure you have the fan exit pointing the direction you will want it because the wood screws may penetrate through to the moveable housing. I did this on purpose to get a deeper grip with the screws.
Now, the important part that I wanted to touch on was this...
I did some measuring of the grill on the intake side. The grill takes up a full 7.5 sq inches of space. This is some serious blockage, especially when the total hole without the grill is only 19.6 sq inches.
These grills must come out!
When you have the grill snipped out and the collar caulked and mounted, run a bead of caulk on the inside of the fan/collar area to make sure of that seal.
Then, run caulk all around where the fan previously rotated. You don't need it to rotate, and there is lots of air loss in that area.
Do these things and your Stanley blower will kick ass!
NorthWestMed
New member
I AM RUNNING THE SAME SETUP IN BASIC PRINCIPAL IT WORKS EXCELLENT FOR ME. AWSOME DETAIL IN THE DESCRIPTION MY FRIEND.
PEACE,LOVE,GOOD HEALTH AND RESPECT
PEACE,LOVE,GOOD HEALTH AND RESPECT

Thanks, NorthWestMed, ShroomDr, ZoSo for stopping in and the kind words!
sativa_cyborg13
Member
diy cabinet
diy cabinet
that is a well planned and constructed cabinet. the stadium scrog is a great touch. seeing this has made me question and want to rethink the cabinet which i am getting ready to build. good luck and i am sure you will yield great results.
diy cabinet
that is a well planned and constructed cabinet. the stadium scrog is a great touch. seeing this has made me question and want to rethink the cabinet which i am getting ready to build. good luck and i am sure you will yield great results.
Thanks mucho, sativa_cyborg13.
Your kind words are appreciated.
Your kind words are appreciated.
wishbone420
Member
cant wait to see huge buds. peace
Wishbone!
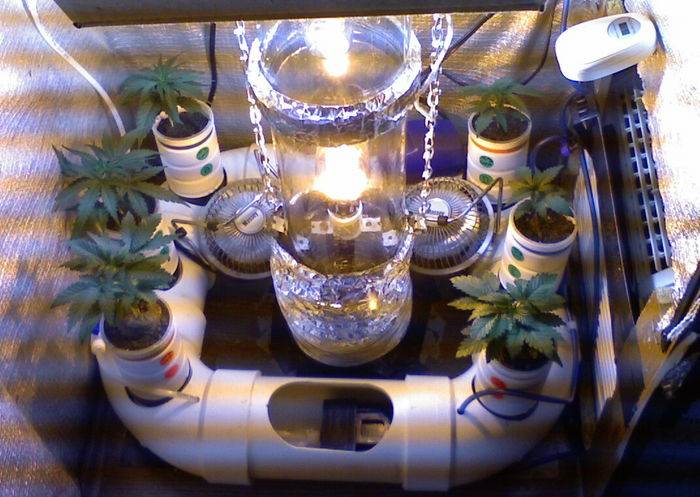
Here is what is running in there now...
(@ 5wks flower)

MOC Carnival (A)

MOC Carnival (B)

Mandala #1

Carnival bud

StS Thunk

Here is what is running in there now...
(@ 5wks flower)
MOC Carnival (A)
MOC Carnival (B)
Mandala #1
Carnival bud
StS Thunk
guanito
Active member
Hi Hoosierdaddy,
Looks real nice! that Sts thunk looks like a pretty little sativa!
Nice work all around but I have a particular interest in your 235cfm in the 6x6x6 cardboard box. To wit - you run it full strength, with no speed control, a minimum of batting ( I assume it's mass loaded vinyl?), and you say it's almost undetectable? Any more infor , brand, model please? I have to use speed control on the lowest setting even with tons of mass loaded vinyl and even sheet lead wrapped around it. I have a problem w/rushing air sound more than the sound of the fan itself though. Bestregards
Hey, quanito
The inline fan is a Suncourt duct booster. Home DePot about $28
With one of them running, I can barely hear it with my cab doors shut. I now have two of them connected together (these are basically pieces of duct with fans in them) and they are pulling air through my cool tube only.
With the addition of the AC unit, and having isolated the air for the tubes from the flower chamber, I have now added two additional Stanley blowers. They are situated in the attic and I run 6" duct down through the roof of the cab. One is connected directly to my AC unit exhaust, the other to my scrubber. So basically I have one pulling air through the veg and another pulling through the flower chamber.
I can tell you that I now have plenty of air movement. In fact, when I go to open the garage door there is resistance on the door, so I know I have a very strong positive (or is that negative?) passive flow going on. I am actually surprised at just how strong those fans do pull on the door. *EDIT: Actually, this let me know that my garage is sealed up fairly well, so I now keep the auto door cracked ever so slightly so I don't deplete Co2.
With the summer months here, I am more worried about cab environment than I am sound proofing. And I have my cab on the other side of the wall from where my central AC unit is, and it is easy to explain the fan noise.
But, the Suncourt inlines are a good way to have low sound air moving, although they are not going to handle a big load. You will only see ~235-250cfm if there are no restrictions in the duct. (lots of turns etc..)
Last edited:
The evolution of Hoosierdaddy's cab continues.....
The Groove Toob!
can you dig it?
Check out the progression of the Groove Toob w/thread in my sig line.
The Groove Toob!
can you dig it?
Check out the progression of the Groove Toob w/thread in my sig line.

