
You are using an out of date browser. It may not display this or other websites correctly.
You should upgrade or use an alternative browser.
You should upgrade or use an alternative browser.
MrAwder's Basement Grow 3.0
- Thread starter MrAwder
- Start date
MrAwder
Member
Bubba Kush S1 #3 - forgot to snap pic before I started cleaning them up
Again that is the entire plant. Just 2 branches.
A crappy closeup

Buds are frosty, smell like nothing I have grown yet, great color with hints of purple. Looks like the seeds are fairly stable but I will probably continue to search for a better pheno in the future (20 more seeds to pop). I'm keeping the #3 for now to flower it again. I usually get better results the second time I grow any strain, and I'm sure they will benefit from a not being fed a super high EC for the first month of their lives. Very leafy but again this may be due to my hot feeds as much as the strain itself. Overall I'm pleasantly surprised. Looks like maybe a 1-1.5oz from each of these which is surprising considering how slowly they grew, how little they stretched and how abused they were for a while.
Again that is the entire plant. Just 2 branches.
A crappy closeup
Buds are frosty, smell like nothing I have grown yet, great color with hints of purple. Looks like the seeds are fairly stable but I will probably continue to search for a better pheno in the future (20 more seeds to pop). I'm keeping the #3 for now to flower it again. I usually get better results the second time I grow any strain, and I'm sure they will benefit from a not being fed a super high EC for the first month of their lives. Very leafy but again this may be due to my hot feeds as much as the strain itself. Overall I'm pleasantly surprised. Looks like maybe a 1-1.5oz from each of these which is surprising considering how slowly they grew, how little they stretched and how abused they were for a while.
MrAwder
Member
Falling behind on updates. Going to be brief and dump in some pics from the 14th I had.
Yields on the Bubba were about as expected. 2oz on the nose off one and about 40 grams from the other.
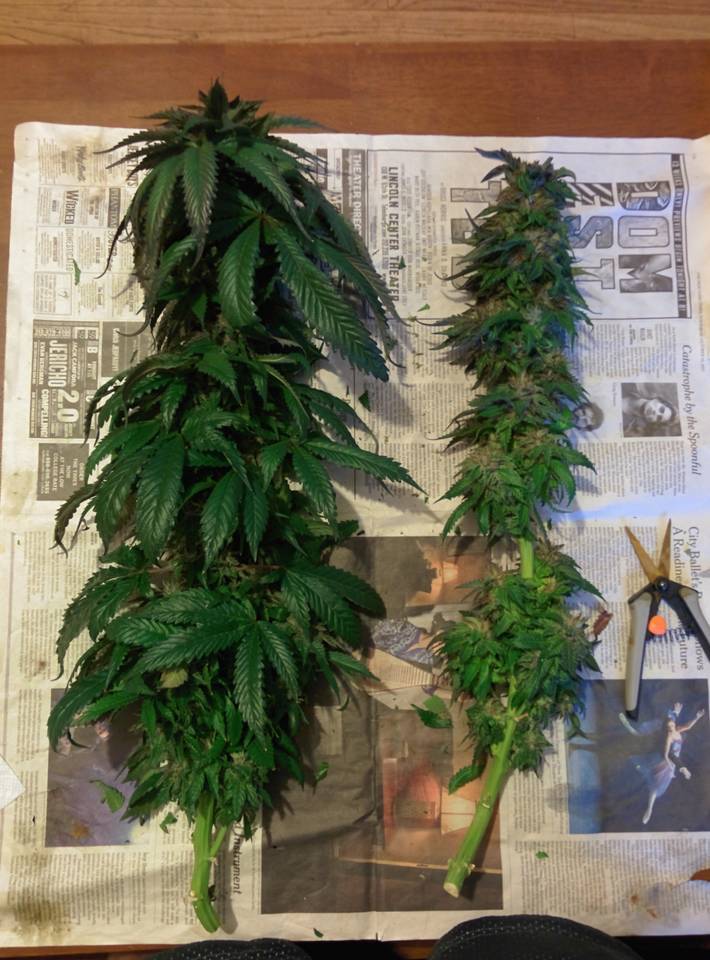
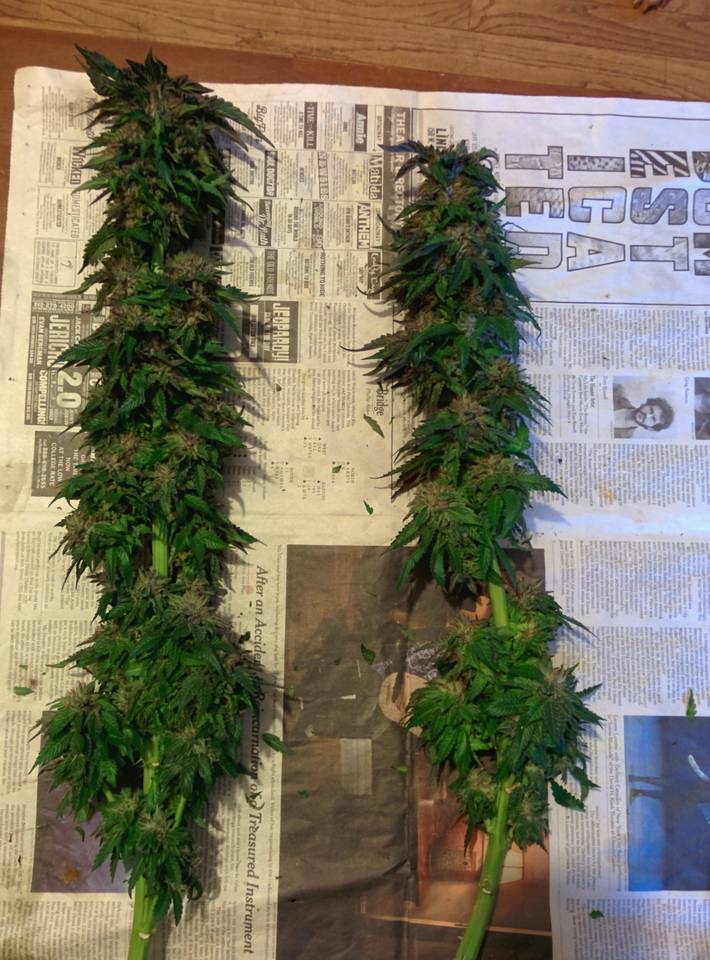
Chopped SLH and DSD last week. Pics before harvest and then with all branches laid out. Trying to show how easy my trimming is with all the training and secondary branch removal. Remember this were the last plants that suffered from my nute screw up. On top of that my "air column" fan on this side of the chamber died. Did not notice until harvest but that explains the discoloration and crispiness of the remaining fan leaves.
SLH


DSD

Yields on the Bubba were about as expected. 2oz on the nose off one and about 40 grams from the other.
Chopped SLH and DSD last week. Pics before harvest and then with all branches laid out. Trying to show how easy my trimming is with all the training and secondary branch removal. Remember this were the last plants that suffered from my nute screw up. On top of that my "air column" fan on this side of the chamber died. Did not notice until harvest but that explains the discoloration and crispiness of the remaining fan leaves.
SLH
DSD
MrAwder
Member
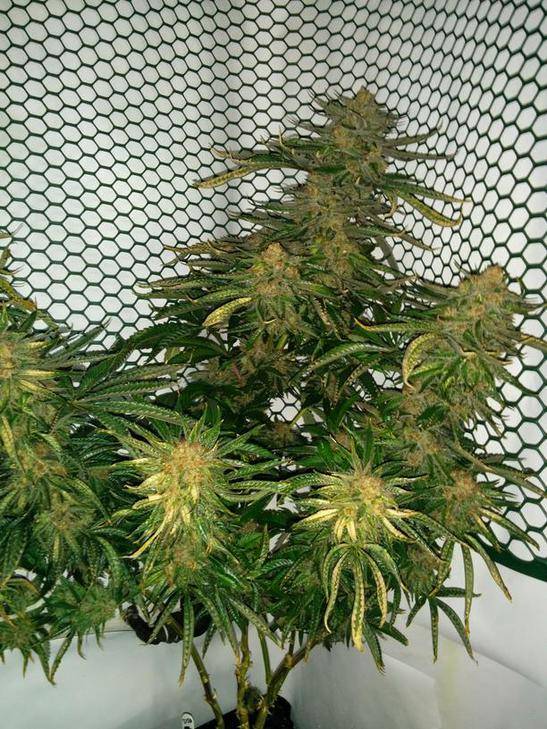
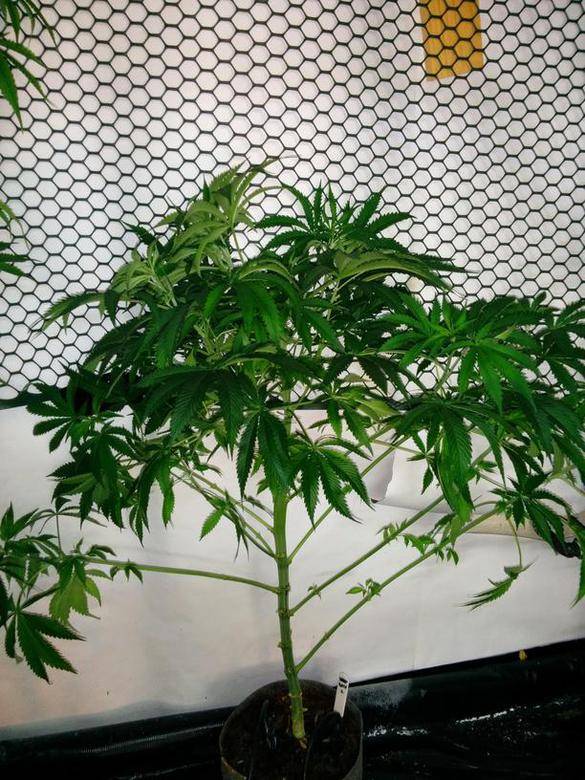
DSD and Midas from ~8 days ago

BATF1
BATF2

BATF2 confirmed female. BATF1 looks promising and should know any day now. Along with these went in 1 Candy & 2 Bubba Kush. Plant numbers and sizes are back to where they need to be. Nutes are in line. New circulations fans are in. Next week I should be back with more up-to-date pics and regular updates. Should also have dry weights for SLH and DSD, expecting about 2.5oz from each.
BATF1
BATF2
BATF2 confirmed female. BATF1 looks promising and should know any day now. Along with these went in 1 Candy & 2 Bubba Kush. Plant numbers and sizes are back to where they need to be. Nutes are in line. New circulations fans are in. Next week I should be back with more up-to-date pics and regular updates. Should also have dry weights for SLH and DSD, expecting about 2.5oz from each.
I'm on a search to find out as much as i can about the afghan mango you did in this thread....any help on: timing, feeding, your exp.with it, ive done it for 4 years now but i have never been able to identify until recently thru this thread, i can get baseball bats, but it is hit and miss...like it will stretch and look great and then throw off marbles and golf balls at best..then next run boom, huge haze looking monsters...strange girl she is, but it is very strong
JointOperation
Active member
great work dude.. loving that bubba s1.. does that bubba purple up completely wen its cold? or
MrAwder
Member
Time for a thread revival!
I've been away from IC mag for a while but still doing my thing. Mostly stopped posting because I ran out of anything interesting or informative to share. I was also a bit embarrassed about my run of Blue Alaskan Thunder Fuck testers for AlienDawg. Things did not go well first go 'round and I blamed myself, but I am sorry to say after 2 more attempts they just insisted on going lady-boy on me. Out of 5 seeds, lost 1 and had 2 females. Both hermied first try, both hermied second try and I ditched the 1, gave the other one last shot and she still hermied. First time I chalked it up to heat stress and my own fuckups, second time I thought maybe I had a light leak. Third time I am sure I did nothing wrong. Here are some pics anyway.
First run before harvest:
Fucked up lady that got heat stressed
Other one

Bud shot from that run

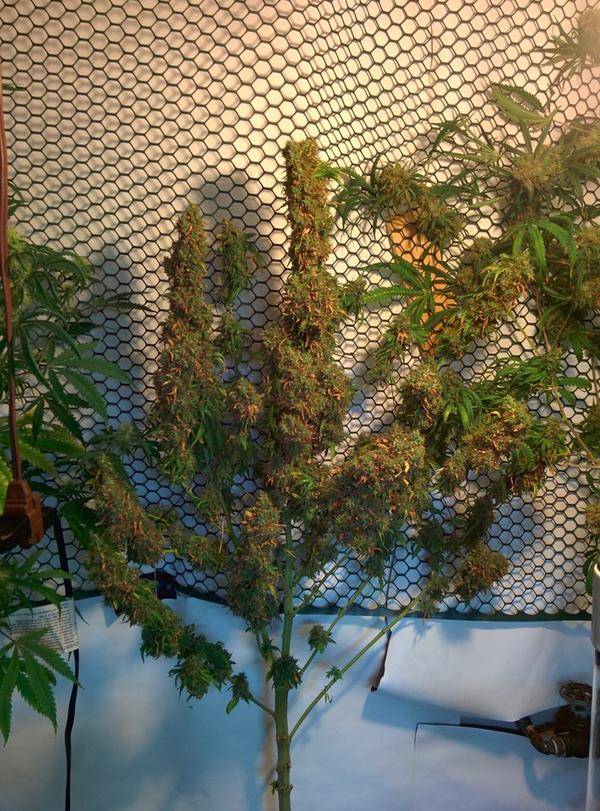
These are from the most recent run:


Beautiful sticky giant buds with a hint of berry and pepper smell. Pretty leafy though and as soon as you peak under the skirt you can start finding nanners So again I apologize to AD for being a shitty tester and not staying on top of things but it was mostly because I went back to the drawing board trying to get it right.
Onward and upward
So new things are coming. I think I am switching over to PPKs after the new year. Have 3 plants left on the table getting chopped right after the holidays, then a quick tear down and conversion to PPK. My hope is that this will do a few things for me:
1) Give me more headroom by allowing me to remove the runoff table
2) Make shit cleaner. Coco is fucking everywhere and driving me crazy.
3) Improve yields. DTW is working fine but I know I can do better by my plants.
4) Make it easier to get into the chamber to defoliate. Right now I am climbing up on the table and sitting in there like a fucking hunched back monkey to defoliate. Ditching the table should allow me to walk in and work without breaking my back.
I am still holding and running the following strains: Deathstar, Candy, Afghani Mango, Midas, Deep Strawberry Diesel. I just snagged a clone of Holy Grail Kush and just popped 5 beans of Casey Jones x Sour Bubble IX. I have one more Bubba Kush S1 finishing up now but culled her and will look for a better replacement from the 10 beans I have left. She is purely for headstash as she yields for shit. I had a really nice Blue Dream cut (from seed) but did not clone her and am bummed about that. I still have 5 more DSD beans so am considering hunting through those to see if I can find something better than my current one.
PPK Construction will begin this weekend with many pics. Installation after new year's.
Hope you all are well. Peace.
I've been away from IC mag for a while but still doing my thing. Mostly stopped posting because I ran out of anything interesting or informative to share. I was also a bit embarrassed about my run of Blue Alaskan Thunder Fuck testers for AlienDawg. Things did not go well first go 'round and I blamed myself, but I am sorry to say after 2 more attempts they just insisted on going lady-boy on me. Out of 5 seeds, lost 1 and had 2 females. Both hermied first try, both hermied second try and I ditched the 1, gave the other one last shot and she still hermied. First time I chalked it up to heat stress and my own fuckups, second time I thought maybe I had a light leak. Third time I am sure I did nothing wrong. Here are some pics anyway.
First run before harvest:
Fucked up lady that got heat stressed
Other one
Bud shot from that run
These are from the most recent run:
Beautiful sticky giant buds with a hint of berry and pepper smell. Pretty leafy though and as soon as you peak under the skirt you can start finding nanners
So again I apologize to AD for being a shitty tester and not staying on top of things but it was mostly because I went back to the drawing board trying to get it right.Onward and upward
So new things are coming. I think I am switching over to PPKs after the new year. Have 3 plants left on the table getting chopped right after the holidays, then a quick tear down and conversion to PPK. My hope is that this will do a few things for me:
1) Give me more headroom by allowing me to remove the runoff table
2) Make shit cleaner. Coco is fucking everywhere and driving me crazy.
3) Improve yields. DTW is working fine but I know I can do better by my plants.
4) Make it easier to get into the chamber to defoliate. Right now I am climbing up on the table and sitting in there like a fucking hunched back monkey to defoliate. Ditching the table should allow me to walk in and work without breaking my back.
I am still holding and running the following strains: Deathstar, Candy, Afghani Mango, Midas, Deep Strawberry Diesel. I just snagged a clone of Holy Grail Kush and just popped 5 beans of Casey Jones x Sour Bubble IX. I have one more Bubba Kush S1 finishing up now but culled her and will look for a better replacement from the 10 beans I have left. She is purely for headstash as she yields for shit. I had a really nice Blue Dream cut (from seed) but did not clone her and am bummed about that. I still have 5 more DSD beans so am considering hunting through those to see if I can find something better than my current one.
PPK Construction will begin this weekend with many pics. Installation after new year's.
Hope you all are well. Peace.
MrAwder
Member
Answers to old questions:
007Steevo - yea she is a mysterious lady. I think it comes down to pot size and root ball mass. Some discussion of similar problems in here: https://www.icmag.com/ic/showthread.php?t=296792
JO - she has never fully purpled on me. Usually just the tips of calyxs will purple. I don't think I ever ran her over a winter though when it gets into the 60's in the room some days. Any lower than 65 and I usually throw a space heater in during lights out.
Miraculous Meds
Well-known member
good luck on the rebuild mr awder. U gonna go with napa or turface in the ppk. I had been doing coco, and while I think u can do it well, I think if I had access to turface or napa, it would be more ideal. And are u gonna do donuts or what style of set up? I been running the ppk in donut style with screens like Ichabod crane. Its never beein easier to train a plant. Just leave a little extra hose for ur return lines and ur feed lines. this allows u to just slide the plant right in front of u and tie and pull a few leaves filling in a perfect canopy.
MrAwder
Member
I want to get away from coco but I still need to find a source for Napa or Turface. There is a napa store nearby but I heard they changed floor dry? I grow in a wall-of-weed donut style. So 3 walls have netting on them which I can hook plants too. The front area where the door is I use a Ichabod style screen or just some bamboo stakes depending on the strain. The space is rectangular, roughly 7x4. Plan is to do 3 plants along the back wall and corners of a single commercial strain. Then 3 on the "front"/door wall of various testers or head stash plants. 2x600's hang in the middle on a vertical mover to improve coverage and reduce hot spots.
Layout:
---------------------------------
|.X...............X..............X.|
|.........O...............O.........|
|.X...............X..............X.|
-------*****DOOR****-------
X = PPK module. O = 600W light
Having the front module on a screen or staked should let me slide it out of the way to easily get in for pruning. Right now it is a similar layout (Sometimes with 8 plants though) but they are up a on table so I need to climb in and sit on top of it to work. PITA
Can't wait to see the PPK build.
I gotta stop in my local NAPA. I heard the same around here somewhere on the forums. All NAPA's ditched the 8822 or just a particular grower's locally ran shop?
Forgive me if this has been discussed around the mag, but has anyone checked out the growstones for use in the PPK. The hydro GS-1 stones are larger, but perhaps there Mix This soil aerator version has enough porosity to work with the PPK?
MrA,
Do you not have a John Deere store around you? They were out so I went with Napa, but I believe they carry an AllSport turface which is the same as MVP. They couldn't give me a straight answer as to ordering me 10 bags of the stuff so I just with with the Napa.
Donuts are fun, but damn is it a bitch sometimes to crawl into the center of the donut to do work. I switched back to tables/horizontal in my donut room. I'll see if the adjust a wings can up my yields to more respectable levels, but otherwise I'm going back to donuts and will just have to suck it up and embrace being a sticky, stinky, spider monkey trying to maintain my girls.
I want to get fully away from coco too. I love it for the plant's purpose, but I hate transplanting, vacuuming, and the little particles that ultimately end up everywhere. My basement used to be sterile lab like, now it looks like a dirty stoner hippie has taken up residence.
Miraculous Meds
Well-known member
My napa carries the calcinated clay shit. Not good for this purpose as it crumbles and clogs to easy ime.
The great thing about the donuts with individual screens is I just slide them open like a door and stand right in front without leaning over or getting all sticky stretching in between plants. No more crawling!!
FF, those growstones have a similar feel as perlite. Too light for using as a lone medium for ppk's imo.
MrAwder
Member
FF - exactly my thoughts regarding coco. A year and a half ago when I setup I spent so much time making everything CLEAN and perfect... now no matter how often I vac I find the shit everywhere.
No John Deere store. Just Tractor Supply nearby. A little searching led me to both bonsai and aquariast forums. Apparently both hobbies also make use of calcined clay for substrate. I may try Tractor Supply OilSorb. I'll check out napa too. Might even mix them together if I can't find enough of one or the other. It seems like the biggest difference between them all is amount of washing/screening needed.
So tonight I am thinking about vegging for this setup. Ideally I'd like to flower between 12-15" depending on strain. I like the look of D9's cloning setups in his new thread. Not sure if I could get plants to 12" in one but a similar setup just sized a bit larger might be doable. I think I could fit 2x6 plant modules in my veg space if I can find the right containers for res and top module. This would allow for 6 moms and 6 vegging plants, with 6 in flower. Off to the store tomorrow to see how many 2 gallon, 3.5 gallon and other sundry containers I can source.
MrAwder
Member
The great thing about the donuts with individual screens is I just slide them open like a door and stand right in front without leaning over or getting all sticky stretching in between plants. No more crawling!!
Yea with my room layout this will give me the best of both worlds I hope. Just move the front plant and have access to the interior of the whole "double donut" for lack of a better term.
For training I use bonsai wire cut to about 6". I then make a hook in each end. Hook a branch and just reach towards the wall, the other end catches on the fencing on the walls. Only trouble is running out of wall space for branches sometimes.
MrAwder
Member
PPK Adventure
PPK Adventure
So the first part of my PPK transition is figuring out moms & veg. I found I could fit 4 large modules in my veg area. This would allow for 2 6-site modules and 2 3-site modules. The 2x6 sites will be used for mom's or new seeds and the 2x3 sites will be for the 6 vegging plants. I ended up building these twice since once I got the 14 gallon rubbermaid containers full they seemed to flimsy. Found these 12 gallon totes that are a smaller version of the 28 gal's I already use. Almost perfect except they have latching tops. The latch mechanism is not water proof, so I can only fill them to about 2" from the top. The lids are inset about 1", so that gives me approx. 1" air gap for the fabric wicks.
Layout the containers and make holes with soldering iron.
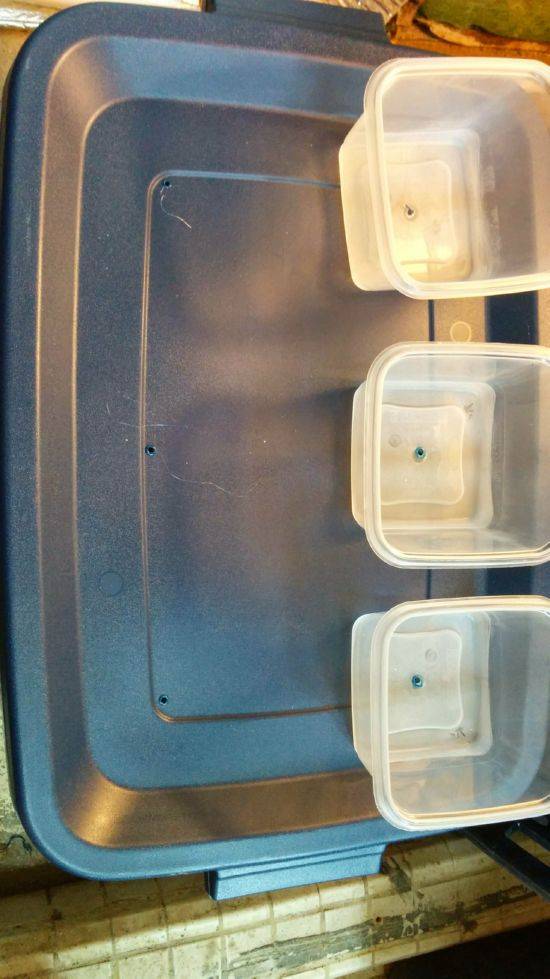
Widen the module holes with a step bit.

Looks good without water
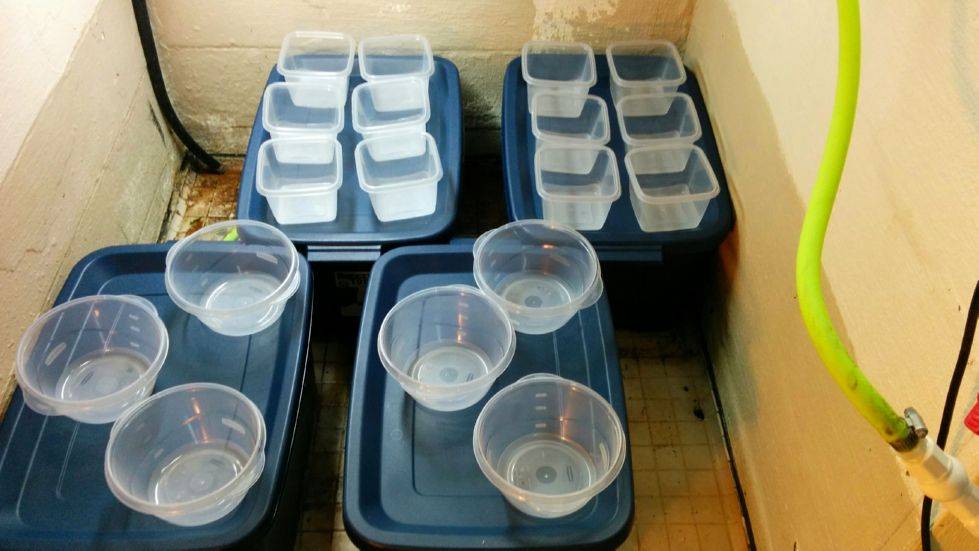
So once filled those blue containers bowed. It probably would have worked, but I wanted this done right, so do it twice.
Much nicer fit and sturdier

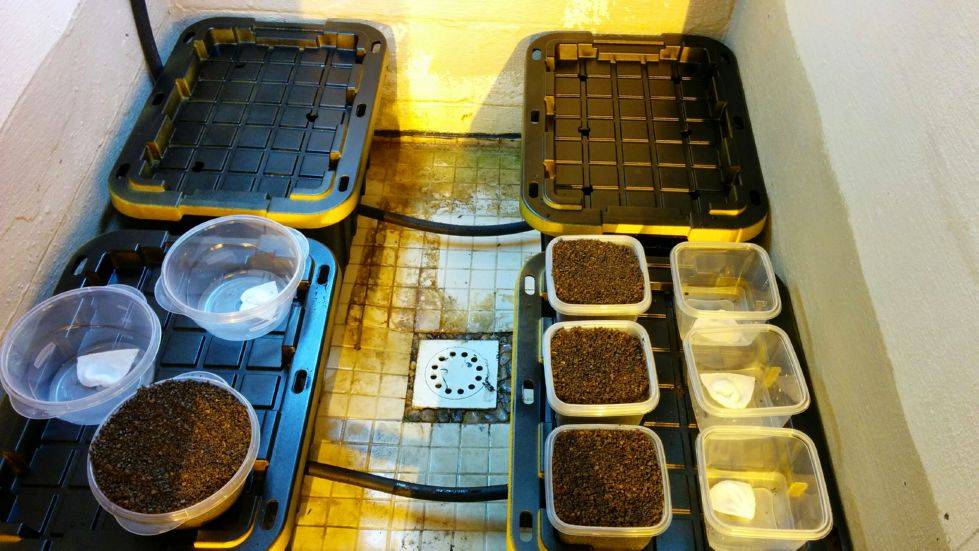
Redid all the lid holes. Just had to be careful and go slow to not crack these lids. It's a more brittle plastic. Also put a few coats of plastic spray paint on. Still some light going through so may go over them again with a coat of plasti-dip.
Plumbed up and testing wicks. If they are still damp/moist in the morning I'll be satisfied and start transplanting.
PPK Adventure
So the first part of my PPK transition is figuring out moms & veg. I found I could fit 4 large modules in my veg area. This would allow for 2 6-site modules and 2 3-site modules. The 2x6 sites will be used for mom's or new seeds and the 2x3 sites will be for the 6 vegging plants. I ended up building these twice since once I got the 14 gallon rubbermaid containers full they seemed to flimsy. Found these 12 gallon totes that are a smaller version of the 28 gal's I already use. Almost perfect except they have latching tops. The latch mechanism is not water proof, so I can only fill them to about 2" from the top. The lids are inset about 1", so that gives me approx. 1" air gap for the fabric wicks.
Layout the containers and make holes with soldering iron.
Widen the module holes with a step bit.
Looks good without water
So once filled those blue containers bowed. It probably would have worked, but I wanted this done right, so do it twice.
Much nicer fit and sturdier
Redid all the lid holes. Just had to be careful and go slow to not crack these lids. It's a more brittle plastic. Also put a few coats of plastic spray paint on. Still some light going through so may go over them again with a coat of plasti-dip.
Plumbed up and testing wicks. If they are still damp/moist in the morning I'll be satisfied and start transplanting.
MrAwder
Member
Lastly, I setup the new bulk res. I feed everything at 1.2EC Jacks + CalNit in RO so this will be the bulk res for veg and flower hooked up by float to both control res'.
Behind it is the RO res on 3 levels of blocks. It is plumbed along the wall to a tap for filling buckets so I do not need access to it.

Behind it is the RO res on 3 levels of blocks. It is plumbed along the wall to a tap for filling buckets so I do not need access to it.
Miraculous Meds
Well-known member
Been busy huh? Got some good work done, looks good in there. Looks a bit snug though. I was wondering how u got those lids black, plastic spray paint huh? That's interesting, do u like how it adheres so far? I probably would have went the lazy way and used some panda plastic for a light block. White plastic spray paint would have been cool for a little reflectiveness. Nice job though looks pro!
