
-
Happy Birthday ICMag! Been 20 years since Gypsy Nirvana created the forum! We are celebrating with a 4/20 Giveaway and by launching a new Patreon tier called "420club". You can read more here.
-
Important notice: ICMag's T.O.U. has been updated. Please review it here. For your convenience, it is also available in the main forum menu, under 'Quick Links"!
You are using an out of date browser. It may not display this or other websites correctly.
You should upgrade or use an alternative browser.
You should upgrade or use an alternative browser.
Lap Does LEDs - My DIY Quantum Board Cabinet
- Thread starter Lapides
- Start date
glad to see some happy hedges in here again 
Things are almost fully recovered. Seems to be a little Mg thing still going on maybe, I dont know if its just old growth tho. Just glad they didn't die. I was seriously only going to give them another day or two.
From this -
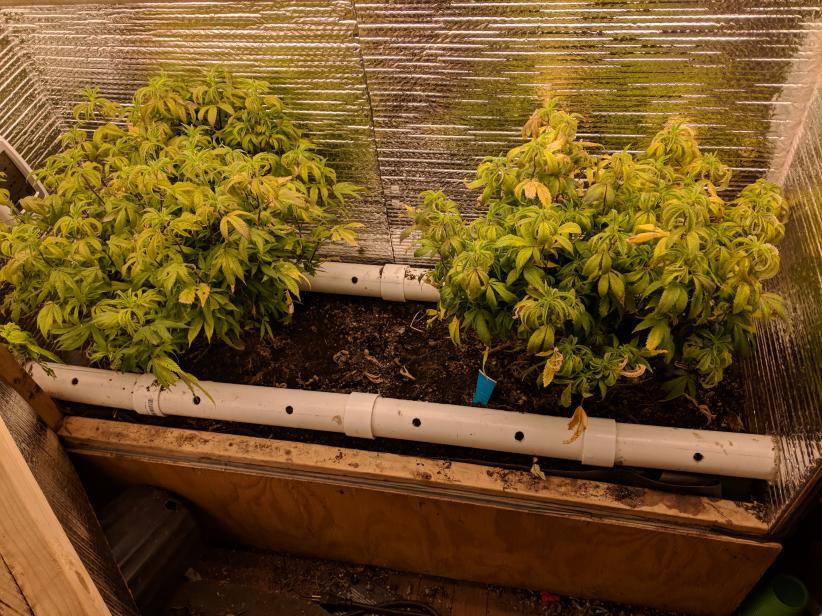
To this -
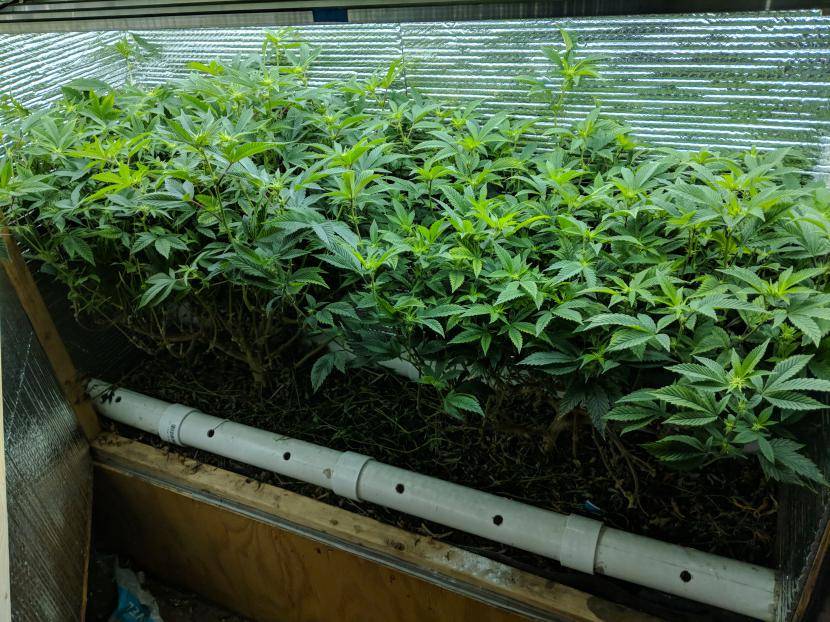
Just really thankful they came around. I would have lost the glue too.
Chem'91 side
GG4 side
From this -
To this -
Just really thankful they came around. I would have lost the glue too.
Chem'91 side
GG4 side
Palindrome
King of Schwag
Nice recovery
Damn you got some staunch ladies in there. Those girlys got some thick bases... just how I like em!
Amazing turn around buddy!
Did you just recycle the trimmed fan leaves right back into the soil? I like.
Just waiting on some finishing touches over here. I think this cabinet I built will make you proud.
Might start a thread under a different handle..... security purposes... I will keep you posted.
Instant Pot
New member
There was a crazy Canadian on Overgrow who had a small warehouse space full of shelves floor to ceiling with thousands of plantlets SOG'n under 8ft fluoros crammed tight together. He was getting pretty good results, easily trimmed little footballs of bud. I think they were in flood tables but I'm not sure. I wish I could remember his username.
I think something like that strategy would be an amazing application for these LED strips/ribbons/boards. To keep plant numbers below the feds' 100, one could do modular ScrOGlets, each small plant spread under its own 1ftx1ft rigid screen for example, plenty of veg time to do that in between harvest cycles.
The tipping point for LEDs is here. I'm so excited.
I think his name might have been "Heath" something. His grows were impressive, but the plant numbers here in the states would have been...difficult to defend.
Instant Pot
New member
Hey Lapides, great thread, man!
Congratulations on your eye-opening experience with the Samsung LM561C strings! I, in fact, am intending on reproducing your success, but with a couple bio-tubs instead of worms, but I could REALLY use your help!
I'm a firm believer in not trying to reinvent the wheel, so I would like some info on your light build, and PLEASE be as specific as possible if you wouldn't mind; it would help a LOT of growers out there, including this one!
I'm looking at doing something more like your 2nd light, with flexible Samsung LM561C strings, but I would also like the specifics on your first purchase (Seller, model, specs/voltage, etc.)... so if necessary, it can be done with the exact same parts.
It appears as though both lights are using using Constant Voltage drivers (models? I think you mentioned the second light uses the HLG-600H-54B) wired in parallel, correct? The SNAFU you ran into with the second build (using the flexible strands), where you had voltage losses towards the end of the strings...did you wire that one up in a combination of series/parallel to recover from the dimmer lights on the ends of the strings? Did you need the second driver simply because the first driver used wasn't powerful enough to run all the diodes, or was there a different reason? I've read before, as noted by that other guy in your thread, that some Samsung LM561Cs are available that DO NOT have resisters in them (resisters are, I believe, what causes this voltage loss towards the end of strings of SOME LM561Cs, while others that DON'T have them are able to be run using simpler wiring)...have you checked-out the difference?
So, again, you'd be helping a bunch of guys out if you went into more depth explaining exactly what parts were used, and EXACTLY how all was wired...like what worked, and what didn't. I would be very grateful for any help or info I could glean. I'm going to start another thread with these same questions, but thought I'd also post-up here, where I know you'll be checking-in from time-to-time.
Congratulations on the new baby, and either way, best of luck in the future! And again, GREAT grow, friend!
Hey Lapides, great thread, man!
Congratulations on your eye-opening experience with the Samsung LM561C strings! I, in fact, am intending on reproducing your success, but with a couple bio-tubs instead of worms, but I could REALLY use your help!
I'm a firm believer in not trying to reinvent the wheel, so I would like some info on your light build, and PLEASE be as specific as possible if you wouldn't mind; it would help a LOT of growers out there, including this one!
I'm looking at doing something more like your 2nd light, with flexible Samsung LM561C strings, but I would also like the specifics on your first purchase (Seller, model, specs/voltage, etc.)... so if necessary, it can be done with the exact same parts.
It appears as though both lights are using using Constant Voltage drivers (models? I think you mentioned the second light uses the HLG-600H-54B) wired in parallel, correct? The SNAFU you ran into with the second build (using the flexible strands), where you had voltage losses towards the end of the strings...did you wire that one up in a combination of series/parallel to recover from the dimmer lights on the ends of the strings? Did you need the second driver simply because the first driver used wasn't powerful enough to run all the diodes, or was there a different reason? I've read before, as noted by that other guy in your thread, that some Samsung LM561Cs are available that DO NOT have resisters in them (resisters are, I believe, what causes this voltage loss towards the end of strings of SOME LM561Cs, while others that DON'T have them are able to be run using simpler wiring)...have you checked-out the difference?
So, again, you'd be helping a bunch of guys out if you went into more depth explaining exactly what parts were used, and EXACTLY how all was wired...like what worked, and what didn't. I would be very grateful for any help or info I could glean. I'm going to start another thread with these same questions, but thought I'd also post-up here, where I know you'll be checking-in from time-to-time.
Congratulations on the new baby, and either way, best of luck in the future! And again, GREAT grow, friend!
I'll do my best to accommodate all of your requests but forgive me if I don't address everything.
I don't see any point in giving out all the specs for the first light. It performs VERY well, but the parts are more expensive than they need to be because I'm using Samsung brand rigid strips and the diodes are being driven harder than optimal in my opinion. Not to mention you are locked in to 4', 2', and 1' configurations only.
I can't remember what details I posted about fucking up that second fixture, but this is ultimately what works, and works VERY WELL -
14 x 4' flexible strips strips for a 4'x2' fixture
I have to quadruple check my math, but I think 2 more 4' strips for a total of 16 strips can be lit by that driver, getting closer to the sweetspot for these diodes and putting out even more lumens.
I really really love these flexible strips from China. You can cut the 24V strips into 4 inch sections. 18 diodes per foot. The vendor I use sells me top bin Samsungs for $.12US/diode shipped and the shipping is unreal fast. His name is Alan and his email is bright03@bright-est.com. The diodes I prefer are Samsung LM561C 4000K S6 bin on a 24V strip. If you email him, please let him know Lapides referred you.
The only downside to the flexible strips, at first, was the soldering involved. I don't mind soldering so much, but would rather not do it. The rigid strips had convenient connectors which was nice. And the soldering involved with the flexible strips was kinda like surgery...just a tiny dab on a 3mmx3mm contact. And after that I had to shrink wrap the ends so there was no short, and to be honest, it was just kinda ugly.
Then I found these things -
They are something like 20 or 40 cents a piece from China and they make the whole job SO much easier and SO much cleaner and SO much faster.
Drivers I buy from Mouser. Heatsinks from heatsinkusa. All the other miscellaneous stuff from Lowes and Amazon.
Anyone who emails Alan, just let him know I sent you. I don't get anything out of it, but he seems like a great dude and I told him I would tell everyone I know to switch over and to buy the LEDs from him.


you could use the flexy strips to build a fixture shaped like a giant pot leaf, man! 
Instant Pot
New member
Hey again, Lapides,
Thanks so much for all the wiring info, and especially for the pics! Yours is truly an inspirational grow! How about an update?
I've been communicating with Alan...he is a good guy. I can get the 60 diode/meter reel strips at a cost of @ 9 cents each, and I can get genuine Samsung F-Series 4' (well, 44 inches) strips with 288 diodes for a cost of @ 18 cents each. It sounds like a huge difference, but when you consider the extra costs for aluminum frame, heatsinks, those 40 cent solderless connections, etc., etc., I just can't justify it. it's either 4-288 LED "double-row strips," rigid and with simple wiring or 16-72 LED reel strips. While coverage might be marginally better with the 16 strips, I can't imagine it will be that much better than 4 sets of the double-rows, at least in my 4'x3' or 4'x4' cab.
And speaking of cabs, I was looking at the perfect simplicity of your homemade cab in the pics...it's so simple and clean. Did you need to frame it at all, or is it just the plywood nailed/screwed together? I want to do one like yours, but at least 4'x3', and 7' in height...so I'm thinking I ought to at least frame-out the bottom couple feet, to lend some stability to where the walls and ceiling come together at the top. Thoughts?
Again, thanks so much for this thread...it really has been inspirational in so many ways. I guess I'd ask about the "Soma" method of growing, but I'm pretty comfortable with DWC, and a very simple version of Bio-tubs that uses powerheads to oxygenate the water. NIMBY and Suga Bear used this a long time ago, and I had success when I did it as well...so I'll not try to reinvent the wheel!
I might give soil a go, though, if I ever decide to try a 2-tier grow in one of these homemade cabs...DWC on the bottom, with soil pots up top. With LEDs, that is certainly possible...check out Youtube, and how the pros grow. There's a facility in Las Vegas that's off the hook, and they have two tiers going in a huge warehouse!
From what I understand, more LEDs=more efficiency, more lumens, longer lifespan. So increasing the number isn't JUST for more coverage. You'll still have to mount those strips to something. I wouldn't feel confident just mounting them to the inside of a cabinet. To get the most heat dissipation, they should be mounted with thermal paste and that shit is messy and is a bit expensive. I like the rigid strips, I used them for my first build, but I like the flexible ones more.
I used something like 3/4" plywood for the walls and I think I just glued and nailed it together. There is framing around the door. I don't think the entire thing is framed though. Lights are off right now, but I can check later to see exactly how I have it in there.
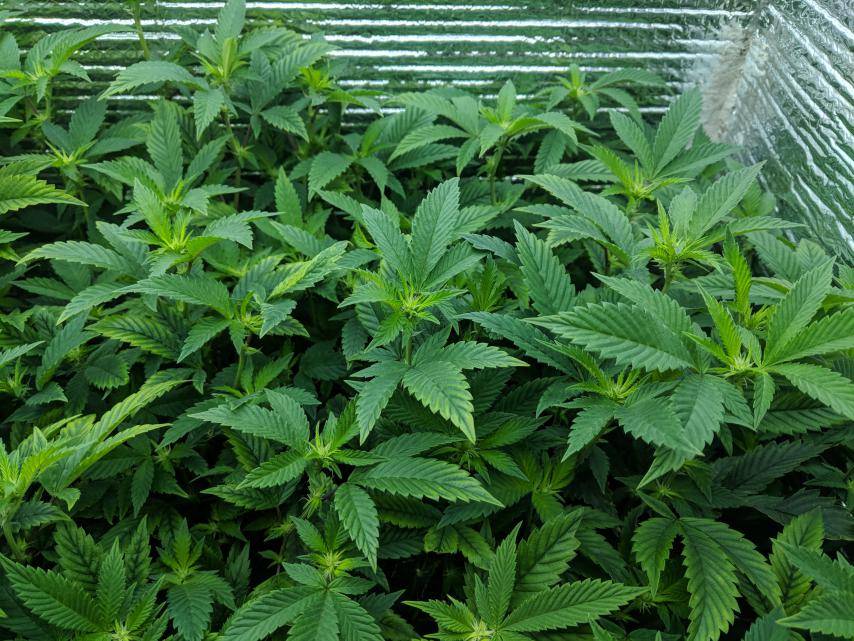
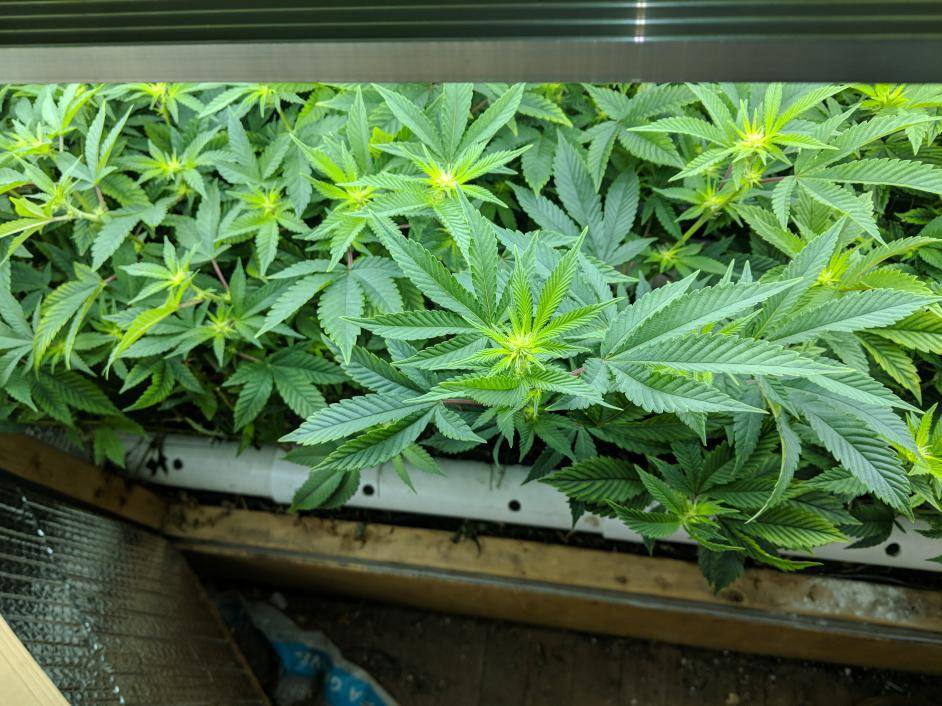
I'll try to take some pictures of the plants today or tomorrow.
I used something like 3/4" plywood for the walls and I think I just glued and nailed it together. There is framing around the door. I don't think the entire thing is framed though. Lights are off right now, but I can check later to see exactly how I have it in there.
I'll try to take some pictures of the plants today or tomorrow.
Instant Pot
New member
One more question (before the next question)...what length heatsinks did you order for your first light? How wide is the frame?
I'm ordering parts now, so my Samsung Rigids are a touch over 44 inches, and are @ 1.5 inches wide (double-row LED strips are wider). I'll need to order the 2" width, and would like to not need to trim down my heatsinks to make the install look as clean as your first light...do you think 45 inch heatsinks would be enough, or would you go with 46 inch?
I'm ordering parts now, so my Samsung Rigids are a touch over 44 inches, and are @ 1.5 inches wide (double-row LED strips are wider). I'll need to order the 2" width, and would like to not need to trim down my heatsinks to make the install look as clean as your first light...do you think 45 inch heatsinks would be enough, or would you go with 46 inch?

