What's new
  • Happy Birthday ICMag! Been 20 years since Gypsy Nirvana created the forum! We are celebrating with a 4/20 Giveaway and by launching a new Patreon tier called "420club". You can read more here.
  • Important notice: ICMag's T.O.U. has been updated. Please review it here. For your convenience, it is also available in the main forum menu, under 'Quick Links"!

Hash oil techniques and solvents for non BHO hash oil?

SkyHighLer

Got me a stone bad Mana
ICMag Donor
Veteran
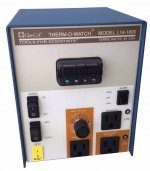
Here's another commercial microprocessor controller like the J-KEM, incorporating wattage control along with PID temperature control or temperature limiting. $1,300!!!

Digital variable voltage ctrl
108A L14-1800K
Digital auto-temperature display of setpoint and process temperatures 120 1800 TYPE K
$1,284.00/EA

"5% to 95% variable output"

https://glco.sniperstores.com/precision-controllers


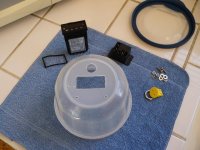
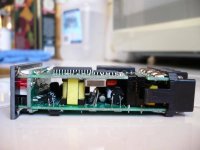
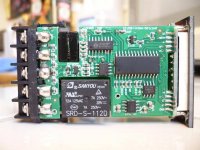
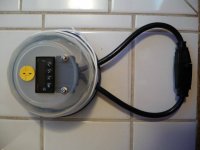
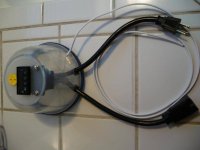
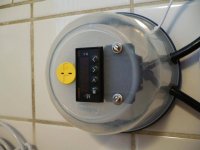
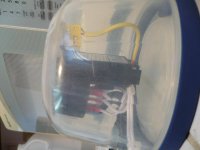
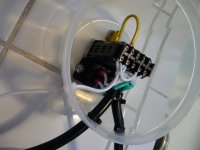
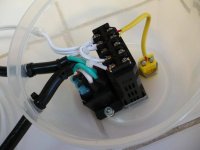
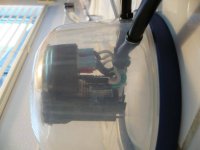
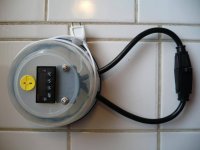
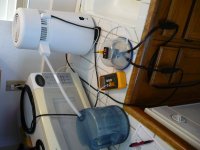
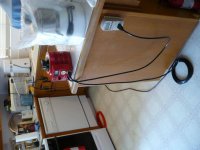
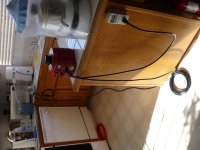
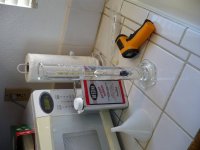
The DIY device I'm assembling is way less expensive and offers way more features.

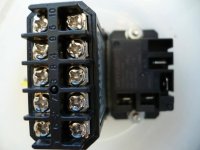
1) The Variac supplies 0% to 130% variable output. Smooth analog control, and extra oomph if you have a heater or mantle you want to supply extra power to, i.e., a 500 watt mantle can be driven with up to 650 watts.

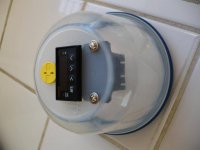
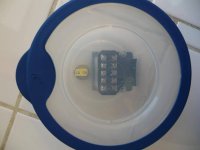
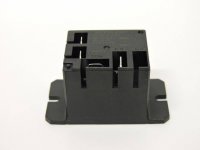
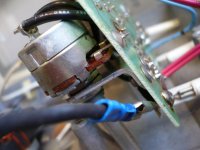
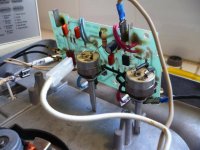
2) The microprocessor controller I found can quickly be switched between set point PID control, on/off limiting, or cut-off limiting.

3) Plugging the Variac into a power meter provides a way to quickly dial in the best wattage for any point of your process.


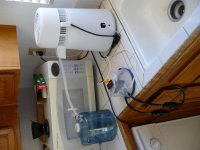
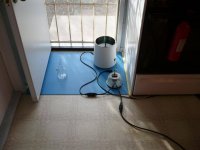
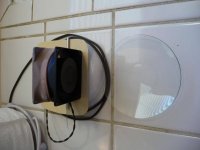
Wall outlet > power meter (P-3 Kill-A-Watt) > Variac > mechanical power relay controlled by a sensor fed microprocessor > your heater or mantle. About $200, and some simple assembly/wiring.

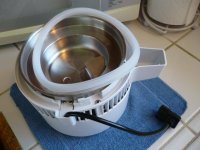
And you can use this same setup elsewhere, I'm planning to also use it with my huge old analog Corning lab hotplate/stirrer.
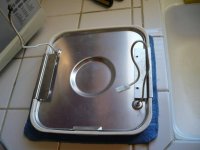
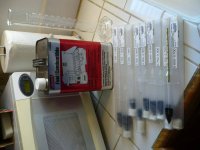
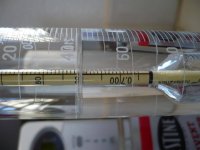
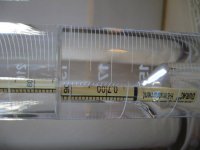
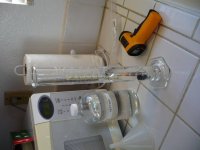
 

Attachments

  • 84ada150313ca6e67ab47df3e44a.jpg
    84ada150313ca6e67ab47df3e44a.jpg
    29.5 KB · Views: 20
Last edited:

SkyHighLer

Got me a stone bad Mana
ICMag Donor
Veteran
The Air Still (ethanol version of the Megahome water distiller) compared to other home distillers.

Introduction to different types of stills

Barley and Hops Brewing LLC
Published on Feb 6, 2016

https://youtu.be/KZVZa5usytQ?t=4m39s


I had planned on attaching a K thermocouple at the head of the condenser of my water distiller (and still may,) here's the reasoning for the placement.

Pot versus reflux and more

Barley and Hops Brewing LLC
Published on Oct 2, 2016

https://youtu.be/22tLPEuSzzY?t=16m46s
 

SkyHighLer

Got me a stone bad Mana
ICMag Donor
Veteran
It came to me how to incorporate Variac wattage control with PID temperature control, use a mechanical relay instead of the solid state relay, and have it switch the output of the Variac.

You initially set the PID set point high enough to deliver un-switched full power, then you adjust the Variac until you're supplying slightly more wattage than necessary to maintain the desired temperature, finally you back the PID set point down to the desired temperature.


PID control alone is like a poorly designed automobile cruise control that pulses a floored accelerator to maintain speed. The Variac smooths out the pulses.


Mini Power Relay SPDT 120V 30A
$8.97
https://www.auberins.com/index.php?main_page=product_info&cPath=2_31&products_id=250


Update: I ordered a PID controller for $11 with free S&H from China, a 120V/30A SPST mechanical relay, and a K thermocouple female panel connector. I intend on using a small Tupperware style container for the project box, and extension cords for wiring.

If you get a DPST relay, or an actual contactor, and add a switch to energize it you can have the power fully disconnect at set point if you like. Basic contractor circuit, I'll describe it fully when I post up pictures and details of the DIY PID controller project.

Further update:

The $11 PID doesn't seem to have a mechanical relay output option, so I went looking...

Check out this baby from Auberins,

https://www.auberins.com/index.php?main_page=product_info&cPath=1&products_id=14

Universal 1/32 DIN PID Temperature Controller
$35.06

Model: SYL-1512A

Product Description:
This universal temperature controller can be used as PID temperature controller, On/off temperature controller, Limit temperature controller, or simply as a thermometer/pyrometer with bright LED display and alarm output. It offers great value for its price, as it is accurate, smart, and reliable. It is one of the smallest 1/32 DIN PID controllers on the market and the perfect unit for hobbyists to upgrade their brewer, incubator, espresso machine or glass kiln and professionals in industrial use. The newly developed artificial intelligence enhanced PID algorithm and auto-tune function will control the temperature within one degree accuracy without complicated PID parameter fine tuning. This controller contains all the primary functions of an industrial grade PID controller but is also made simple for amateur use.

The PID control mode can maintain the temperature within one degree when properly tuned. The on/off control mode is useful for controlling refrigerator, motor, or solenoid valve that does not favor frequent switching. Users can set the target temperature and hysteresis band. It will work like a mechanical thermostat with higher accuracy and tighter temperature range. Limit control mode can be used for safety protection and special applications. When connected to a contactor, it can function as a latching relay that will shut off the system if the temperature is out of control. The heater will not be turned back on until reset manually. The limit control is also useful for automatic shutdown applications when a certain temperature is reached. e.g., ceramic kiln firing, meat cooking, and distillation. All the control modes can be set for either relay output or SSR control output by user. When using the SSR output, the relay output can be used as an alarm output. A splash proof gasket is added for wet environment and outdoor applications.

Recently, we added an option for additional LED display colors. The white LED display will give the controller a more modern look than the traditional red LED.

Features:
Compact size, 1/32 DIN that is only 24x48x75mm (0.95 x 1.89 x3")
Artificial intelligence enhanced PID algorithm provides precise control
Auto-tune function can automatically find the best PID parameters
On/Off control mode for refrigerator, motor and solenoid valve control application
Limit control mode for safety protection and special applications
Supports 10 different types of commonly used temperature sensor inputs
Displays temperature in either Fahrenheit or Celsius
Output configuration can be set by user for either relay contactor or SSR control
90-days warranty


You lose the Alarm when outputting to a mechanical relay rather than a solid state relay, otherwise it does exactly what I want, it can be switched to PID control, on/off set point limiting, or set point cut-off. With this controller you don't need a fancy relay or contractor with tricky wiring to have a cut-off switch, the simple SPST power relay I ordered will do just fine.

And the manual is in understandable English!!

https://www.auberins.com/images/Manual/SYL-1512A2instruction 1.0.pdf

6. On/off control mode
On/off control mode is not as precise as PID control mode. However it is necessary for inductive loads such as motors, compressors, and solenoid valves that do not like to take pulsed power. It works like a mechanical thermostat. When the temperature passes the set point, the heater (or cooler) will be turned off. When the temperature drops back to below the hysteresis band (dead band) the heater will turn on again.

7. Limit control mode
The limit control mode will shut the heater off when SV is reached. The heater will not be turned on again until the controller is reset manually (press the SET key for 5 seconds). The controller can’t be reset when the temperature is within the hysteresis band (Hy).


Update:

Here's pictures of what I have so far, I still need a couple of short extension cords, a heavy duty one for the relay switched line in and out, and another light weight ungrounded one just to power the microprocessor controller, and supply the switched current to the relay coil.

The controller and K thermocouple receptacle will fit into cutouts in the inverted Rubbermaid container base as shown. A couple of screws/nuts will attach the relay to the inside of the container base next to the microprocessor.

Also show are some switches with covers (notice the picture showing they are not sealed on the back side.) The power relay in the background is the DPST I had planned on using with the switches before I found the slick microprocessor controller. The coiled cable is K thermocouple extension wire, and there's another of the un-inexpensive K thermocouple panel mount receptacles. :biggrin:

https://www.ebay.com/itm/K-type-The...e=STRK:MEBIDX:IT&_trksid=p2060353.m2749.l2649


Pictures of the project box cutouts and mechanical assembly. The extension cords to wire it up should come today.

I have plenty of tools and experience, and getting those cutouts accurate and clean was frustrating. The thick plastic of the container bottom broke off the tips of two Xacto blades before I turned to the Dremel. :biggrin:

The cords came. I'm out of quick disconnect terminals, they should be here in a couple of days.


If it hadn't occurred to you guys, the same setup: power meter > Variac > temperature controller(s) > heater(s) might be a nice tweak to your rosin presses.
 

Attachments

  • P1040013.jpg
    P1040013.jpg
    107 KB · Views: 22
  • P1040014.jpg
    P1040014.jpg
    45.8 KB · Views: 17
  • P1040015.jpg
    P1040015.jpg
    42.3 KB · Views: 18
  • P1040018.jpg
    P1040018.jpg
    42.2 KB · Views: 17
  • P1040019.jpg
    P1040019.jpg
    58.5 KB · Views: 17
  • P1040012.jpg
    P1040012.jpg
    47.3 KB · Views: 15
  • P1040011.jpg
    P1040011.jpg
    64.5 KB · Views: 16
  • P1040009.jpg
    P1040009.jpg
    108.8 KB · Views: 15
  • P1040020.jpg
    P1040020.jpg
    40.4 KB · Views: 19
  • P1040021.jpg
    P1040021.jpg
    67.2 KB · Views: 21
Last edited:

SkyHighLer

Got me a stone bad Mana
ICMag Donor
Veteran
Microprocessor temperature controller with built in power limiting specifically designed for distillation.

https://www.auberins.com/index.php?main_page=product_info&cPath=53&products_id=559

Still Heat Controller for Distillation Process Automation
Starting at: $67.95

Model: DSPR220

Product Description:
DSPR220 is a controller for automating the distillation process. It is to be used with a solid state relay to drive the electric heating element. It can bring the liquid to the boil point in the maximum speed; then automatically reduce the power to maintain the boil at a desired level; It has a programmable alarm that can be used to notify the operator to remove the foreshots/heads at specific temperature. It also stops the distillation automatically so that the feints/tails will not be collected. The criterial for stopping the distillation can be either a preset temperature, or a preset distillation time.

This controller was developed based on our Digital SSR Power Regulator and the EZboil® controller (DSPR1, DSPR120). It provides linear and uniform power output with 1% resolution. The power adjustment is done with a rotary encoder that is easier to operate. The new features of this controller are the higher temperature resolution and the automatic shut off by a temperature setting. The controller offers 0.1-degree resolution which is important for the distillation application. The automatic output power shut off mechanism is latched just like a limit controller. Once it is shut off, the heater will not turn on unless the system is reset.

DSPR220 offers two control modes, distilling mode and mashing mode. In the distilling mode, the controller function as a power regulator as discussed above. In the mashing mode, the controller function as a temperature controller. It allows the user to set the temperature instead of setting the power. This mode can be used for mashing as well as preheating and stabilizing the reflux column. Its temperature control function utilizes an artificial intelligent algorithm optimized for mashing application. It is easier to understand and more convenient to operate than a PID controller. Regular PID controllers may have overshoot or slow response issues when not properly tuned. However, for most mashing systems, this controller can hold the temperature within one degree right out of the box. The temperature resolution in mashing mode is 1 degree.

Two versions of the Distilling Controller are offered at this time. DSPR220 is the standard model with one SSR control output. DSPR400 is the advanced model with two additional programmable relay outputs. These relays can be programmed to engage at specific temperature or time. They are very versatile and can be used for many different types of applications. Following are some examples.

The relay can be set to synchronize with alarm conditions. If you feel the internal buzzer is not sufficient, you can connect a flashing buzzer to the relay. It allows you to get both audio and visual alarm notification. You can set a specific alarm duration, or add a switch in the loop so that you can disable it at any time.

The relay can be set to the latching mode and be looped into the control output so that it functions as an over temperature protection mechanism.

The relay can also be set to act at a specific temperature range to control other devices such as a circulation pumps.

Relay #1 can be set in synchronization with the acceleration heating phase of the main control output. User can use it to drive a contactor that is connected to extra heating elements. For a 12KW three heating elements system, user can have two 4kw elements controlled by relay #1, and one 4kw element controlled by a 25A SSR. This configuration reduces the SSR heatsink size for the heat dissipation, making the system more compact and reliable.

Relay #2 can be set in synchronization with the timer for mashing or distilling. So once the boil is complete, a chiller pump can be turned on.

Application Example for Alcohol Distilling

Set the high power accelerated heating limit to 170.0°F (76.7°C) and power output to be at 100% of the element capacity, set distilling power at 30%. Set the foreshots/heads alarm at 172°F. Set the distillation ending criterial to be either when temperature rise to 175.0 °F or when the time is more than 3 hours. When the controller is powered up, it will heat the wash with full power. After the wash temperature reaches 170°F, the power is automatically reduced to 30%. When temperature reaches 172°F, the alarm will beep four times to notify the operator that temperature is close to the alcohol boil temperature so that he can remove the heads. Soon the temperature rise to 173.0°F, the timer is activated. After distilling for a while the content of alcohol is depleted and temperature starts to rise. Once the temperature reaches 200.0°F, the heater is turned off and the controller will send long beeps and flashing "End" on the display. if the temperature does not rise to 200.0°F after 3 hours, the heater will also be turned off. During the distillation, the user can use the rotary knob to fine tune the boil at any time. The figure below shows how the power is correlated to the temperature and time.


https://www.auberins.com/index.php?main_page=product_info&cPath=53&products_id=560

EZboil, Power Regulator for Boiling Process Automation
Starting at: $46.95

Model: DSPR120

Product Description:
EZboil® is a digital power regulator designed to automate the liquid boiling and mashing processes. In boil mode, it can bring the liquid to boil in the maximum speed; then automatically reduce the power to maintain the boil at a desired level; and after maintaining at boiling for a predetermined time, it can shut off the power. This controller can be used for wort boiling during the beer brewing process or for cooking food that involves a long simmering time.

The EZboil® can also be used as a temperature controller for mashing. In mash mode, its temperature control function utilizes an artificial intelligent algorithm optimized for mashing application. It is easier to understand and more convenient to operate than a PID controller. Regular PID controllers may have overshoot or slow response issues when not properly tuned. However, for most mashing systems, EZboil® can hold the temperature within one degree right out of the box.

This controller was developed based on our Digital SSR Power Regulator (DSPR1). It provides linear and uniform power output with 1% resolution. The power adjustment is done with a rotary encoder that is easier to operate than the press button adjustment type. The major improvements of this new controller are the addition of temperature sensor input and programmable timer function. Unlike DSPR1, the built-in temperature measurement capability allows temperature-triggered power output adjustment as well as the timed output shut-off.

Controlling the boiling process can’t be done with a regular PID temperature controller. The boiling point is not just determined by the type of liquid and its chemical composition, but also by the altitude of the location, and the barometric pressure. In addition, there is no temperature difference between weak boil, rolling boil, and vigorous boil. The most practical way to control the boil level is by adjusting the power applied to the heating element.

“A watched pot never boils”… many people have had this experience because they like to bring the pot to a boil quickly using high power to save time. As soon as the liquid starts to boil, they need to reduce the power to prevent boiling over, reduce evaporation, and prevent fire hazard. For example, in home brewing, a brewer would like to bring the wort to boil as soon as possible, and then adjust the power to maintain a nice rolling boil but not letting the wort to boil over. Similarly, a cook may want to bring a pot of soup/stew to boil and then reduce the power to let the soup/stew simmering for a long time. This time consuming process can be taken over by EZboil®.

The EZboil® eliminates the hassle of waiting and watching a boiling kettle or a cooking pot. It is especially useful when using it to repeat the same heating/boiling process. Other than just manually tuning the output level, a feature that is already available on DSPR1, EZboil® has three additional parameters to control the boiling process: 1) Acceleration Temperature Set Point (ATSP), 2) Acceleration Output Power (OUTH), and 3) a timer to shut off the output. The parameter ATSP is a temperature threshold below which the controller will send out high power at a level that is defined by OUTH. Once the temperature reaches ATSP, the power level will be automatically reduced to the setting level displayed on the bottom line of the LED display. This setting is controlled by the rotary knob. A timer can also be activated when a set temperature is reached so the controller will shut off the output after certain time. For users who prefer a less automated boiling process, the acceleration phase can be eliminated by setting ATSP to a very low temperature. The temperature display can be used as a regular thermometer for reference. The timer can be manually reset just like a single event timer.

Two versions of the EZboil® are offered at this time. DSPR120 is the standard model with one SSR control output. DSPR300 is the advanced model with two additional programmable relay outputs. These relays can be programmed to engage at specific temperature or time. They are very versatile and can be used for many different types of applications. Following are some examples.

The relay can be set to synchronize with alarm conditions. If you feel the internal buzzer is not sufficient, you can connect a flashing buzzer to the relay. It allows you to get both audio and visual alarm notification. You can set a specific alarm duration, or add a switch in the loop so that you can disable it at any time.

The relay can be set to the latching mode and be looped into the control output so that it functions as an over temperature protection mechanism.

The relay can also be set to act at a specific temperature range to control other devices such as a circulation pumps.

Relay #1 can be set in synchronization with the acceleration heating phase of the main control output. User can use it to drive a contactor that is connected to extra heating elements. For a 12KW three heating elements system, user can have two 4kw elements controlled by relay #1, and one 4kw element controlled by a 25A SSR. This configuration reduces the SSR heatsink size for the heat dissipation, making the system more compact and reliable.

Relay #2 can be set in synchronization with the timer for mashing or boiling. So once the boil is complete, a chiller pump can be turned on.

Application Example for DSPR120
Set ATSP = 200°F (96°C) and OUTH = 100%, set boiling output dial to 65%, and the timer to start at 210°F (99°C) for 60 minutes. When the controller is powered up, it will heat the liquid with full power capacity of the heating element. After the water temperature reaches 200°F, the power is automatically reduced to 65%. Soon the temperature claims to 210°F, the timer is activated. Sixty minutes later, the power will be turned off and the controller will send long beeps and flashing "End" on the display. During the boil, the user can use the rotary knob to fine tune the boil at any time. There is also a programmable alarm that can be set to an important temperature to notify the user to take action. The figure below shows how the power is correlated to the temperature and time.


Plug and play versions, and DIY kits incorporating these controllers are available from Auberins.


Instead of controlling the power output using a Variac (which has a further advantage of 130% over-volting,) they incorporate a microprocessor driving a solid state relay. I expect my setup to put these to shame. :biggrin:
 
Last edited:

troutman

Seed Whore
Ok, it's been a while since I checked this thread.

Question: Did you make an extraction yet or should I come back in 2018? :biggrin:

I got a 2000mL separatory funnel now. I dropped my 1000mL one a while back and had to upgrade anyways. LOLZ

Yesterday, I received a much better heating mantle. I got a 2000ml Magnetic Stirring Heating Mantle from EBAY that can hit 450°C.

Can't wait to fire it up.

My next extraction will probably use N-Hexane alone as the primary solvent along with distilled water.

Last time, I used Methanol also with the N-Hexane & water and it got too green for my taste.
 
Last edited:

SkyHighLer

Got me a stone bad Mana
ICMag Donor
Veteran
Pictures of the wiring. I need another plug for the white cord (I cut the plug end too short yesterday.)


Here's a video review of one of the <$100 120V/20A eBay Variacs similar to the one I have. Near the end he plugs in a drill motor to demonstrate the smoothness of control, and the over-volt feature.


2KVA 120V Variac Autotransformer (Incredible Buy)

electronicsNmore
Published on Jun 17, 2017

https://youtu.be/AEyPBFOhhHw?t=47s
 

Attachments

  • P1040036.jpg
    P1040036.jpg
    55.3 KB · Views: 16
  • P1040037.jpg
    P1040037.jpg
    53.8 KB · Views: 15
  • P1040038.jpg
    P1040038.jpg
    56.6 KB · Views: 25
  • P1040039.jpg
    P1040039.jpg
    47.5 KB · Views: 18
  • P1040040.jpg
    P1040040.jpg
    51.7 KB · Views: 20
  • P1040046.jpg
    P1040046.jpg
    57.1 KB · Views: 16
  • P1040045.jpg
    P1040045.jpg
    49 KB · Views: 18
  • P1040041.jpg
    P1040041.jpg
    47.5 KB · Views: 18
Last edited:

SkyHighLer

Got me a stone bad Mana
ICMag Donor
Veteran
:dance013:

Kicks butt.

Tuned the PID function, and tested the on/off and limit functions. I ran it up to boiling point at full over-volting (945 watts) using the on/off control function, and then dialed it down to 675 watts with the limit control set to shut it down completely at the end when the temperature gets a couple of degrees beyond the boiling point.

I'm going to remove the temperature sensor on the output tubing. It's unnecessary as I can observe the squirt, drip, drip, squirt, drip, drip, drip.

One appliance cord is way too long in the setup as shown, I have a short one coming tomorrow.


The distiller goes outside when distilling flammable solvents, power meter and Variac remain inside.
 

Attachments

  • P1040048.jpg
    P1040048.jpg
    58.3 KB · Views: 25
  • P1040049.jpg
    P1040049.jpg
    78.2 KB · Views: 18
  • P1040051.jpg
    P1040051.jpg
    73.8 KB · Views: 20
Last edited:

SkyHighLer

Got me a stone bad Mana
ICMag Donor
Veteran
A couple of pictures of the final setup.

I don't think I posted the info for the SPST relay I'm using. It's the same brand and rating as the little mini power relay Auberins carries without the superfluous normally closed contact.

https://www.ebay.com/itm/Zettler-Mi...e=STRK:MEBIDX:IT&_trksid=p2060353.m2749.l2649

The initial controller setup is straightforward and simple, and changing between PID, on/off, or limit, and adjusting set point is just as hassle free. One note (this from the controller manual,)

"Note 10. Cycle rate (ot): It is the time period (in seconds) that the controller uses to calculate its output. e. g. If ot=2, and the controller output is set to 10%, the heater will be on 0.2 second and off 1.8 seconds for every 2 seconds. Smaller ot value results in more precision control. For SSR output, ot is normally set at 2. For relay or contactor output, it should be set longer to prevent contacts from wearing out too soon. It normally set to 20~30 seconds."

https://www.auberins.com/images/Manual/SYL-1512A2instruction 1.0.pdf


Instead of upping the cycling rate to 20-30 seconds to accommodate the mechanical relay, I went with the lowest suggested value I could find, 8 seconds, though I just found another reference stating 5 seconds. I'm not worried about wearing out the relay contacts, I just want to avoid pulsing them, so I may experiment with lower values to find out just what's actually optimum for this situation.

Five seconds works fine, any lower and the clicking gets annoying. :biggrin:
 

Attachments

  • s-l1600.jpg
    s-l1600.jpg
    29.9 KB · Views: 18
  • P1040055.jpg
    P1040055.jpg
    81.6 KB · Views: 16
  • P1040056.jpg
    P1040056.jpg
    76.1 KB · Views: 17
Last edited:

SkyHighLer

Got me a stone bad Mana
ICMag Donor
Veteran
Lab hotplates suck!!

This huge Corning stirrer/hot plate had lousy temperature control, so I never used it much. I connected it up for advanced power and temperature regulation and it still sucks. It just doesn't transfer the energy from the ceramic base to liquid contained in vessels (I tried several of different compositions and sizes.)

I paid like $600 for this ancient POS, and all it's basically good for is turning wood to charcoal. :laughing:

Check out the heavy duty stirrer motor/magnet. I couldn't easily get to the actual bottom of the ceramic base to attach a thermocouple.
 

Attachments

  • P1040063.jpg
    P1040063.jpg
    70.3 KB · Views: 16
  • P1040062.jpg
    P1040062.jpg
    86.2 KB · Views: 17
  • P1040059.jpg
    P1040059.jpg
    105.3 KB · Views: 16
  • P1040058.jpg
    P1040058.jpg
    83.8 KB · Views: 18
  • P1040057.jpg
    P1040057.jpg
    91.3 KB · Views: 23
  • P1040076.jpg
    P1040076.jpg
    60 KB · Views: 16
  • P1040072.jpg
    P1040072.jpg
    71.7 KB · Views: 20
  • P1040069.jpg
    P1040069.jpg
    100.2 KB · Views: 20
  • P1040067.jpg
    P1040067.jpg
    68.5 KB · Views: 24
  • P1040065.jpg
    P1040065.jpg
    62.9 KB · Views: 14

SkyHighLer

Got me a stone bad Mana
ICMag Donor
Veteran
Here's something that interestingly does work, a magnetic stirrer through the bottom of a stainless steel pan and a silicone heater.

A silicone heater's element area should always be in full, firm contact with the intended heated surface. It can only take the rated power with all of the element 'sunk,' or the exposed areas will overheat and the mat will burn out. Usually the mats are supplied with 3M adhesive backing to ensure full contact. Also, the exposed side of the mat should be insulated, to free air, or something that can withstand the heat.

Note the order date on the mat, I've been messing with these for awhile.


Take a stock pot and fit it with a digital heater like these from BVV,

https://www.bestvaluevacs.com/categories/digital-heatpads.html

and then put a stirrer under it.


Those heaters from BVV are only intended to heat a vacuum chamber, not boil liquids, so a higher wattage heater should be used, and while you're at it try out the set up I've been describing that let's you smoothly dampen down a powerful heater as necessary along with all the features of modern microprocessor temperature control.
 

Attachments

  • fullsizeoutput_115.jpg
    fullsizeoutput_115.jpg
    55 KB · Views: 19
  • fullsizeoutput_116.jpg
    fullsizeoutput_116.jpg
    46.2 KB · Views: 15

LibertyGuz

New member
Thanks for sharing everyone. I would like to share my experience on using Korean brand bho extractor. I bought this because it's cheap. However, I got a very weird and funny taste extract from it. And I was very disappointed and now I am thinking of buying a better one. But I am still saving money. I am hoping to have it this Christmas. :D
 

SkyHighLer

Got me a stone bad Mana
ICMag Donor
Veteran
Coleman fuel distillation. This is not a how to, inquiring minds want to know, educational purposes only, etc.

I'm not censoring the pictures, this is too important. There is massive forced ventilation passing through the doorway, the fridge and furnace/air conditioner etc. are shut down, emergency plans with fire extinguishers/blanket/spill absorbent in place, I live alone, and seldom accept guests.

Since the water distiller has already proven itself by others to be up to ethanol usage, I grabbed a can of Coleman fuel from the garage to give it a challenge. I was all ready to go, and I see the can says it contains rust inhibitor. I just checked Rick Simpson's site, and he clearly states Coleman fuel contains rust inhibitor, but that naphtha is readily available without it.

And it's blue. I decided this really is a challenge, and proceed. :biggrin:


Coleman lantern fuel according to the MSDS is composed of cyclohexane, nonane, octane, heptane, and pentane.


Here's my working notes:

iso-pentane C5H12

Boiling point 27.8-28.2C/81.9-82.7F

Density 0.6201 at 20 deg C


n-pentane C5H12

35.9-36.3C/96.5-97.3F

0.6262 g/cu cm at 20 deg C


methyl tert-butyl ether (MTBE) C5H12O

Boiling point 55.2C/131.4F

Density 0.7353 g/cu cm at 25 deg C


Hexanes C6H14

B.P. (°C) B.P. (°F)
2,2-dimethylbutane (neo-hexane) 49.7/121.5
2,3-dimethylbutane 58.0/136.4
2-methylpentane (iso-hexane) 60.3/140.5
3-methylpentane 63.3/145.9
n-hexane 68.7/155.7


Hexane C6H14

Boiling point 68.5 to 69.1*°C/155.2 to 156.3*°F

Density 0.6606 g/cu cm at 25 deg C


Benzene C6H6

Boiling point 80.1*°C /176.2*°F

Density 0.8756 g/cu cm at 20 deg C


cyclohexane C6H12

Boiling point 80.74C/177.33F

Density 0.7781 at 20 deg C


n-heptane C7H16

Boiling point 98.38C/209.08F

Density 0.6795 g/cu cm at 25 deg C


iso-octane C8H18

Boiling point 99.30C/210.74F

Density 0.69194 @ 20 DEG C


Octane

Boiling point 125.1 to 126.1*°C/257.1 to 258.9*°F

0.6986 g/cu cm at 25 deg C


xylene C8H10

Boiling point 138.5C/281.3F

Density 0.864 g/cu cm at 20 deg C


Nonane

Boiling point 150.4 to 151.0*°C/302.6 to 303.7*°F

Density 0.7176 g/cu cm at 20 deg C


(Specific gravity = SG)

Out of the can the Coleman fuel had a SG of 0.701 @ 24C/76F

By adjusting the wattage I slowly ramped up the temperature, the temperature controller was only allowed to cap the temperature at the very end of the distillation when the dripping slowed.

At 215F @ 250 watts it started to drip

AT 225F I cut the wattage back to 225 watts as I noticed a little solvent weeping from the lid seal

Tossed ~50ml of 'head'

At 231F @225 watts I had ~150ml

At 236F I cut the wattage back further to 200 watts to see if that eliminates the solvent weeping

Switched out the receiver, ~250ml @ 0.657 SG

At 261F returned to 225 watts

Switched out the receiver, ~250 ml @ 0.700 SG

276F @ 225 watts

Switched out the receiver, ~200ml @ 0.721 SG

292F @ 225 watts

Switched out the receiver, ~100ml @ 0.725 SG

The last two fractions were combined, 0.722 SG


The first fraction's odor and feel to the touch is fine, mostly pentane I assume, the second fraction is ok, and the third is a little too gasoline like, it should probably be redistilled, I'll probably combine the second and third bottles for re-distillation. I did a watch glass test for non-volatile residue on the heavy 0.722 SG fraction. The puddle receded down to a minute speck of clear oil with no odor.


The silicone gasket swelled up as expected (I did a sample test, huge swelling, and then everything returns to normal as the solvent evaporates, the gasoline odor goes also,) what I hadn't expected was the plastic of the lid melting. I'll get back to you on how I repair and upgrade it, it seems only the edge of the white plastic where it met the hot silicone was there any problem. Upgrading the seal to a large, thick PTFE o-ring would be too expensive, a ring made from PTFE tubing might work, 2-24mm OD is available at eBay, 10mm OD is only $6/meter plus e-packet shipping from China. How to secure it in place? I have braided Dacron cord in a variety of thicknesses (20# test to 500# test,) maybe a piece double wrapped around inside of the tubing, and tied with a constrictor knot. The knot is pulled tight by exiting the tails of the knot through the underside of the tubing near the end using a thread and needle leader. Now there's some jibberish for you. :laughing:

https://www.ebay.com/itm/Wholesale-...06&rk=1&rkt=1&&_trksid=p2045573.c100506.m3226

Update: I disassembled the unit, cleaned it up, and took some measurements. I ordered two meters of 10mm ID PTFE tubing to replace/upgrade the lid seal, and the piece of tubing between the condenser and collection jar. I also ordered a couple of 3/8" x 11/16" PTFE washers to replace the oversize fat silicone seal where the condenser tubing passes through the lid. PTFE washer/a short piece of PTFE tubing/another PTFE washer, the three pieces go on the condenser tube, sandwiched between the stainless steel lid and the plastic fan assembly above.


Pentane is not available to everyone inexpensively in the US, this is a response.


Bottom line, don't use un-distilled Coleman fuel, and naphtha contains enough high end solvent to make it worth distilling.
 

Attachments

  • P1040229.jpg
    P1040229.jpg
    83.3 KB · Views: 16
  • P1040240.jpg
    P1040240.jpg
    83.6 KB · Views: 13
  • P1040252.jpg
    P1040252.jpg
    94.4 KB · Views: 17
  • P1040247.jpg
    P1040247.jpg
    64.2 KB · Views: 16
  • P1040246.jpg
    P1040246.jpg
    72.6 KB · Views: 16
  • P1040244.jpg
    P1040244.jpg
    62.6 KB · Views: 19
  • P1040237.jpg
    P1040237.jpg
    63.2 KB · Views: 17
  • P1040253.jpg
    P1040253.jpg
    76.1 KB · Views: 17
  • P1040257.jpg
    P1040257.jpg
    55.7 KB · Views: 19
  • P1040265.jpg
    P1040265.jpg
    56.9 KB · Views: 16
Last edited:

SkyHighLer

Got me a stone bad Mana
ICMag Donor
Veteran
^ "There is massive forced ventilation passing through the doorway, the fridge and furnace/air conditioner etc. are shut down, emergency plans with fire extinguishers/blanket/spill absorbent in place, I live alone, and seldom accept guests."

Pictures of the three fan stack (~$60) providing the positive pressure forced ventilation. The fans suck in air from an open window in the back bedroom, and blow it into the closed up house where it has no place to easily exit except out the back door. There are a couple of protruding screw heads in the doorway the fan stack slips over to hold it up, while the baffle is secured at the top right corner only, the slight vacuum created behind it pulls it tight against the control knobs/handles and the door frame.

https://www.homedepot.com/p/Lasko-20-in-3-Speed-Box-Fan-3733/100405665

That's a three layer anti-static work mat, so far completely chemical resistant.
 

Attachments

  • P1010217.jpg
    P1010217.jpg
    51.2 KB · Views: 18
  • P1040267.jpg
    P1040267.jpg
    84 KB · Views: 16
Last edited:

SkyHighLer

Got me a stone bad Mana
ICMag Donor
Veteran
I think I have identified the problem with the water distiller 'melt down.'

You can see in the attached pictures the original design, it had a nylon inner lid instead of the stainless steel piece they now use.

What melted was the lip of the outer lid that protrudes down around the inner lid. It's only purpose seems to be to keep the silicone seal from sliding off. So I'm going to grind the inner lid off all around with my Dremel grinder, I indicated the area with a note in the pictures.

I'm also increasing the gap between the stainless steel inner lid and the plastic outer lid by adding more washers. With the amount of shim shown, the inner and outer lids are completely isolated except at the bolts. The original design had a firm area of horizontal contact near the lip I'm removing.

With the lip gone, I'll need to secure the seal some other way. I tested the solvent resistance of braided Dacron cord yesterday, no problem with ethanol, isopropyl, methanol, acetone, and Coleman fuel distillate, so I intend on tying it around the stainless lid using a constrictor knot to hold the seal in place. If the Dacron cord slips, I'll tack it in place with a few drops of J-B Weld around it's circumference.

If I can get the PTFE tubing I have coming to form an adequate seal, I should be able to call this a successful completed project.


If anyone missed it, only two hundred watts was the optimum heater power for distilling the white gas in Coleman fuel.

Different solvents, different power to the heater, the boil off temperature will regulate itself when you have the power dialed in.
 

Attachments

  • P1040281.jpg
    P1040281.jpg
    39.5 KB · Views: 20
  • P1040279.jpg
    P1040279.jpg
    46.7 KB · Views: 19
  • P1040277.jpg
    P1040277.jpg
    34.5 KB · Views: 18
  • P1040276.jpg
    P1040276.jpg
    33.6 KB · Views: 18
  • s-l1600.jpg
    s-l1600.jpg
    31.7 KB · Views: 18
  • P1030918.jpg
    P1030918.jpg
    85.1 KB · Views: 14

troutman

Seed Whore
You're distilling flammable solvents like Coleman Fuel with a water distiller? :peek:

I'm so glad I got real lab glassware.
 

SkyHighLer

Got me a stone bad Mana
ICMag Donor
Veteran
:biggrin:

I don't think I'd distill a gallon of highly flammable solvent at up to 300F in glassware, even under a hood.

If I can get the water distiller to pass shakedown, it has multiple advantages, no glass, only stainless steel and PTFE contact surfaces; powerful 750 watt heater welded to the base providing better heat transfer than a hot plate or mantle, gallon vessel with a fully open top for removal of product and cleaning; no internal temperature reading necessary as the underside thermocouple tracks the internal temperature accurately; and the fan cooled condenser doesn't require an external heat sink (of water, etc.)

Besides, my gizmo deluxe temperature controller setup works well with it.

Wall outlet >power meter (P-3 Kill-A-Watt, etc.) > Variac > temperature controller with PID, on/off, and limit functions switching a mechanical relay > device heater

Or a power regulator microprocessor combined with a custom temperature controller instead of the Variac/temperature controller setup (you loose the ability of over-volt with 1.3 times the power to the heater,)

Still Heat Controller for Distillation Process Automation
Starting at: $67.95
Model: DSPR220

Product Description:
DSPR220 is a controller for automating the distillation process. It is to be used with a solid state relay to drive the electric heating element. It can bring the liquid to the boil point in the maximum speed; then automatically reduce the power to maintain the boil at a desired level. It has a programmable alarm that can be used to notify the operator to remove the foreshots/heads at specific temperature. It also stops the distillation automatically so that the feints/tails will not be collected. The criterial for stopping the distillation can be either a preset temperature, or a preset distillation time.

https://auberinc.com/index.php?main_page=product_info&cPath=53&products_id=559
 
Last edited:

troutman

Seed Whore
Why do you need 300F for low boiling solvents?

People who use excessive heat are careless and will ruin their products or worse set off a disaster.

I distilled N-Hexane by gently heating to less than 70C.

You couldn't see much action in the boiling flask and the drip rate was very slow but steady.

The beauty of glass is that I can see what is going on and can adjust the heat accordingly. :tiphat:

Every time I see a rolling boil in a flask in a video on YouTube I shake my head.

BTW: I am using a Friedrich Condenser for my highly volatile solvent distillation.

https://hobbychemistry.wordpress.com/2015/04/03/types-of-condensers/
 

SkyHighLer

Got me a stone bad Mana
ICMag Donor
Veteran
^

Octane

Boiling point 125.1 to 126.1°C/257.1 to 258.9°F

0.6986 g/cu cm at 25 deg C


Nonane

Boiling point 150.4 to 151.0°C/302.6 to 303.7°F

Density 0.7176 g/cu cm at 20 deg C


Coleman lantern fuel according to the MSDS is composed of cyclohexane, nonane, octane, heptane, and pentane.


When I get the distiller back up and running I'll repeat the Coleman fuel experiment with secondary distillations of the products. I'll then take specific gravity and boiling point readings to label the bottles.
 

troutman

Seed Whore
If have looked at distilling Coleman Fuel and if I did it. I would just heat enough to within a few degrees of the
second boiling point fraction. This way I would get all the pentane. Then I would redistill and try to get purer
pentane. I wouldn't bother with the rest of the fractions.
 

SkyHighLer

Got me a stone bad Mana
ICMag Donor
Veteran
Bestine heptane is back!! The brand is now owned by Speedball Art Products Company,

https://www.speedballart.com/our-product-lines/best-test/bestine/

https://www.speedballart.com/wp-content/uploads/2017/12/Bestine-Thinner.pdf

I bought a quart via Amazon for $16,

https://www.amazon.com/gp/product/B006SOK9YY/ref=oh_aui_detailpage_o00_s00?ie=UTF8&psc=1

The pictures show the specific gravity comparison tests done at 25C, pure n-heptane should read 0.6795 at 25C.

Bestine 0.690

Doc Edington's 0.687

Beacon 0.693

The Bestine has a stronger odor than the other two, and I see a little brown gunk in the bottom of the can which should be filterable.


I added links at my Solvents and polarity page (linked to in my ICMAG Signature below) so you can easily find purchase info. The n-heptane entry now looks like this:

n-heptane C7H16 142-82-5 98.38C/209.08F 0.012
https://en.wikipedia.org/wiki/Heptane
https://www.icmag.com/ic/showpost.php?p=7929096&postcount=153
https://www.icmag.com/ic/showpost.php?p=7941481&postcount=165
https://www.icmag.com/ic/showpost.php?p=8004478&postcount=218
https://www.icmag.com/ic/showpost.php?p=8137955&postcount=260
 

Attachments

  • P1040338.jpg
    P1040338.jpg
    69.6 KB · Views: 18
  • P1040337.jpg
    P1040337.jpg
    75.3 KB · Views: 21
  • P1040336.jpg
    P1040336.jpg
    93.3 KB · Views: 24
  • P1040335.jpg
    P1040335.jpg
    90.2 KB · Views: 19
  • fullsizeoutput_11b.jpg
    fullsizeoutput_11b.jpg
    46.8 KB · Views: 22
  • P1040339.jpg
    P1040339.jpg
    61.6 KB · Views: 21
  • P1040340.jpg
    P1040340.jpg
    69.2 KB · Views: 23
  • P1040341.jpg
    P1040341.jpg
    54 KB · Views: 19
  • P1040342.jpg
    P1040342.jpg
    69.4 KB · Views: 19
  • P1040344.jpg
    P1040344.jpg
    54.7 KB · Views: 20
Last edited:
Top