Planning ahead and good documentation are two things that I think are critical to improving your growing skills. I can go back on these forums and see what I did my first grow, at several different stages during the grow. It's very good to go back and look through previous grows sometimes and notice the mistakes, and catch yourself before you make them again.

You are using an out of date browser. It may not display this or other websites correctly.
You should upgrade or use an alternative browser.
You should upgrade or use an alternative browser.
GrnMtnGrwr gets back into growing! 400w HPS Stealth Cabinet Construction Log
- Thread starter GrnMtnGrwr
- Start date
roughnice420
Active member
GrnMtnGrwr, you should check out my thread I just posted in the soil forum my cabinet is really similar to yours. I've got an aircooled 400w with a 4" vortex and filter inside a cab using one of those 12"x12" darkroom louvers (with hepa filter).
Take it easy man I think you're cab is gonna work real well!
Take it easy man I think you're cab is gonna work real well!
GrnMtnGrwr, you should check out my thread I just posted in the soil forum my cabinet is really similar to yours. I've got an aircooled 400w with a 4" vortex and filter inside a cab using one of those 12"x12" darkroom louvers (with hepa filter).
Take it easy man I think you're cab is gonna work real well!
Wow thanks for letting me know, I'll definitely be checking out your thread, I'll probably have some questions for you! My Chemdog/C99 and Chem4/SD both shipped today, and I've got about a half dozen tracking numbers that I'm watching for all the little bits and pieces of my grow that are on their way here!

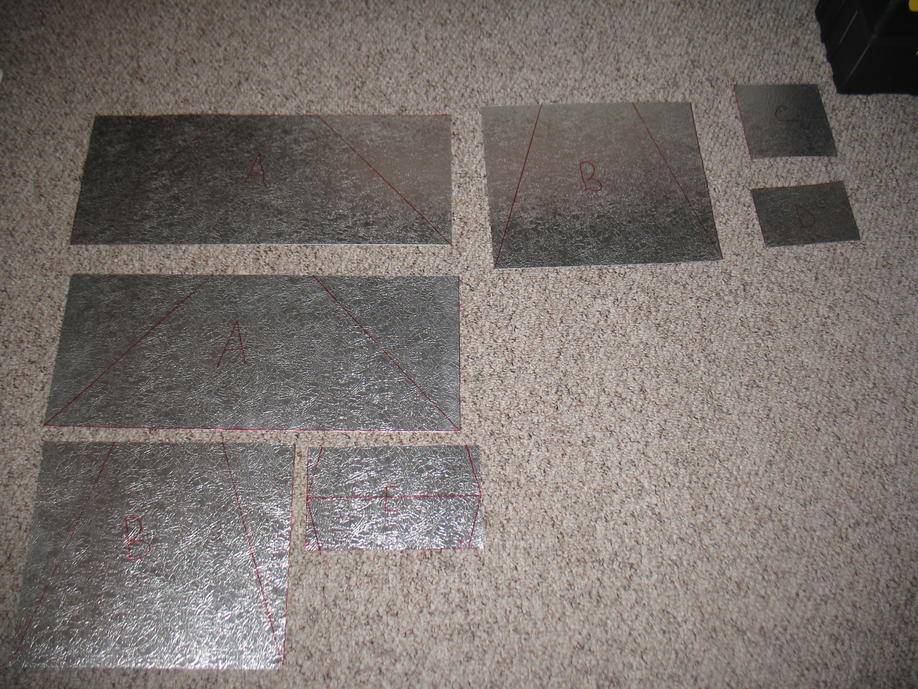
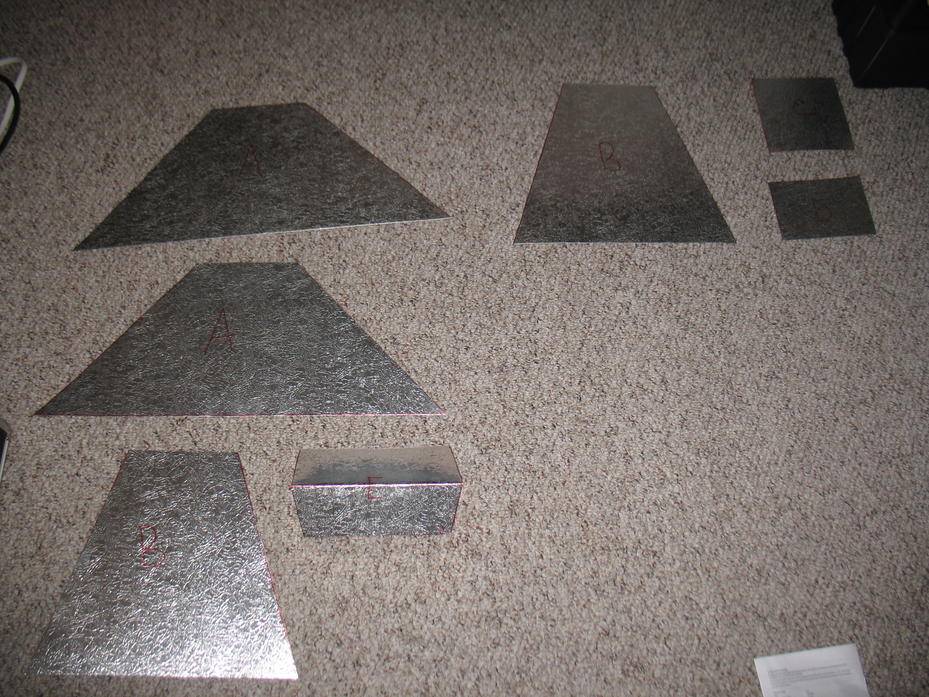
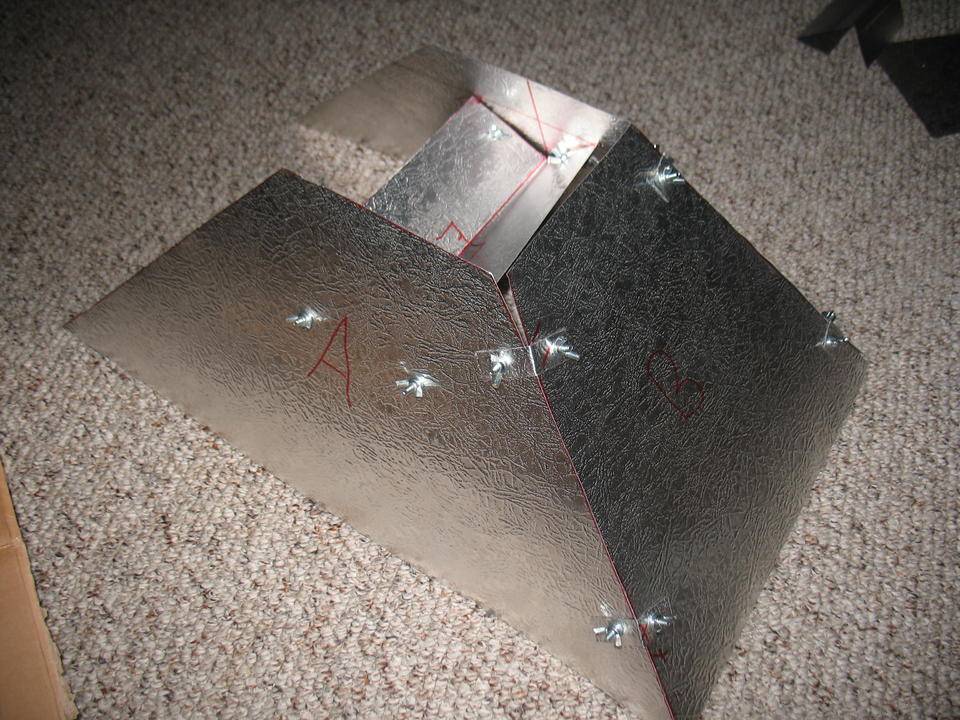
Well, I had the day off today and I just kinda hung out, got high, and worked on my reflector. I came up a few pieces short, but a trip to the hardware store tomorrow will take care of that, and I'll be able to finish it up. I'll be making a thread about it when I'm finished, but for now, here's the pictures.


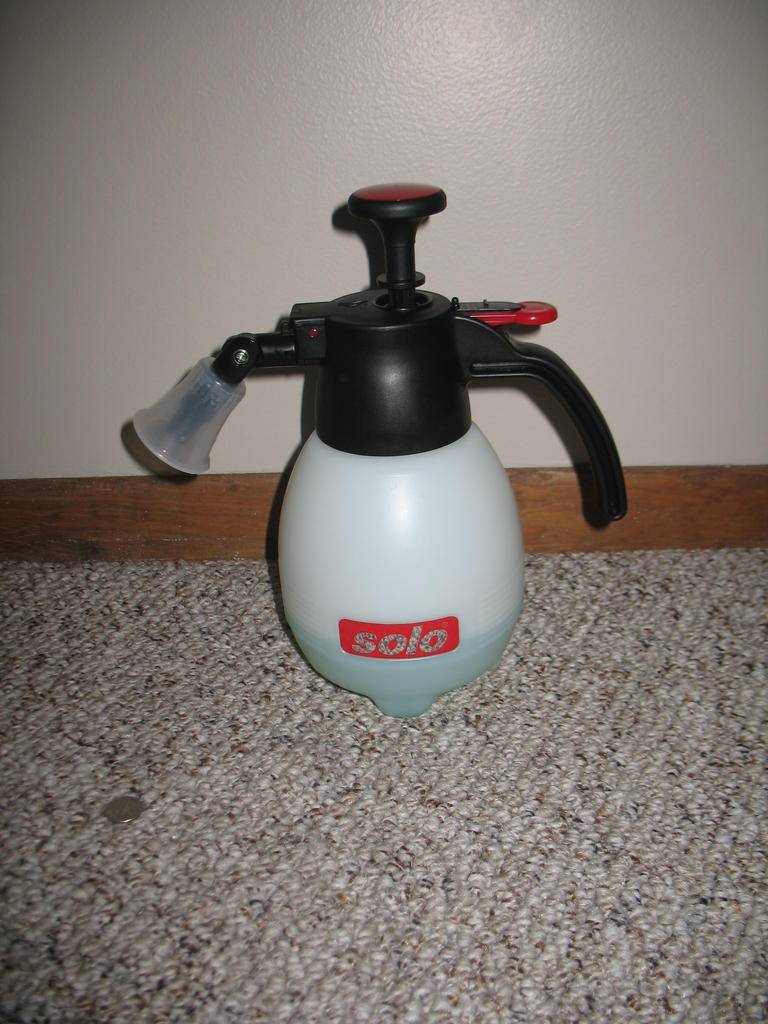
I also got my pressurized mister today, I think it's exactly what I was looking for. I'll be foliar feeding throughout veg and the first few weeks of flower. I'll be using Liquid Light and Penetrator with some Maxicrop, and then cut out the Maxicrop during the stretch.

I also got my pressurized mister today, I think it's exactly what I was looking for. I'll be foliar feeding throughout veg and the first few weeks of flower. I'll be using Liquid Light and Penetrator with some Maxicrop, and then cut out the Maxicrop during the stretch.
severian
Member
Hey, I saw your other thread and came to see all the bad advice you been getting. Not much it seems.
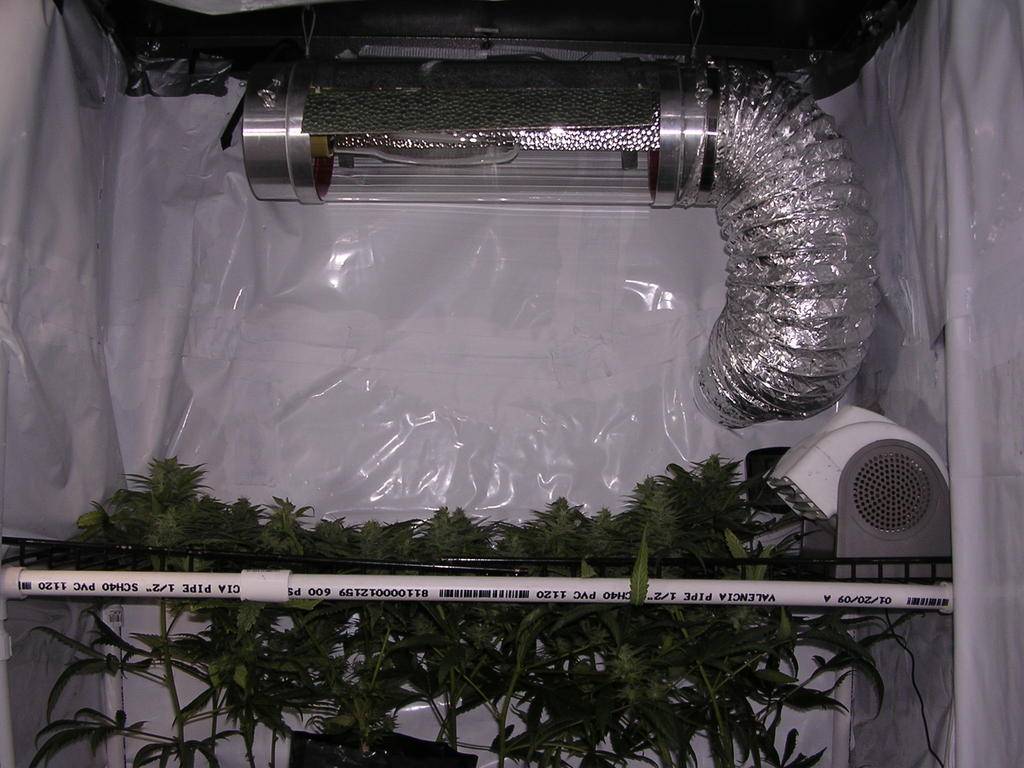
I like the way your cabinet is coming together. The vortex is loud so you will have to work on that if you want stealth. I put it outside in the garage and housed it in an old 15" subwoofer box.
I have the same layout as you - except I got the metal cab from Lowes. I first went with an ebb n flow, but not enough room so I switched to organics which I love. There is room on the bottom for a mom/veg chamber.
1 thing you may run into is problems without an aircooled reflector - specially when your cab gets full of green.
Here is a pick of mine. Good Luck with the cab and your beans.
Yeah the Vortex is definitely not a quiet fan. In my previous cabinet I had the Vortex exhaust directly out the top of the cabinet, with the carbon filter coming before an air cooled hood. I'm hoping by putting the Can33 on top of the exhaust it will muffle the sound. This, combined with the speed controller, should bring noise down to a level that is masked by a fan in the bedroom.
I've definitely been planning with ventilation and temps as a high priority. The exhaust for the cabinet is through the hood, so all air exiting the cabinet will be flowing from the tops of the plants, past the bulb, and out the exhaust. The exhaust then travels straight up and into the carbon filter, no turns anywhere. I've also got a pretty large passive intake to maximize airflow.
I should get a much better idea in a few days, the final pieces are coming together, and I've got the next two days off so I've got plenty of time to work.
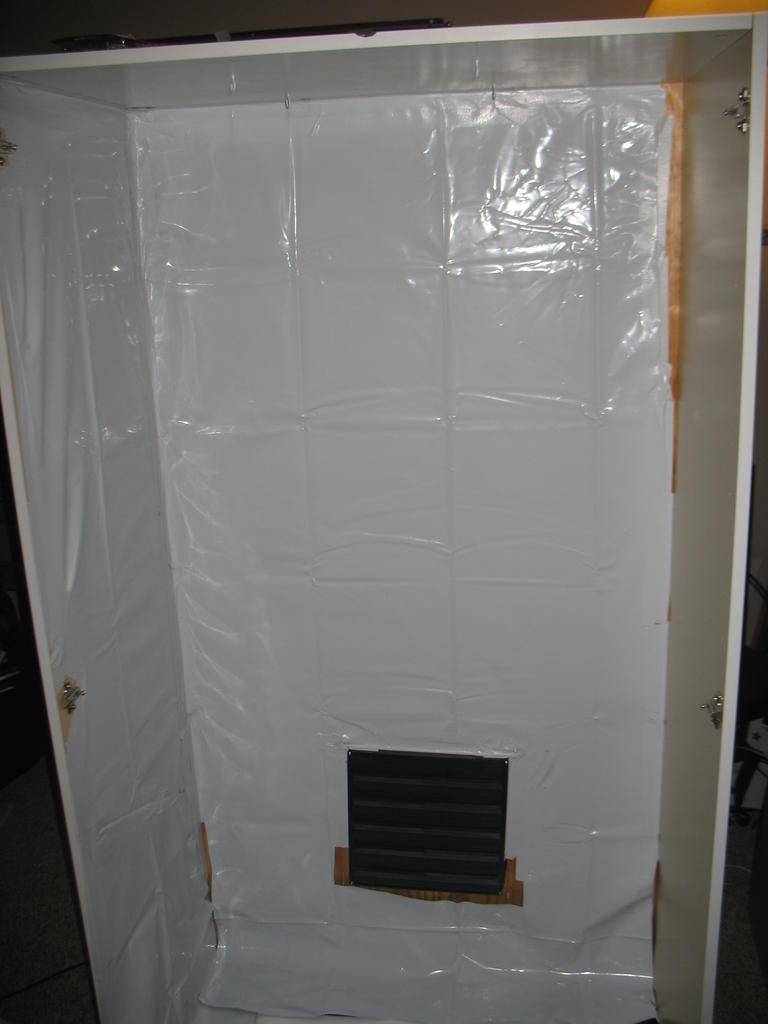
Things are going great! The jigsaw I used to cut the 12"x12" hole for the light louver was loud as hell. I need to go get ammo for the staple gun to put up the panda film... or should I use heavy duty duct tape? Either way, I also need a few more wingnutes to finish up the top of the hood, a few long screws to mount the mogul socket, still not quite sure what size to get. A few miscallaneous parts and pieces, and a 1"x4" board to go up and down the center of the cabinet, right behind where the doors meet. This will give more stability, and will also make it much easier to completely lightproof the doors. The doors will be the last thing to go on, so that will be tomorrow. I have to get a few things out of storage to drill the exhaust hole and I'm still not sure how I'm going to hang the Vortex. Any ideas would be welcome!
That last picture shows the top of my reflector. That is going to be covered with a 4" outlet on it, which will be connected directly to my Vortex, which will be a few inches above it.
when i put my panda film up i use just duct tape but a staple gun makes it so much easier; the best is to put a piece of duct tape down and then a staple on top; that way the poly won't tear as easily although it usually doesn't tear as is
i hope you're going with the poly over and instead of the mylar
so the vortex will sit ontop of the reflector? maybe a rubber gasket between the two to cut down on vibration a bit; they're not the lightest fans in the world; i might mount it to the top of the cab securely; would hate for it to fall
i hope you're going with the poly over and instead of the mylar
so the vortex will sit ontop of the reflector? maybe a rubber gasket between the two to cut down on vibration a bit; they're not the lightest fans in the world; i might mount it to the top of the cab securely; would hate for it to fall
Yes definitely poly instead of mylar. I got mylar at first, without thinking, and then realized that I was going to be foliar feeding quite a bit, and mylar wouldn't stand up to that. A 10' x 10' sheet of 6mil was only like $15, why wouldn't you get it?
The Vortex will be suspended an inch or two below the exhaust out the ceiling by some sort of bungee cord or string contraption. There will be an inch or two up to 24"~ of ducting between the Vortex and the exhaust at the top of the hood.
The duct tape + staple option sounds like a good one to me. I'm shooting for a cabinet of a pretty good quality, that will last a while. I'll be reinforcing all the joints, and then caulking all around to completely seal it. I still need to buy a filter to attach to my passive intake, that's going to be pretty important to me. I don't want to see hair or dust on these buds when I take macros.
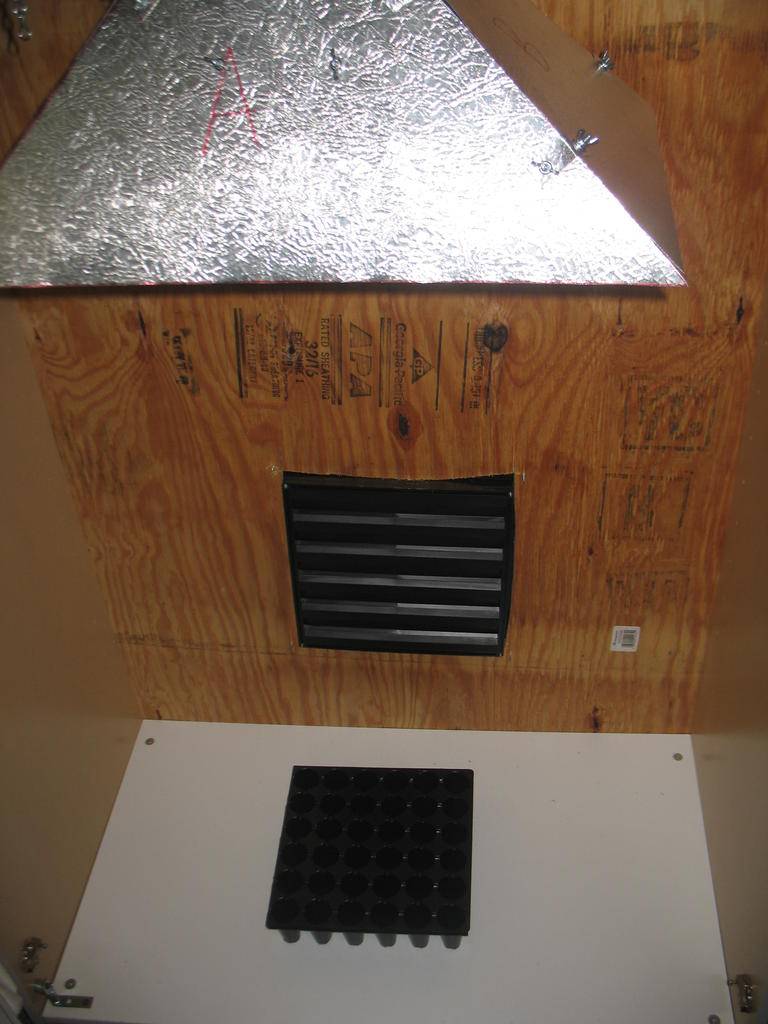
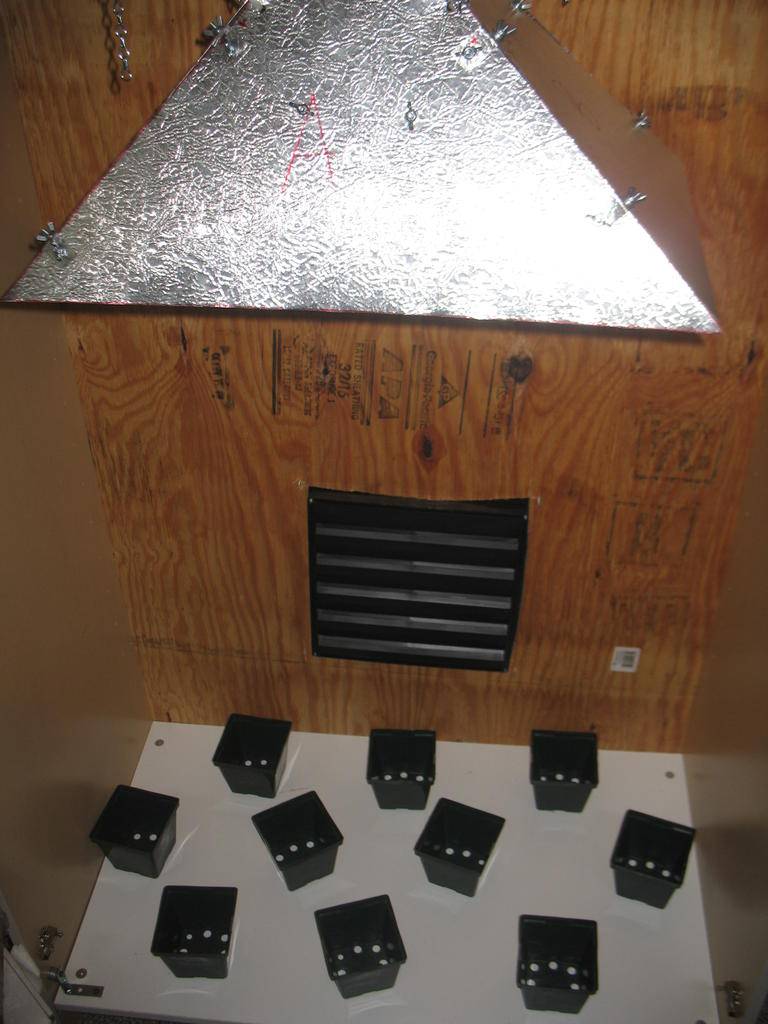
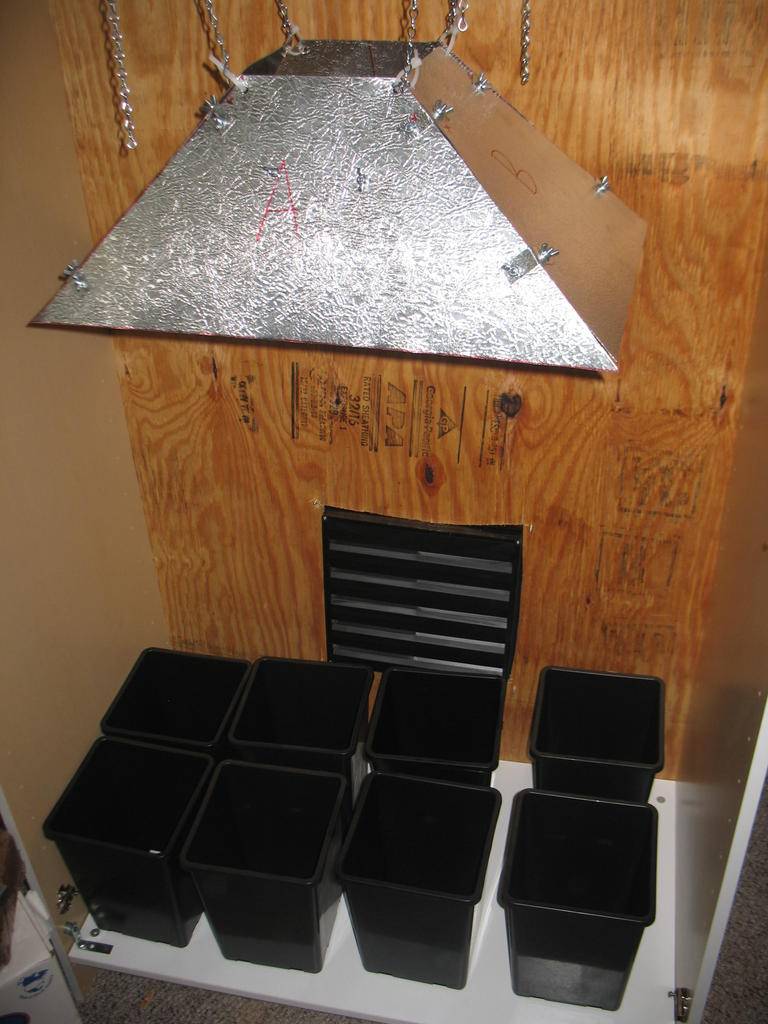
2/3 done applying 6mil poly. I'm really liking how this looks! I'm leaving it unattached at the bottom, because I'll be putting a single piece of poly at the bottom that extends upwards 6" on all sides, to act as a small waterproof area, so that I don't have to have a little tray for each pot. The poly that is lining the walls will go over that, so any water that gets on the walls will just drip to the bottom and not touch the MDF/Plywood at any point. I'm using heavy duty HVAC duct tape right now, I will be stapling when I get more staples, and then duct taping over the staples.

That second pic is the only problem I've had with the cabinet. I leaned on it before there was any support for the shelf, and it cracked. My fault, and easily fixed. I've got those L brackets all over the cabinet.
Accomplished today:
-Drilled 4" exhaust in the ceiling.
-Reinforced all joints, cabinet is much more stable.
-Added center brace, adding to stability and making lightproofing much easier.
-Created the poly floor.
Things to do:
-Bring in electrical outlets.
-Reinforce all duct tape/poly with staples, and re-tape.
-Make filter and apply to inside of passive intake. (Scaled up version of JLP's Male Isolation Chamber exhaust filter.)
-Figure out how to hang the Vortex
-Finish DIY Reflector
So close...
Vortex hung...

Electric brought in...
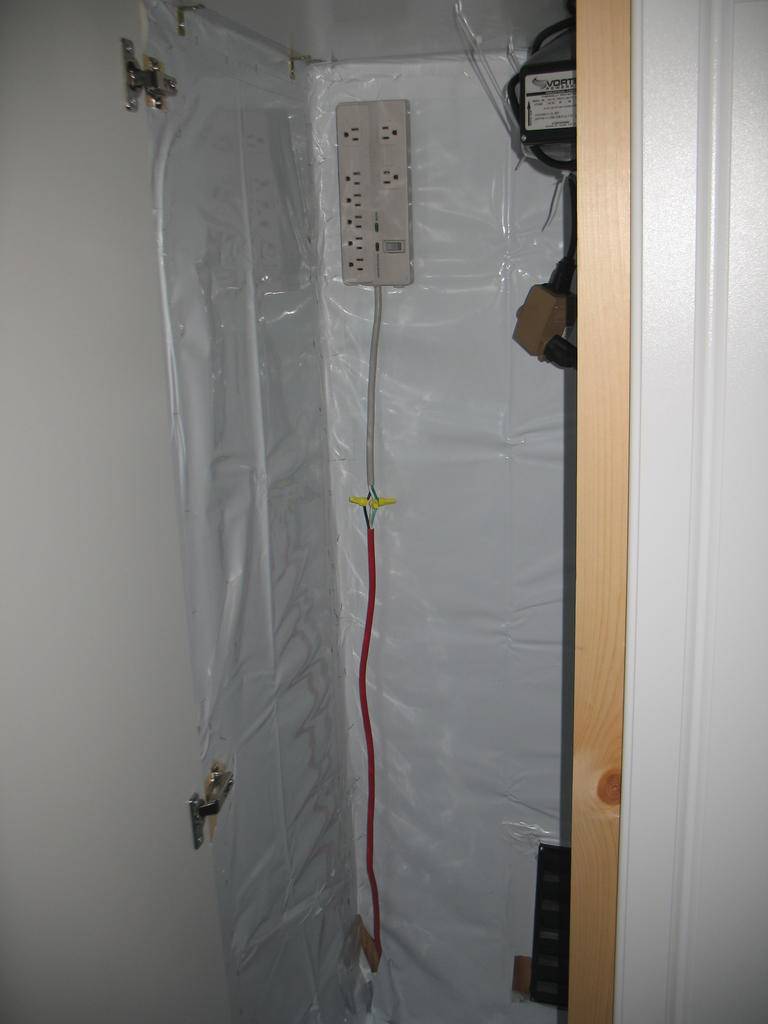
Vortex hung...
Electric brought in...
If you don't mind my asking, why not use a furnace-type filter in front of the intake? It does little to impede the airflow and can be changed/replaced on the fly.
That's what I use on mine. The bulk of the intake area (2x8" darkroom louvers) is on the side of the cab and a single 16x25 filter covers it with lots of room to spare. I used slightly longer bolts to install the louvers, so that ~1" of each bolt sticks out. The filter is then hung on those bolts.
Simon
Like this?

Not sure if that's what you're talking about though, but there's a view of the back of my cabinet, just the filtered intake and the extension cord coming out.
Not sure if that's what you're talking about though, but there's a view of the back of my cabinet, just the filtered intake and the extension cord coming out.
Like this?
Not sure if that's what you're talking about though, but there's a view of the back of my cabinet, just the filtered intake and the extension cord coming out.
Yes, that's pretty much what I mean. Sorry for not being clear. The only issue I see is changing the thing. IME, the filters only last a couple of months. With that in mind, perhaps hang the filter on the inside of the cab.
I was originally referring to this:
-Make filter and apply to inside of passive intake. (Scaled up version of JLP's Male Isolation Chamber exhaust filter.)
Perhaps I misunderstood. If you're using a furnace filter, why the filter above?
Simon
gdbud
Member
When I was building my cabinet before I assembled the cabinet I used spray adhesive and attached the panda plastic to the sides, back and floor then assembled the cabinet and caulked the corners.
For the intake I built a plenum box that would accommodate a 12x20" furnace filter that I was able to install baffles to make it light proof.
For the intake I built a plenum box that would accommodate a 12x20" furnace filter that I was able to install baffles to make it light proof.
looking good nieghbor i'll be tagging along as i have basically the same cab but i use soil got a 400 hps ,homade cooltube ,i exaust into the attic .i hung black polly over the front of mine ,the cabinet is in a closet so peeps dont see it anyway so the plastic on the outside is no problem
simon - The quote from my post was my original idea, I decided I'd rather have the filter before the louver so that I wouldn't have to clean it out, and I'm pretty sure I'll change the filter once per grow. The filter pictured is what I've decided on for my intake filtering.
gdbud - I was considering doing the spray adhesive but ended up just going with duct tape and staples.
chuckyoufarley - This cabinet is going to be right in my bedroom, I can't wait until I've got a space I don't have to worry about people seeing it, and an attic to vent into!
gdbud - I was considering doing the spray adhesive but ended up just going with duct tape and staples.
chuckyoufarley - This cabinet is going to be right in my bedroom, I can't wait until I've got a space I don't have to worry about people seeing it, and an attic to vent into!
Soular HITS
New member
I like what you've got going so far it is very reminiscent of the cabinet that I just built for myself. This size is perfect for producing a nice personal amount and then some...
Not trying to hijack your thread or anything but you should check out my grow...I just began posting as I just had my first harvest and finally decided that I had something worthwhile to share with this great community of growers
I run a 400 watt 24 plant perpetual SOG with a mother/clone chamber running AIR POTS in a similar sized cabinet. I saw the pictures you have in your sig and YES thats the kind of roots you get with those babies...they're crazy!!! I swear they should pay me for how much I talk about these pots to my grower friends...
My thread is here:
http://www.icmag.com/ic/showthread.php?t=153951
Keep up the great work of documenting this process and thanks for doing it! Peace brother and be safe.
No worries about hijacking at all, thanks for letting me know about your thread I will definitely check it out! I've avoided perpetual because I'd like to keep my plant numbers as low as possible, but I've always been interested. When I do implement it, it will probably be a one plant a week harvest at most.

