What's new
  • Happy Birthday ICMag! Been 20 years since Gypsy Nirvana created the forum! We are celebrating with a 4/20 Giveaway and by launching a new Patreon tier called "420club". You can read more here.
  • Important notice: ICMag's T.O.U. has been updated. Please review it here. For your convenience, it is also available in the main forum menu, under 'Quick Links"!

DIY Ebb and Flow $50! Instructions step by step

Levitikuz

Member
i dont know, because i was never told or shown how to do it the correct way so i had to rig it the way i thought of...im sorry lol!!!
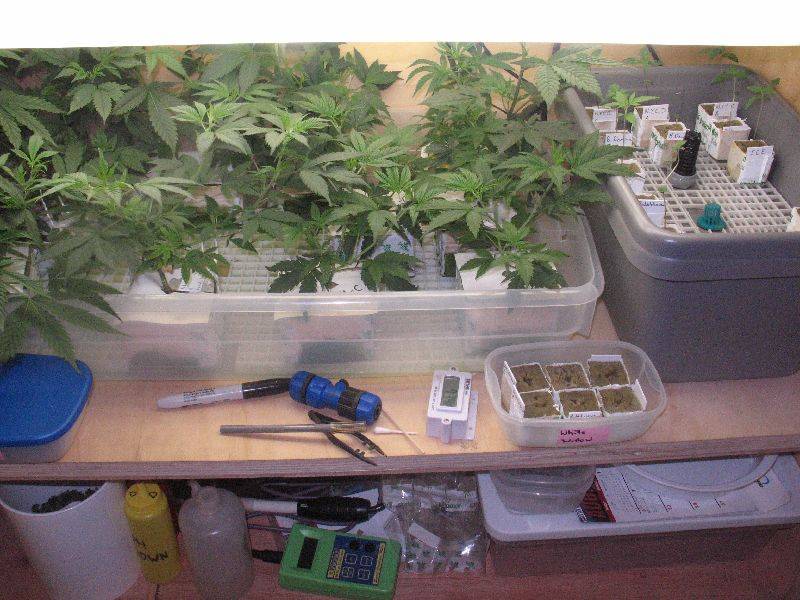
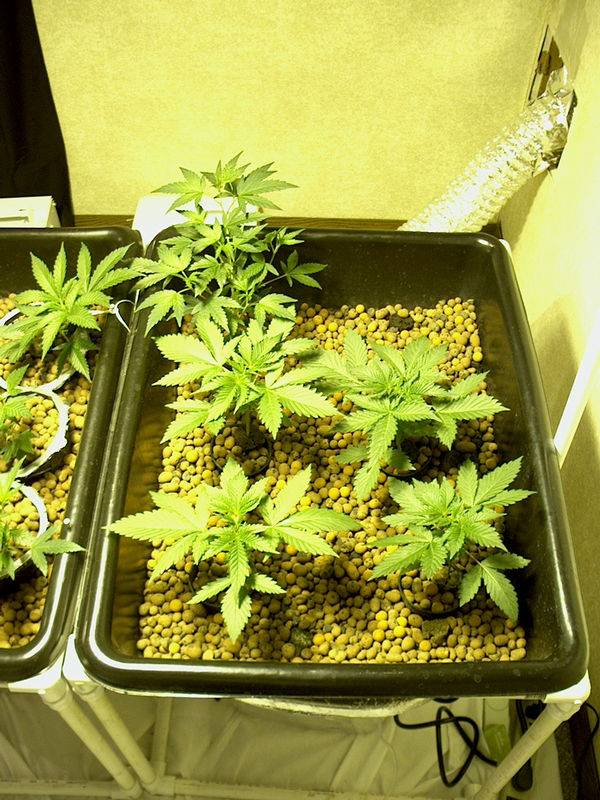
My flow rates seem to stay the same tho, my sadhus definitly have alot more root mass then they did when they were seedlings obviously and my flow rates are still the exact same...
I feel this system is almost fail proof set up this way...i dont see why the drainage flow would change because of root mass? well i guess it hasnt changed the flow in the Sadhu table...have yet to see if it will change in the clone table...


But now i do see what your saying...see i never thought of it that way, im glad you told me...ive looked at so many DIY ebb and flows and the way a ebb and flow works and that 1 little detail had always seem to be left out, thank you for finally clearing that up for me...im sure the next tables ill make will work the way you explained...thanks man

lol, i actually just fixed the 1 i just built...thanks alot man!

thanks for all the support and help guys :wave:
 
Last edited:

chosen

Active member
Veteran
Nice... How funny. I didn't even notice that you didn't have an overflow.I use electrical fittings and washers for my building too. I don't go to the hydro store unless I need food.
 
Good call on the overflow, didn't think of that either. Basing mine off a thread I saw here using stacked tubs, but can't find the thread. Always forget to post in them so I can find them later. Pump and 2 tubs for about $30, couple a bucks for fittings. Will start a thread when I get it done and get some pics.
 

imnotcrazy

There is ALWAYS meaning to my madness ®
Veteran
Tyler you thinkin somethin like this:

The E&F on the right is made from 2 different height "Nestable" tote boxes

Levi: Look in this pic, the overflow is the fitting in the back.


They use the overflow fitting to regulate the flood height. Not that your system won't work, but you'll have more functionality by adding an adjustable overflow fitting. Keep in mind you can adjust 2 things to adjust the amount of feedings your plants will need: either adjust flood time/frequency OR adjust the height of flooding
 
Heh, no, that looks much better than mine. Mine are same sized tubs, so it's quite a bit taller overall. The one I saw had the top cut out, and the top tub rested in the hole keeping about half the upper tub protruding from the lower tub. I went ahead and made a pvc frame to support the upper tub, tho, just in case.

Blast you! Now I have to go shopping again and see if I can find a shallow tub that'll stack like yours. Thanks.
 

Levitikuz

Member
well if somone decides to actually build one of these tables i show you how to build im sure they can just pop in ebb and flow parts from the hydro shop if they choose to, im just showing them a different way to do it, and it seems to work fine on the other 2 tables, but im pretty damn sure ebb and flow parts would work alot more reliably.

thanks for all the input guys! later
 
I'm gonna be building one like this but a bit differently but basing it on the same design. I will probably split one res into 2 seperate tables. I'm gonna be using coco chips and CNS17. Any special nute demands? what ph and PPM do you run at?
 

Levitikuz

Member
At veg i ran as up to 1200 ppms flooding 12 times a day...but they dont seem like they need that much so im running my ppms around 800-950 ppms.
My ph i try to keep in the range of 5.5-6.5 and they seem to be doing great.
Im just using the GH 3 part along with hydroguard.

I actually put them into flower room tonight, there getting there 1st hours of darkness tonight...im going to run veg formula for them for the 1st 2 weeks of flower then switch to flower nutes.

This is actually techincally the end of day 21 of veg, and will be starting tommorow on day 22 for the 1st day of 12/12....


the 1st 4 in front are the ones from seed, the bubblegum in the back left is from clone...btw the seedlings are Mandala Sadhu
 
Last edited:

Budweiser13

Active member
Very cool there is a video out there on torrent sites thats called "I Grow Chronic" or something like that. Some dude all painted green shows how to build the same exact system but he does use the store bought fittings. Hope you get some big buds......... :wave:
 

I.M. Boggled

Certified Bloomin' Idiot
Veteran
Good design observations folks, we have an informative, system variation/ design improvement discussion going on here :)
...and it's a good thing. :) :joint:

System design "recipes" are similar to cooking, one can take a specific recipe and "tweek it" to personalize it to their specific likings. :)
>>>

In regards to sourcing specialty D.I.Y. parts at local non-specialty stores:


An overflow pipe setup can obviously be utilized at will for that added fail-safe aspect to the basic design concept presented here.

I use electrical fittings and washers for my building too.
The gray screw type connectors from the electrical department in addition to a rubber washer externally hunkered on down kinda tight will work exceedingly well for a table bulkhead fitting...either as a fill or overflow application.

For an overflow, just simply insert the desired height piece of pvc pipe to the inside of the washer sealed 2 piece male/female gray connector.

An auto supply store is a possible source of rubber washers or even various tubed silicone gasket makers (silicone aquarium sealant is basically the same critter.) :)
A bead of silicone on the external fitting, allowed to dry and cure, then screwed together and snugged up tight to the tub, will achieve a long term leak proof fit.

Evaporative cooler overflow fittings work well too and are available in drier climates of the world (and mail order hardware) in the cooler dept..
Now if all else fails, get your wallet out, then walk over and ask the hardware guy
"where the hell do you keep the Bulkhead Fittings around here." ;) :)

If using the larger tubs (the six cubic foot ones), one should probably be sure to incorporate a larger diameter pvc pipe for the frame in order to handle the fully flooded tables additional weight.

One may which to purchase one, perhaps two tubs at a time as to remain discrete, as they probably don't sell many six packs of cement mixing tubs none to often down at the ye olde local hardware store. ;) :)

IMB :)

 
Last edited:

LiLWaynE

I Feel Good
ICMag Donor
Veteran
That is a decent Idea you got goin on there levitikuz.

I plan on using the JUMBO size black tubs for my flood table ($12each)(which were just put into stock at this LOWES near me)

my plan is to use 4 of these tubs to hold 32-7inch pots with a top drip feed to waste. For the waste, I plan on connecting 4 pvc pipes (1 from each table) to one drain which will drip back into the reservoir and re-used.


it is going to be COOL
 

rr14

Member
here's a total newbie question. I noticed in some of the pics guys run the tray full of hydroton and other guys just run the buckets or cups of the plants with hydroton, but none outside the netpots in the tray. Is there an advantage to either method?
 

rr14

Member
lil wayne, do you have the measurements of the jumbo trays? The regular ones measure 18 by 24 if I recall. I just bought two of them at home depot but one jumbo would be easier and more fool proof. I'll post pics once I build it.
 

RedXIII

Member
I have the same flood and drain fittings from hydro shop as Imnotcrazy, how do you adjust the overflow? It seems mine is just set at one height.

Also, how do you make all the water drain out from that green fill fitting? There is like 1/4" to 1/2" of water in bottom of the tray, because that green fitting is not flush. Is this normal?
 

JohnnyToke

Member
Nice tutorial. :smoke:

one thing I would change for the fill / drain plug is rather than drill holes in the side of the 1/2" fitting for better draining, I would cut off that part completely and install the fill plug from the top through the tub and aquarium silicone it up tightly. Now the drain inside the tub is barely above the bottom of the tub yet won't fall through.

now cut a piece of screen about 1.5" square and silicone it down over the fill / drain hole.

another alernative is to buy the inexpensive ebb & flow fill / drain kit that includes the overflow drain as well. click here the kit is $7.

Regards,
JT
 

Latest posts

Latest posts

Top