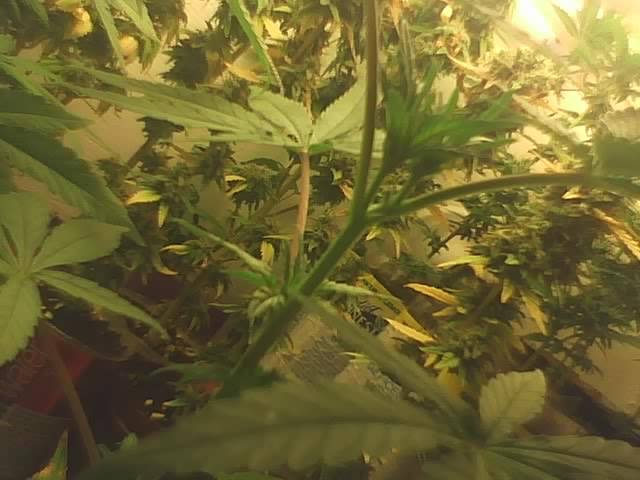
What's new

Compact SOG with CFL's

justwatchin

Member
Double header

Double header

picture.php
picture.php
picture.php


picture.php

Five more weeks till :tree:
A triple header:dance013:
picture.php

picture.php

This strain is the lowest yielding in the garden. I can't wait to try this on my SSH(MNS). It does affect stretch by about 2-3in, but does not affect flowering time.

Anyone else doing this that care to share experiences, as the good doc seems to have given us up?

[
Bro ....you are "Looking Good" Mang'.....and as far as my 21 gram cut ...it was a two headed Beast....after you learn to get them to finish where you want.....then it's SOG 102.... :listen2:

learnin' to make a two headed beast out of your gurls....that is where ya can get a nice increase in yur yield. :jump:

Note that it is not a two stemed plant it only splits to make 2 top colas...two stems takes up to much room....we only want one stem w/ 2 top colas
This is a "Sweet Sativa" done this way.


NO idea how to shrink pics or rotate image. Sorry too anyone with low bandwith, any help would be nice
 
Last edited:

justwatchin

Member
The Doc has said that his reveg moms when reflowered tend to yield better. (perhaps because they have more sites?)

Do you think maybe because it is working off already established roots?
I think maybe because they are more roots throughout the medium when plant re-establishes itself, but i don't know as i think the plants roots also dies back when foliage is cut down that much.

As long as it works right? :D
 

justwatchin

Member
Good lookin out for catchin this, i've read this thread back and forth and missed the importance of this post many times. It has been my exp that the majority of ones yield with this system is from the top cola, sometimes as much as 75%, producing two top cola's should be very fruitful.
At what point did you top that girl? I've got a LA Woman clone in flower that just stopped stretching, seems like the perfect time for it....thoughts anyone?

Yea, took me a little while too. I think you wanna catch it b4 it stops stretching as 3-4 wks in after stretch is counter productive, but too early and too many laterals develop. I topped at the highest, greenest node i could see about 3-5 days flipped (after it started shooting up). secondary latterals shoot up too and grow like if it was a top bud, but smaller and close to stem.

Topping on day 1 plant format was a little bit to open and took up too much space.

Another idea I had, but haven't tested yet is overgrowing b4 onset then topping 4 days in at node i want

I also defoliate once close to the later half of growth to increase potency. It works and I couldn't figure out why till i read a Dj short article. I told a guy this in that defoliate hydro sticky thread and he flipped out and i really didn't feel like arguing or had a reason for my claims till I read it. I'll try to find it.
 

justwatchin

Member
Reason in red. Not trying to ride the mans john or anything, but you can also see that the Dr. does this in his 48hr thread. Ive done it and it works. Although in the example above I did it a little bit earlier than I usually do.

from DJ short
Quote:
Moisture is essential for the curing process, it is both your friend and enemy. If too much moisture is left in the buds, with out the regular mixing, venting and turning of buds involved with curing, molds and bacteria can quickly form and ruin the taste and potency of your stash. On the other hand, without the necessary moisture metabolic processes essential to curing do not take place.

Fresh cannabis plants are around 80% water (all %’s by weight); curing generally begins after the cannabis has lost half of it’s initial mass, and contains approximately 33% of it’s initial water.

Once curing is complete and the pot is “dry”, it should still contain 10-15% moisture, approximately 2-4% of its’ initial water. This is an ideal because most bacteria and molds can not grow below 15% water content, and below 10% cannabis buds tend to powder.

Naturally, as the metabolic processes continue during curing, the conversion of cannabergerol to tetrahydrocannabinol will continue and the potency of the pot will increase. This is because cannabergerol (CBG) is the non-psychoactive precursor for tetrahydrocannabinol (THC). Of course, the exact change in THC content will necessarily be dependant upon the concentration of CBG in the fresh material at harvest. Of course any remaining precursors necessary to form additional cannabidiol (CBD) and other cannabinoids will also be consumed and converted.

Curing proceeds while the leaf is still alive, for until it dries, many of the leaf's life processes continue. Since the leaf's ability to produce sugars is thwarted, it breaks down stored starch to simple sugars, which are used for food. This gives the grass a sweet or earthy aroma and taste. At the same time, many of the complex proteins and pigments, such as chlorophyll, are broken down in enzymatic processes. This changes the colour of the leaf from green to various shades of yellow, brown, tan, or red, depending primarily on the variety, but also on growing environment and cure technique. The destruction of chlorophyll eliminates the minty taste that is commonly associated with green homegrown.

Potency during curing and storage can be maintained by observing some basic precautions. Excessively hot temperatures will promote oxidation and the growth of mold and bacteria, and very cold temperatures can prolong curing and drying for up to several months.

1. The buds need to be kept in the dark, protected from light, which will quickly decompose the THC.

2. Moderated temperatures should be observed during curing, 50-75F being ideal.

Continued Metabolism

Also as these metabolic process take place, the plant needs energy which leads it to consume the sugars, starches, nitrates, and minerals. Many of these compounds are metabolized and released as water and carbon dioxide, therefore removing what is essentially inert material from the pot increasing the concentration of cannabinoids therefore making it more potent.

Much of these positive metabolic processes can be most effectively begun with thourough flushing and stripping of the plant before harvest. This will help reduce the amount of time necessary for a good cure.


Curing will not only improve potency, but the color and look of most cannabis buds because as the chlorophyll is broken down purple, gold, and white coloration can emerge and the trichomes will appear more pronounced.

Decarboxylation

Some decarboxylization will take place during curing as well. This happens when the carboxyl group (COOH) located at C-2, C-4, or the end of the hydrocarbon chain at C-3 is destroyed leaving a hydrogen attached and liberating CO2.

Decarboxylization is necessary to convert cannabinoids to usable psychoactive forms; the plants (and your body) carboxylize cannabinoids to make them more soluble in water (for metabolic reactions and excretion). As decarboxylization occurs, the loss of CO2 will liberate a small amount of inert material making the pot more potent via concentration of the cannabinoids.

Taste & Odor

Terpenoids are the highly volatile compounds that give marijuana much of its’ characteristic odors, and therefore tastes.

The most current research also suggests terpenoids lend to the high, sometimes very significantly. Cannabinoids are phenolated terepenes so it’s not surprising that many hundreds of different terpenoids are synthesized as well.

As pot ages, some of the terpenoids go through polycyclic aromatization in the process of decomposition. This agglomeration of terpenoids will change the flavor; hence the ability of cured pot to show flavors that didn’t seem present in the original fresh material. Much of the very volatile terpenoids will also evaporate and or decompose, especially with prolonged curing or storage. This action will remove some matter from the pot increasing the cannabinoid concentration and therefore potency.


A little background on what happens inside and outside the harvested drying plant will help you understand why proper drying and curing are so important to good quality dope. Drying evaporates most of the 70-75 percent water content in fresh marijuana. Drying also converts THC from its non-psychoactive crude acidic form to its psychoactive pH-neutral form. Every THC molecule must shed their moisture content before they are fully psychoactive. In other words fresh green marijuana will not be as potent as dried marijuana.

When you cut a plant or plant part and hang it to dry, the transport of fluids within the plant continues, but at a slower rate. Stomata, small openings on leaf undersides, close soon after harvest and drying is slowed since little water vapor escapes. The natural plant processes slowly come to an end as the plant dries. The outer cells are the first to dry, but fluid still moves from internal cells to supply moisture to the dry outer cells. When this process occurs properly, the plant dries evenly throughout. Removing leaves and large stems upon harvest speeds drying, however, moisture content within the “dried” buds, leaves and stems is most often uneven.

Quick drying also traps chlorophylls and other pigments, starch and nitrates within plant tissue, making it taste “green” burn unevenly and taste bad. Taste and aroma improve when these pigments break down. Slow even drying – where the humidity is similar inside and outside the foliage – allows enough time for the pigments to degrade.


Drying bud converts crude acidic THC from its nonactive form into a neutral pH psychoactive substance. Each THC molecule has to lose it's moisture content in order to become fully psychoactive. When the water exits the bud, the THC becomes slightly different in molecular structure.

Cured buds undergo a:

Reduction in Chlorophyll content,
Reduction in plant starch content,
Reduction in nitrate levels,
Loss of moisture,
Loss of volitile terpenoids, and the polycyclic aromatization of other terpenoids.

All of these phenomena reperesent a loss in weight, and gain in net potency (except for the polycyclic aromatization of terpenoids which affects flavor).
 

Applesauce

Member
I've read this thread since it first came about but missed something. When you submerge water, do you reuse the nutrient water you're dipping your plants in? Example: Dip 6 plants at a time then refill the dip tray with fresh mix or reuse and just re-up the water line as the plants absorb it?
 

Anti

Sorcerer's Apprentice
Veteran
I've read this thread since it first came about but missed something. When you submerge water, do you reuse the nutrient water you're dipping your plants in? Example: Dip 6 plants at a time then refill the dip tray with fresh mix or reuse and just re-up the water line as the plants absorb it?


I wondered the same. Never got an answer from the doc.

But... here's what I've been doing:

I have four 5 gallon buckets with lids. I fill 'em with tap water and then let them sit with an airstone bubbling at the bottom until I need them.

I take the bucket that's been sitting and bubbling longest (typically 4-8 days) remove the airstone and add my nutes to it. Check the PH, adjust if necessary (usually not) and then I open my cabinet and start dunking plants.

I water them all in the same 5 gallon bucket. Sometimes I water them one at a time. Usually I stick several in at once.

Submerge each plant completely in water and then wait til they stop bubbling then set them in a different dry container to drain off excess and then back into the cab. I can do my whole cab (veg and flower) plus my mom cab in under an hour.

If I have to add more water, I add nutes too. (Ph) Generally, I can do a day's watering with less than 4 gallons of water per cab.


Hope this helps.
 

Anti

Sorcerer's Apprentice
Veteran
Is dipping the real way to go?
Whats the benefit for using this method?

I'm a big fan of submersion.

If you sprinkle water on a plant from above... the water will form channels in the soil and you are not likely to evenly wet the whole medium. You'll have some dry pockets.

If you dunk the whole container in water and wait til it stops bubbling, it solves that. The whole container is saturated with water. No dry spots remain.

Also... any gasses that were trapped in the soil will be forced out by the water. That's what's bubbling. Escaping gasses.

Plus. when you remove the plant from the water at the end, the draining water creates a vacuum in the soil that pulls fresh air down with it.

Many people don't use this technique and grow fine plants.

It's up to you to choose your methods to suit your space, inclination and work ethic.
 

Tilt

Member
Im a dunker too. I drown those bitches....
But seriously submersion is good just make sure you have a good draining soil or they will stay water logged (not good for roots). I like using those buckets that are rectangle shaped that laundry detergent or kitty litter comes in. I can dunk 6 of my mt38 pots at a time.
 

311devon

Member
I'm a big fan of submersion as well. I believe it is essential to getting good yields in a Dr Bud SOG. I brew act/nute teas in a 1.5 gal bucket and use a 2qt rubbermaid pitcher to do the drowning in. I brew the tea strong and then dilute it about 50% as i go. I start with a half pitcher of water and add tea, then water 2-3 clones, which consume about half the pitcher. I then refill the pitcher with 1/4 pitcher of tea and 1/4 pitcher of water and continue this way until all the girls have had a drink. I keep a perpetually aerated 55gal fish tank as a water source and since I'm fully organic, i don't give a crap about pH-ing my solution. Like the Doc says, nature takes care of that if ya let her.

i have found that the more drainage holes you have in your bottles/pots the faster it will achieve full saturation.
 

kjz71521

Member
Just got here in this tread, man Dr.Geen thats some incredible farming. I just finished a cfl grow with 8 23w cfl & the quality was comparable to my buddys 250w hps setup. Since I have torn my room down, rebuilt and now its a 150w vert hps perpetual set up in the budding chamber. Im still with the daylight cfl's in my mom chamber & I love them. Im going with smart pots 1gal cut in half to make two pots, they are about the size of a smart water bottle, thanks to you doc.. Happy farmin...
 

kjz71521

Member
I first came here to IC and this post was pretty exciting what you could do with a small amout of space.. Heres to you Doc, Please stop by my spot and check my pics. Thanks to a great farmer like you I came up with this perpetual SOG setup with a 150w hps.. check the pics... Let me know what you think.
 

ion

Active member
ive tried a half-ass subwater technique thats okay......im using 24oz botts cut to 20, h202 botts, and anything comparable. im usually in a tweak-mode so i cant take the time to go full sub-- i take some cottage cheese-size containers(3"tall, 4"dia.) > put the girl in,fill the cont halfway then start top water until you see the outter cont water level start to rise.....you still get lotsa bubbles.....its not as through as the fulldunk, but itsa damn good second place......def. effective if yer ina hurry.
 

dr.budwannabe

New member
Does anyone Know DR.Budsgreengenes Soil mix???Here is what i've gather. He uses Perlite, Vermiculite, Chicken Compost, Local Peat, and Worm Castings.All I know is it needs to be 33% Perlite! That is all.Does anyone know the soil mixture?I want to do the same watering technique the Doc does so my soil has to be right.Thanks
 
My guess would be that "local peat" in his neck of the woods is topsoil with varying amounts of semi decomposed fir trees, fiddle head ferns, skunk cabbage and aspen leaves. Which is to say that I don't believe the good Doctor had an analysis done on his local peat, so your guess is as good as any. Ultimately good draining humus with plenty of readily available nutrients is what he was working with. His approach seems to have an over riding air of "don't stress" about it so I would say try what's in your own back yard first and see where it takes ya. Unless you start mixing in moisture absorbing polymers I think anything short of straight clay or sand will work fine in place of his "local Peat", and it's easy enough to test without having to risk any high quality seeds.
 

dr.budwannabe

New member
My guess would be that "local peat" in his neck of the woods is topsoil with varying amounts of semi decomposed fir trees, fiddle head ferns, skunk cabbage and aspen leaves. Which is to say that I don't believe the good Doctor had an analysis done on his local peat, so your guess is as good as any. Ultimately good draining humus with plenty of readily available nutrients is what he was working with. His approach seems to have an over riding air of "don't stress" about it so I would say try what's in your own back yard first and see where it takes ya. Unless you start mixing in moisture absorbing polymers I think anything short of straight clay or sand will work fine in place of his "local Peat", and it's easy enough to test without having to risk any high quality seeds.

I wanted to know exactly how much worm castings, chicken compost, and vermiculite he uses in how many parts. Yeah I remember him saying he used decomposed trees but he didnt add that to his list in the begining of the thread. Hopefully he will be back.
 

Sgt.Stedenko

Crotchety Cabaholic
Veteran
Hey Bonehead, look at my username. It's Dr.BudWANNABE! Im not trying to spend 27 years "experimenting".

I'm pretty sure if you duplicated his soil mix, his box layout and used his genetics, you would still not duplicate his work.
That's not a knock on you. There's so many variables in growing, duplicating the soil mix does not guarantee success.

It took me less than 2 months to figure out what was wrong with my first soil mix. No need to get dramatic about 27 years or call people names, especially on your 4th post.
 

MagicChef

Member
I'm pretty sure if you duplicated his soil mix, his box layout and used his genetics, you would still not duplicate his work.
That's not a knock on you. There's so many variables in growing, duplicating the soil mix does not guarantee success.

It took me less than 2 months to figure out what was wrong with my first soil mix. No need to get dramatic about 27 years or call people names, especially on your 4th post.


Cheers to that SGT!:bump:
 

Anti

Sorcerer's Apprentice
Veteran
Start somewhere. Use what you have available and see how it works out. Try other things as you have the inclination and option, and see how that works. Fine tune your mixes to suit your style and methods.

Then come back and share your findings with the rest of us.

Happy Community Rejoices!
 
Top