What's new
  • Happy Birthday ICMag! Been 20 years since Gypsy Nirvana created the forum! We are celebrating with a 4/20 Giveaway and by launching a new Patreon tier called "420club". You can read more here.
  • Important notice: ICMag's T.O.U. has been updated. Please review it here. For your convenience, it is also available in the main forum menu, under 'Quick Links"!

Breaking Bud w/ Drop: A mobile hydroponic RV grow room trailer conversion gone mad!

Drop That Sound

Well-known member
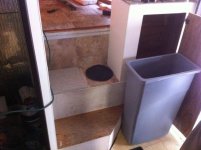
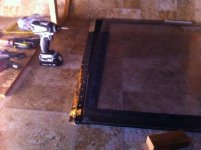
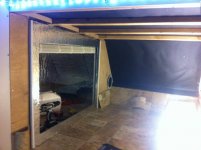
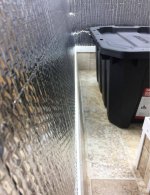
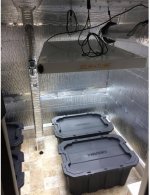
Turns out, I could just barely fit one of those tall "Slim Jim" trash containers in the slim cabinet space. I tore out the shelves, and tiled the floor with vinyl. I had ordered a trash can, and was dead set on the idea.

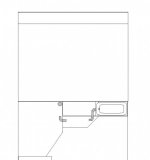
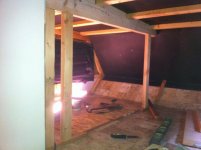
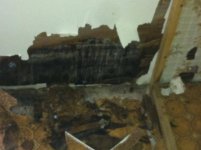
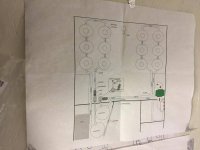
Eventually I didn't like the idea that the system would be on the right side of the loft, kind of in the way of crawling up there to work. The placement was just off.

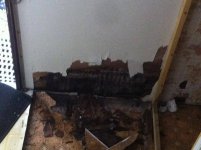
I figured out the plan, and decided to put the veg chamber on the left side. Over on the side where the multi room wall was in the way anyways.

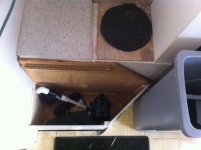
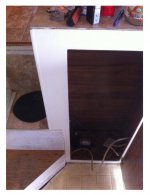
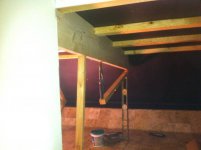
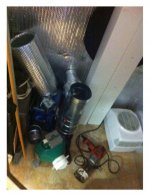
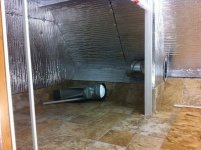
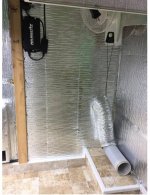
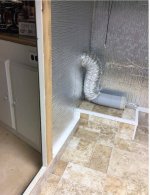
I would have to run feed/drain plumbing from the left side of the trailer to the control bucket cabinet. That would be pretty easy though, and I even had a small space inside of the loft stair step to make a pump\filter house. Everything would be up high, and the res down a bit lower to drain into.

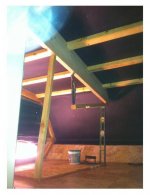
Things were coming along.
 

Attachments

  • IMG_1611.jpg
    IMG_1611.jpg
    50 KB · Views: 88
  • IMG_1612.jpg
    IMG_1612.jpg
    49.3 KB · Views: 92
  • vegroom.jpg
    vegroom.jpg
    14.5 KB · Views: 87
  • IMG_1610.jpg
    IMG_1610.jpg
    42.2 KB · Views: 92

Drop That Sound

Well-known member
P.S.

^ The other upper step to the loft is the dual propane tank storage. Accessible from the outside through a hatch. I could run plumbing through there too, but have kept the space clear for something else, possibly a window AC for the work/veg room areas. I can drill a hole through the floor and run a pipe under the loft floor to the backside of the cabinet. And have a bulkhead into the control res. I can do it so that there is still plenty of clearance for a pickup truck bed to back up and make turns.

Also, the cabinet top comes off like a lid. That is the only way to fit the trash bin, slide it in from the top.
 

Drop That Sound

Well-known member
Partitioning the loft, framing in the vegetation chamber.

Partitioning the loft, framing in the vegetation chamber.

+
++I took some more of the thick black roofing tar paper and stapled it over the ceiling.

Then I ran fresh new 2 x 3's across the ceiling again, from side to side. Flat again to save head room.

I wanted to make the front roof of the trailer as good as I did the back. Practically like a deck built just underneath the ceiling, so I could jump on the roof if I wanted.

The center beam I think was a 2x10" or 2x12" board I had laying around, I needed a wider one. The roof and ceiling is slanted, running at a downhill angle towards the front nose section as I like to call it, and so I held up and scribed the angle onto the board before I ripped it, to keep the bottom level with the floor. I also notched out for the 2x3 rafters. I made it a perfect fit.

Too lazy to go out and grab a jack, I just used some good old fashioned leverage to lift the new roof beam into place, and get the wall studs underneath.


I could have just made a door right above the steps to the upper loft, and used the whole front section as a veg room, but I didn't need a veg room almost the same dimensions as my flower roof.

Also, I wanted to made the other half of the loft more work space, or whatever. I could also make a removable door leading to the loft, and have 2 seperate veg spaces still if I want.

Or I could toss down a little mattress and take naps up there.
 

Attachments

  • IMG_1609.jpg
    IMG_1609.jpg
    41.3 KB · Views: 92
  • IMG_1606.jpg
    IMG_1606.jpg
    33.3 KB · Views: 90
  • IMG_1608.jpg
    IMG_1608.jpg
    27.5 KB · Views: 93
  • IMG_1607.jpg
    IMG_1607.jpg
    41.1 KB · Views: 89

Drop That Sound

Well-known member
I put in a little bit more framing, I reinforced the rest with some angled metal brackets in certain places. Also not seen is another beam up towards the ceiling, right inside the veg chamber on the multi-P room wall. That whole wall was sorta flimsy by itself, like a cheap double panel cabinet wall.


Here you can see how I was designing the veg access hatch. I used a sheet of plexiglass for a viewing window, and cut out large opening in a left over piece of OSB panel.

I trimmed the glass and glued it to the painted OSB frame. The frame had to be angled just like the roof at the top, so when it opens up it stays flat against the sloped ceiling. Otherwise it would hang down and get in the way

Added a piano hinge on the top, so the hatch opens out and up. Then I could latch it into the ceiling when I worked in there

That was the plan, going well too.
 

Attachments

  • IMG_1617.jpg
    IMG_1617.jpg
    52.5 KB · Views: 90

Drop That Sound

Well-known member
Not everything can be going so well, as we already know...


There was a section of the lower wall, under the kitchen cabinet, that was always sort of off to me. Ok, I can't lie. I knew there was something evil lurking in the walls before I painted over it, and I was originally gonna cover it up, and just kind of pretend there was nothing wrong.

Also, a few spots of paint were bubbling out.

I had already re done the front and back sections of the 5th wheel trailer, and so much more. I couldn't just neglect a section of a wall that was starting to bow out and sag down. Man, used trailers are full of gremlins I tell you.

I grabbed my pry bar, and started hacking into the soft wall, digging out the moist rotten guts. Parts of the damage were even going into the floor.

Shoot, what the heck was I gonna do? Well. Keep picking and digging at it, try to find the source of the problem.


I'll get back to the nightmare later, but for now I mostly kept working in the loft...
 

Attachments

  • IMG_1634.jpg
    IMG_1634.jpg
    35.7 KB · Views: 93
  • IMG_1632.jpg
    IMG_1632.jpg
    55.6 KB · Views: 93

Drop That Sound

Well-known member
After I finished framing the new partition wall, added some 1/4" plywood panels, and installed a 6" duct collar towards the right side, or front end of the trailer. That would be the intake.

Skinned the hatch door with metal tape, started adding trim, annd test fitting it as well

I used white vinyl lattice trim for the hatch opening casings.

I installed a window blind that I already had ready to go. Just like in the propagation chamber. That way I have a way to block some of the light.
I thought about painting the blinds too, so when they are fully closed a cool picture is all back lit. Maybe a big cannabis leaf, or something awesome like that!

Put more reflectix inside the veg chamber. I used more flooring scraps, and started cutting out tall water proof wall splashes to put around the room.


Also, I started to figure out the exhaust part of the ventilation. I would put the fan inside the multi-p room, just on the other side of the wall. I cut a hole through the wall to get to it, and save some space in the veg room.

And for the new 4" inline fan, I eventually later sometime cut out a 4 inch hole right through the side wall of the trailer, up towards the top, in the multi-p room. Outside, I installed a 4" one way dryer exhaust flap, using butyl putty tape and screws. Looks good from outside and barely noticeable. More pics of that soon.
 

Attachments

  • IMG_1741.jpg
    IMG_1741.jpg
    59.4 KB · Views: 90
  • IMG_1690.jpg
    IMG_1690.jpg
    47.7 KB · Views: 91
  • IMG_1740.jpg
    IMG_1740.jpg
    91.3 KB · Views: 88

Drop That Sound

Well-known member
Then, I put more reflective bubble wrap in the rest of the loft section too.

This time, I didn't go flat on the ceiling rafters, I wrapped around them too. I figured I could use the extra headroom in such a short space.

Also, I had blocked out the windows on the veg chamber side, but I left the loft work area on the right side's window open. That way I could have sun light and fresh air when needed, as almost all the other window and vents in the trailer were permanently blocked off. I made a remove-able cover to push in the window for now, until I made a nicer foam one.
 

Attachments

  • IMG_1742.jpg
    IMG_1742.jpg
    88.4 KB · Views: 90
  • IMG_1743.jpg
    IMG_1743.jpg
    84.5 KB · Views: 85

Drop That Sound

Well-known member
With the exhaust port being on one side of the wall, I needed to figure out a way to even out the flow across the room.

I chose to use a square stack duct as it was the perfect size to fit up in the upper end of the the chamber. Also they were already the right length, and you had to buy 2 halves to make the full duct.

So, I made the ports I cut out bigger as they got to the other end, as a way to equalise the air flow.

The exhaust side is also the higher side of the ceiling in there, and the new duct would be right at the end of an 8 bulb t-5 fixture, sucking the heat away.

I put a 4 inch duct collar on the back of it, long enough to slide through the hole I cut through the wall, where the fan was going to be.
 

Attachments

  • IMG_1745.jpg
    IMG_1745.jpg
    81.3 KB · Views: 83
  • IMG_1746.jpg
    IMG_1746.jpg
    56.3 KB · Views: 92

Drop That Sound

Well-known member
Put end caps on the exhaust duct (rectangular plywood blocks covered in metal tape, screwed into place).

Got it installed, slid the back collar right through a 2x10 and double panel wall, into the multi-p room.

Here's some more pics around the room.

I also had to add some extra framing on both the side walls, something to attach the splash panels and reflectix too, before I put them in..

I figured I could do something similar as the exhaust, but with the 6 inch round intake port. Just use a round duct pipe with holes, or even a manifold or some fittings.

A way to spread the flow even across the chamber. like a laminar flow hood, with different filters I can attach.
 

Attachments

  • IMG_1754.jpg
    IMG_1754.jpg
    88.8 KB · Views: 88
  • IMG_1753.jpg
    IMG_1753.jpg
    87.5 KB · Views: 91
  • IMG_1819.jpg
    IMG_1819.jpg
    82.1 KB · Views: 89
  • IMG_1752.jpg
    IMG_1752.jpg
    100.7 KB · Views: 92
  • IMG_1756.jpg
    IMG_1756.jpg
    83.7 KB · Views: 89
  • IMG_1755.jpg
    IMG_1755.jpg
    114 KB · Views: 86
  • IMG_1821.jpg
    IMG_1821.jpg
    94.3 KB · Views: 87
  • IMG_1757.jpg
    IMG_1757.jpg
    71.2 KB · Views: 91

Drop That Sound

Well-known member
Starting to look good!

Starting to look good!

Also, started adding some trim to finish the room out.

I used more white pvc lattice like trim, as a threshold of sorts, to make the transition from reflectix to flooring look nice.

I added come cove trim on the sides of the ceiling rafter beams up above, just for looks.


Notice that I came up with a new way to seal the corner seams. Instead of trying to fold metal tape, now I just use caulking. Looks so clean that way!
 

Attachments

  • IMG_1823.jpg
    IMG_1823.jpg
    117.1 KB · Views: 86
  • IMG_1824.jpg
    IMG_1824.jpg
    102.7 KB · Views: 85
  • IMG_1822.jpg
    IMG_1822.jpg
    79.7 KB · Views: 90

Drop That Sound

Well-known member
The plexiglass panel didn't like being held upside down, when I had the hatch raised up, and silicone glue bead kept popping loose.

I used some small galvanised metal bars, and drilled holes through them every so many inches. Then, I places them around the frame opening, on top of the plexiglass, and carefully drilled wide enough holes to screw them down.

Now the glass viewing hatch was ready to rock. Also put more finish trim on it.


And, I got a nice little 5500 btu window banger to play with. The back of the unit fits perfectly into the main intake vent in the old fridge cabinet.

I could cut a slot into the wall to the flower room, and carefully bend the cold evaporator coil around and into the room. Then seal the wall back off, around the copper tubing. Then, add a box and fan around it, or even use the face panel of the AC unit on the box.

Basically, turn the window AC into a home made mini split for the flower room, by separating the AC's exchanger coils with the wall. In the winter, I could direct the heat back in somehow.

At 5500 btu, that could handle the small flower room, with some sealed up air cooled lights that have a dedicated & isolated ducting loop of there own.

I also started collecting all kinds of cool ducting. Electric motorized dampers as well.
 

Attachments

  • IMG_1834.jpg
    IMG_1834.jpg
    63.4 KB · Views: 85
  • IMG_1825.jpg
    IMG_1825.jpg
    53.7 KB · Views: 85
  • IMG_1835.jpg
    IMG_1835.jpg
    42.3 KB · Views: 86

Drop That Sound

Well-known member
Running electrical to the loft.

Running electrical to the loft.

With the loft section of the trailer coming together, and a new vegetation chamber to work with, I started working on the exhaust.

I got the fan installed in the multi-p room. I used a T fitting so I can ventilate either the multi-p room, or the veg chamber/loft area. Or both, at the same time, and with motorized dampers and sensors in the future.


I hadn't brought a circuit from the sub panel all the way over for the veg room itself yet. Just the lung cabinet, cloning chamber, and multi room that each had a recepticle.

So I ran some more conduit all the way around, to where I installed the fan. I made a 4 way junction box to split it up into different areas of the front end of the trailer. 1 run going to a surge protector above the veg control reservior cabinet, by the main entrance door, and on the other side of the wall from the box. I had to drill into it to make it work, not exactly up to code, but good enough. 1 for the new inline fan circuit. 1 leading into the veg chamber, and the last going down to a waterproof GFCI switch box and recepticle, for the veg hydro system's pump house, in the lower step.


I had ran it right through the upper section of the propagation cloning chamber, up above the seedling shelf. Like an extra rod for hanging even more gear.


The upper area of the air handling cabinet was a mess, I cleaned up the wires and got them all covered in flexible conduit. I'll show off more pictures of it fixed up later. You can see where a 6 inch duct boot fitting is attached to the roof vent, for my flower room exhaust though.


I like to get kinda tricked out with my conduit, and bend it into cool shapes. To me it's like custom headers, but in a grow room. A heat gun can save you a lot of money when working with PVC!
 

Attachments

  • IMG_1873.jpg
    IMG_1873.jpg
    56.4 KB · Views: 85
  • IMG_1874.jpg
    IMG_1874.jpg
    72.3 KB · Views: 86
  • IMG_1875.jpg
    IMG_1875.jpg
    72.6 KB · Views: 84
  • IMG_1876.jpg
    IMG_1876.jpg
    66.6 KB · Views: 89
  • IMG_1877.jpg
    IMG_1877.jpg
    81.4 KB · Views: 84
  • IMG_1878.jpg
    IMG_1878.jpg
    71 KB · Views: 83
  • IMG_1881.jpg
    IMG_1881.jpg
    78.1 KB · Views: 84
  • IMG_1879.jpg
    IMG_1879.jpg
    68 KB · Views: 87

Drop That Sound

Well-known member
And finally, I had power up into the veg chamber!

I liked how the exhaust duct vent I made sits right at the end of the angled t-5. Sucks all the heat right off.

For the intake duct I was thinking about using an oscillating motor off a fan, and making a round 6 inch duct twist up and down, instead of adding mini fans in the room.

Or, I though about mounting one of those vertical tower fans horizontally on the wall.

Either way, for now it seems like it will work great. Hasn't even had a plant in it yet, till this day.

I also have a large conduit box to install temp/humidity controllers, but haven't exactly figured out how I want to configure it all. I want the panel to look nice and be accessible when sitting in the loft. Especially with an HRV, motorized dampers, and also summer/winter mode automated ventilation in mind.
 

Attachments

  • IMG_1870.jpg
    IMG_1870.jpg
    82 KB · Views: 94
  • IMG_1868.jpg
    IMG_1868.jpg
    74.6 KB · Views: 89
  • IMG_1867.jpg
    IMG_1867.jpg
    70.2 KB · Views: 86

Drop That Sound

Well-known member
Too make quick work of Season 2, let's just say I did little bits of finish work here and there. More electrical and trim.

I dug out more of the bad wall section, and found the source of water. In the skirting board, outside on the exterior, there was a nic in the metal, where rain could splash into. Water made its way in and rotted most the wood in there, and started seeping up the wall too. I just stuffed some foam in the cracks and blocked it off, to let it dry for awhile before doing anything.

Not a whole lot of work really, I spent the next few months using the rooms to grow again. Even the main work area at times.

I was brave enough to toss some plants back in the multi room again, not wanting to taint my brand new veg chamber\loft yet.


I hooked up those cheap DWC totes together with bulkheads (just 2 for an extra res), to have more water holding capacity, and easier access to work.

I experimented with air layering another monster plant, pretty much the entire center of it, to flatten it back out for a scrog. See my "help with air layering" thread for more info.

Did another big plant grow, just a single plant.

Then I did a hand watered coco run, which was kind of a pain, as I didn't wan't to really make a DTW system for the trailer. Just had ghetto drain pans, and used my floor drain. Rather keep bare roots only onboard.


During that time I starting trying to figure out what kind of a hydroponic flowering system I did want to build in there. Some kind of semi permanent RDWC setup, made from scratch.....
 

Attachments

  • IMG_1967.jpg
    IMG_1967.jpg
    70.2 KB · Views: 93
  • IMG_2285.jpg
    IMG_2285.jpg
    97.7 KB · Views: 87
  • IMG_2279.jpg
    IMG_2279.jpg
    48.9 KB · Views: 88
  • IMG_2282.jpg
    IMG_2282.jpg
    58.8 KB · Views: 87
  • IMG_2057.jpg
    IMG_2057.jpg
    64.6 KB · Views: 89
  • IMG_2289.jpg
    IMG_2289.jpg
    38.8 KB · Views: 90

caljim

I'm on the edge. Of what I'm not sure.
Veteran
Trailer Park OG.....Drop that sound....great work in this thread. Thanks for sharing your efforts.
 

Drop That Sound

Well-known member
Trailer Park OG.....Drop that sound....great work in this thread. Thanks for sharing your efforts.

Thanks my man! It's been a fun build, despite having to restore a trailer at the same time. There's been a lot more work than it looks like, that's for sure. Glad to share finally, welcome.


Haha, Breaking Bud is kind of like a cross between Breaking Bad and Trailer Park Boys.. Trying to set up a grow lab instead.

Imagine if Mr White was Ricky's teacher instead, lol.

Or, in an even crazier parallel universe, Jesse Pinkman is one of the park boy's, and sets up a lab in Lahey's trailer...
 

Drop That Sound

Well-known member
But anyways.. it was time to start growing out a mullet, put a 5th wheel hitch on the back of an El Camino, and leave the trailer park for good.

First, I had to get my life back on track, grow some good bud, make a shit ton of money, and get my trailer fixed up.

Which brings us to: (stay tuned!)
 

Drop That Sound

Well-known member
Season 3:

Season 3:

Getting back to it, after another break, I wanted to fix the nightmare rotted out floor\wall section. That way I could finally start installing some of the hydroponic grow systems I had been designing for the different grow rooms onboard.

I cleared out the main work room, and under the main countertop cabinet. Got busy, and started hacking away even more rotten wood. I spent days figuring out how to fix it. I was gonna have to remove the lower metal side skirt from outside the trailer to do it right, which the idea of really sucked. Important sections of the floor where its bolted to the frame were bad too. I did what all I could from inside first, waiting for good dry days to open her up.

I got to a point where every thing else except inside the cabinet area itself was bad, and then I went ahead and laid fresh new plywood underlayment panels over the whole main work room floor, and over the loft stair steps. I already had boxes of vinyl tiles ready to go, and figured I might as well go ahead and get my new floor done sooner than later.


But first, while I was at it, I used some of the same plywood and made new side wall splash skirting boards for the flower room floor. I wanted it to be like the loft and veg chamber I last worked on. I found a type of sheet flooring that closely matched the original sheet texture/color I had used up, because it was no longer available anymore.

Got the new flower room splashes all screwed and glued in, and now the floor is completely water proof up to like 6 inches on the walls, except where the door is. I also fixed the ugly crease by redoing the reflectix in the very back middle section of the rear wall that points outwards. Made it curve around the angle better. I had also taken down the ducting as I wanted to redo it as well.

I had older plans drawn up for a dual RDWC system in the flower room, with the 2 control reservoirs being down under the workroom countertop, in the cabinet. I'll upload a pic of that plan first.

But, I had started drawing up new plans as well, for an even better system, unlike any I know of made before. (see my "building a dual rdwc system" thread for more info).

You'll see in the pics below I was deciding which totes I now was planning to use, instead of buckets like the older drawing. Also the new floor splash panels that were just installed, and hadn't even been caulked yet..
 

Attachments

  • IMG_2031.jpg
    IMG_2031.jpg
    80.4 KB · Views: 89
  • IMG_2022.jpg
    IMG_2022.jpg
    78.2 KB · Views: 88
  • IMG_2033.jpg
    IMG_2033.jpg
    36.3 KB · Views: 83
  • IMG_2038.jpg
    IMG_2038.jpg
    94 KB · Views: 81
  • IMG_2030.jpg
    IMG_2030.jpg
    68.9 KB · Views: 85
  • IMG_2020.jpg
    IMG_2020.jpg
    42.1 KB · Views: 85
  • IMG_2023.jpg
    IMG_2023.jpg
    90.3 KB · Views: 92
  • IMG_2024.jpg
    IMG_2024.jpg
    72.2 KB · Views: 91
  • IMG_2025.jpg
    IMG_2025.jpg
    82.2 KB · Views: 85

Latest posts

Latest posts

Top