If you look at #2 under "Water tap or elevated tank as source", you will see what I was quoting.
Where is this #2 you are referring to?
If you look at #2 under "Water tap or elevated tank as source", you will see what I was quoting.
It is under the heading of "Water Tap....etc" in the instruction booklet. The blumat site used to follow the book very closely, I don't know if it still does or not. Time for me to go to bed - we can continue this tomorrow if you like.
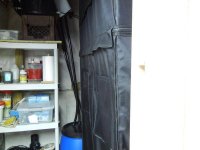
I couldn't stand it. I'm on my 49th post, so sorry for spamming. Here's the Northern Lights headed for the tent.
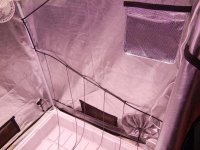
Holy cow, Bubba, it looks like you are in business in an admirable fashion! Very nice looking arrangement and hardware selection. I'll be very interested to see how that much lighting works out for you - I had been toying with the idea of supplementing my 315s with some 660nm red LEDs, but haven't really seen the need thus far. You may convince me to do exactly that.
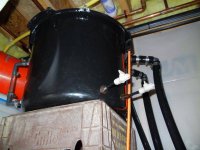
What is that upper reservoir? It looks much more heavy-duty than a standard "Homer Bucket". Plants look great & I bet that they will love their new home. Nice job.
Stoned40yrs - obviously you should do as you like. Most of us have found that the higher the supply is, the better the blumats function. My first system initially had the bottom of the reservoir about 20" above the media surface, with the normal water level roughly a foot above that. After several months, I raised it up another 2' to get it as close to the ceiling as possible and still be able to look into the rez with a mirror (this is all sitting on top of a bathtub). Doing this reduced my runaway incidence significantly. The higher that the supply reservoir is placed, the lower the variation in head pressure becomes as a percentage of total head pressure, and our cumulative experience says that is a good thing. YMMV.
Also, I don't know how well the blumats will adapt to your desire for cyclical runoff. They are designed to hold a given moisture content, above which they pinch the line closed and below it they open it to flow. I would think that you will find that you either get no runoff or you get it continuously. Again, YMMV.
Keep us posted, and good luck.

One idea mentioned many posts back for using thick nutrients and granular organics was a "nutrient well" - digging a little hole under where the Blumat drips and filling it with the nutrients. Because the Blumat supplies water so slowly, you don’t have to worry about the nutrients draining away. Every time water goes to your plants, a little more fertilizer dissolves.
You can also use this method with thinner, more liquid nutrients by first putting vermiculite in the hole to act as a kind of sponge. It's like making your own time release fertilizer.