forkup
Member
Hola fellow ppkers! LTNS!!
I've been extremely busy ppking my ass off and finally found time to drop in and say high!
In my last post I stated I would tell about my first ppk run so here goes. I had great success with little to no issues until the very last week or so before chop. One of my biggest girls started to yellow quickly, I had already noticed it was draining slower by the day so I realized it was drowning. I cut off water to her and let her stand until she dried out the turface then I hand watered her until chop.
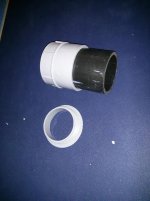
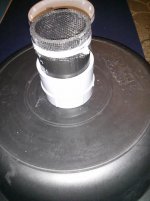
Root inspection showed a solid mass of root with a bit of rot in the tailpiece. There was a solid mat of roots about 3/4" thick that had literally raised up the entire plant media and all. Remember I'm using 3 1/2 gallons buckets with 6 inches of turface as media. That particular plant was the heaviest and went a bit over 18 ounces dry. In fact out of 8 plants, 5 different strains, only 3 were under a pound the smaller ones being slow veggers.
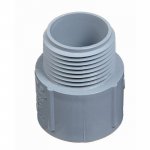
On to round 2 which I already had 4 girls vegging. Of the 4 I culled 2 because they simply weren't keepers which only left me with 2 to flower. Since I only had the 2 to flower I vegged them up to up to 42 inches then flipped with 3 1000 watters hanging between them. They outgrew the buckets 3 weeks into flower. They suddenly drained very, very slowly so I knew I had screwed up. I decided to transplant into a larger bucket similar to the newest model D9 uses with the huge tailpiece. I hated transplanting during flower but didn't see any alternatives. The transplant went pretty well considering. I noticed no shock or slow down in growth but the buds did not swell the final week like they did first round. The plants had hundreds of budsites tho and the final weight tally of the heaviest plant went a shocking 44.5 ounces dry! Again this was with 3000 watts hanging in front of it in a large vertical scrog and during the final 2 weeks I hung a 400 watt MH on the back side. I honestly think if the buds had swelled anywhere near like the first round it would have beat 5 pounds.
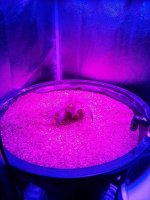
I learned my lesson and have since set up a perpetual with 10 girls in flower in the smaller buckets. This time I'm vegging to about 2 foot and am preparing to stick the 10th plant in tomorrow which means one more week until the first plant comes down. They look fantastic.
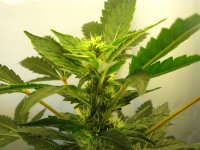
I have had a few problems I want to mention. Thru out each grow I get what appears to me to be calcium spots and at also a slight magnesium deficiency. As I added plants to the perpetual week by week the EC started to spike upwards getting to around 2400. The plants appeared to be suffering so I watered it back down to 1800 or so with an input of 1200 still. Looks like it's still creeping upwards so I guess I'll have to lower the input more. Is anyone else seeing this?
As far as the calmag deficiency I see the same thing in the cloners I made like D9 used to use. It acts a lot like coco with its high CEC altho D9 says turface has a lower CEC than coco.
I'm still amazed each and every day as I tend this wonderful system D9 has developed with everyones input. It truly is easy to get bored and complacent and I have to hunt for something to do .
.
I see no recent posts by D9 but I see where he logged on last week so I hope all is well. D9 I can't say enough good things about you and how much I appreciate all the effort and willingness to help others in their quest for the grail! Please let me know if you're ever in the PNW as I'd love to treat you and your wife to a nice dinner.
I've been extremely busy ppking my ass off and finally found time to drop in and say high!
In my last post I stated I would tell about my first ppk run so here goes. I had great success with little to no issues until the very last week or so before chop. One of my biggest girls started to yellow quickly, I had already noticed it was draining slower by the day so I realized it was drowning. I cut off water to her and let her stand until she dried out the turface then I hand watered her until chop.
Root inspection showed a solid mass of root with a bit of rot in the tailpiece. There was a solid mat of roots about 3/4" thick that had literally raised up the entire plant media and all. Remember I'm using 3 1/2 gallons buckets with 6 inches of turface as media. That particular plant was the heaviest and went a bit over 18 ounces dry. In fact out of 8 plants, 5 different strains, only 3 were under a pound the smaller ones being slow veggers.
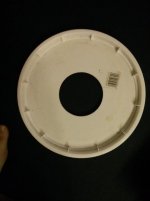
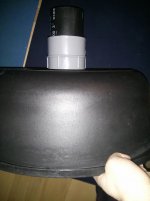
On to round 2 which I already had 4 girls vegging. Of the 4 I culled 2 because they simply weren't keepers which only left me with 2 to flower. Since I only had the 2 to flower I vegged them up to up to 42 inches then flipped with 3 1000 watters hanging between them. They outgrew the buckets 3 weeks into flower. They suddenly drained very, very slowly so I knew I had screwed up. I decided to transplant into a larger bucket similar to the newest model D9 uses with the huge tailpiece. I hated transplanting during flower but didn't see any alternatives. The transplant went pretty well considering. I noticed no shock or slow down in growth but the buds did not swell the final week like they did first round. The plants had hundreds of budsites tho and the final weight tally of the heaviest plant went a shocking 44.5 ounces dry! Again this was with 3000 watts hanging in front of it in a large vertical scrog and during the final 2 weeks I hung a 400 watt MH on the back side. I honestly think if the buds had swelled anywhere near like the first round it would have beat 5 pounds.
I learned my lesson and have since set up a perpetual with 10 girls in flower in the smaller buckets. This time I'm vegging to about 2 foot and am preparing to stick the 10th plant in tomorrow which means one more week until the first plant comes down. They look fantastic.
I have had a few problems I want to mention. Thru out each grow I get what appears to me to be calcium spots and at also a slight magnesium deficiency. As I added plants to the perpetual week by week the EC started to spike upwards getting to around 2400. The plants appeared to be suffering so I watered it back down to 1800 or so with an input of 1200 still. Looks like it's still creeping upwards so I guess I'll have to lower the input more. Is anyone else seeing this?
As far as the calmag deficiency I see the same thing in the cloners I made like D9 used to use. It acts a lot like coco with its high CEC altho D9 says turface has a lower CEC than coco.
I'm still amazed each and every day as I tend this wonderful system D9 has developed with everyones input. It truly is easy to get bored and complacent and I have to hunt for something to do
.I see no recent posts by D9 but I see where he logged on last week so I hope all is well. D9 I can't say enough good things about you and how much I appreciate all the effort and willingness to help others in their quest for the grail! Please let me know if you're ever in the PNW as I'd love to treat you and your wife to a nice dinner.