What's new
  • Happy Birthday ICMag! Been 20 years since Gypsy Nirvana created the forum! We are celebrating with a 4/20 Giveaway and by launching a new Patreon tier called "420club". You can read more here.
  • Important notice: ICMag's T.O.U. has been updated. Please review it here. For your convenience, it is also available in the main forum menu, under 'Quick Links"!

150w HPS Cabinet by Quazi

Quazi

Member
Hello everyone!

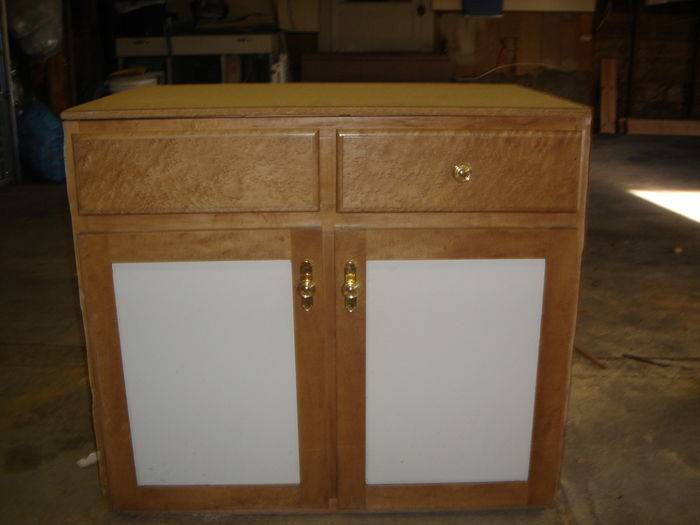
I'm getting close to the point of starting construction on my new cabinet so I figured it was time to start my own thread.

I originally posted some of these blueprints in the 150w HPS Club and Resource Guide and received some good feedback so far.

I am creating the cab to meet my needs as a patient so super-high yield isn't that important. In addition, I am complying with all state laws so stealth was not the biggest concern. The space I have is a large closet in my house. It doesn't get too hot where I live and the winters are long, so it seemed that the space would do.

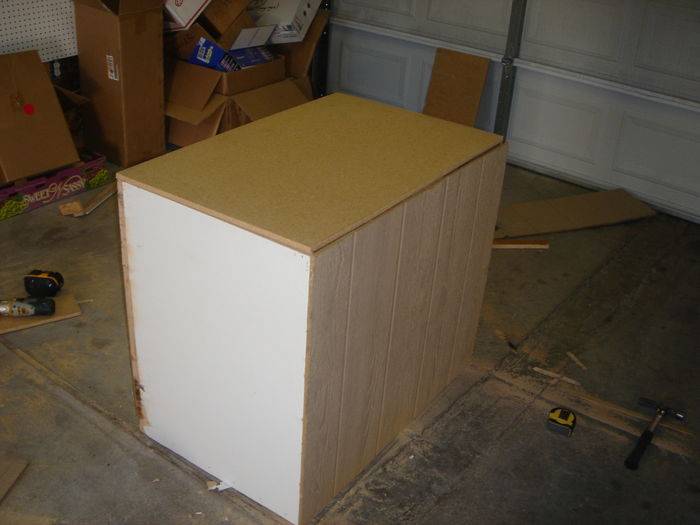
The dimensions that I am working with are 4' tall, 3' wide and 2 feet or so deep.

After a lot of reading I found that the 150w HPS would be perfect for my needs so I decided to go with that. I also read that adding CFLs for spectrum can be helpful for the plants so I knew I wanted some accent lighting in the flowering room.

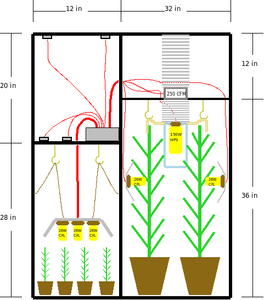
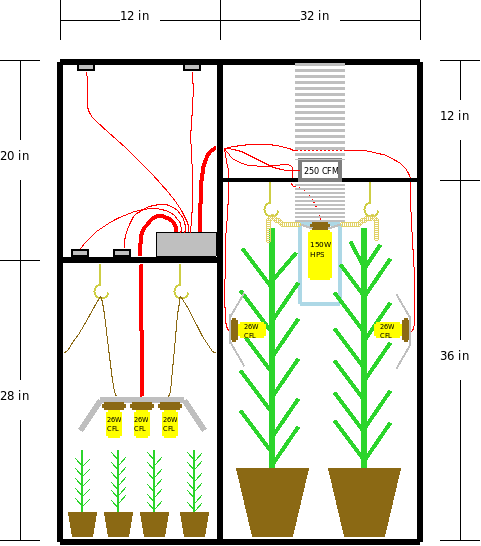
My first design was done using a paint program:


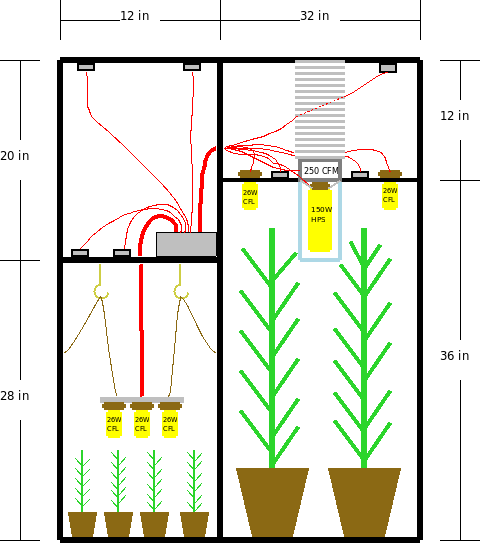
After conferring with my friends I found a cool open source program for the design, and came up with the second set of blueprints:


Now, after receiving some feedback from the folks in the 150w HPS Club, I have come to my third design:


The air intake for the cab will be through holes drilled in the bottom of the veg and flowering chamber. Both of the chambers will be lined with Mylar wrapping paper (or an equivalent). The veg chamber will have 3 26w CFLs on a bar that can be raised or lowered depending on the stage of the veg. There are two fans in the top of the veg chamber for ventilation. The flowering chamber will have a single 150w HPS lamp in the middle with a cool tube in the form of a straight 8" Hurricane glass shield. Additional ducting will be provided so the lamp can be raised or lowered. In addition, two 26w CFLs will be on either side of the flowering chamber with reflectors. This is for compliments to the spectrum. They will also be able to be raised or lowered. The small grey boxes around the electrical room are small fans.

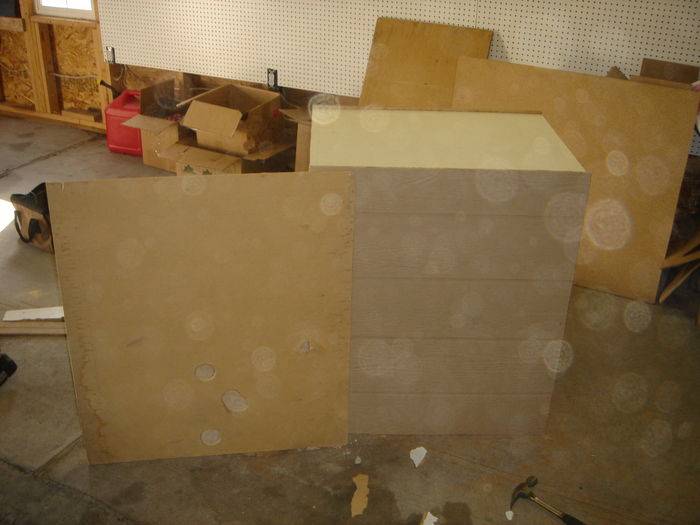
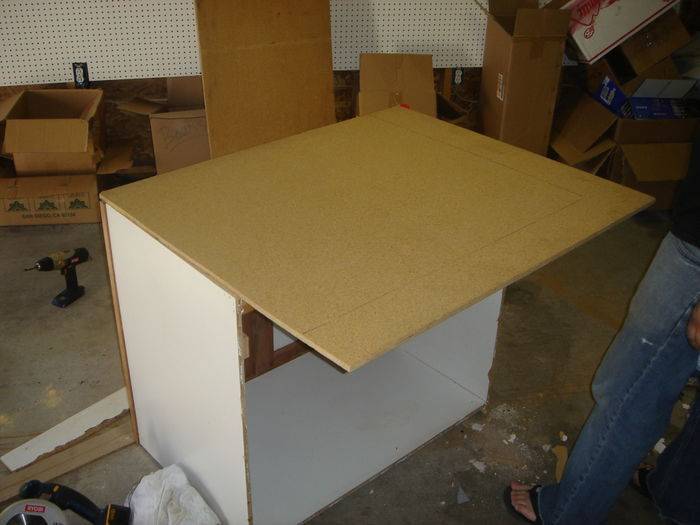
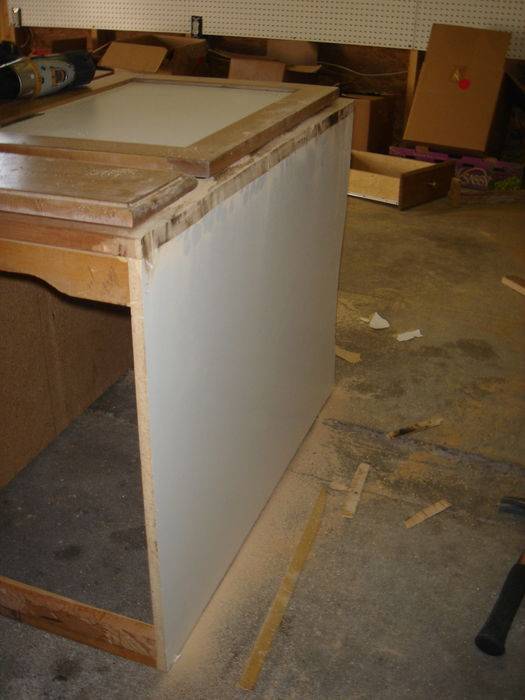
I will be ordering my light next week so I plan to begin construction very soon.

This is my first attempt into the micro world so I am still looking for any kind of feedback before I begin construction. Please feel free to throw any suggestions my way! :1help:

Thanks!

I plan on taking lots of :kewlpics: 
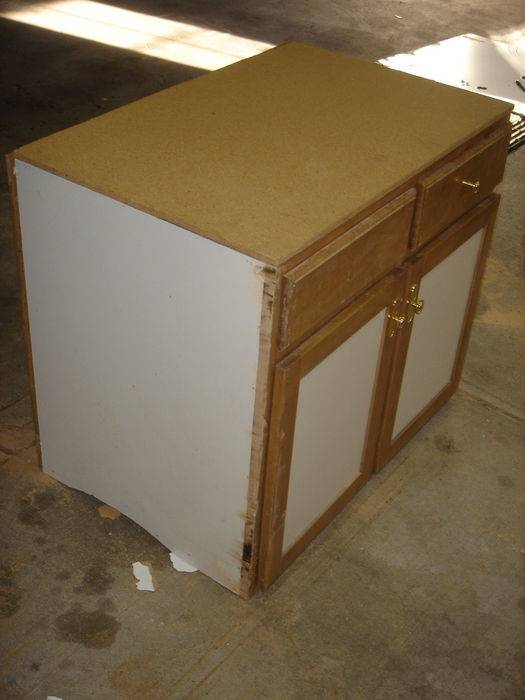
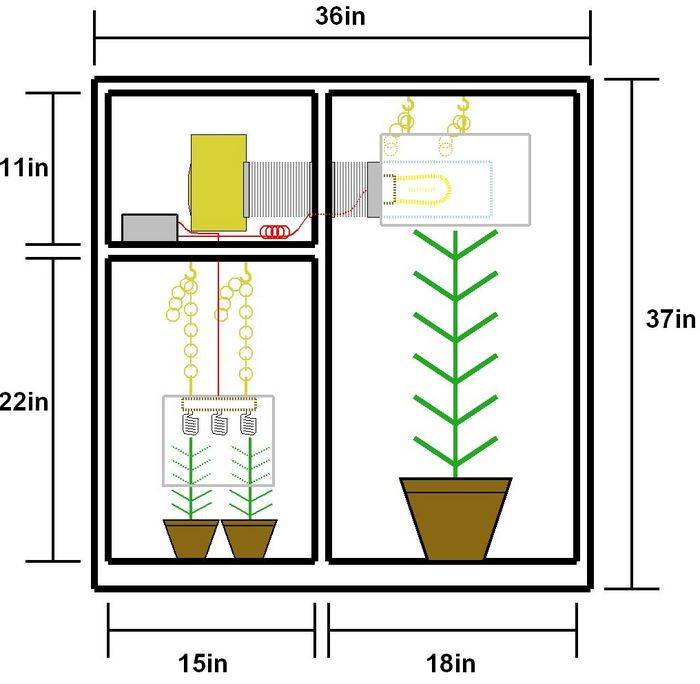
of the process/construction as well as the product so stay tuned!

Quazi said:
EDIT: scrapped the vertical design and the movable veg chamber lights. Ended up much more "NGBish" in style. Design ended up looking much closer to this:

The difference being that the CFLs are dropped vertically through the roof of the veg chamber with over-sized holes to allow air to flow over them. You'll have to check out the rest of the thread to see how it actually ended up.
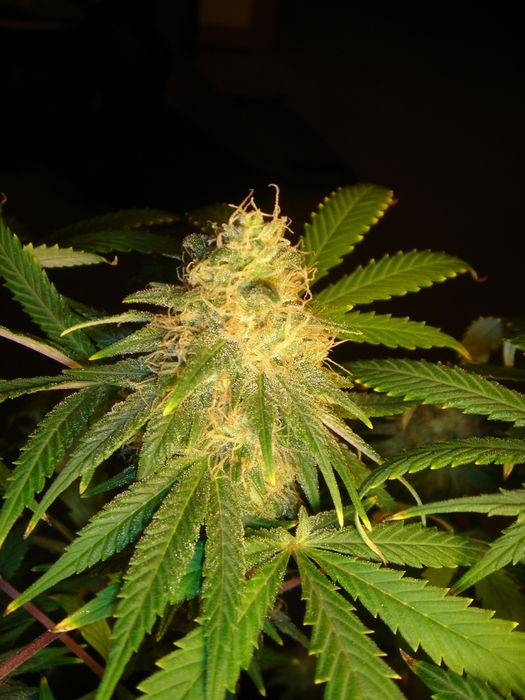
Yes, it works:


Read on to find out more!
 
Last edited:

Thundurkel

Just Call me Urkle!!
Veteran
Not a bad design, I'm am in the process of making my second grow cab and it's similar but I'm doin all cfl I just finished painting the inside of my flower chamber and will be posting pics soon good luck with your cab buddy and welcome to IC
 
C

Cozy Amnesia

Looks like your set! I don't see anything else I would change that I haven't said already.
 

FreezerBoy

Was blind but now IC Puckbunny in Training
Veteran
I was going to say move the vertical support to shrink the mom area and increase flower chamber until I noticed you were WAY out of scale. Using the numbers provided a 150 sounds rather small but, I'm a horizontal guy. I don't know that verticals use the same 50w per sq ft formula.
 

Quazi

Member
FreezerBoy said:
I was going to say move the vertical support to shrink the mom area and increase flower chamber until I noticed you were WAY out of scale. Using the numbers provided a 150 sounds rather small but, I'm a horizontal guy. I don't know that verticals use the same 50w per sq ft formula.
The cab will be around 1.5-2 feet deep. The flowering chamber will be just around 2 feet (if not a under) wide. That makes for about 3-4 sq ft. Add in the ~50w of CFLs and you're looking at around 45-50w sq ft.

However, I would consider shrinking the cab up a bit to shoot closer to the 50w per sq ft. I'm not entirely sure how important it is to stay true to the 50w per sq ft formula, buy I'm willing to make changes to the design to aim for it.

If someone else could chime in or if you could point me to some reading on the magic 50w per square foot formula, then I could definitely be persuaded. Especially since the prefab cabinets come in a slightly smaller size than my plans, for a decent price.

Thanks for the help!
 
Last edited:

blynx

WALSTIB
Moderator
ICMag Donor
Veteran
Lose the adjustable cfls in the veg chamber. Mount the lights on the top.
It's way easier to raise and lower individual plants than it is the light. All it takes is one quick growing plant for you not have an even veg chamber anyways.
I had an adjustable cfl bar with reflector in my veg cab, it just stayed pulled all the way up. When I moved the cab and re-set it up, I removed the reflector and just mounted the lights on top. It also gave me more height for the plants.
 

FreezerBoy

Was blind but now IC Puckbunny in Training
Veteran
Quazi said:
The cab will be around 1.5-2 feet deep. The flowering chamber will be just around 2 feet (if not a under) wide. That makes for about 3-4 sq ft.
You need to give us a better diagram with legit measurements. As pictured, you're at 24x32 which is over 5.3 sq ft. A 150 provides about 28 w per sq ft, a 250 about 47 w per sq ft.

Again, I don't know that vert cabs have the same watt requirements.
 

organick

Member
Cab

Cab

Nice light movers, a light mover of some sort, in my experience, can be much more efficient than moving the plant. I used 3-gal organic soil. Next time SCOG.

I like air-intake systems to give the plants a little breeze and filter the air. Air movement can solve a lot of problems later. (gallery)

Don't know any mathematical calculations but as I was looking at it, I thought he needs more light and that switching from top to side with the CFL's looks a little "pain-in-the-assish", but we all have our own styles.

Of course it's all theoretical until the power driver hits the dry-wall screw (my favorite fastening system). So good luck on getting the project going.

Enjoyed the thread, thanks for getting my brain going this morning...Light movers...Mmmmmm.
 
Last edited:

Quazi

Member
flashog said:
What (open source) program did you use?
It's called Dia.
http://live.gnome.org/Dia/Download

It's got a Windows and Linux flavor.

It's basic, but it does the trick, it's a tiny program, and it's open source -- which makes me happy.

It's basically a program that has a grid on the drawing panel with good tools to create, duplicate, and modify objects, lines and points. Make sure you turn off snap to objects if you want to do detailed drawings. It's under the View menu I believe and it messed me up when I first started messing around with it.

organick said:
Nice light movers, a light mover of some sort, in my experience, can be much more efficient than moving the plant. I used 3-gal organic soil. Next time SCOG.

I like air-intake systems to give the plants a little breeze and filter the air. Air movement can solve a lot of problems later. (gallery)

Don't know any mathematical calculations but as I was looking at it, I thought he needs more light and that switching from top to side with the CFL's looks a little "pain-in-the-assish", but we all have our own styles.

Of course it's all theoretical until the power driver hits the dry-wall screw (my favorite fastening system). So good luck on getting the project going.

Enjoyed the thread, thanks for getting my brain going this morning...Light movers...Mmmmmm.
Thanks for the advice. I'm not too worried about moving the CFLs around. However, I will be sure to keep in mind that I can always fasten them to one place if they become "pain-in-the-assish." :spank:

I've definitely been trying to think about moving the lights ahead of time in the design rather than wishing I could later.
 

flashog

Member
Quazi said:
It's called Dia.
http://live.gnome.org/Dia/Download

It's got a Windows and Linux flavor.

It's basic, but it does the trick, it's a tiny program, and it's open source -- which makes me happy.

It's basically a program that has a grid on the drawing panel with good tools to create, duplicate, and modify objects, lines and points. Make sure you turn off snap to objects if you want to do detailed drawings. It's under the View menu I believe and it messed me up when I first started messing around with it.


Thanks for the advice. I'm not too worried about moving the CFLs around. However, I will be sure to keep in mind that I can always fasten them to one place if they become "pain-in-the-assish." :spank:

I've definitely been trying to think about moving the lights ahead of time in the design rather than wishing I could later.

Ah yes, I've had dia installed before.. Thanks, I'm gonna tinker with it now, just got myself a new cabinet.
 

Quazi

Member
FreezerBoy said:
I was going to say move the vertical support to shrink the mom area and increase flower chamber until I noticed you were WAY out of scale. Using the numbers provided a 150 sounds rather small but, I'm a horizontal guy. I don't know that verticals use the same 50w per sq ft formula.
I think you're quite right.

I may be aiming a bit large for the 150W then.

That's fine with me though. I don't mind trimming down the design a bit. Just means less lumber to purchase and put together. I'll see if I can tighten up the design a bit and get closer to the 50w per sq. ft. :yes:
 

Quazi

Member
Thundurkel said:
I would go horizontal with the 150w HPS that would give you better coverage of the area
I have been considering dropping the idea of having a vertical lamp. I have the feeling that, as an unexperienced grower, I might want something a bit more straightforward in design such as a horizontal setup for the 150w HPS. This would prevent me from having to learn about the plants and how they grow while trying to train them to do well in the vertical environment.

Thanks for the feedback everyone! I'll be posting my new plans tonight.
:rasta:
 

Quazi

Member
Construction Begins! Huzzah!

Construction Begins! Huzzah!

Alright everyone. The construction has begun! :muahaha:

With the long weekend I decided that it would be time to go ahead and find my cabinet that I am going to use for my 150w HPS of goodness.

I was considering purchasing a brand new cabinet; one of the prefabs from Lowes, or Home Depot. However, I couldn't find any that were wide enough or deep enough to suit my needs. In addition, I was looking at spending $55-100 just to get started. I knew I could always add height to the cabinet by removing the top and putting some lumber in, but I really needed the width and depth right because of the size of my closet. My ideal with and depth were 36" wide and 24" deep. Shopping around and looking online was giving me no good results.

I started to imagine how much it would cost to just buy lumber and start from scratch. But, I knew I would probably end up with something a bit too Frankenstein if I decided to start from nothing.

Luckily, there is this great place in town where you can drop off used stuff from construction. This includes old lumber, wiring, sinks, etc. After searching around I eventually found a wonderful cabinet with a GIANT counter on it. The thick counter-top easily extended 2 or 3 feet past the width of the cabinet. In addition, there was a hole cut in the top for a sink to sit in. But the other dimensions were perfect: 24" deep and 36" wide. Sure it wasn't in the best shape, but it would do.

So for $15.50 I got my cabinet and three decent sized pieces of particle board: 1 to replace the top, 1 to replace the back (which had holes cut in it for plumbing), and 1 to put a divider in the cabinet to separate my veg from my flower.

Luckily a good friend of mine has a garage and some decent electrical tools, so I'll be doing most of the construction there. He helped me with a lot of the cuts and measurements too. Huzzah! So, for under $20, I was ready to begin!

Here's what we started off with:


When you go the route of second hand, you will always run into minor problems. This particular cabinet was a bit wobbly on the bottom due to some odd cuts being taken out and a bit of breakage. You can see that the cabinet was in good shape with no nastiness inside except for some dirt:


So that's our materials thus far: an old, torn up cabinet, and three decent pieces of particle board:


First we needed to rip the back off because it had the holes cut in it for the plumbing. In this picture you can see the old piece in the background with the holes in it. We've got our backless cabinet and the piece of wood we're gonna use to replace the back:


A few measures and cuts later, and we can now see the old back and the new back. Yes, I realize the back is textured and a bit funny looking, but it's flat on the other side and it's on the back of the cabinet so I don't care. Also, sorry about the dust floating in the air on this shot; we had just finished cutting:


Next, the new top was measured and cut:


Now we have a new back and top for our cabinet. If you remember from the shot of the dirty insides above, you'll notice that there was nothing in the middle dividing out cabinet in half. So, this was our last custom piece for the day:


You can see it in the middle dividing the sides of the cabinet now. One thing to note, if you have to make a piece that goes in the middle like this: make sure you pay attention to what the edges look like where it is going. Otherwise, you'll end up with gaps. Here's what we had to do for this one:

You can see there were a couple of 90 degree cuts necessary to fit it in there without any gaps.

So far, so good. The last step for today was to cut just a bit of edging off of the sides of the cabinet. The dimensions of the cabinet were just a hair too much to fit in my closet so I had to cut a bit of the width off. You can see where I'm talking about if you look for the "burned" looking cut along the edge:


So the pieces have been cut and the sides of the cabinet shaped. In addition, I gave the inside a thorough cleaning. I also made some cuts on the bottom of the cabinet so that it wasn't wobbly anymore. I haven't fastened the middle, top or back yet because I am probably going to be making more cuts for ventilation. However, here's the cabinet now with the pieces just sitting there so you can get an idea:


So there we have it. Cost of the cabinet thus far: $15.50. It feels really good to finally have the cabinet purchased and ready. Now I can start making the custom cuts necessary. Here's the leftovers from my materials and the drawer innards and other things removed from the cabinet:


:1help:
I still have a question for everyone though:
The final height of the flowering chamber is only 30". I was thinking of purchasing some used 2x4s and just adding an additional 8 inches or so around the edge and middle to increase the height. Does anyone else think this is a good idea or should I just leave it at around 30 inches? If I do decide to stay with the shortened 30" height, I am plenty willing to learn how to LST to compensate, but I'd rather not.

Also, I think I have decided that I am going to go for the traditional 150w HPS on the top of the box instead of going vertical as I feel a little bit inexperienced to try to train plants around a vertical setup or do the custom construction required for it.

Well, whatcha guys think?

Thanks again for everyone who has provided input so far.
:respect:

Thanks for stopping by! More pics of the cabinet construction coming soon. Once I can decide on the height for the cabinet (or decide to leave it) then I can make some better blueprints and start making the custom cuts necessary. I will be ordering my lamp in a couple of days so I plan to start shortly after that arrives.

Again any comments, suggestions, questions are GREATLY appreciated. Thanks!
:rasta:
 
Last edited:
C

Cozy Amnesia

Great work! I would have built myself a wooden cab but I have no way of getting the tools or a garage to do it in.

Ok, you have to restrict your plants hight, which isn't hard to do. Indoor growers, especially micro growers, have been dealing with this problem for decades and have come up with several great techniques. LST, ScrOG, SOG, FIM, and topping all are designed to fit as much plant material possible in small spaces. A good way to deal with small spaces is to grow plants the grow small -- indicas. You can still grow sativas, but restrict it's root mass by growing in .5-1 gallon containers, which keeps their size down.

Good luck building your box, I love building things so I'm jealous :bashhead:
 

Quazi

Member
Thanks Cozy! You aren't the first to mention LST. I think that I am going to add about 4 inches of height to the cab and also utilize LST. It looks like it might make things a bit more interesting anyway.
:rasta:
 
Last edited:

Quazi

Member
Construction Continues

Construction Continues

Construction continues!

Hello everyone. Completed some additional construction today. Unfortunately I forgot to bring my camera but I'll be sure to take pics for the next phase.

So, I decided to go ahead an add about 6 inches to the cabinet or so. This is to increase the amount of play I have for the flowering side. I basically cut a frame that will sit on the top of the current cabinet frame to extend it a bit using 2x6's. In addition, I cut the shelf for the electrical room and also cut support for that shelf.

It's come a long way, but here's, pretty much, the final blueprint:


Pretty much the same as before. However, you can see I switched more to the NGB style now that I have more height to do the horizontal setup. It's tried and true so I don't know why I would want to mess with it.

I decided to go with a blower and just attach the ducting to it for the side with the cool tube. The other side will passively pull into the electrical room. If I find there's a bit too much heat, I may put an additional fan from the veg chamber to the electrical.

I also figured out how I am going to attach the reflector and what the angles/measurements are going to look like:


The reflector will be attached to a piece of wood forming a T in the V above the lamp. Hooks will be installed on the wood parallel to the floor that will have chains leading to the ceiling of the flowering chamber. Then I can freely move my lamp up and down without hassle.

Nothing really changed for the lamps. Gonna have Mylar on the inside of the flowering/veg chamber too.

Next steps will be cutting holes for ventilation and ducting from electrical to flower. Also need to decide exactly which blower I want to go with. I plan on finishing most of the cabinet by Thursday of this week. I'll be sure to keep this thread updated.

Can't wait to get some green in there!
:rasta:
 

Hydro-Soil

Active member
Veteran
Sweet looking cab so far!

I'd definitely go with a Scrog setup for that 30" deal though it might be a little short?

5" for the light without reflector
9.5" for light penetration
15" or so for space to move hands under screen
7" for SWC tub...

That's over 30 Inches...

I'd extend that cab a bit. One can easily drop the lights down a bit if necessary. Working in a cramped space can be a pain over time.

You'll definitely want to scrog that 150W to get the best results unless you're planning on a staggered harvest.

Good luck!
 

Quazi

Member
Thanks for the advice Hydro-Soil! In my last post, you can see that I added another 6 inches to the cab 'cause I felt 30in was a bit short as well. I'm thinking of going LST instead of scrog but it depends on how big the plant gets in there I s'pose.

The cool tube allows the lamp to get much closer to the plants. In addition, the charts I have looked at for 150w HPS says the plants are safe at 4 inches away for good penetration so I'm not too worried about that. Also, I'm going for soil so no needs to worry about tubs.

All of that said: I'm putting this inside a closet so I couldn't get too out of control with the height.

The most recent blueprint gives a better idea of what it would look like.

Thanks for stopping by!
:rasta:
 
Last edited:

Latest posts

Latest posts

Top