What's new
  • Happy Birthday ICMag! Been 20 years since Gypsy Nirvana created the forum! We are celebrating with a 4/20 Giveaway and by launching a new Patreon tier called "420club". You can read more here.
  • Important notice: ICMag's T.O.U. has been updated. Please review it here. For your convenience, it is also available in the main forum menu, under 'Quick Links"!

Breaking Bud w/ Drop: A mobile hydroponic RV grow room trailer conversion gone mad!

Drop That Sound

Well-known member
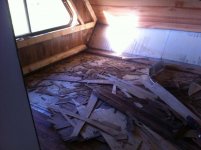
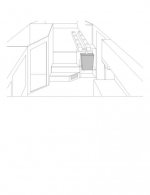
Mr. White's brother-in-law DEA agent was coming to visit, and had to get the monsters out of his living room...


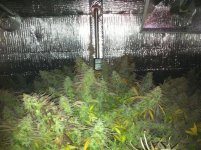
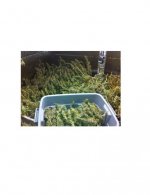
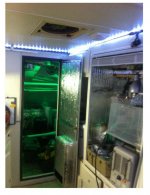
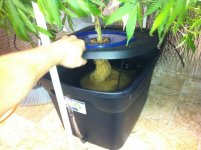
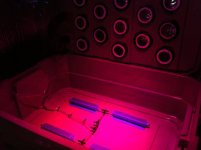
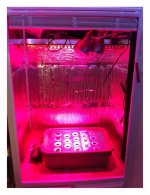
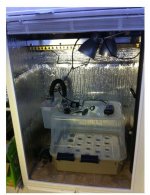
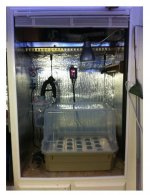
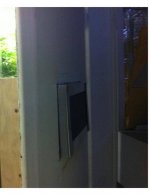
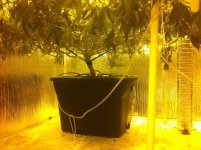
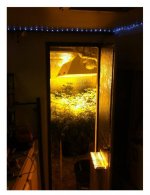
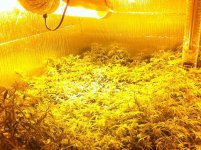
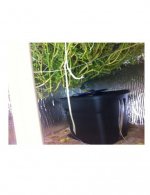
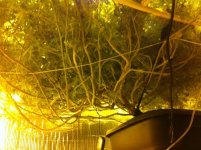
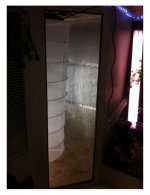
And so I made some cheap 20 gallon DWC tubs, smacked the ladies around, and managed to stuff 4 of them in the new flower room. Tigermelon x snow lotus.

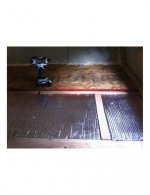
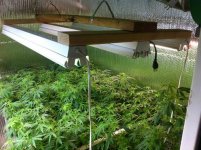
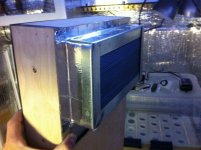
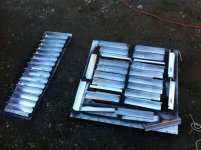
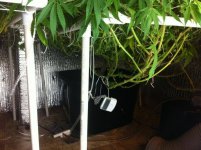
I finagled up a ghetto t-12 light hanger, and put a t-5 over the other side, just until I could get the hoods fit, and figure out a few other things.

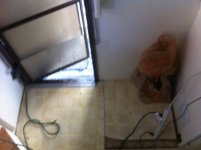
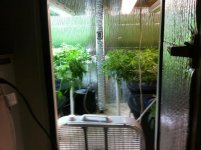
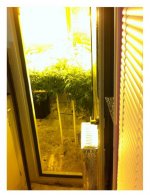
Come to think of it, I was actually running off an extension cord for a few days, and hadn't even plugged in the sub panel quite yet. I was still pulling wires.

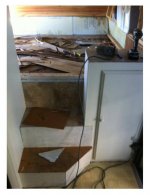
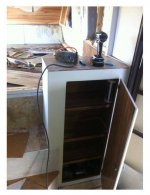
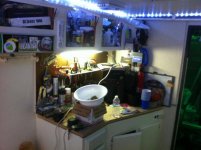
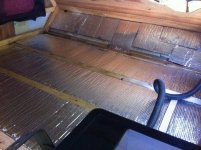
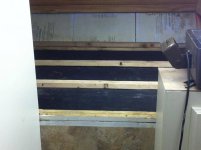
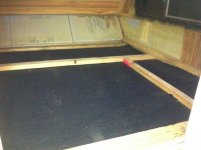
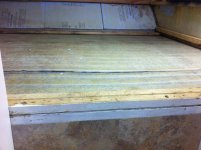
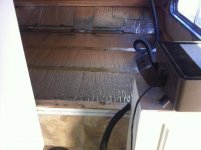
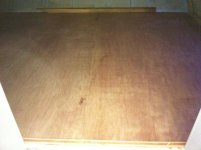
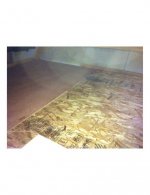
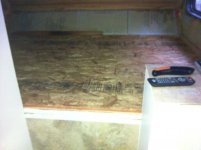
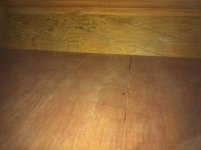
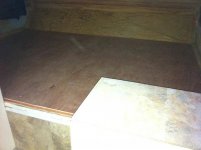
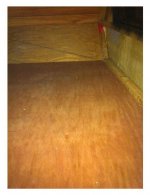
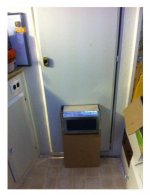
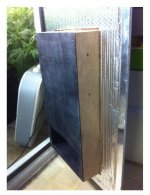
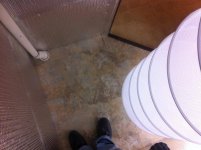
Also busy putting in a new countertop over the old kitchen one, and flooring in the closet and other spaces.
 

Attachments

  • IMG_0670.jpg
    IMG_0670.jpg
    87.1 KB · Views: 103
  • IMG_0728.jpg
    IMG_0728.jpg
    106.1 KB · Views: 101
  • IMG_0726.jpg
    IMG_0726.jpg
    91.9 KB · Views: 98
  • IMG_0674.jpg
    IMG_0674.jpg
    63 KB · Views: 104
  • IMG_0681.jpg
    IMG_0681.jpg
    72.8 KB · Views: 99

Drop That Sound

Well-known member
The race to get power hooked up was on, but things could finally settle down at the home front. Was sticking 4 big plants in a small room not such a good Idea?

Stay tuned and find out on the next episode of Breaking Bud!
 

Drop That Sound

Well-known member
While waiting for the rest of the electrical parts, and whatever else I was doing, I started lining out and finishing area's in the main work room.

I got the propagation closet painted and done. Lined it out the same way as the flower room. Kept the original upper shelf for germinating seedlings, and already had a clothes rack under it to hang gear. I decided to leave the 2 doors off of it, and cut out the thin piece of face frame that ran down the middle between the doors. I made it one big opening instead. I used sticky tiles for the floor, and put some nice vinyl corner mouldings around the opening. I installed one receptical.


You can see I was working on a new cloner. I'll upload more info/pics of it soon.

Also, I decided that cabinet doors were not all that important, especially on the clone closet. I instead opted for using cheap window blinds, and treat the openings as windows instead. Same with the fridge/air intake room. Something to block most of the light, but also looks cool!

I cleaned up the old fridge area, put tiles in it, and lined it with reflectix too. I made a little box like section with a frame to mount furnace filters into, and divert the incoming air. I used the existing side vent as the fresh air intake to the whole trailer for the time being. Right next to one of the flower room intake ports, in the same space. The other intake port is under the old kitchen cabinet, on the other side of the room. I made them both light proof with elbowed duct fittings, and also covered the flexible 5" intake tubes inside the room with 6" mylar ducting as an extra sleeve.


I had finished adding more plywood over the existing countertop, to cover up the sink cutout, and tiled it with the same sticky floor tiles too. Makes for a decent top, matches everything nice Still needs trim around the edge though. I blocked off the window behind it, and added a peg board over that whole part of the wall for a place to hang tools. The upper cabinets I started storing my nutrients and supplies. The work room side of the new wall is where I installed the sub panel. The wall got painted too, and a few other walls, basically the entire work area.

There is more space on the main wall to mount environment and light controllers, and more recepticals, next to the sub panel. The end of the cabinet and counter top I used as part of the framing for the new wall, and added blocking to it. The upper wall has a 2x8 running across the ceiling, where I ran the conduit through, and along. More pics of the electrical coming soon.

Made a fan mount for the corner of the flower room.


It was taking more time, and the plants were vegging out even bigger, but I was close to having power.


Attachments

  • IMG_0851.jpg
    IMG_0851.jpg
    29.2 KB · Views: 98
  • IMG_0839.JPG.jpg
    IMG_0839.JPG.jpg
    62.3 KB · Views: 93
  • IMG_0825.jpg
    IMG_0825.jpg
    73.4 KB · Views: 95
  • IMG_0750.jpg
    IMG_0750.jpg
    83.5 KB · Views: 104
  • IMG_0850.jpg
    IMG_0850.jpg
    60.8 KB · Views: 101
Last edited:

Drop That Sound

Well-known member
Aero/Fog/DWC hybrid cloner.

Aero/Fog/DWC hybrid cloner.

I already had plain old DWC cloners that I was using just fine, but I wanted to try and build a multi purpose unit that I could pick and choose, or use a combination of the different hydro cloning methods. Or turbo charge the clones if possible.

On the dome I added an extra container to hold distilled water. Then I have an ultrasonic pond fogger, with a float that pumps fog up and then down through the hood and into the cloner container. Through a clear tube, with a light blocking system in the lid. In the top of the fog container I added a small brushless computer type fan for the air intake. I cut the square fan frame into a circular shape and it fit perfect in a round PVC fitting used as a bulkhead.

I used 2 inch pvc knock out caps as a rim to seat in some home made cloning pucks, siliconed to the lid.

I made the pucks themselves by taking a 2-3" long piece of 2 inch pipe, and roughly sharpening down one end.

Then I buy cheap neoprene foam garden kneeling matts, and use a vice with blocks to press the pucks. It cuts right in and makes a pop sound when its cut. I can make many of them in no time, especially if I built an auto press. Then I slice them just like the commercial brands.


I planned to not only use DWC with air stones, but also pump fog down to the root chamber at certain intervals, with a humidity controller or timer. Or not, but hey its a cool feature to have. Probably help to keep the roots moist before they are able to drop down into the solution, without having to raise the level.

The container itself I have another mini gravity fed float, to hook up to a bottle of distilled water from up on the shelf. Constant supply of pure water to keep the ultrasonic nebulizer disks running top. I might add another fogger after testing.

Also have another matching container, that is a little bit deeper, and fits the same dome (clear tote). I can switch right over to that with the same lid, and have ez clone sprayers with a pump & manifold instead. Plus fog.

I have yet to even fill the system and use it. I mostly do air layers now, but I will probably use the cloner someday soon, just for the efforts sake.

Up top on the shelf is where the seedling temp controlled heat mat go's. A place to germinate seeds and that's about it.

I have all kinds of goodies, timers, and meters to install, just been sitting in there. And out with the blurple screw in LED. There will be a few SILs and that's it.

That's about it for the propagation station.
 

Attachments

  • IMG_0995.jpg
    IMG_0995.jpg
    63.8 KB · Views: 101
  • IMG_0856.jpg
    IMG_0856.jpg
    69.7 KB · Views: 99
  • IMG_0996.jpg
    IMG_0996.jpg
    62.1 KB · Views: 98
  • IMG_0500.jpg
    IMG_0500.jpg
    52.2 KB · Views: 101
  • IMG_0503.jpg
    IMG_0503.jpg
    68.4 KB · Views: 98
  • IMG_0501.jpg
    IMG_0501.jpg
    55.5 KB · Views: 99
  • IMG_0499.jpg
    IMG_0499.jpg
    54.4 KB · Views: 98

Drop That Sound

Well-known member
Light Proof Louvered Vent

Light Proof Louvered Vent

Another project I worked on, just before hooking up the lights, was adding another vent to the flower room door.

I wasn't always planning on using it for the flower room, and just sort of borrowed the door for awhile. I was eventually going to be making a new door, and replacing the multi purpose room's door back with it anyway.

That plus the intake ducts only being 5" each, I figured I could use the extra incoming air, towards the center of the room.

I also really wanted to try out the new idea for the vent, using aluminum z channel that I painted black.

I cut a bunch of pieces of the channel up, used small strips of the leftover sticky floor tiles as spacers, and stacked them up.

Then I used more of the z channel as a sort of picture frame to hold it all together, as it was still a bit wobbly.

I covered the inside of the box with black spray paint, putting the stacked aluminum vent toward the top on one side, and the port down below on the opposite side.

The louvers themselves just aren't quite enough (with one stack anyway) to block the light, hence the addition of the tall slim box. Thinking back I could have made more stacks and a smaller box, but it worked, and fit the door without taking up too much space.

Works great, and will work good for when I replace the door back on the multi purpose room, if and when I want to grow in it.

After all, I always wanted to seal off the flower room, and won't need the extra vent.
 

Attachments

  • IMG_0854.jpg
    IMG_0854.jpg
    59.7 KB · Views: 98
  • IMG_0852.jpg
    IMG_0852.jpg
    58.5 KB · Views: 97
  • IMG_0853.jpg
    IMG_0853.jpg
    60.7 KB · Views: 94
  • IMG_0855.jpg
    IMG_0855.jpg
    40.7 KB · Views: 92
  • IMG_0849.jpg
    IMG_0849.jpg
    76.5 KB · Views: 94
  • IMG_0858.jpg
    IMG_0858.jpg
    32.9 KB · Views: 94
  • IMG_0857.jpg
    IMG_0857.jpg
    50.6 KB · Views: 100

Drop That Sound

Well-known member
And finally.. I was able to flip on the breakers and hook up the lights!

There was a "big" problem though.

4 plants were already too crammed in the first place, let alone leaving them to them veg another week. I carefully removed 2 of them, and re-scrogged the 2 towards the back that had most the screens already. The pair of single plants were pretty massive, one on each side of the room, and had no problem filling the nets all by themselves. They would each get a 1000 HPS, and in a few days be flipped. Not exactly the what I had planned but..

I was in for a crazy ride!
 

Attachments

  • IMG_0947.jpg
    IMG_0947.jpg
    86.3 KB · Views: 92
  • IMG_0946.jpg
    IMG_0946.jpg
    93.2 KB · Views: 92
  • IMG_0945.jpg
    IMG_0945.jpg
    88.4 KB · Views: 94

Drop That Sound

Well-known member
Haha, it is somewhat of a show, not my fault you guys are binge watching. I would too though, what can I say? Glad to have a great audience, welcome aboard the hydro express. Please remove your shoes and put on a tyvek suit (j/k but it is a requirement to enter the trailer soon enough).

It's chill here in Palindrome's workshop, I like it! Look forward to checking out the rest of your guy's setups here too.

I wasn't exactly planning on documenting historic grows in here, just showcasing the build itself, but I feel the maiden voyage at least is vital to the build documentary.

As soon as I finish up releasing seasons 2-3?, I'll show you guys the current state of the grow trailer, and what all i'm back to doing with it now. Shouldn't take long considering I just now started working on it again after 2 years. And back at it again. Until then you'll have to hold on to your seats, and find out what happens on the next episodes.


So on with the show, gotta hurry up and finish season 1, Lol...
 

Drop That Sound

Well-known member
There wasn't a whole lot of construction going on with the trailer after that point. Or room to do much (that's one major con in trying to grow and build in a travel trailer at the same time).

Mostly just working out light leaks, and a few other kinks before setting the timers. I had let the 2 plants veg under the HPS, and slowly transition to it. Also kept weaving the nets into a somewhat manageable canopy. I eventually flipped the timers on, something that's always cool to do in a new room, let alone a new room on wheels!

The other 2 that I took out I put in the multi-p room. I actually needed a mother plant anyway, and they were bigger than the ones I had. I had just skinned the walls in there with reflective insulation wrap too. And put new plywood with floor tiles down. Gone was the old toilet, shower pan, mini corner cabinet and sink. And the other knick knacks on the walls. Just a nice little space. Finished enough for the time to house the 2 plants. I had put them back into 5 gallon buckets. Earliest pics of the multi-p room coming soon.


I had an outdoor crop I started earlier that was starting to get battered by the weather, and fall was setting in. I managed to get something out of it to hold me over, until the real crop I was waiting for. That was keeping me busy too.


I started ordering gear more gear. A 50 pint dehumidifier with drain just for the flower room. Got a radiant heater up and going. Some other odds and ends. LED rope light around the ceiling, another green rope night cycle work light in the flower room that I never really use...


After re working the scrogs so much, and killing my back, I decided to mount a stainless steel shower grab bar on the 4x4 post. Also some heavy duty steel handles on the ceiling beam. Then I could hang out over the canopies like a jungle monkey, without bulging disks in the process. That was nice.


Running the 2 big plants was gonna be interesting. I had already been following hygrohybrid's work for a bit, so that kind of helped to prepare me of what to hope and expect for.


It was awesome taking a break, and just going in the trailer for res changes or maintenance every day or so. And fun little side projects, and dreaming about what else I can do. Sometimes just to jam out and watch flowers form.


I wasn't expecting the build to take so long. I wasn't even close to being finished with everything, and the more time I spent in there, the more I wanted to re-do. Using an older used RV comes with a ton of work and maintenance on it's own, and there were many things I had to be fixing along the way.


It was hard not to feel like I was in over my head a lot of the time, but I just kept feeding into it, as if it was my calling to create the best portable grow trailer that I can, without doing it from the ground up. Almost like I'll need it for survival someday, like I needed to build an ark of sorts. I still feel that way.


Finally seeing my project being used (even in an unfinished state) was keeping me motivated!
 

Attachments

  • IMG_1016.jpg
    IMG_1016.jpg
    118.2 KB · Views: 103
  • IMG_1031.jpg
    IMG_1031.jpg
    86.1 KB · Views: 96
  • IMG_1014.jpg
    IMG_1014.jpg
    60.6 KB · Views: 96
  • IMG_1026.jpg
    IMG_1026.jpg
    126.7 KB · Views: 96
  • IMG_1013.JPG.jpg
    IMG_1013.JPG.jpg
    45.6 KB · Views: 91
  • IMG_1015.jpg
    IMG_1015.jpg
    124 KB · Views: 95
  • IMG_1036.jpg
    IMG_1036.jpg
    136 KB · Views: 97
  • IMG_1039.jpg
    IMG_1039.jpg
    41.3 KB · Views: 97
  • IMG_0957.jpg
    IMG_0957.jpg
    138.1 KB · Views: 101

Drop That Sound

Well-known member
Not everything can go perfect though right?

A fan I had blowing into the room quit working at some point, in the multi room where I was keeping the 2 mothers, and I didn't find out for a couple days.

The odd Snow Leopard pheno (that turned out extra dank with lower yeild) started growing greyish white fuzzy mold on the leaves. Not like powdery mildew either, more like bud rot but on the leaves and stems. I did sort of cram them in there, but the fan going out itself caused me to have to chop up and dispose of her. Kind of a bummer.

The good one, and i'll say that because it didn't really mold at all, I pulled out of the trailer anyway. I just wasn't set up to veg or house any kind of plants in the there at that point, nor should I have. I re-located her elsewhere and took some cuttings.

The multi room walls were dripping wet, hiding under the canopy when I found it that way. I dried off then sprayed bleach on everything, and went ahead and pulled the reflectix down anyway, and re-did the room real quick.. just because.

There was no real ventilation in there yet, but I could still use the space in another way.

I later decided to use the newly re done again multi-p room for a curing chamber, with the dehumidifier if needed. Hung up a rack, and some extra netting for larf & trim. Just waited for the time to come...
 

Attachments

  • IMG_1062.jpg
    IMG_1062.jpg
    71.2 KB · Views: 94
  • IMG_1051.jpg
    IMG_1051.jpg
    93.1 KB · Views: 90
  • IMG_1070.jpg
    IMG_1070.jpg
    115.1 KB · Views: 92
  • IMG_1188.jpg
    IMG_1188.jpg
    78.9 KB · Views: 96
  • IMG_1240.jpg
    IMG_1240.jpg
    37.4 KB · Views: 98
  • IMG_1242.jpg
    IMG_1242.jpg
    49.4 KB · Views: 96

Drop That Sound

Well-known member
And to wrap up the first season of Breaking Bud, I think it's safe to say..

The new flower room (and first harvest on wheels) pretty much killed it, IMO. Not bad for just kind of throwing it all together in a hurry!

I was pretty happy with the results. Gave me a good idea of what to do in the future. Ways to upgrade.

It was cold out that winter, and I was actually running aquarium heaters instead of a chiller.

But still, I needed better environmental controls when growing in the winter. I wanted to seal the flower room and install AC, and even add more insulation to the walls. Suppose losing tons of heat energy for an almost outdoor like winter grow isn't as bad as losing your DWC crop due to warm water though ;)

I wanted to play with geothermal loops, and make all kinds of attachments to go along with the trailer. Considering I have the room and privacy there's a lot of things I could do. I could store water/heat in a large insulated tank just outside, and release it back into the grow room during the off cycle.

Suppose I could even bury a culvert or some pipes in a loop nearby, and pump air through it to keep a constant temp above freezing in the trailer, to offset my energy costs. Oh wait.. I'm already parked directly over one, 6 ft under and 70 ft long, with water running half the year!

Energy/Heat recovery ventilators, now that was something to look into.. It would have to be DIY though, more on that in the future.

My head was and always is spinning with idea's for the grow trailer.


The thing is, at the time, I hadn't even really finished the main base. I had a lot of work left to do. Like finishing the other rooms off, before I got too wild with everything else, and what I could do in my new space.

I took a break for a couple months after that. I would get back to construction soon enough in the spring time.
 

Attachments

  • IMG_1312.jpg
    IMG_1312.jpg
    110.2 KB · Views: 93
  • IMG_1346.jpg
    IMG_1346.jpg
    93.9 KB · Views: 88
  • Untitled 1.jpg
    Untitled 1.jpg
    34.6 KB · Views: 93
  • IMG_1365.jpg
    IMG_1365.jpg
    60.6 KB · Views: 92
  • IMG_1334.jpg
    IMG_1334.jpg
    84.5 KB · Views: 91

Drop That Sound

Well-known member
Breaking Bud, Season 2:

Breaking Bud, Season 2:

Spring had came back around, the sun was coming out more. My spirits were pretty high after the nice winter harvest. I was ready to get back to my project, and spend even more time with it than before. I had already put so much into it, I couldn't just stop there. There was a lot to be done, but:


There was one major problem to deal with. The loft area...

Up until that point, I had sort of blocked it off. Both physically and mentally. I just avoided even looking in that general direction. I didn't want to stir up any thing with the grow that was going on. It was kind of a disaster zone since the incident. Let me tell you a little more about it.

When I first got the trailer years before, the front loft's roof vent had already been leaking, the panels were sagging down at the seams, and had de-laminated. That's mostly what holds the whole thing together, is plywood sandwiched foam, with very little framing, and a metal skin. The ceiling was pretty much ruined, but hadn't completely been destroyed, otherwise I would have ran. I got a great deal so it was cool.

I did the best I could back then to fix it up, and re-panelled the loft with cheap MDF pre finished wall boards. Even routed out the curved window openings. I had also framed in 2 extra side walls, to better support everything. I mainly did that so I could span some sideways bowed up 2x3s all the way across, and for something to hold the new sheets up to the ceiling. I had also tore the hatched roof vent out, and patched over it with a sheet of aluminum. It was pretty nice and cozy actually. Looked like real wood walls almost. I only lost a little headroom, and I stayed in it sometimes while I built another house.

A year or so later I was staying in it again for a month or so, well actually I was using it like a music studio, and I went on a vacation In the winter. Came back to the main ceiling panel sagging down with 10 gallons of rain water! The roof patch I did froze, and failed because I used silicone to seal it. That's when I just tarped and left it parked for awhile, before ever getting the grow op idea...


So anyway, I was bummed that I would have to do it over again, but I started clearing out, and ripping away the nasty panels.

On one good note, I finally ripped into a wall section that I previously covered up, and found the source of a re-occuring mini sugar ant infestation. I hated those things, crawling across my face when chilling out in there. At one time I thought I had rid the trailer of them. After spending 12 hours sucking them up with a shop vac. One by one, hurrah hurrah! And borax feedings... But they would re-emerge again months later in small numbers. Well, I found the queen this time, sucked up the whole nest, in between the foam wall boards. Sucking up entire ant colonies is oddly satisfying BTW, possibly more than exterminating a spider mite infestation. Ok, back to the build.


I cleared it out, started ripping out anything with bad wood or rot, and though about how I would do it better this time...
 

Attachments

  • IMG_1532.jpg
    IMG_1532.jpg
    41.4 KB · Views: 92
  • IMG_1533.jpg
    IMG_1533.jpg
    49.4 KB · Views: 96

Drop That Sound

Well-known member
Here's another picture of the entry way.


The odd piece of flooring to the right of the door, is actually part of the old doubled up floor section I had cut out of the flower room end of the trailer. They had put a smaller 3/4" floor down on top of a floor, between all the cabinets and stuff. I guess that's how they build them lol.. I trimmed the panel down to fit in the missing floor section. There was a sink plumbing pipe that went down under it too, but I removed and capped it off. It was going directly down into the top of the grey water tank below.

The reason the floor was missing is because there was none right there. It originally was was the old lower stove\cook top combo cabinet section that I cut out, and also moved the end panel over, before painting.

I left the main work area floor alone after that, because I would be doing a lot of work on top of it, cutting and stuff.


Also, I was trying to figure out what to do with the shelf cabinet by the door. Keep it as a useful storage perhaps?


Not much going on in the rest of the trailer, the flower room was still kind of a mess. The propagation closet was a mess, not sure what was happening there.

I was gonna spend my time working on this end for awhile.
 

Attachments

  • IMG_1541.jpg
    IMG_1541.jpg
    48.4 KB · Views: 95
  • IMG_1538.jpg
    IMG_1538.jpg
    55.5 KB · Views: 91
  • IMG_1534.jpg
    IMG_1534.jpg
    56.1 KB · Views: 96
  • IMG_1539.jpg
    IMG_1539.jpg
    37.3 KB · Views: 94

Drop That Sound

Well-known member
I got all the bad loft flooring cleaned out, down to the metal siding. Mostly it was just thin plywood and foam, that had seen its fair share of moisture a time or 2. Also worked some on the exterior, to make sure everything was leak tight around the front nose section. The side walls were still ok, and ant free now too lol.


Then I sealed up anything I could from inside with expanding foam/caulk,metal tape, etc. I laid down some black tar felt paper, just because I had a roll laying around, and a sort of vapor barrior..

There was no real framing in the loft floor, it was nothing really but a large plywood skinned foam panel, spanning over the metal siding and frame. I wanted something better and stronger, so I put 2x running right over the metal frame configuration.

Then I filled the gaps between my new floor joists with 1-1/2 foam panels, and even added a layer of reflectix on top all the them for the heck of it. I just didn't want to ever tear out and re do anything up there again.
 

Attachments

  • IMG_1577.jpg
    IMG_1577.jpg
    79.4 KB · Views: 93
  • IMG_1566.jpg
    IMG_1566.jpg
    44.5 KB · Views: 96
  • IMG_1545.jpg
    IMG_1545.jpg
    54.9 KB · Views: 92
  • IMG_1543.jpg
    IMG_1543.jpg
    61.3 KB · Views: 86
  • IMG_1542.jpg
    IMG_1542.jpg
    45.9 KB · Views: 91
  • IMG_1578.jpg
    IMG_1578.jpg
    51.5 KB · Views: 88
Last edited:

Drop That Sound

Well-known member
And for the next step, I could put on my flooring.

To save a few bucks, I used 9/16" OSB for the main floor panels. As you can see I was shooting foam in all the corners and a few other spots right before dropping the panels in. Getting them in through the small opening was a little tough, considering they were 7 1/2 ft long. Fastened it all down with screws.

Then, I went ahead and put some 1/4" plywood on top of that. 2 wider panels, instead the seam running the opposite direction, front to back.

Also, I ran a strip of 1/2 plywood across the lower front nose section. I used angle cuts on both sides with the table saw when I ran it, to fit very snugly into place with the odd angles. It made the front end solid, and even straightened it out some.

Lastly, I got the other half roll of the vinyl flooring in so quick, that I didn't even have time to take a picture after I rolled it out... It went in real nice, and even up the angled front nose section.

What a nice & solid, well insulated floor I now had to work with!
 

Attachments

  • IMG_1585.jpg
    IMG_1585.jpg
    33 KB · Views: 88
  • IMG_1584.jpg
    IMG_1584.jpg
    41.1 KB · Views: 88
  • IMG_1583.jpg
    IMG_1583.jpg
    33.5 KB · Views: 88
  • IMG_1582.jpg
    IMG_1582.jpg
    39.7 KB · Views: 91
  • IMG_1579.jpg
    IMG_1579.jpg
    41.7 KB · Views: 89
  • IMG_1588.jpg
    IMG_1588.jpg
    43.9 KB · Views: 88
  • IMG_1589.jpg
    IMG_1589.jpg
    40.9 KB · Views: 89
  • IMG_1590.jpg
    IMG_1590.jpg
    40.9 KB · Views: 86

Drop That Sound

Well-known member
Now, If I had started with a newer RV Motorhome/5th Wheel/Travel Trailer in better shape, or even built a room from the frame up, I probably would have been farther along. Maybe, maybe not.

There was something awesome about this trailer though, the feeling of security it gave me. Not to mention we are the same age. I really liked the thought of restoring her. She's a real queen.

Now with the front section re floored, I wondered exactly how I was gonna turn it into a veg loft.

I also started dreaming up a new hydroponic vegging system, before I even
figured out what I was going to do with the rest of the loft.

Another hybrid combo system. This time, LP Aero, NFT, and.. shallow water culture. I thought about using the cabinet next to the door/loft as a place to put the res.

attachment.php
 

Attachments

  • IMG_1573.jpg
    IMG_1573.jpg
    57.2 KB · Views: 93
  • IMG_1574.jpg
    IMG_1574.jpg
    48.4 KB · Views: 85
  • IMG_1575.jpg
    IMG_1575.jpg
    48.6 KB · Views: 91
  • front veiw.jpg
    front veiw.jpg
    16.2 KB · Views: 88
Last edited:

Latest posts

Latest posts

Top