What's new
  • Happy Birthday ICMag! Been 20 years since Gypsy Nirvana created the forum! We are celebrating with a 4/20 Giveaway and by launching a new Patreon tier called "420club". You can read more here.
  • Important notice: ICMag's T.O.U. has been updated. Please review it here. For your convenience, it is also available in the main forum menu, under 'Quick Links"!

Sammy's Chinese COB-FEST

I figured that I'd better keep the Cree work separate from the Chinese COB's as many here are not interested in anything from China...........So I will begin this thread


Where to start. . . . .

I got my box from China today


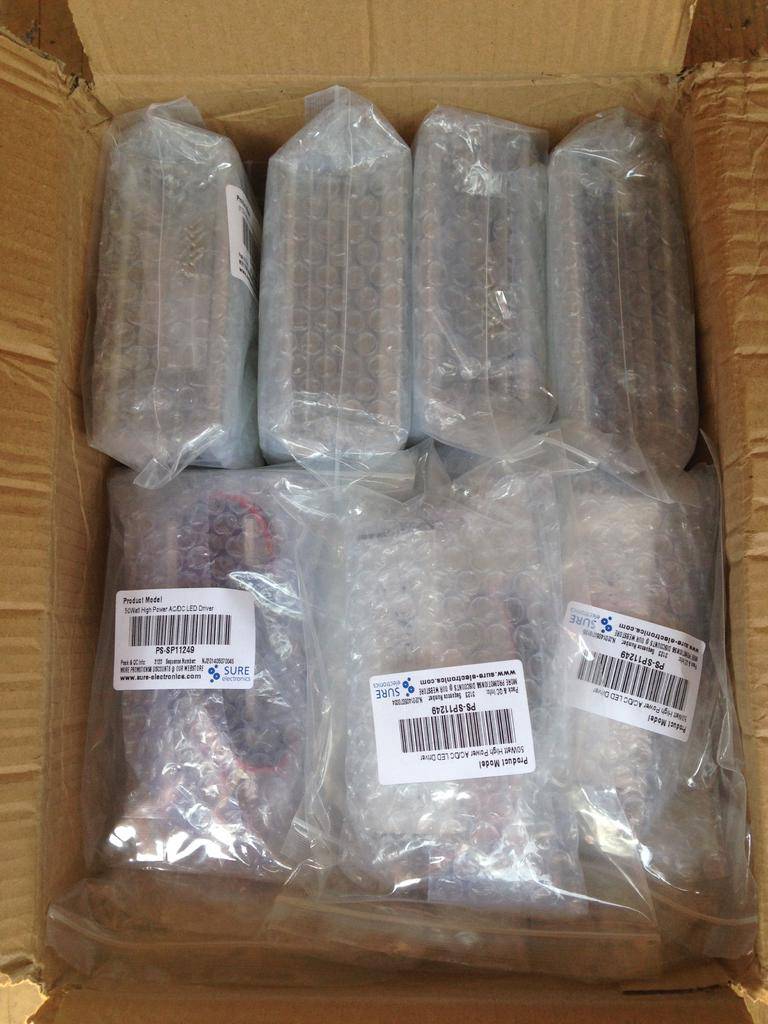
This is about half of the materials that I am going to be working with. . . to incorporate these into my convection pipe design (COB spacing to be determined)

The pipe will be laid up against the wall, just above the canopy, around the perimeter of the grow room.


I have 100 watt -----------------RED, BLUE, YELLOW, FULL SPECTRUM , and WARM WHITE (3000 k) --to try and incorporate

I will use the warm whites and full spectrums as side lighting in the pipe design

And plan on making a hood/lamp----- to rotate on the solar rev----- with some of the "other" colors in motion


I will be working on this in the next few weeks and am hoping to learn more while I do it


I'll keep updating this as I progress. It should be pretty interesting
 
Last edited:
These are the warm white, and the full spectrum chips that will be used as side lighting, 1:1 ratio


I also was toying with these lens's---- I like different components in different applications


This is a 60 degree lens that seems to come on other certain production lights. It focuses the beam and magnifies it into a 60 degree beam-------I will use these when there is some distance between the COB and my canopy. I was skeptical about it at first , but it does improve and magnify the beam , narrowing it and making it BRIGHTER in a tighter area.

I actually use the small reflector piece with no lens and it works nicely without blocking any real outgoing light (except the sides which go directly into my eyes ) LOL
 
The 1 noticeable difference with Chinese vs. Cree is that all the Chinese stuff works together. The chips , the heat sinks, the drivers.

Everything has a screw hole and a screw. They are all designed to work with the same system---CHINESE LED's

The foreign market makes it easier to build your own lights, in my opinion


Now-------- we will have to see how these LED's hold up---I am most fearful of the full spectrums failing, not too worried about anything else, but time will tell
 

Phychotron

Member
You can thank communism for that, when one guy has the technology, they ALL have the technology. You ever wonder why different factories are pumping out the same LED fixtures?

In the US one guy designs it, pattens it, and if the next guy wants to use it he either has to pay or design his own. In China your original designs are state property for all to use.
 

hempfield

Organic LED Grower
Veteran
Hey sammy, can I have a suggestion for you ? Why do you use round pipe for square heatsinks ? You will get better cooling if instead of circular pipe you use square or rectangle profile pipe, and the heatsinks are mounted entirely into the pipes. You just need to make some round openings on the pipe where the LED sit. The entire heat dissipated by the leds will be moved away by the extractor.

I don't know what you can find in your area, but a square PVC post will do the job very well.

I found here some rectangle PVC tubing which came with round fittings also :

http://www.airguru.ro/img/produse/5...-Blauberg-PlastiVent-55mm-x-110mm---350mm.jpg
Tubulatura-PVC---Rectangulara-Blauberg-PlastiVent-55mm-x-110mm---350mm.jpg


http://www.airguru.ro/img/produse/5...ent---55mm-x-110mm---Diametru-100mm_medie.jpg
Adaptor-tubulatura-rectangulara-la-tubulatura-circulara-Blauberg-PlastiVent---55mm-x-110mm---Diametru-100mm_medie.jpg


Are you aware that you just started the 'LED cooltube' era ? I had an attempt somehow like yours couple years ago , but the heat was pulled and discarded on the flower room, not on the exhaust path (dumb me). https://www.icmag.com/ic/album.php?albumid=41610&page=2


:2cents:

P.S. :lurk:

P.P.S @Phychotron: That's why the patents suck ! :biggrin:
 

hempfield

Organic LED Grower
Veteran
Well, I must confess that I did saw your thread, but being to stoned at that moment I was left with the impression that was sammy's creation.

Let me reformulate : Are you guys aware that the 'LED cooltube' era has began ? With this approach the heat problem could be solved on every growing space, from crowded PC case to big rooms with thousands of Watts.

:tiphat:
 
The more I think about the square tubing the more I like it. The holes for the LED's would not have to be precisely located as the heat sink being tight to the inner surface would prevent the flowing air from escaping. You could probably use tubing designed for downspouts for roof gutter systems (is that what's in your jpg's?) if you could find the right thickness heat sink.
 

hempfield

Organic LED Grower
Veteran
The tubing I posted above are build especially for venting (http://www.airguru.ro/produse/453-T...astiVent/451--Tubulatura-PVC----Rectangulara/) and they came in several sizes : 55x110mm, 60x120mm and 60x204mm; the square to round fittings are available for 100,125 and 150mm diameter. But any square tubing will do the job. You can even build them from plywood or metal sheet if you would like .

The idea is the heatsink will be totally enclosed in the tube and the airflow will blow at high speed over it's entire surface and that means the heatsink could be as long as needed.

I work now with 1000mm (3') heatsinks like this one : http://www.tme.eu/en/details/rad-a4463_1000/radiators/

rad-a4463_1000.jpg


ramka_1852.jpg


This gives me the opportunity to mount the led driver inside the tube also, which means a more compact fixture and a good cooling of the divers.

And the best part is : any led could be changed without taking apart the entire assembly.
 
So roughly 3' X 2.75" X .75" for those of us trapped in the measurements past.

Nice. Downspout tube would work.

I guess the only advantages I see to the clear glass tube hoods are:
1. Uses up any spare hoods one has lying around.
2. Air flows over the LED's as well as the heat sink. (I wonder how much of a difference that would make)

[FONT=Arial, Helvetica, sans-serif]And the best part is : any led could be changed without taking apart the entire assembly.


That could be handy.
[/FONT]
 

hempfield

Organic LED Grower
Veteran
Most of COB leds are made of ceramic/plastic and silicone so the heat dissipation on the front is quite low .
But on the long term, having the led surface exposed to air flow will cause some truble as dust tends to stick to the silicone coating and this means troubleshooting. But if you can protect the led surface somehow, the problem is solved. Having them exposes to open air will alow maintenace tasks like cleanig them with wet cloth or iso .
 
You can thank communism for that, when one guy has the technology, they ALL have the technology. You ever wonder why different factories are pumping out the same LED fixtures?

In the US one guy designs it, pattens it, and if the next guy wants to use it he either has to pay or design his own. In China your original designs are state property for all to use.

Interesting, these are things that I did not know, but it answers many previous un-answered curiosities
 
Hey sammy, can I have a suggestion for you ? Why do you use round pipe for square heatsinks ? You will get better cooling if instead of circular pipe you use square or rectangle profile pipe, and the heatsinks are mounted entirely into the pipes. You just need to make some round openings on the pipe where the LED sit. The entire heat dissipated by the leds will be moved away by the extractor.


These are all fantastic ideas and I am thrilled that we seem to have the creative juices flowing. Thank you for your thoughts and I will keep my eyes and ears wide open when educated skillful people (like yourself) give their valuable input


These plans being discussed are certainly subject to change, modification, or completely scrapped even, so here we go

There are numerous reasons that I wanted to use the round pipe and with this particular heat sink, I will explain-


I believe that inserting the entire heat sink (this heat sink) into the pipe (of this size), -------- would greatly inhibit the overall "performance" of the entire gizmo, based on restricting the airflow (even a little). Unless you used a LOW PROFILE heat sink like in hempfield's earlier links. There are endless options here to be exercised and experimented with

My other thought was that the heat sink (as a whole) would be close to the same temperature throughout its mass--- at any given time, therefore, inserting even a smidge into the pipe would (in theory) exhaust ALMOST as much heat as it would being confined-- entirely within

I was in heavy construction for many years and took a safety class on exhausting toxic gases from sewer systems and the class discussed in DETAIL the arrangement of the hose going away for the man hole. Any tight curves or obstructions GREATLY restricts and slows down the flow straining the fan and posing a great risk to the individual (in the sewer)------ because the exhaust hoses and lines need to remain as straight as possible or have slow sweeping corners to prevent drag
That said, adding numerous obstructions and/ or too tight of a 90 degree curve , and bad things may start to accumulate, but I am not certain , someone should try it

These the sweeps I picked up today. . . . Gentle curves
(Lots of couplings too, cause every time you want to add a LED. . . . . yeah)


The upper run that will be the perimeter run will be JUST above the canopy as upper side lighting and will be ~ 6 feet off the ground. In this 15 x 15 room , I will start the ENDS of the run on either side of the doorway in 4 inch pipe. They will eventually meet in the middle. Doorways are a given in any space , and a nice place to start each run

2- 4" lines meeting in on the opposite side of the room and doorway, coming to a "T"

Both 4" lines being pulled in conjunction, being exhausted by the 6" inline fan, pulling everything up to to ceiling and back over the top of the garden and therefore raining C02 as it always has in there.

General overall cooling for me, here , is NOT an issue (anymore) :woohoo:

All that said, I plan on several longer runs of this pipe with corners and am going to include up to 10 LED's or more per run, so I want MAXIMUM airflow exhausting as rapidly as possible, with minimal obstructions within the main line of flow---and this thing fit in this pipe like a GLOVE

See---


The heat sink I'm using seems to be a nice size too-- running ~ 50 watts at a fairly cool temperature-- I'm thinking that a 100 watt COB runs nicely ~ 50 watts
 
Last edited:
I have 2 flower rooms that sit back to back and are sealed in a C02 environment. These 2 rooms being sealed, exchange air between each other pulling up the C02 from the ground and launching it up to the next room with 2-- 4" fans and the pipe that I am using here. Always both equipped with carbon filters "scrubbing" the air full time. Each room also has an additional 6" fan and filter as a scrubber only, so I intend to use this otherwise "stationary" equipment for dual or triple purposes.

This has been working flawlessly for many years . . . . .

Then I thought, why waste all that airflow ???

Today I put a few LED's on one of the updraft pipes on 1 side. . . .
I did one 3000k warm white -- and 2 full spectrums (Just a warm up project)


I tilted them to slightly different angles covering a few different perspectives, but holy crap, BRIGHT AND COOL

I plan on starting the perimeter line in the next few days


I am humbled and flattered by all the positive and helpful responses and wanted to extend a big thank you to everyone who has either contributed or inspired me, here on IC MAG

I also intend to always keep an OPEN mind and be flexible to others ideas, as this is how the world functions best.


I hope to return that favor to others here
 
Last edited:

Dr.Nonagon

Member
So let me get this straight Hempfield

We take the extrusion brought up. 1 meter long a 12 bucks, pretty good. I wonder what it's thermal resistance is.
w7lv9x.jpg


Then we add some LED's to that.
30n8ylw.jpg


Cut out the ABS or extruded aluminum box for the cob peep holes.
wrzzhs.jpg


Then the nifty lenses can go on.
2my6drt.jpg


And last the fittings.
2ns9avm.jpg


Is this what you were talking about?
 

hempfield

Organic LED Grower
Veteran
Sammy, What time is liftoff? It won't be done until you paint USA on the side - EPIC-

View ImageView Image

This was exactly my idea when I first saw the "growing rocket" .

So we really can tell : "growing with led is rocket science" :laughing::laughing:

What's the code name for this mission ?


And yes Dr. Nonagon, those pictures reflect exactly what I wanted to say in my previous posts. I would go for a slightly larger box/tube to allow air to pass without to much friction (and to have room for drivers also - mounted on the opposite wall).

When look at the section of the assembly, the surface of this area should be grater or equal with the surface of the round couplings , to avoid pressure loss. In my opinion, at least 0.5" gape (or even more) should be left between heatsink and the enclosure walls.

But if you would like to have a more compact assembly, you can use flat heatsinks, like those :

http://www.tme.eu/en/details/rad-a52317_1000/radiators/

rad-a52317_1000.jpg


img_14920.gif


Actually this heatsink is 150mm wide (~6") , but you can find also 100mm (4") or less.

P.S. Muhahaha, at a closer look I noticed the 'chip' pattern of the COBs on the drawings. That's awesome !!! :good:
 
Top