DonkeyPunch
Member
The "Tony Danza" - 440 Watt PL-L - Low Pressure Aeroponic - Cabinet Build and Grow
Ok, so here is yet another spin off of the NGB design with a few changes. It's basically a giant fucking version of the NGB cab with two added rooms, so I take no credit for it.
It will have the following features.
1. A flower room large enough to hold the Botanicare 2x2 tray and lid, which will hold 9 plants in a SOG. This room will have 8 - 55 Watt PL-L lamps (440 Watts).
2. A mother room to hold, well you guessed it, mother plants. This room will have 2 - 55 Watt PL-L lamps.
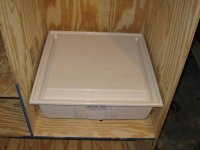
3. A room for a 27 gallon "toughbox" tote to be used as a reservoir, with float valve filling, and a nifty drain for easy water change outs.
3. A drying room, where the air intakes will be. This will allow me to dry and carbon filter all in the cab.
4. A utility room for all the electronics, fan, and carbon filter.
5. Wheels, so I can roll this bitch around, or maybe ride it down the street.
I went to home depot a week or two back and got 4 sheets of plywood, and had them cut it all to my specs. They were kick ass about this, and cut all 14 pieces of this cab, to my specs out of the 4 sheets. They had a sign up saying they charged for this service, but they only charged me for the plywood. I tipped the guy $20 for not being pissed off at me while I took up an hour of his time. When I left the store and was halfway to my vehicle, another dude came running out yelling "Sir, Sir", I turned around and whipped out my "receipt and said I paid at the register" - To my surprise, he said "I know, I just wanted to help you load this into your car" -- After my experience, I highly fucking recommend home depot, they will do all the hard work of building your pot cabinet, and ask you if they can throw it in your fucking car too.
Ok, so my carpentry skills are pretty much fictional, and now comes the point where I show pics, and you can point and laugh and tell me where I fucked up, but this is where I am now. Still a way to go, but it has a shape. The two shelves that you see on the left, are not yet mounted, and that's why they are crooked. I just wedged them in approximate spots to give you an idea of how the rooms will be laid out. This is not to say that they won't still be crooked when I mount them, like I said, my carpentry skills are about as believable as me finding a two horned unicorn.
I seriously doubt anyone would want to copy this design, but if they do I have a cutlist of exact sizes, and can hook you up with a nifty free program I found online that will make you print outs to take to home depot, showing them how to cut the pieces, as to minimize waste, and get the most bang for your buck. Just let me know and I will post the info.
Well enough rambling, this is what I got so far...
Ok, so here is yet another spin off of the NGB design with a few changes. It's basically a giant fucking version of the NGB cab with two added rooms, so I take no credit for it.
It will have the following features.
1. A flower room large enough to hold the Botanicare 2x2 tray and lid, which will hold 9 plants in a SOG. This room will have 8 - 55 Watt PL-L lamps (440 Watts).
2. A mother room to hold, well you guessed it, mother plants. This room will have 2 - 55 Watt PL-L lamps.
3. A room for a 27 gallon "toughbox" tote to be used as a reservoir, with float valve filling, and a nifty drain for easy water change outs.
3. A drying room, where the air intakes will be. This will allow me to dry and carbon filter all in the cab.
4. A utility room for all the electronics, fan, and carbon filter.
5. Wheels, so I can roll this bitch around, or maybe ride it down the street.
I went to home depot a week or two back and got 4 sheets of plywood, and had them cut it all to my specs. They were kick ass about this, and cut all 14 pieces of this cab, to my specs out of the 4 sheets. They had a sign up saying they charged for this service, but they only charged me for the plywood. I tipped the guy $20 for not being pissed off at me while I took up an hour of his time. When I left the store and was halfway to my vehicle, another dude came running out yelling "Sir, Sir", I turned around and whipped out my "receipt and said I paid at the register" - To my surprise, he said "I know, I just wanted to help you load this into your car" -- After my experience, I highly fucking recommend home depot, they will do all the hard work of building your pot cabinet, and ask you if they can throw it in your fucking car too.
Ok, so my carpentry skills are pretty much fictional, and now comes the point where I show pics, and you can point and laugh and tell me where I fucked up, but this is where I am now. Still a way to go, but it has a shape. The two shelves that you see on the left, are not yet mounted, and that's why they are crooked. I just wedged them in approximate spots to give you an idea of how the rooms will be laid out. This is not to say that they won't still be crooked when I mount them, like I said, my carpentry skills are about as believable as me finding a two horned unicorn.
I seriously doubt anyone would want to copy this design, but if they do I have a cutlist of exact sizes, and can hook you up with a nifty free program I found online that will make you print outs to take to home depot, showing them how to cut the pieces, as to minimize waste, and get the most bang for your buck. Just let me know and I will post the info.
Well enough rambling, this is what I got so far...