
-
Happy Birthday ICMag! Been 20 years since Gypsy Nirvana created the forum! We are celebrating with a 4/20 Giveaway and by launching a new Patreon tier called "420club". You can read more here.
-
Important notice: ICMag's T.O.U. has been updated. Please review it here. For your convenience, it is also available in the main forum menu, under 'Quick Links"!
You are using an out of date browser. It may not display this or other websites correctly.
You should upgrade or use an alternative browser.
You should upgrade or use an alternative browser.
You Gotta SIP, Not Slurp
- Thread starter thailer
- Start date
eyesdownchronic
Active member
Really great thread you got going on here.
I was wondering, do you toss the soil at the end of every run , or do you reuse it "living soil" style?
I was wondering, do you toss the soil at the end of every run , or do you reuse it "living soil" style?
eyesdownchronic
Active member
Thinking im gonna give the "handwatered" design a run. Will be using a coco/hydroton mix + vermicompost as the media. hydroton/ perlite the bottom. Living soil"less" media...
thailer
Well-known member
Really great thread you got going on here.
I was wondering, do you toss the soil at the end of every run , or do you reuse it "living soil" style?
the SIP system can work either way. i play it pretty loosey goosey on how i reuse my soil. the bigger and longer my plants stay in the SIP for the round, the more the soil level drops down and the soil looks more decomposed than potting soil. i will take half of it out and use it for the compost portion of new soil along with some fresh compost. if it still looks like brown peat moss then i will add back some fertilizer and plant again.
Really great thread you got going on here.
I was wondering, do you toss the soil at the end of every run , or do you reuse it "living soil" style?
I am reusing the soil.
I have been using the same soil for about 5 years and using it in sips for nearly 2 years in some of the containers. After each run I lift up the mulch layer of wood chips, pull the old root ball out, replant a new clone and top dress dry amendments.
eyesdownchronic
Active member
I am reusing the soil.
I have been using the same soil for about 5 years and using it in sips for nearly 2 years in some of the containers. After each run I lift up the mulch layer of wood chips, pull the old root ball out, replant a new clone and top dress dry amendments.
do you think it is recommended to keep the soil itself and the bottom wicking layer separate with landscape fabric, or something? or is it ok if they are directly in contact?
eyesdownchronic
Active member
This might be a stupid question. but how do you know when you need to water? do you do it just by judging how the plant looks, or do you use a soil moisture meter?
do you think it is recommended to keep the soil itself and the bottom wicking layer separate with landscape fabric, or something? or is it ok if they are directly in contact?
I don't use it. Perlite and soil are directly in contact, the perlite compresses after a while and the level (of the perlite) has sunk by nearly a whole inch. It doesn't seem to make any difference. Once in a while I dig into a container to see what is going on downstairs.
This might be a stupid question. but how do you know when you need to water? do you do it just by judging how the plant looks, or do you use a soil moisture meter?
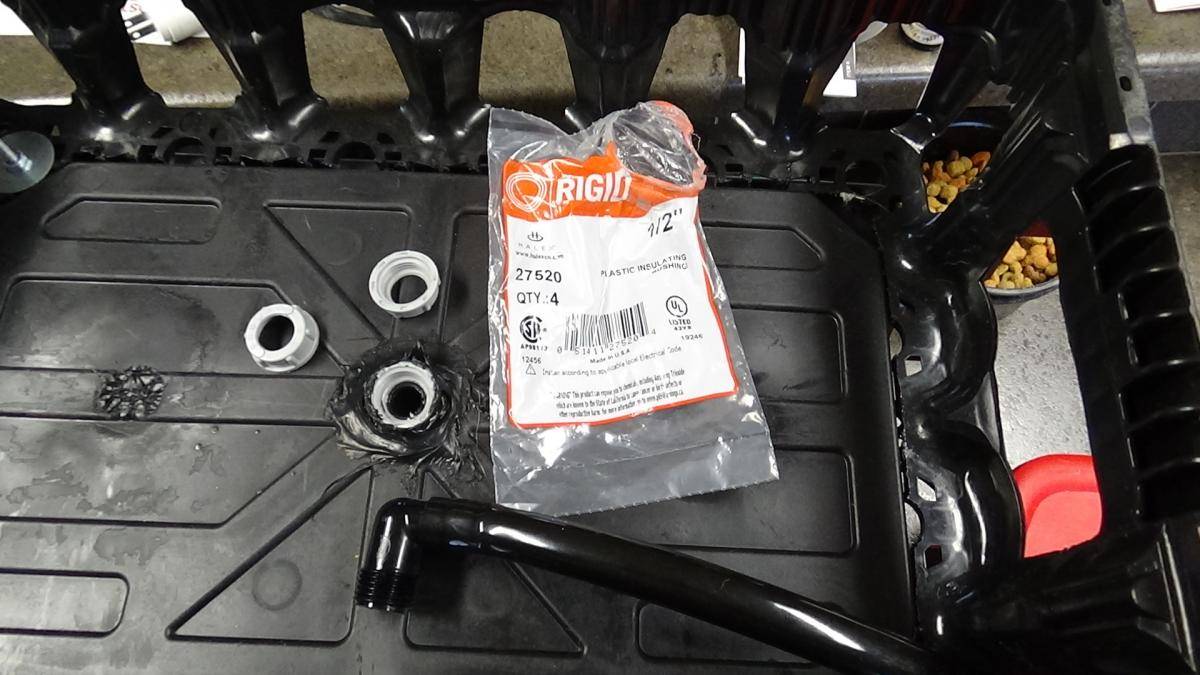
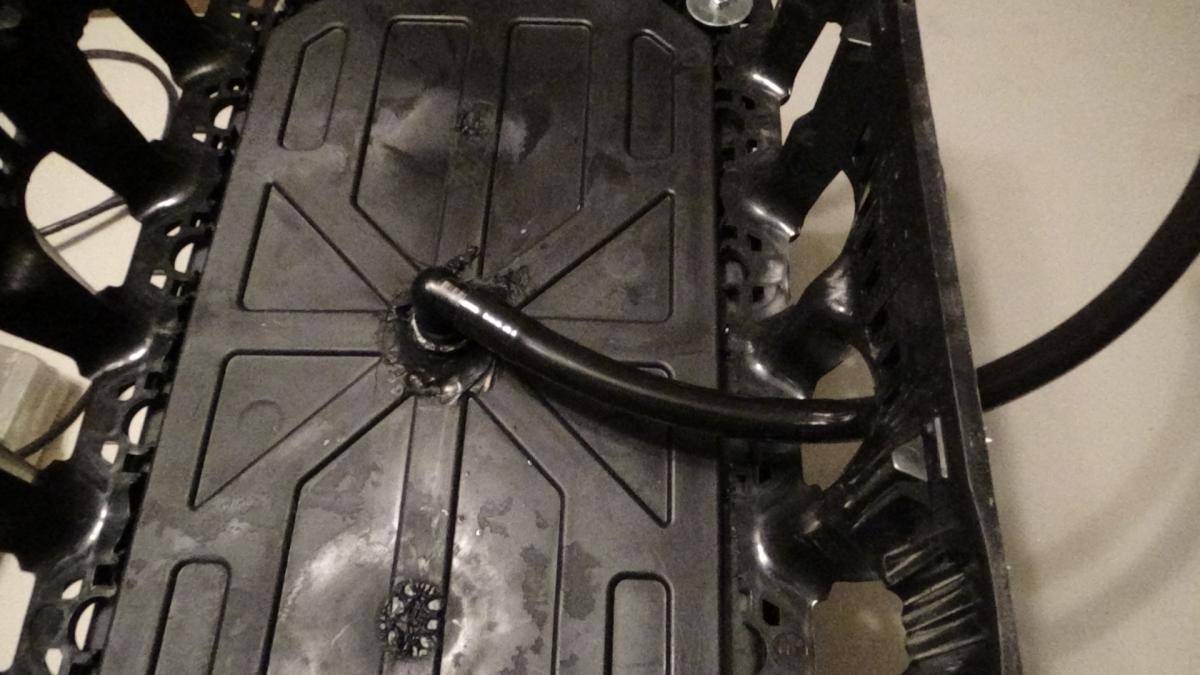
My design is very simple. Hardly a design at all really. A sealed container with only a watering tube of 50mm. 40mm is also fine. I check the level with a dipstick and water accordingly.
I try to maintain a level of 4 inches water which leaves you with an inch layer of air in the rez. As Thailer said there is a point during stretch when they drink like crazy and then you can fill it a couple inches extra because they will use it in no time.
What I have done is over watered a container by mistake until the level reached the mulch layer. It was too difficult to get a dipstick in because crazy growth, so I became lazy and was just watering by thumb and didn't notice until too late. Anyhow was an interesting experiment, the plant died very quickly.
40degsouth
Well-known member
Hey everyone, I’m really enjoying the thread.
I’ve seen wicking beds with a conduit cut to just above the height of the container, which contains a piece of styrofoam, cut to size, that floats on top of the water inside the conduit. A skewer is pushed into this that becomes a visual aid for watering especially if you put a mark for high and low water on the skewer.
Hope this helps.
Cheers,
40.
I would think one could add some sort of water level Guage like those auto pot buckets have. I just filled my rez day before yesterday. Went back yesterday morning with more water just to see how much they soaked up over night. Each tub took another gallon.
I'll do this just to get a bit of a feel but am thinking I will be able to settle on watering every 5 days or so.
I'll do this just to get a bit of a feel but am thinking I will be able to settle on watering every 5 days or so.
thailer
Well-known member
i tried to make a floating measure stick but it didn't float. lol i had marked it: one gallon, two gallon, three gallon to show how much it needed too. i didn't think of a skewer. i used a plastic hollow lightweight straw tube. i thought it was light enough and i shoved some styrafoam inside it. so i ended up using a wooden stick to see how much water got wet as a dipstick.
my hand watered design has an overflow so you can put a tube on it to do drain to waste or i use a gallon jug to catch any overflow but you can figure out how much to add and it won't overflow at all.
i don't know what type of guage the autopots have.
my hand watered design has an overflow so you can put a tube on it to do drain to waste or i use a gallon jug to catch any overflow but you can figure out how much to add and it won't overflow at all.
i don't know what type of guage the autopots have.
eyesdownchronic
Active member
dipstick seems straightforward enough. thanks guys.
Is the whole point to water from the bottom to get the roots to grow down to there? Isn't the lower soil still going to have the majority of the space water instead of air?
I am working on getting a system for flower, and was making a top water with rings, copied from a coco set-up. The totes I added a drain to could also use that drain as a fill tube, and the drain collection reservoir a sip box.
My top watering design, collecting all that runoff and pumping it to a waste jug, kinda got cold water thrown on it when the soil guys said I don't really want to water so much that there is any runoff. But, it could be used as a bottom watering system to flood to a certain level, on timer, so the flooding happens every so often and the soil is allowed to drain / transpire in between. A tote in tote could be used to have the water area in the lower tote, soil in the upper one.
a to put fabric bags in them.
I have holes in my totes for air, because I plan to use fabric bags.
Is the whole point to water from the bottom to get the roots to grow down to there? Isn't the lower soil still going to have the majority of the space water instead of air?
I am working on getting a system for flower, and was making a top water with rings, copied from a coco set-up. The totes I added a drain to could also use that drain as a fill tube, and the drain collection reservoir a sip box.
My top watering design, collecting all that runoff and pumping it to a waste jug, kinda got cold water thrown on it when the soil guys said I don't really want to water so much that there is any runoff. But, it could be used as a bottom watering system to flood to a certain level, on timer, so the flooding happens every so often and the soil is allowed to drain / transpire in between. A tote in tote could be used to have the water area in the lower tote, soil in the upper one.
a to put fabric bags in them.
I have holes in my totes for air, because I plan to use fabric bags.
[URL=https://www.icmag.com/ic/picture.php?albumid=85372&pictureid=2112604&thumb=1]View Image[/url] [URL=https://www.icmag.com/ic/picture.php?albumid=85372&pictureid=2112594&thumb=1]View Image[/url]
[URL=https://www.icmag.com/ic/picture.php?albumid=85372&pictureid=2112526&thumb=1]View Image[/url]
Yes you absolutely can do it that way. I have done totes with drainage holes within trays 6 inches deep. It works well
The only problem I encountered was roots grew out of the drainage holes into the reservoir and were then exposed to light because the totes did not fit very closely with the trays.
Last edited:
Edit, I took the time to watch some wicking videos. I see now what the idea is: create a water table below the bottom of the soil with a medium that will allow the soil to wick up the water.
So, I am thinking about using my existing totes as - is, and water them this way. Will this work the same way:
Can a fabric pot of soil be placed on wet medium and still soak up the moisture OK? What's to stop me from just putting a layer of fabric on top of the grid (to keep medium from getting into the grid), a 1-2" layer of medium, and set the soil pot directly on top of that medium? What medium?
Why not a bag with an inch of medium in the bottom, and the soil bag set on top into that one? The tote supports it all (and a here, also a scrog). That way I would only lose an inch of soil height.
The high waterline is supposed to be located where relative to the medium/soil (in this case the bag) interface?
If it is better for the plants to water periodically, as in hand watering the SIP, and let the plant drink the soil moisture down, then can that hand watering process be automated?
Last edited:
eyesdownchronic
Active member
So back to the question about bottom watering vs top... is it to try to drive the roots down to the bottom?
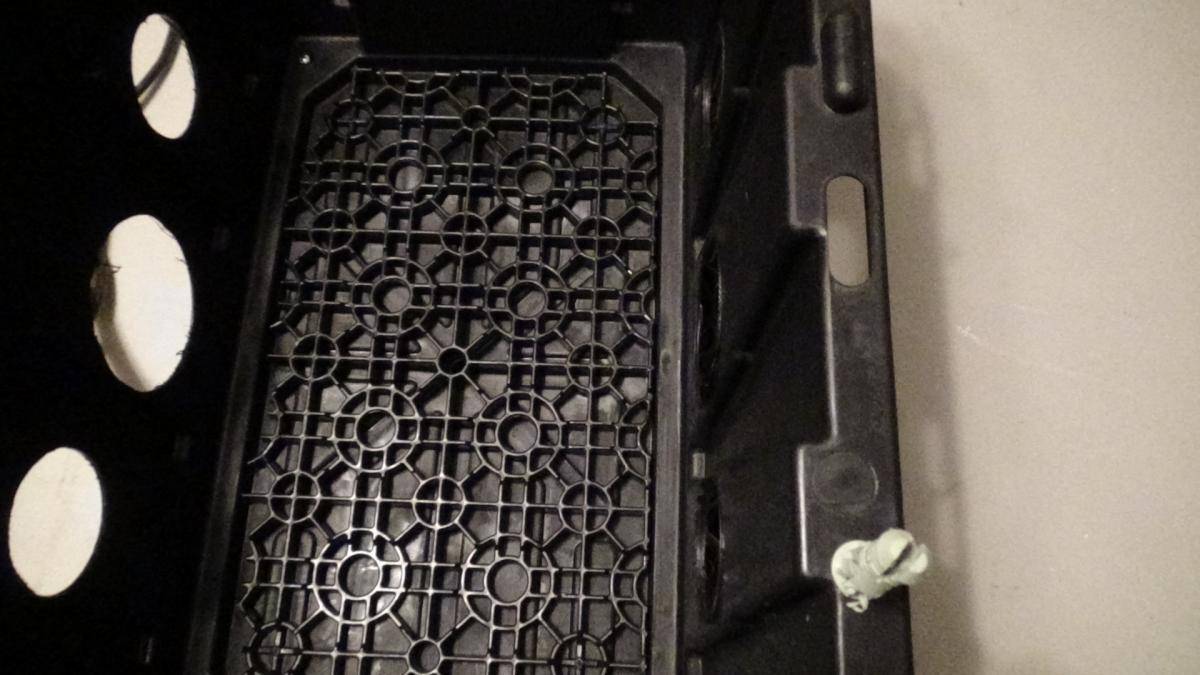
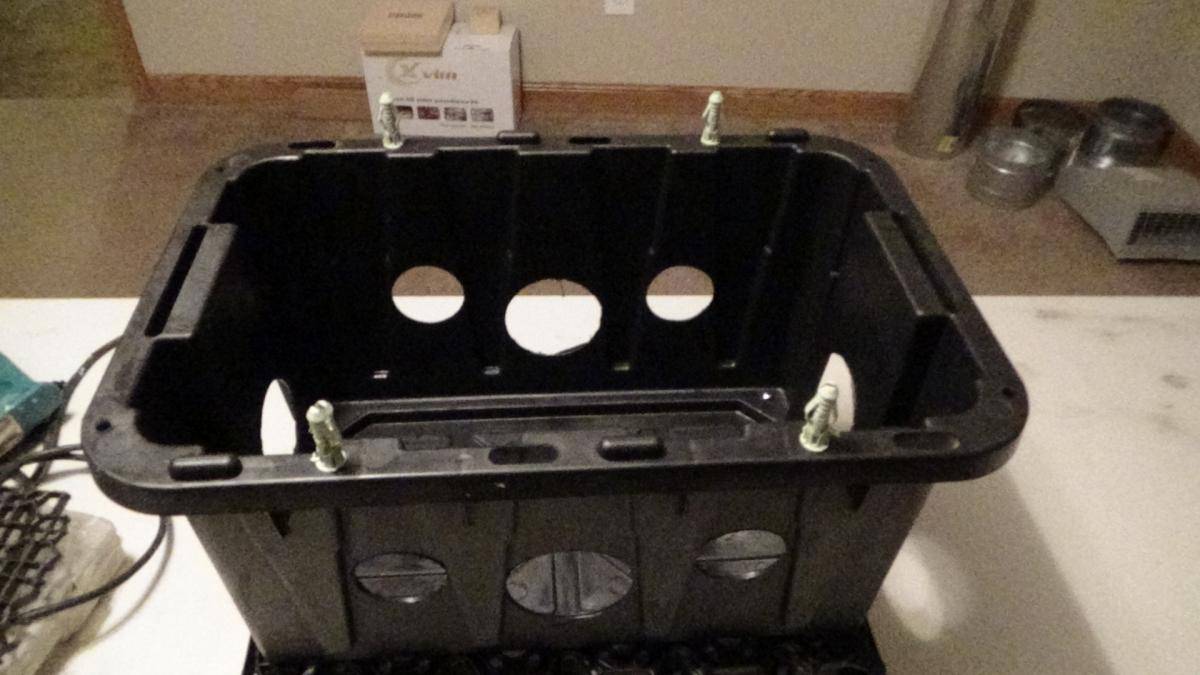
I am planning to use 7 gallon bags in those 7 gallon totes, which is why the holes are there. They will flood from the bottom just fine I think, if a bottom watering is preferable to top.
My automatic top watering system will convert easily to bottom watering. If needed. In fact, if it is better to water from the bottom and then let the plant suck the soil moisture down, here is how it could be done:
1. the timers and pumps could flood at SIP height,
2. wait however long,
3. then activate the bilge pump to empty out the same box that was filled to make the SIP level.
4. The water that drains from the totes would return to the box, and is pumped out by the automatic bilge pump. The bilge pump leaves about an inch of water in the box (in my case a 5 gallon bucket that I also mount a fan onto). This is my return catch bucket. It could just as well be the box, IF the hoses were sealed to the bucket. I have a nice submersible pump that would pump from the reservoir to the box. That pump would need to keep the SIP water level up during the wet time (step 2).
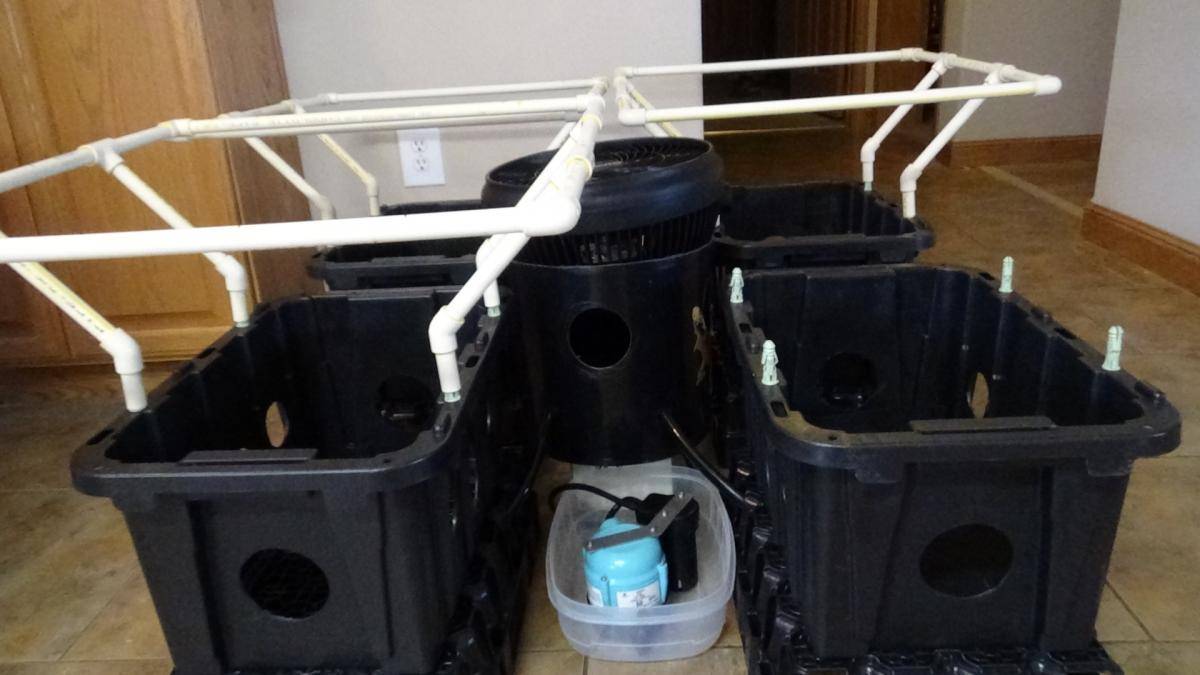
https://www.icmag.com/ic/picture.php?albumid=85372&pictureid=2112537View Image https://www.icmag.com/ic/picture.php?albumid=85372&pictureid=2112538View Image https://www.icmag.com/ic/picture.php?albumid=85372&pictureid=2112536View Image
I was going to pump the drain water into a carboy for disposal onto my garden. I was also going to have the carboy gravity overflow back to the reservoir, in case I cannot get to the room for a few days. Using live soil is nice, because there is no nute schedule. Just a big reservoir, which I plan to aerate.
So then let the soil / plant do it's thing, and when moisture dictates another round, fill up the box again to SIP height. What would be nice is a moisture sensor that triggers the next round of water.
no, its definitely not to drive your roots to the bottom, the soil is supposed to act as a wick to pull up water from the bottom (res). i think the purpose of sub irrigation is that the soil maintains an even moisture. it also doesnt compact the soil.
Im sure someone else can explain better.
thailer
Well-known member
Edit, I took the time to watch some wicking videos. I see now what the idea is: create a water table below the bottom of the soil with a medium that will allow the soil to wick up the water.
So, I am thinking about using my existing totes as - is, and water them this way. Will this work the same way:
Can a fabric pot of soil be placed on wet medium and still soak up the moisture OK? What's to stop me from just putting a layer of fabric on top of the grid (to keep medium from getting into the grid), a 1-2" layer of medium, and set the soil pot directly on top of that medium? What medium? you can placed a fabric pot on top of a container that holds perlite and water, just like the inside of a SIP but it has some limitations compared to a SIP designed like mine. for more info on this type, i'd googled "SWICK system". the height of the water can not climb as high when using large pots but it may work for yours. you'd have to try and see. i think this is due to not having plastic pots because it loses humidity from the fabric bags.
i think perlite is the best for wicking because it is not porous and is solid which makes it easier for water to cling to and climb upwards compared to pumice which has holes.
Why not a bag with an inch of medium in the bottom, and the soil bag set on top into that one? The tote supports it all (and a here, also a scrog). That way I would only lose an inch of soil height.
i don't think you'll need to add perlite at the bottom before adding soil in the soil bag itself. i think it may work better with the peat on the bottom of the bag.
[URL=https://www.icmag.com/ic/picture.php?albumid=85372&pictureid=2112526&thumb=1]View Image[/url] [URL=https://www.icmag.com/ic/picture.php?albumid=85372&pictureid=2112528&thumb=1]View Image[/url] [URL=https://www.icmag.com/ic/picture.php?albumid=85372&pictureid=2112530&thumb=1]View Image[/url]
The high waterline is supposed to be located where relative to the medium/soil (in this case the bag) interface? inch or two below the bag.
If it is better for the plants to water periodically, as in hand watering the SIP, and let the plant drink the soil moisture down, then can that hand watering process be automated?yes, i have mine connected together with hydro tubing that automatically tops off the reservoir inside the SIPs but i have been adding just enough to fill the reservoir plus a couple gallons and then i let the reservoir go empty. it actually doesn't get empty but will leave an inch of water in the bottom. it will let me "handwater" by filling up the SIPs when i add water and since i am not filling up the garbage can full, it allows for the soil to dry out a little before i fill it up again. often when i add water again, especially once plants are larger, you will go in after a few hours or the following day to find the plants are leaning over with weight from the uptake. its a good thing you got scrogs. definitely need some sort of support system with these.
i put answers above for ya!!
I am convinced. It looks like the bed of perlite "wick" just needs to stay wet and be in contact with the bottom of the soil-only bag. A 1-2" layer of perlite on the bottom of my totes, on top of a later of fabric to keep the perlite out of my grid, keep the grid flooded wet by the water level in the control box. The only thing is, the soil won't be that deep. But the bag sitting into the tote can go up a little in height above the tote.
This will work in my system because I can move the plants in the bags from my veg/training tent to the totes in the flower tent, that are set-up and working with a SIP system already. Drop the low scrog frame on top, and let them stretch up to the higher screen. Come chop time, I will remove the bag of used soil and deal with it. The pearlite wick should be OK for re-use, it sounds like. No leaching of the soil into the water, no nutes needed if the soil is growing OK, automatic, easy peasy. Moses Wellfleet had me at "foolproof". I still have my manifold of rings I can use to top dress anything if needed.
Thanks!
All I need to do to convert my system to SIP, is raise the center bucket that the totes were going to drain into, and use bulkhead fittings so the center bucket hoses are water tight. The waterline will be determined and a drain tube installed onto the center bucket, that flows onto the return catch pan, which has a bilge pump standing by, ready to return overflow water to the reservoir. Pump from the reservoir into the center bucket with a timer, and the system circulates back to the reservoir, keeping the SIP water level up, until the timer says to stop the cycle. At that point the center bucket drains down as the plants drink, and the SIP level goes down with it. The wick will only be 1 1/2" thick, and I figure that the wick will go dry pretty quickly.
The bucket has 3" air inlet holes to gather the low air entering the tent from the return, and blow it upward where the heat from the lights is the worst. Since there is water in the bucket, it helps add humidity.
Anybody use these? Moisture readings from the next room. One of my goals is to not have to open the tent when it is flowering, but I will need to - for the light adjustment, as the plants grow.
https://www.amazon.com/gp/product/B07CJYTSH1
Last edited:

