What's new
  • Happy Birthday ICMag! Been 20 years since Gypsy Nirvana created the forum! We are celebrating with a 4/20 Giveaway and by launching a new Patreon tier called "420club". You can read more here.
  • Important notice: ICMag's T.O.U. has been updated. Please review it here. For your convenience, it is also available in the main forum menu, under 'Quick Links"!

The growing large plants, outdoors, thread...

Status
Not open for further replies.

baet

Member
horsemouth-where did you get that probe? i might like that for my outdoor beds.
also how does the neem affect soil biology and microbes?

i just ordered some "double death" predatory nematodes from ecowise.com , and ill be applying all my beds once now and once when plants go in, probably another time during flowering. i also be putting down a square of magnets, I'm being as preventative as possible :)
 

nomaad

Active member
Veteran
I love me some predator nematodes. i will get them and water them in once plants get bigger. June sometime. In the black box they will go in in the first watering upon pulling tarp. last year I had no pests till flowering. thrips in the black bix were the earliest problem.

+1 on that probe. donde?
 

HorseMouth

Active member
Baet- The Brand name is Control Wizard. You should search engine in this order. Control Wizard 18' probe. That should turn you on to it somewhere. I'm pretty sure I ordered mine from NGW. But this was AT LEAST 1 1/2 yrs. ago.

And in response to the NEEM ?. As you can see on my raised bed, I built it out of wood. NOT Pressure treated mind you. So I sprinkled that bulk neem (little brown granules) around the corners on the inside of the bed. This is a direct attack on any termites/bugs that were in the wood.

When I use the neem in the beds, I use about a 1 cup over a 12' x 20' bed. Mixed in the soil w/the other admendments in March/April. I found these Eco guys at the Arcata Farmers Market a decade ago. I think this product was developed 5 years ago. I have used it since, and I do not have mite / white fly / aphids problems in my greenhouse.

Hope that helps.
 

nomaad

Active member
Veteran
i didn't link to the manufacturer's site because of the price but rather because that's the place to find the manuals, specs, etc.
 

nomaad

Active member
Veteran
ok... i was looking for one with an 18 inch probe. ha... i've got all these 18" deep pots... perfect world...
 

Dr. Purpur

Custom Haze crosses
Veteran
ok... i was looking for one with an 18 inch probe. ha... i've got all these 18" deep pots... perfect world...
12+ inches would give you a real good idea what was going on down there. I probe 7 gallon pots about 8"
and outdoor 10"
 
P

planty

FWIW I went with one of the twist locks in to my local true value hard ware store and had them look it up to see if they could get it and lo and behold! there they were...good thing too because I bought ACE on the coast out and need more!
 
P

planty

:tiphat: Good luck to all this year. All that's left to do to my newly expanded space is run the irrigation system and button up the fencing because deer in the patch is a no no
 

localhero

Member
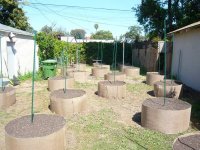
OK im filled and resting. 20 100-150 gallon pots. Next up to install irrigation and add surfacant.


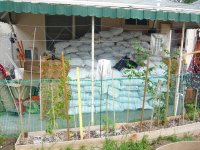
180 2cf bags of my own mix P1050124.JPG

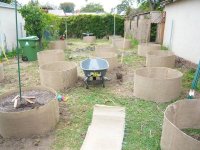
DIY smart pots P1050126.JPG

and filled P1050130.JPG

edit: After doing only 20 of these at only @100 gallon pots I now have a new found respect for anyone doing 300 gallon pots. the pickaxing to turn the soil alone beat the shit out of my back. Also crazy respect for anyone crazy enough to mix mad yards of soil by hand. I was lucky enough to find a nursery supply that would mix and bag my own ingredients. still alot of moving 50lb bags around, but nowhere near the amount of heavy redundant labor mixing 15 yards of soil with a shovel would have been. PEACE
 

Tom Hill

Active member
Veteran
The transplant, the first watering, and the preliminary tie-up.

Be very gentle, take our time, we are in no hurry and should be able to perform the first of these tasks while balancing books on our heads. Do not wet beds out before transplanting, it is damaging to the tilth of the soil to wet it out and then go digging around in it. Transplant dry, then water-in. I usually transplant on one day, then come back and water them in a day or two later. This allows the plants to be exposed to the sun for a day or two before they are introduced to the new comparatively rich soil. This is all designed to lessen transplant shock.

When watering-in, the target is a donut shape around the old container we came out of, and about as deep as the old container was. The goal is to marry the new dirt to the old. During plugging, do not compress/pack the soil with your hands at all, the above watering does a better job of this than we ever could with our hands. Never soak the entire bed/pot/container after transplanting, we want to leave dry dirt around the outside to help wick away moisture from the area we wet-out.

The preliminary tie-up requires two stakes. If we use only one, the wind will hammer the plant against the stake and that is not good. The tie method pictured here is borrowed from the fruit tree etc industry, and works best. Tie it loose enough to allow for some movement in all directions, but firm enough to stop the plant from laying down in any direction. A few rains we are sure to get still before the spring is over. Also, forget about those auto tietape machines that pull the stalk up tight to the stake and automatically ties it off - I'm not even sure I would subject grapevine to such cruelty. Anyway, a pic is worth a thousand words, so here are a couple that should help to explain most of this. -Tom

picture.php


picture.php
 
P

planty

8' look great. I went with more 6' than less 8' but for the beds I add next year in front of the house I'll go 10'..unless you're doing 10, then i'll go 12...We're at the same size but mine are stuck in the G pad...Maybe May 15...
 
Status
Not open for further replies.

Latest posts

Latest posts

Top