G
Guest
Hey Guys - I just finished building my brand new shiny growbox.
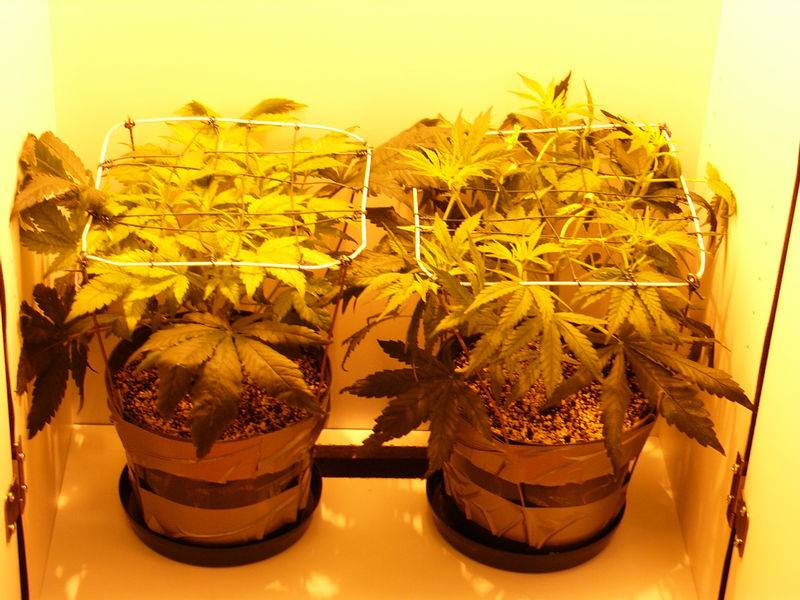
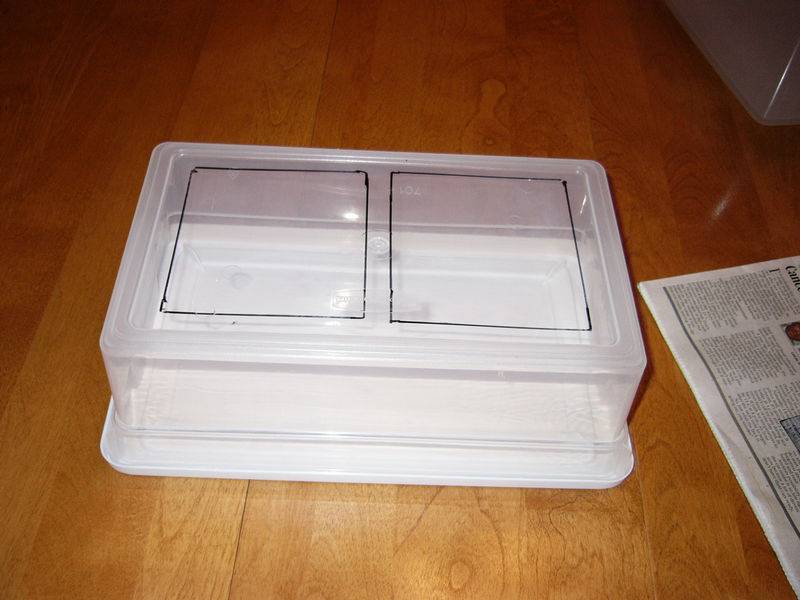
My 254W CFL Rubbermaid tub was a prototype for this growbox. I ran the 150W HPS in the tubs for a week with no problems. My 254 Watt CFL Rubbermaid design can be copied into cabinet and you will have no problems.
My Rubbermaid design was meant for anyone to put together with simple tools, a drill, utility knife, and a few screwdrivers. The cabinet design needs some woodworking tools. I used a jigsaw to cut the ventilation holes. A table saw and a radial arm saw were used to cut the shelves. A jigsaw would work fine if that's all ya got.
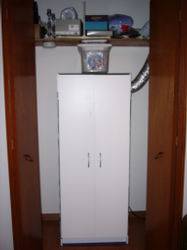
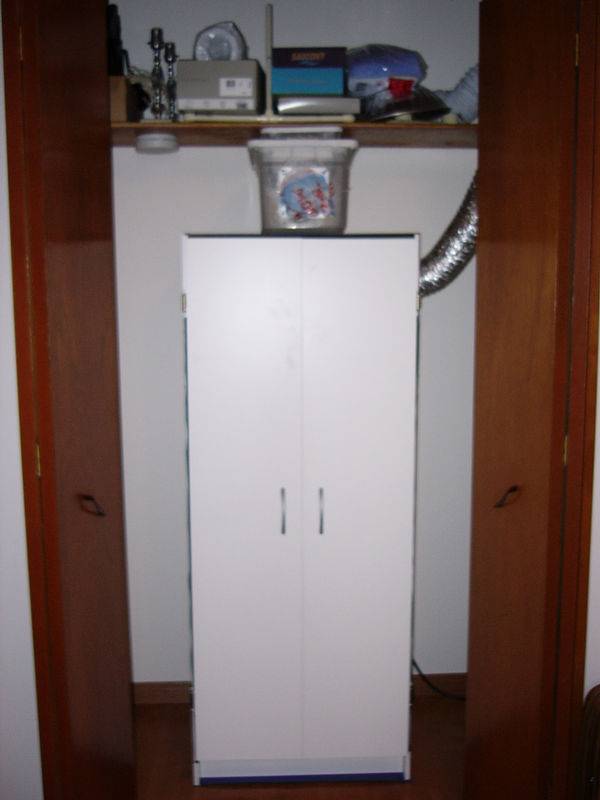
The cabinet is from Canadian Tire and is 60" tall x 24" wide and 12" deep.
It was on sale for $50. I think I'm going to pick up another one.
The ventilation system uses three 100mm 65CFM fans from Radio Shack along with 4" ducts from Home depot. I like using AC fans because they are easier to wire and a bit more powerful than DC fans.
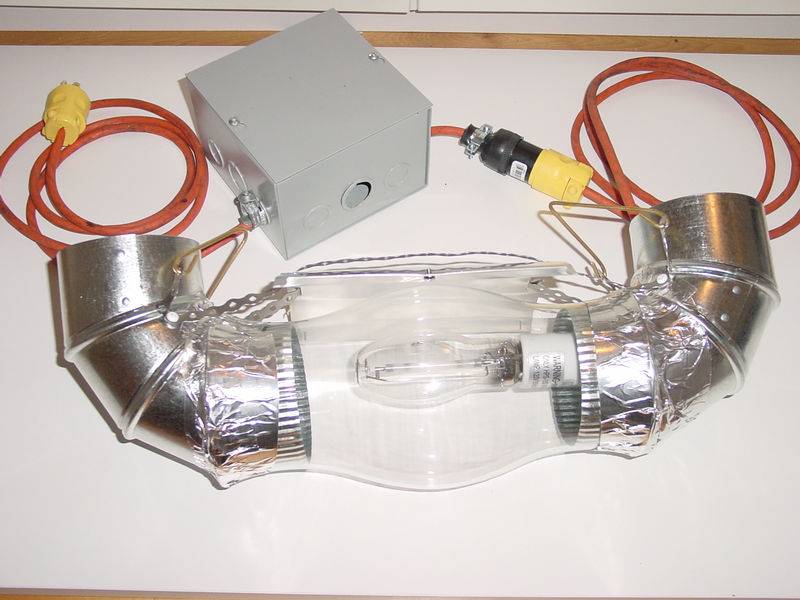
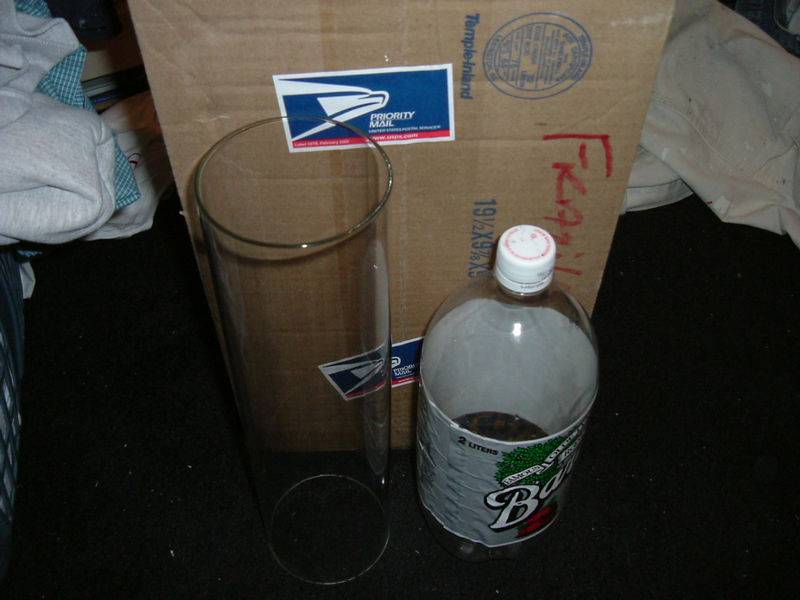
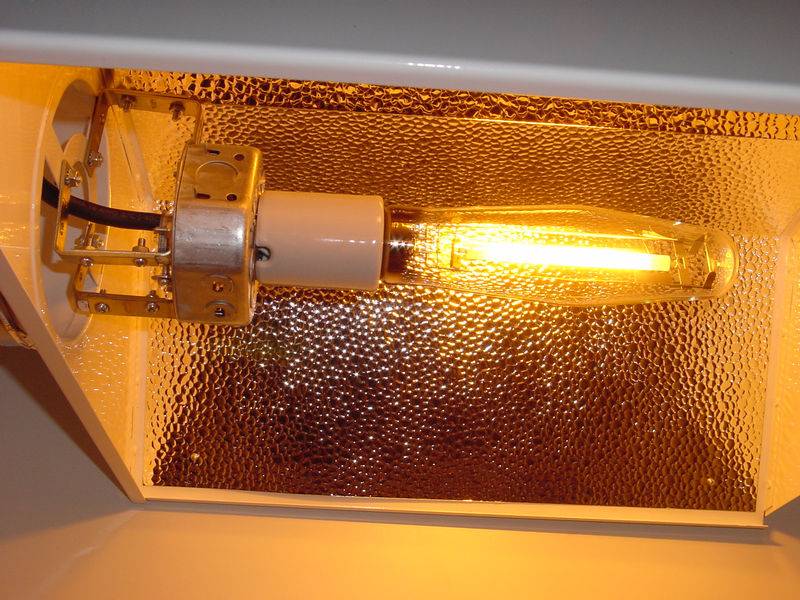
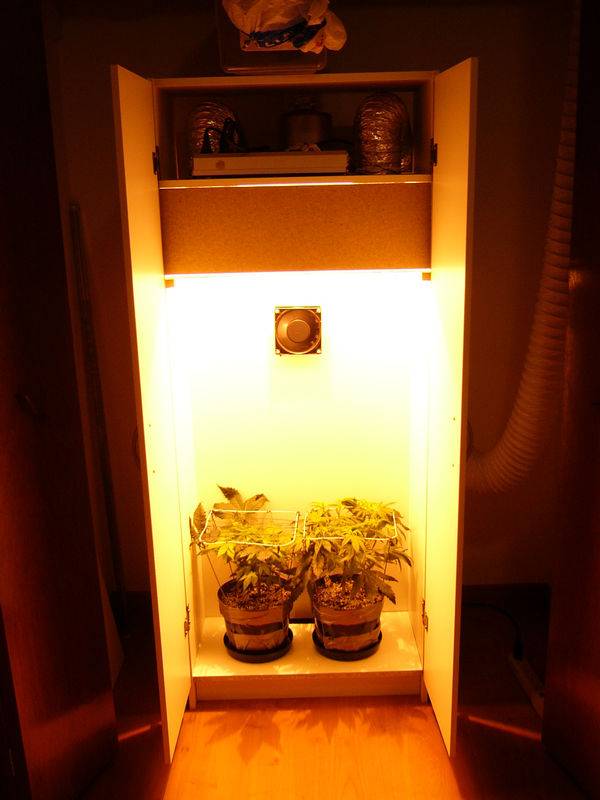
The lighting chamber uses my cool-box design which is like a ventilated hood or a cool tube made from an old piece of glass that I cut with a $2 glass scratcher that is installed like a shelf.
I've been picking up goodies all week and took the day off work and put her together today.

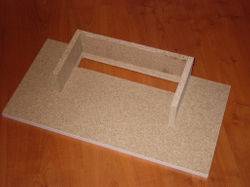
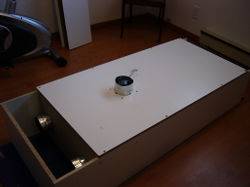
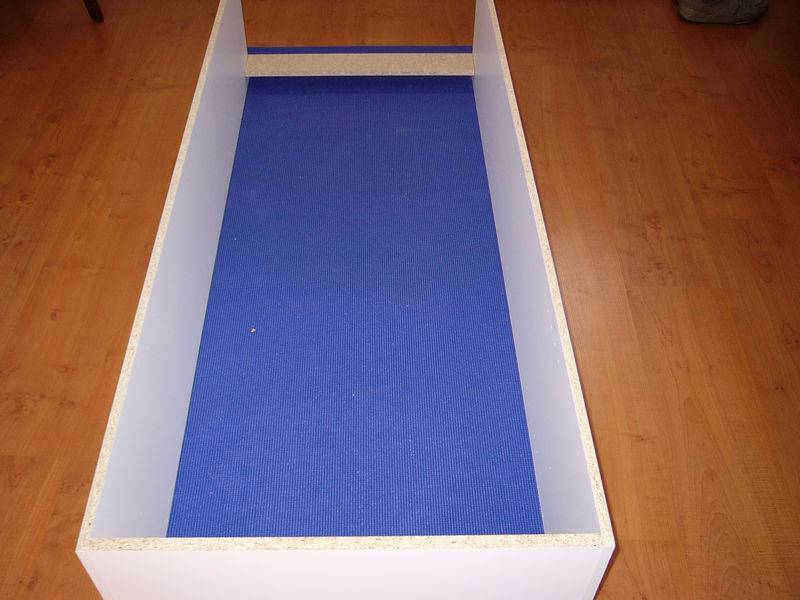
Here is the top, sides and bottom kick board assembled.
It's sitting on a blue yoga mat so I don't scratch my nice flooring.

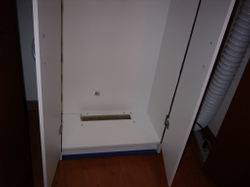
This is the floor of the cabinet with a passive intake cut to 25 sqin, 12-1/2" x 2"
This is twice the area of the 4" duct that will exhaust this section of the cabinet.
Always cut the intakes twice the exhaust size to prevent a big pressure loss to maximize air flow.
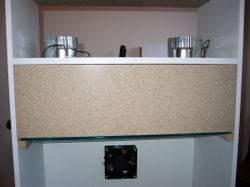
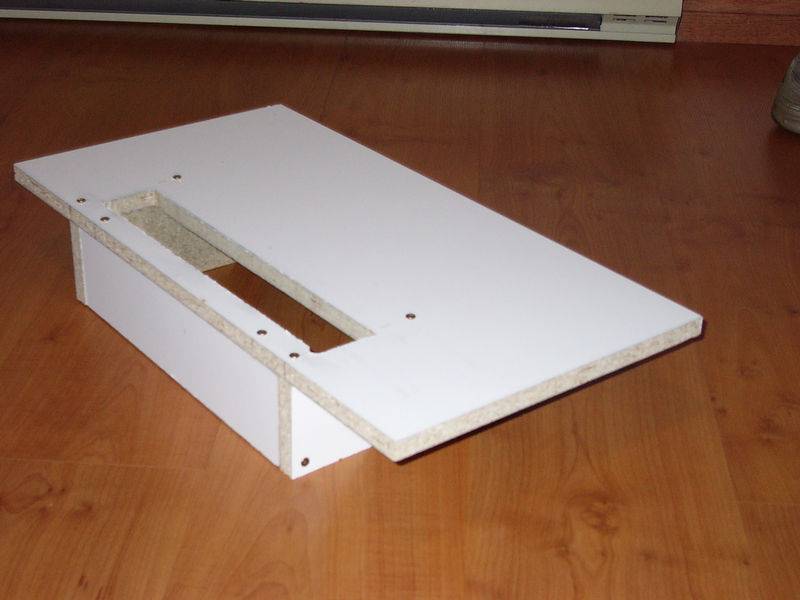
I made a light trap using 3 pieces cut from one of the shelves.
It's a bit better than Kleenex boxes - eh! The airflow is down at the back, turns to the front then splits left and right before going straight back at the sides. This works really well with no light leaks or glowing

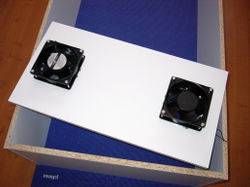
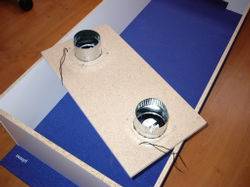
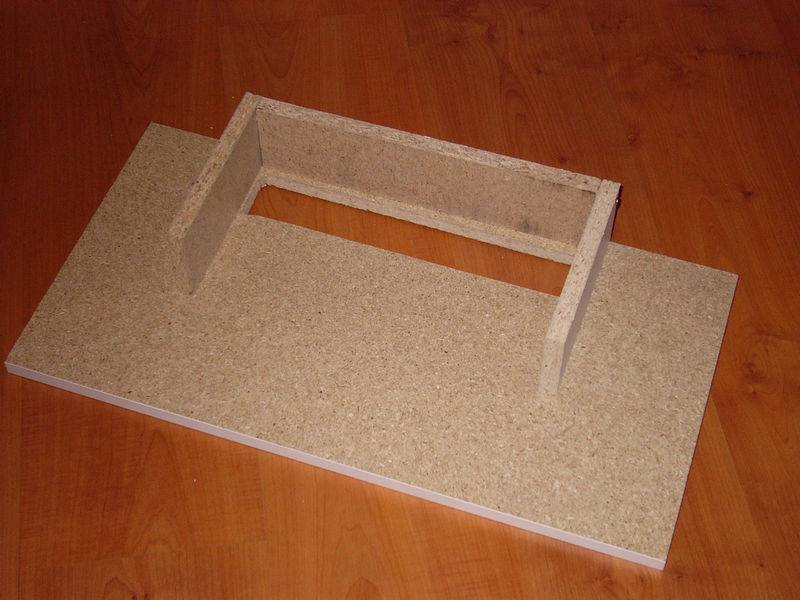
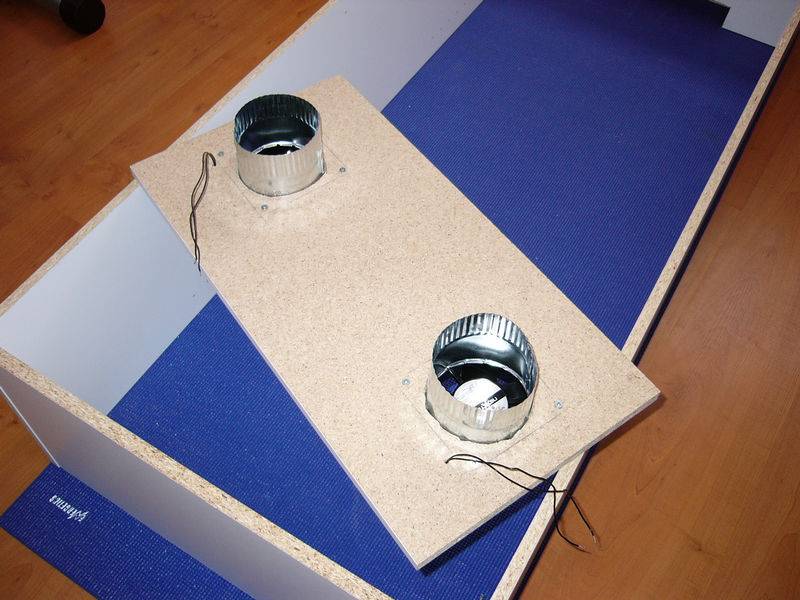
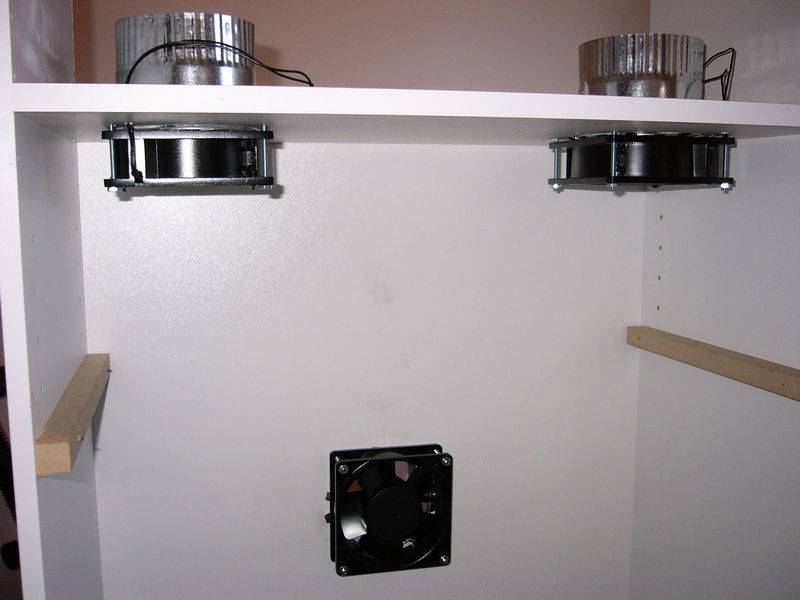
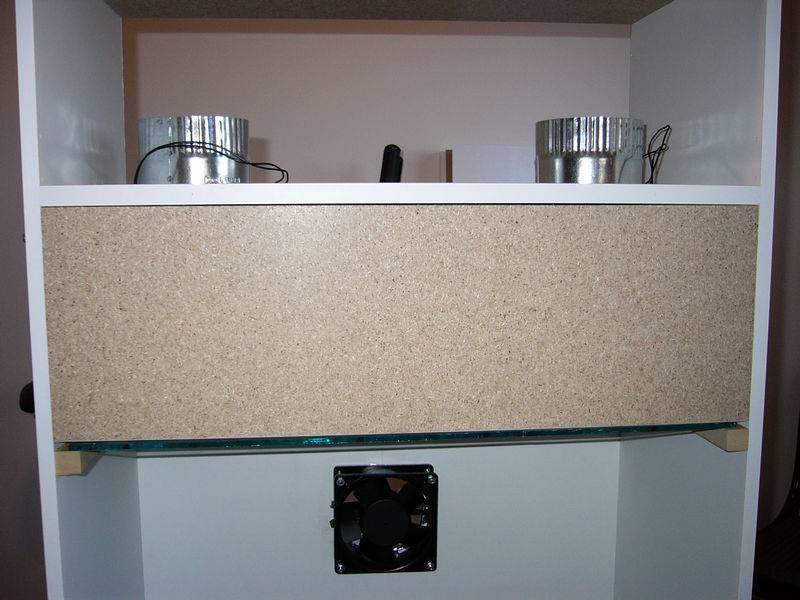
This is the top of the lighting section made out of one of the shelves.
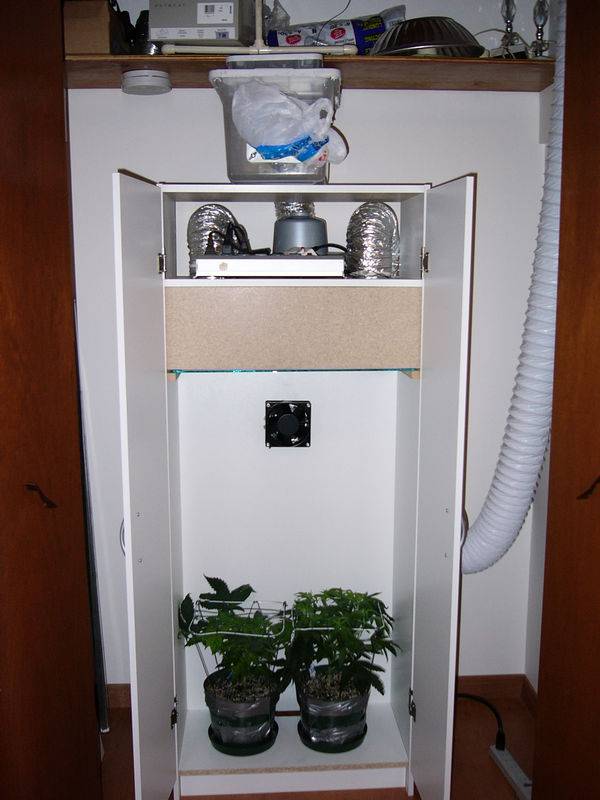
It has two 4" 65CFM fans one blowing, one sucking.
In my Rubbermaid design, a single 38CFM fan is sufficient to cool the 150 HPS so there's lot's of ventilation here.
I installed the 4" (100mm) fans because they match up with the 4" duct. My HPS has a safety feature that one fan is a backup for the other in case one fails.
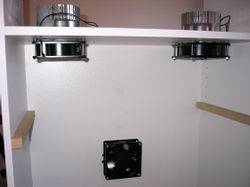
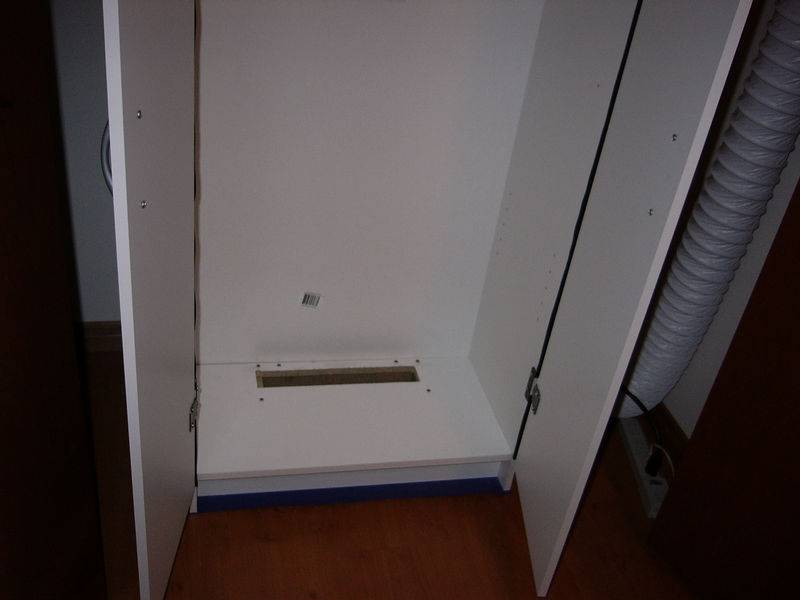
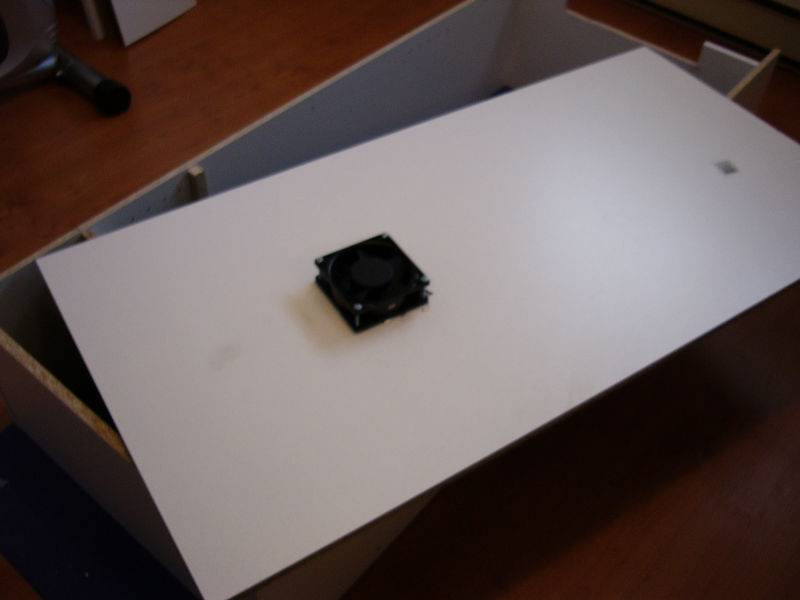
This cabinet came with a cardboard backing which I replaced with a piece of 4' x 24" melamine that I got at Home Depot for $10.
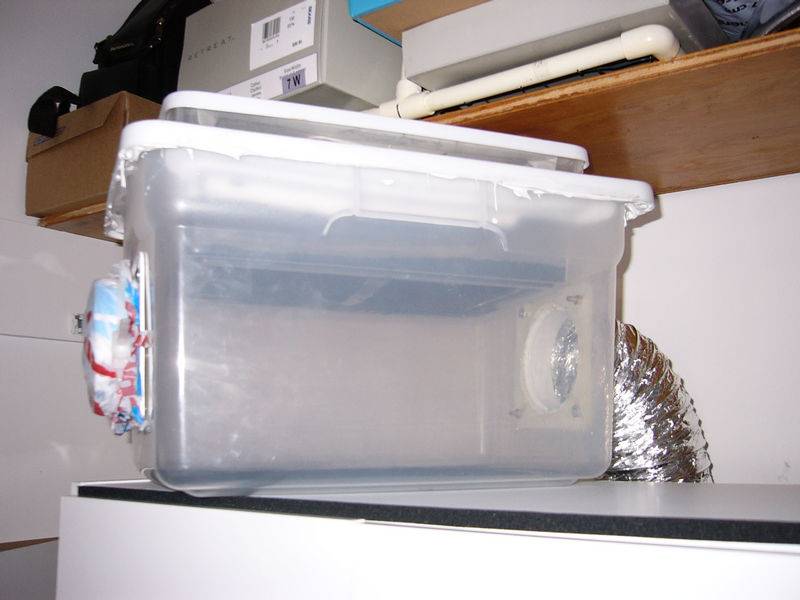
It worked out perfect since I wanted to leave the very top section open. I mounted another 100mm duct fan with a 4" tin duct. This fan will exhaust the grow section into my homemade scrubber.

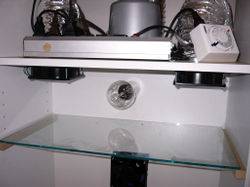
Now I'm assembling the light section from what I call my cool-box design. It's basically a ventilated hood using a piece of window glass.
Two rails made from some scrap MDF particle board are screwed to the sides.
The glass heat shield sits on the rails like a shelf.
I took one of the spare shelves and cut it to fit in the space between the glass and the top shelf to seal in the light chamber.
I can slide the glass out easily to change the light bulb. The fans make a positive pressure with some air leaks inside so I don't need to seal this up at at.
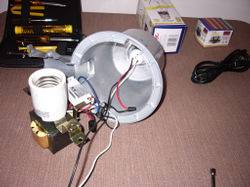
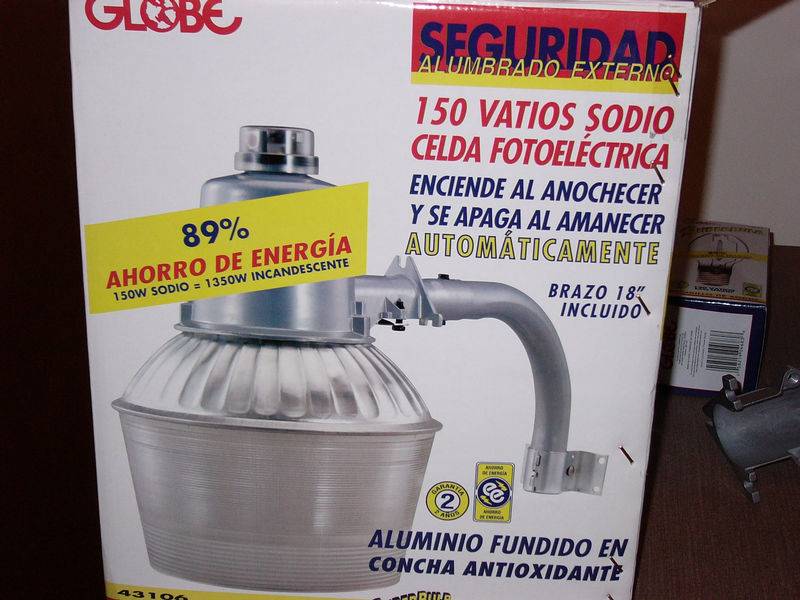
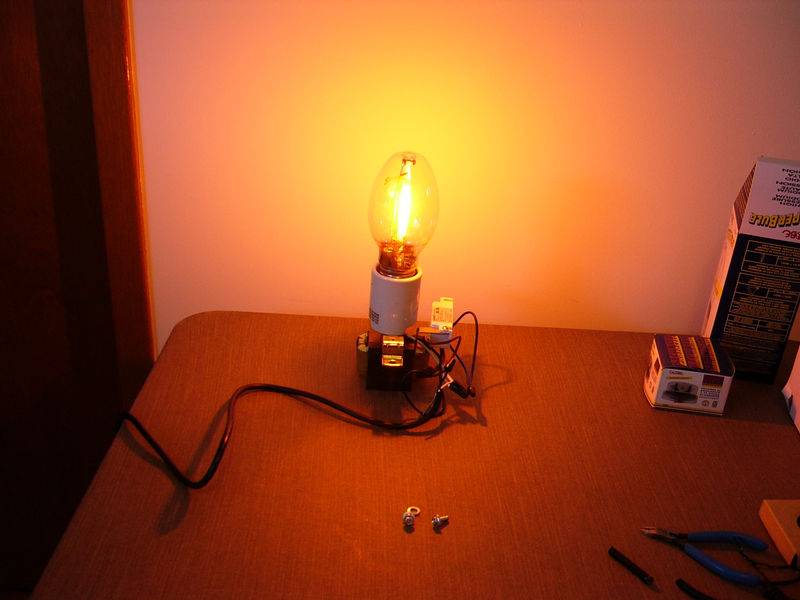
I picked up a 150 HPS security light for $125 at Rona Home Hardware. You can only get 35W at Crappy Tire for $75 and 70W for $99 at Home Depot so locally this is a sweet deal.
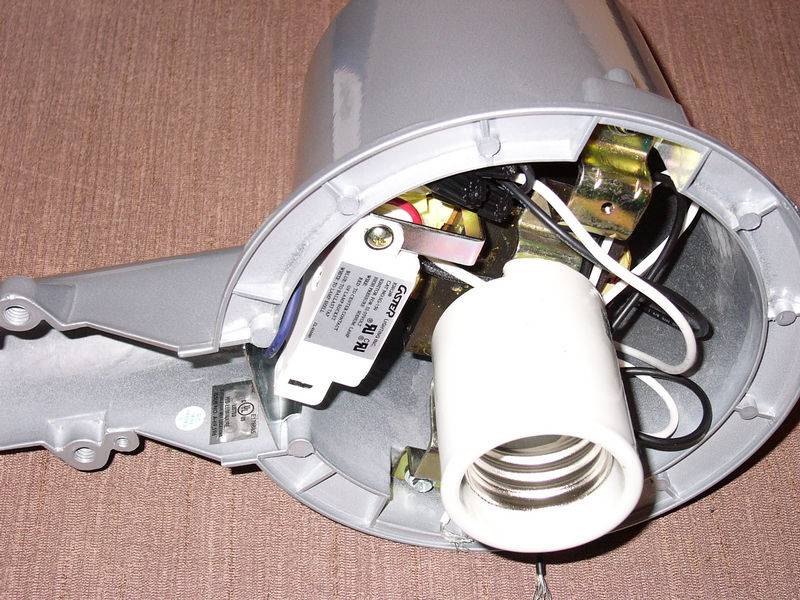
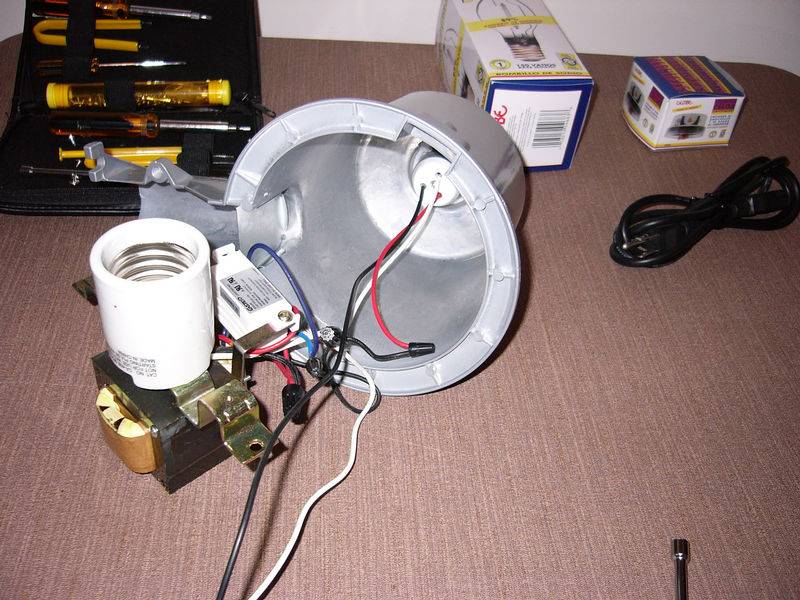
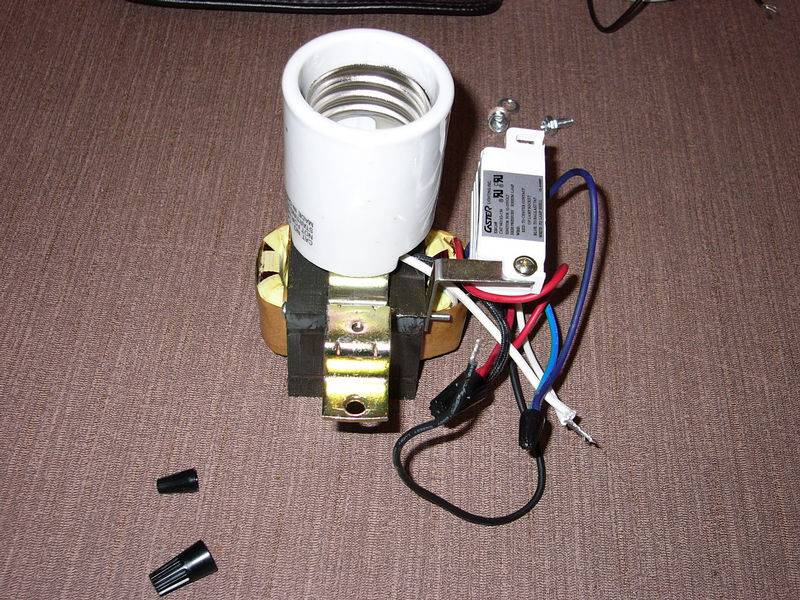
The photocell shut off switch has to be taken out of the circuit.
I used Sugabear's guide http://www.icmag.com/ic/showthread.php?t=36344&page=1&pp=15 to rewire the HPS light. I'm not going to go into detail cause Sugabear's how to shows it all!!!
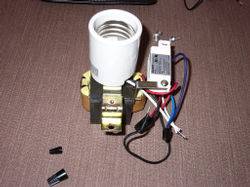
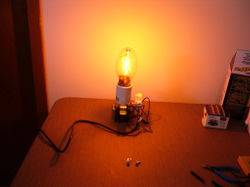
I'm using the light can as a temporary remote ballast and have it sitting on the top shelf in the utility area. The light recepticle is mounted remotely in the lighting chamber. I still have some cleanup to do electrically. My connections are all wire-nutted together and then taped up with electrical tape so they won't pull apart. I plan to put the ballast in an electrical project box and mount a proper electrical receptical box.


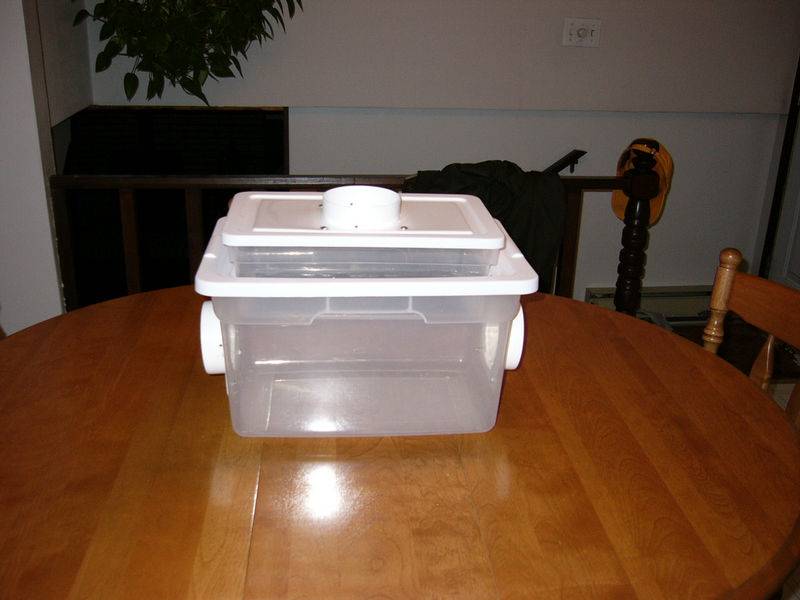
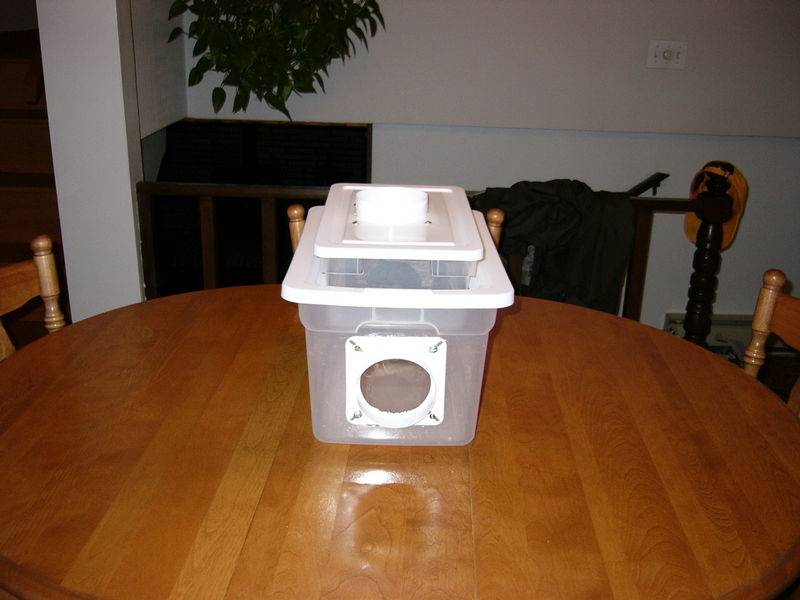
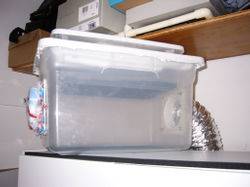
And here is my inline scrubber. It's connected with a 4" duct from the growcab and just sits on top. I pulled the 4" fan that was mounted in the tub lid and put it in the growbox. I had to block up the extra hole.
*********************************************************
Edit - I got my camera fixed and will continue to add pictures and details....
Red
My 254W CFL Rubbermaid tub was a prototype for this growbox. I ran the 150W HPS in the tubs for a week with no problems. My 254 Watt CFL Rubbermaid design can be copied into cabinet and you will have no problems.
My Rubbermaid design was meant for anyone to put together with simple tools, a drill, utility knife, and a few screwdrivers. The cabinet design needs some woodworking tools. I used a jigsaw to cut the ventilation holes. A table saw and a radial arm saw were used to cut the shelves. A jigsaw would work fine if that's all ya got.
The cabinet is from Canadian Tire and is 60" tall x 24" wide and 12" deep.
It was on sale for $50. I think I'm going to pick up another one.
The ventilation system uses three 100mm 65CFM fans from Radio Shack along with 4" ducts from Home depot. I like using AC fans because they are easier to wire and a bit more powerful than DC fans.
The lighting chamber uses my cool-box design which is like a ventilated hood or a cool tube made from an old piece of glass that I cut with a $2 glass scratcher that is installed like a shelf.
I've been picking up goodies all week and took the day off work and put her together today.
Here is the top, sides and bottom kick board assembled.
It's sitting on a blue yoga mat so I don't scratch my nice flooring.
This is the floor of the cabinet with a passive intake cut to 25 sqin, 12-1/2" x 2"
This is twice the area of the 4" duct that will exhaust this section of the cabinet.
Always cut the intakes twice the exhaust size to prevent a big pressure loss to maximize air flow.
I made a light trap using 3 pieces cut from one of the shelves.
It's a bit better than Kleenex boxes - eh! The airflow is down at the back, turns to the front then splits left and right before going straight back at the sides. This works really well with no light leaks or glowing
This is the top of the lighting section made out of one of the shelves.
It has two 4" 65CFM fans one blowing, one sucking.
In my Rubbermaid design, a single 38CFM fan is sufficient to cool the 150 HPS so there's lot's of ventilation here.
I installed the 4" (100mm) fans because they match up with the 4" duct. My HPS has a safety feature that one fan is a backup for the other in case one fails.

This cabinet came with a cardboard backing which I replaced with a piece of 4' x 24" melamine that I got at Home Depot for $10.
It worked out perfect since I wanted to leave the very top section open. I mounted another 100mm duct fan with a 4" tin duct. This fan will exhaust the grow section into my homemade scrubber.

Now I'm assembling the light section from what I call my cool-box design. It's basically a ventilated hood using a piece of window glass.
Two rails made from some scrap MDF particle board are screwed to the sides.
The glass heat shield sits on the rails like a shelf.
I took one of the spare shelves and cut it to fit in the space between the glass and the top shelf to seal in the light chamber.
I can slide the glass out easily to change the light bulb. The fans make a positive pressure with some air leaks inside so I don't need to seal this up at at.
I picked up a 150 HPS security light for $125 at Rona Home Hardware. You can only get 35W at Crappy Tire for $75 and 70W for $99 at Home Depot so locally this is a sweet deal.
The photocell shut off switch has to be taken out of the circuit.
I used Sugabear's guide http://www.icmag.com/ic/showthread.php?t=36344&page=1&pp=15 to rewire the HPS light. I'm not going to go into detail cause Sugabear's how to shows it all!!!
I'm using the light can as a temporary remote ballast and have it sitting on the top shelf in the utility area. The light recepticle is mounted remotely in the lighting chamber. I still have some cleanup to do electrically. My connections are all wire-nutted together and then taped up with electrical tape so they won't pull apart. I plan to put the ballast in an electrical project box and mount a proper electrical receptical box.
And here is my inline scrubber. It's connected with a 4" duct from the growcab and just sits on top. I pulled the 4" fan that was mounted in the tub lid and put it in the growbox. I had to block up the extra hole.
*********************************************************
Edit - I got my camera fixed and will continue to add pictures and details....
Red
Last edited:
") your not filtering the air pulled from above the glass ? and are the fans you got 120v or 12v,fron instore or online? thanks again for sharing your wealth of knowledge
your not filtering the air pulled from above the glass ? and are the fans you got 120v or 12v,fron instore or online? thanks again for sharing your wealth of knowledge