acespicoli
Well-known member
please help - show me the best auto water
Some favorite hydro threads
been looking into automation (getting smarter or lazy )
)
peat based organic nute super soiless (organic-hydro???)
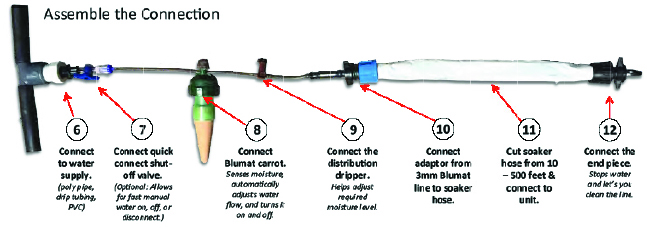
Blumat Watering Systems are the epitome of drip irrigation technology. However, installing and operating the systems can be tedious and high maintenance for gardens with a high number of low-volume containers (e.g. several hundred or thousand plants in 1-gallon containers). The problem is only exacerbated when the plants need to be moved around frequently, and a Blumat system can become more of a liability than an asset in these settings.
Capillary mats are commonly used in agricultural nurseries and greenhouses to efficiently irrigate a multitude of small containers. However, just like conventional drip systems, these watering systems are subject to over and under-watering, needlessly boosting humidity, stressing plants, and requiring more out of dehumidifiers and air conditioners.
Blumat & Capmat systems combine the two technologies, providing a “Best-of-both-Worlds” solution to efficiently irrigate many small containers with minimal maintenance. Plants can even be moved around without any additional maintenance to the system. Not even a single valve needs to be turned.
Plants in smaller containers (5-gallons of volume and under) can be placed directly onto the mat, and automated irrigation immediately begins. When a plant is placed on top of the mat, the weight of the container pushes down into the mat, forcing moisture up into the growing media into the container.
A capillary mat is embedded with drip tape, and wrapped in an anti-algae material. This material prevents algae, fungus gnats, and other unwanted biologicals from colonizing your mat. The material is porous, only allowing water to pass through when a weighted plant is placed on top of it.
To avoid over and under-watering, the moisture levels are regulated using a flat-bottomed surface Blumat:
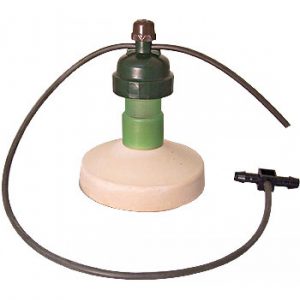
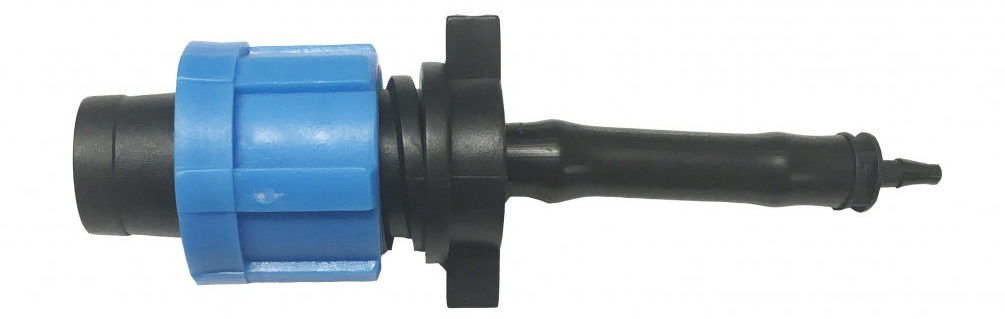
This flat-bottomed Surface Blumat emits into a manifold of BluSoak drip tape, that in turn emits into the moisture-wicking capillary material below it. The material evenly distributes the moisture through the surface area of the mat, before making its way into the containers that sit on top. The Blumat can also be integrated with distribution drippers (instead of BluSoak drip tape) for gravity-fed systems, or smaller capmat systems.
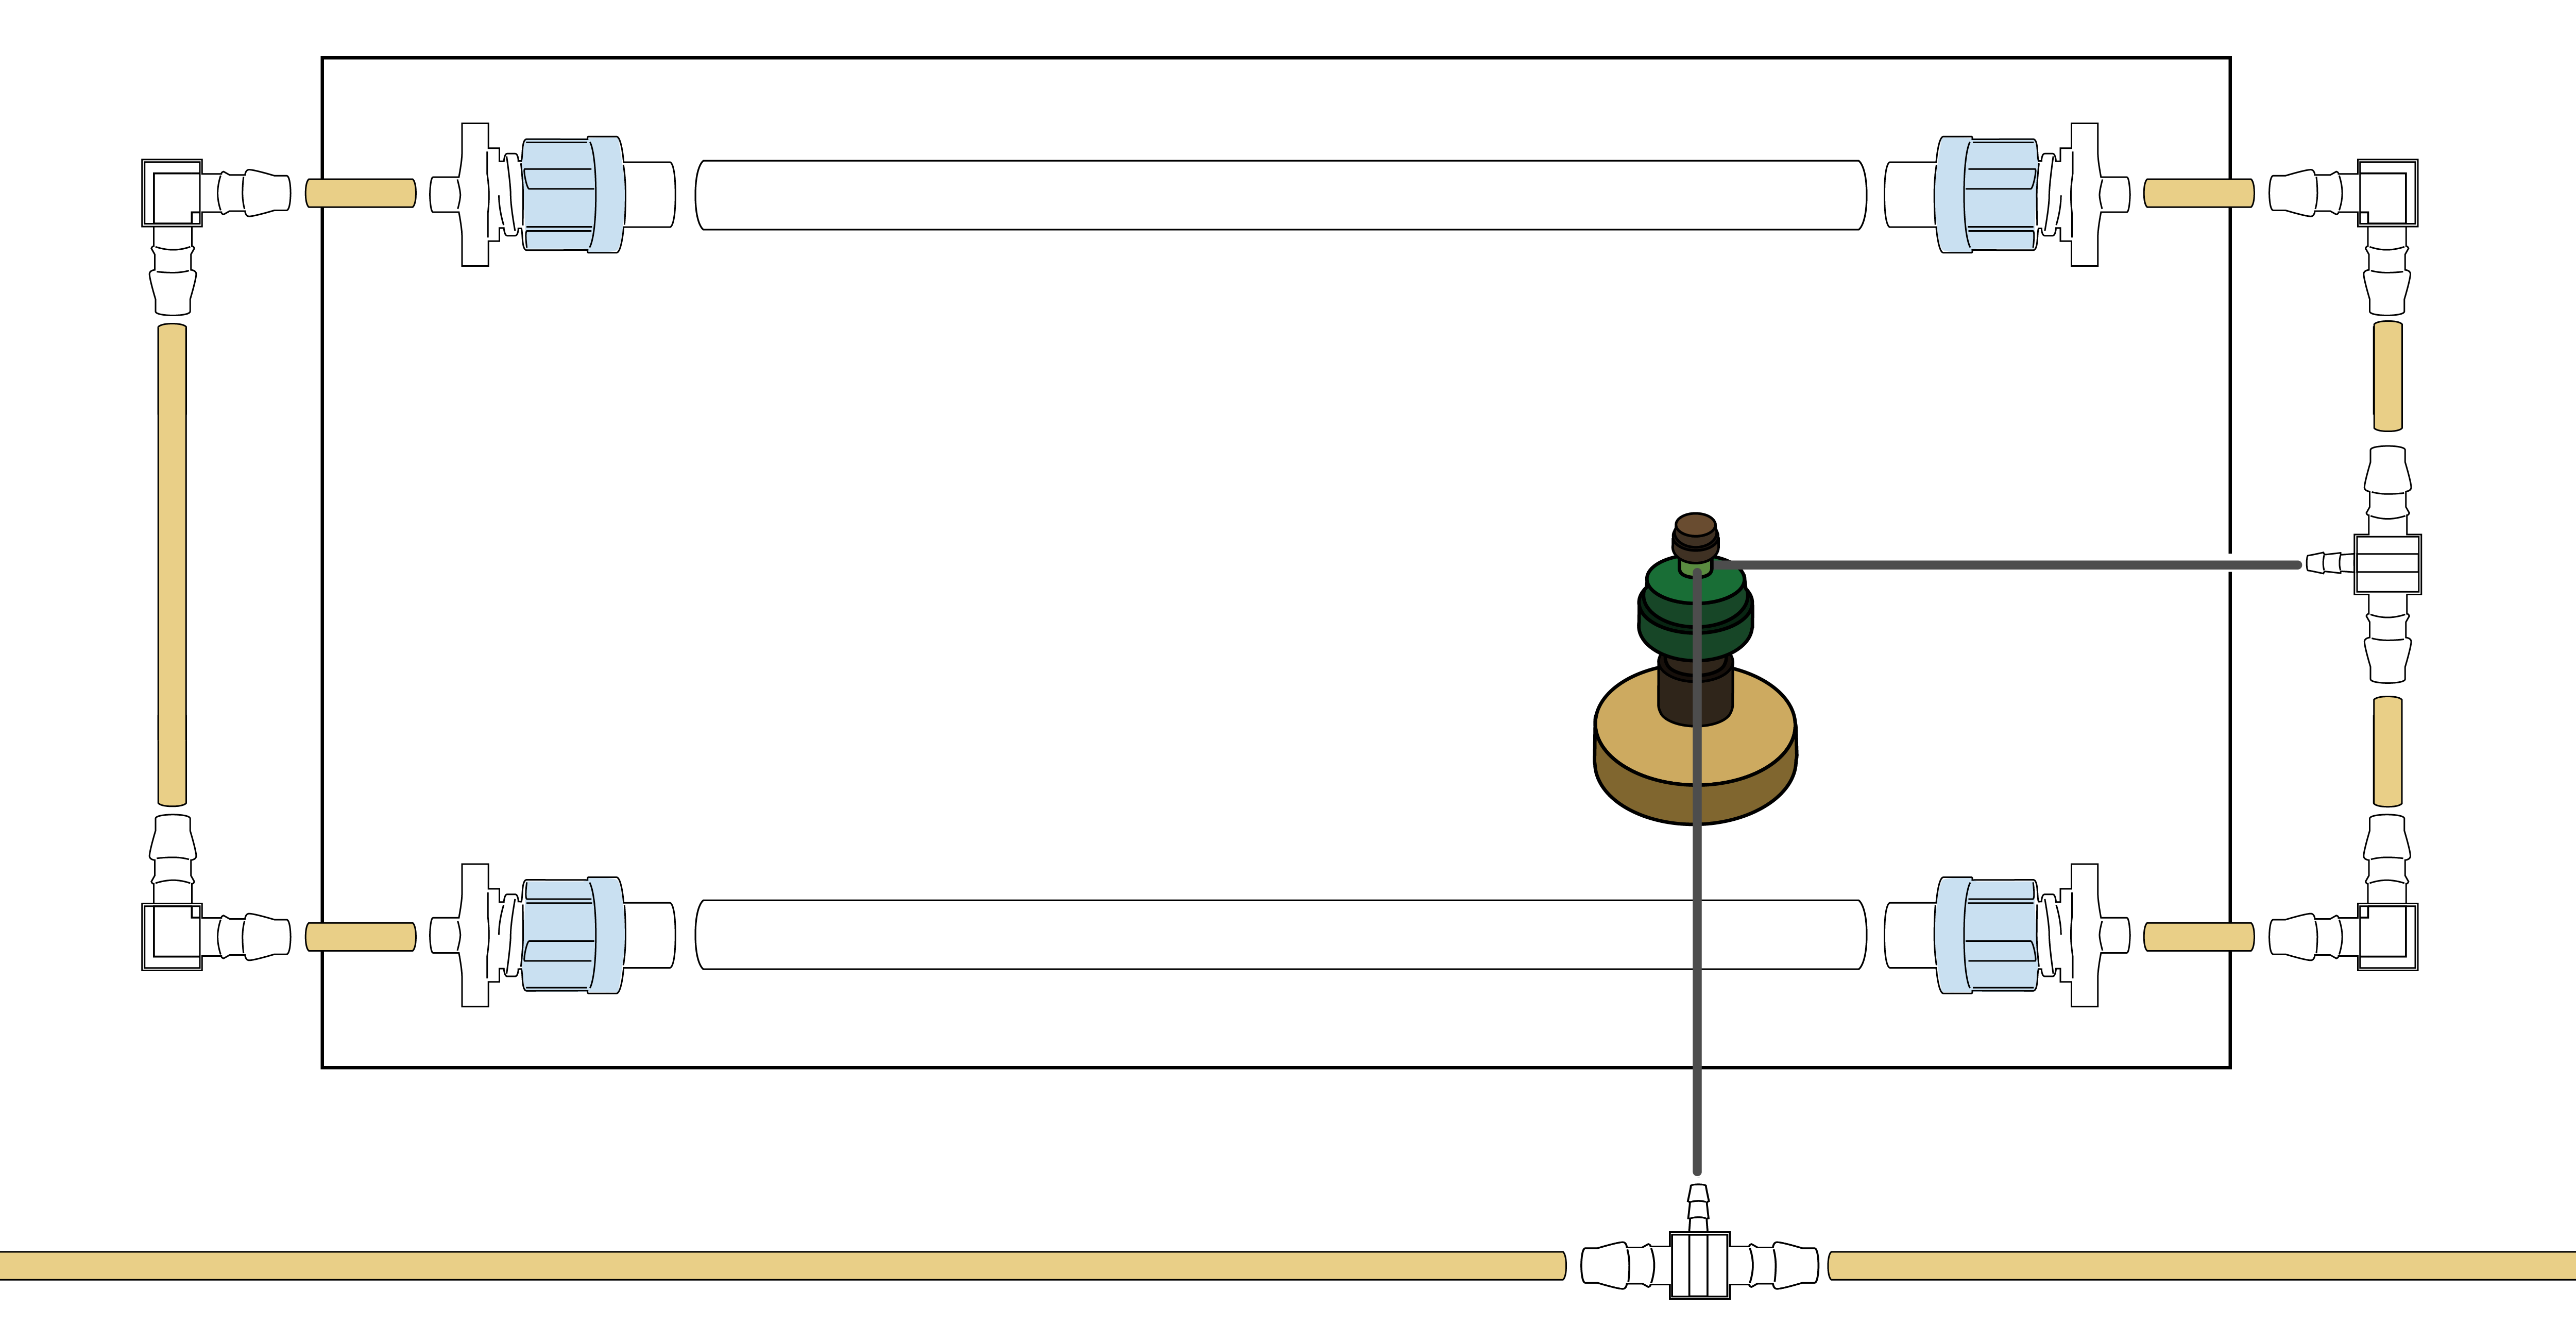
Here is a diagram outlining the placement of all parts of a capmat system with a Surface Blumat:
The orange line on the bottom of the diagram is the water supply line–it is implied in the diagram that this line is coming from either a pressurized line or reservoir, and is continuing on to other capillary mats or Blumat Watering Systems.
The tape is not actually visible when properly using the mats, but is displayed in the diagram for viewing purposes.
These mats are made up of five components in four distinct layers.
This tape distributes moisture as it is emitted from the Surface Blumat. The tape emits the moisture into the capillary material below.
This capillary material is an a la carte item, and can be used in conjunction with a Surface Blumat, anti-algae material, and drip tape to essentially construct your own version of an “Aquamat” configuration.
This capillary material is an a la carte item just like the above material. This material is made of recycled synthetic fibers–it does not use organic materials like jute, cotton, and others that typically rot and do not perform well. This is a more eco-friendly version of the above-material.
Some favorite hydro threads
been looking into automation (getting smarter or lazy
)peat based organic nute super soiless (organic-hydro???)
Guide to Blumat-Regulated Capillary Mat Systems
Overview
Blumat Watering Systems are the epitome of drip irrigation technology. However, installing and operating the systems can be tedious and high maintenance for gardens with a high number of low-volume containers (e.g. several hundred or thousand plants in 1-gallon containers). The problem is only exacerbated when the plants need to be moved around frequently, and a Blumat system can become more of a liability than an asset in these settings.
Capillary mats are commonly used in agricultural nurseries and greenhouses to efficiently irrigate a multitude of small containers. However, just like conventional drip systems, these watering systems are subject to over and under-watering, needlessly boosting humidity, stressing plants, and requiring more out of dehumidifiers and air conditioners.
Blumat & Capmat systems combine the two technologies, providing a “Best-of-both-Worlds” solution to efficiently irrigate many small containers with minimal maintenance. Plants can even be moved around without any additional maintenance to the system. Not even a single valve needs to be turned.
Plants in smaller containers (5-gallons of volume and under) can be placed directly onto the mat, and automated irrigation immediately begins. When a plant is placed on top of the mat, the weight of the container pushes down into the mat, forcing moisture up into the growing media into the container.
Design Concept & Configuration
Despite the varying capillary mat types, the concept behind operating all of the capillary mat systems in conjunction with a surface Blumat is the same.A capillary mat is embedded with drip tape, and wrapped in an anti-algae material. This material prevents algae, fungus gnats, and other unwanted biologicals from colonizing your mat. The material is porous, only allowing water to pass through when a weighted plant is placed on top of it.
To avoid over and under-watering, the moisture levels are regulated using a flat-bottomed surface Blumat:
This flat-bottomed Surface Blumat emits into a manifold of BluSoak drip tape, that in turn emits into the moisture-wicking capillary material below it. The material evenly distributes the moisture through the surface area of the mat, before making its way into the containers that sit on top. The Blumat can also be integrated with distribution drippers (instead of BluSoak drip tape) for gravity-fed systems, or smaller capmat systems.
Here is a diagram outlining the placement of all parts of a capmat system with a Surface Blumat:
The orange line on the bottom of the diagram is the water supply line–it is implied in the diagram that this line is coming from either a pressurized line or reservoir, and is continuing on to other capillary mats or Blumat Watering Systems.
The tape is not actually visible when properly using the mats, but is displayed in the diagram for viewing purposes.
Capillary Mat Types
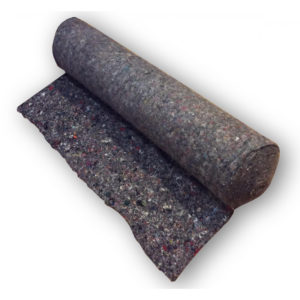
Sustainable Village carries several different types of capillary mats.Aquamat
The Aquamat capillary mats are the highest quality mats that Sustainable Village offers. These mats are completely composed, and ready to integrate with Blumat Systems.These mats are made up of five components in four distinct layers.
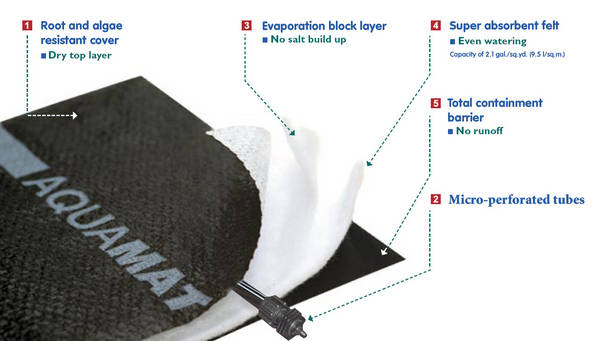
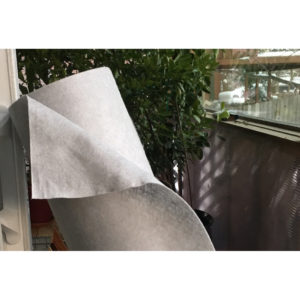
1) Algae & Root-Resistant Foil Covering
This black, perforated material prevents algae and other unwanted biologicals from penetrating into the mat. Contrary to popular belief, this material WILL stop roots from penetrating the mat! This makes the mats incredibly easy to clean, and moving plants is never stressful–for you, or for the plant!2) BluSoak Drip Tape (Not pictured)
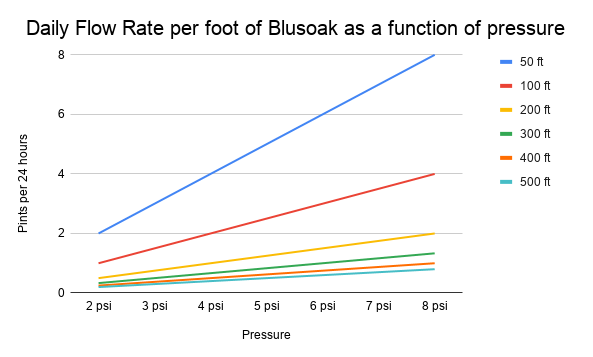
We replace the black drip tape that is embedded in each mat (pictured) with our BluSoak drip tape (a Guide to this tape is linked below). The BluSoak drip tape works ideally with Surface and other Tropf Blumat sensors. The tape is ideal as it does not have a minimum pressure requirement to function. However, the tape does do best between 2-4PSI, which is generally best achieved with a pressurized system (as opposed to a gravity feed).This tape distributes moisture as it is emitted from the Surface Blumat. The tape emits the moisture into the capillary material below.
3) Evaporation Block Layer
This layer prevents salt or other fertilizer build up in the capillary material itself. It also prevents excess evaporation from occurring, and helps to prevent excessively high humidity. This reduces the burden on dehumidifiers, air conditioning appliances, and other temperature/humidity control infrastructure.4) Super-Absorbent Capillary Mat
This material does the actual “work” in these systems. This material is extremely absorbent of water and nutrient solution. It is so absorbent that it evenly emits the moisture throughout the capillary material, ensuring there are no overly wet/dry pockets.5) Containment Barrier
This a completely waterproof material that prevents all run-off from the cap mat, and prevents unwanted biologicals from growing into/through the bottom of the mat.Basic Capillary Material
This capillary material is an a la carte item, and can be used in conjunction with a Surface Blumat, anti-algae material, and drip tape to essentially construct your own version of an “Aquamat” configuration.
Thick Recycled Capillary Material
This capillary material is an a la carte item just like the above material. This material is made of recycled synthetic fibers–it does not use organic materials like jute, cotton, and others that typically rot and do not perform well. This is a more eco-friendly version of the above-material.
How to Construct a Complete Capillary Mat System
Capillary Mat InstructionsComprehensive Parts List
- Surface Blumat
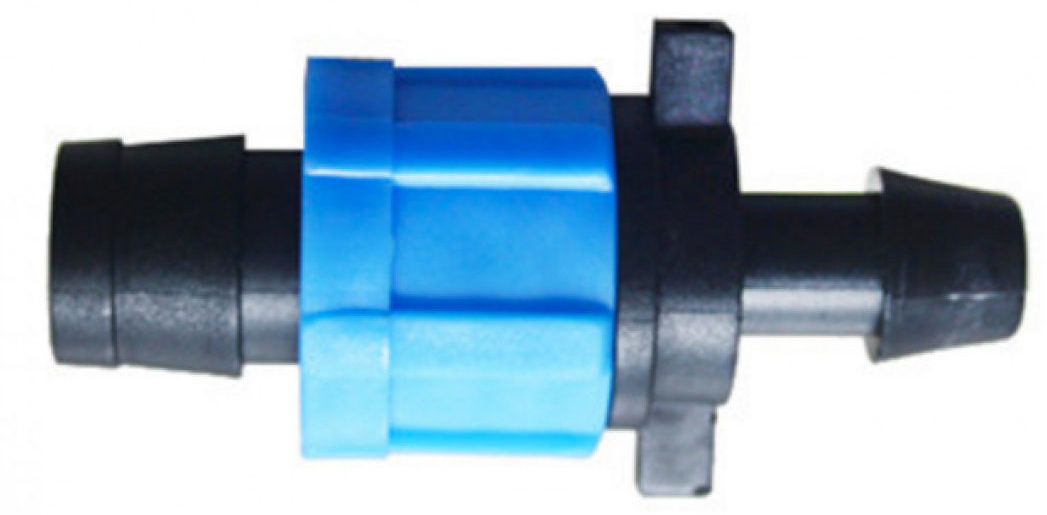
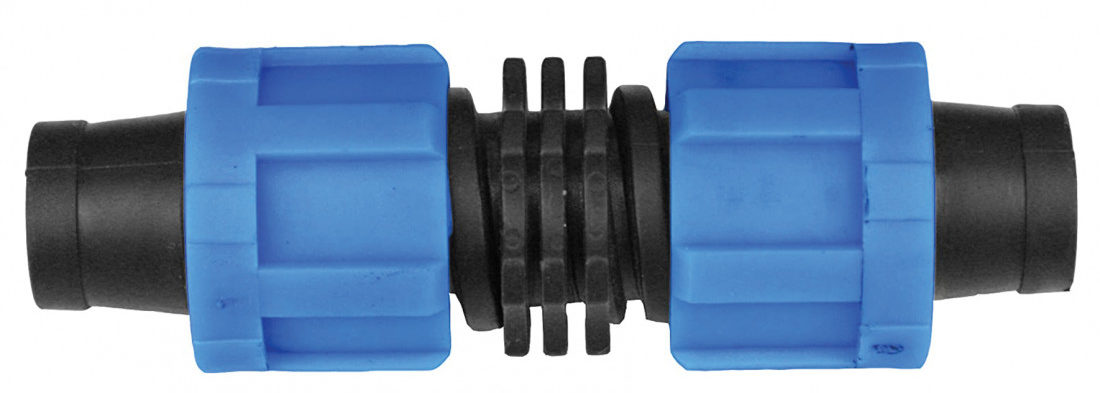
- Blumat 8mm Tee
- Blumat 8mm Elbow
- 8mm x 8mm x 3mm Reducing Tee
- 3mm Tubing
- 8mm Tubing
- BluSoak Drip Tape
- Tape x 8mm Adapter
- Aquamats
- Capillary Material
- Recycled Capillary Material
- Anti-Algae Foil (For covering the capillary material)
Maintenance & Troubleshooting
- If the mat is being over or under-watered, adjust the surface Blumat dial directly.
- Capillary mats and other Blumat Systems that utilize BluSoak drip tape do best under pressurized water supply. They generally run into issues on gravity feeds, as a gravity-fed system generally cannot achieve adequate pressure for BluSoak flow rates to meet plant demand.
- To clean the mat between uses, use a sweep or broom to remove any physical debris that has settled onto the mat. If any nutrient build-up has occurred, wash the build-up away with a hose or other flowing water. Once the mat has dried, roll it up and remove from UV exposure.
- The mat should be on an extremely level surface. Trays with channels will NOT work well with these mats–there will be moisture that settles into the channels, and will encourage fungus gnats, algae, and other undesirable biological elements.
Recommended Resources
Last edited:
 they also come with the clone domes
 thx hows the pump delivery work regulate is the mat wicking and the pump supplies water or circulates the basin, both?
")
 and the sounds of the waterfall
 but with salts or organics and the best media ?