
-
Happy Birthday ICMag! Been 20 years since Gypsy Nirvana created the forum! We are celebrating with a 4/20 Giveaway and by launching a new Patreon tier called "420club". You can read more here.
-
Important notice: ICMag's T.O.U. has been updated. Please review it here. For your convenience, it is also available in the main forum menu, under 'Quick Links"!
You are using an out of date browser. It may not display this or other websites correctly.
You should upgrade or use an alternative browser.
You should upgrade or use an alternative browser.
Macro Attack
- Thread starter MyGreenToe
- Start date
 !
!MyGreenToe
Member
My favorite setup to play with is a vintage Olympus bellows with an old 50mm zuiko lens on it reversed. That gives me a large range of magnification to play with, something like from .5X on up to almost 4X magnification. It's not a backyard bug shooting setup, but at home, with a couple flashes and a few hours time, you can do some incredible photography. I spent some time with some cardboard, paper, and tape, and made my own ringflash diffuser to fit the bellows, in order to get the best light without breakin the bank. An old manual flash I had became the power for it. It may not be as nice as a $10,000 Canon setup with macro flashes, but it only cost me 100 bucks(not counting my camera body).
Now that I have a garden in bloom again, I will start snipping off leaves and other trich covered bits to shoot. Look for me to add some new pics to the thread soon! Macro photography is addictive!
Now that I have a garden in bloom again, I will start snipping off leaves and other trich covered bits to shoot. Look for me to add some new pics to the thread soon! Macro photography is addictive!
MyGreenToe
Member
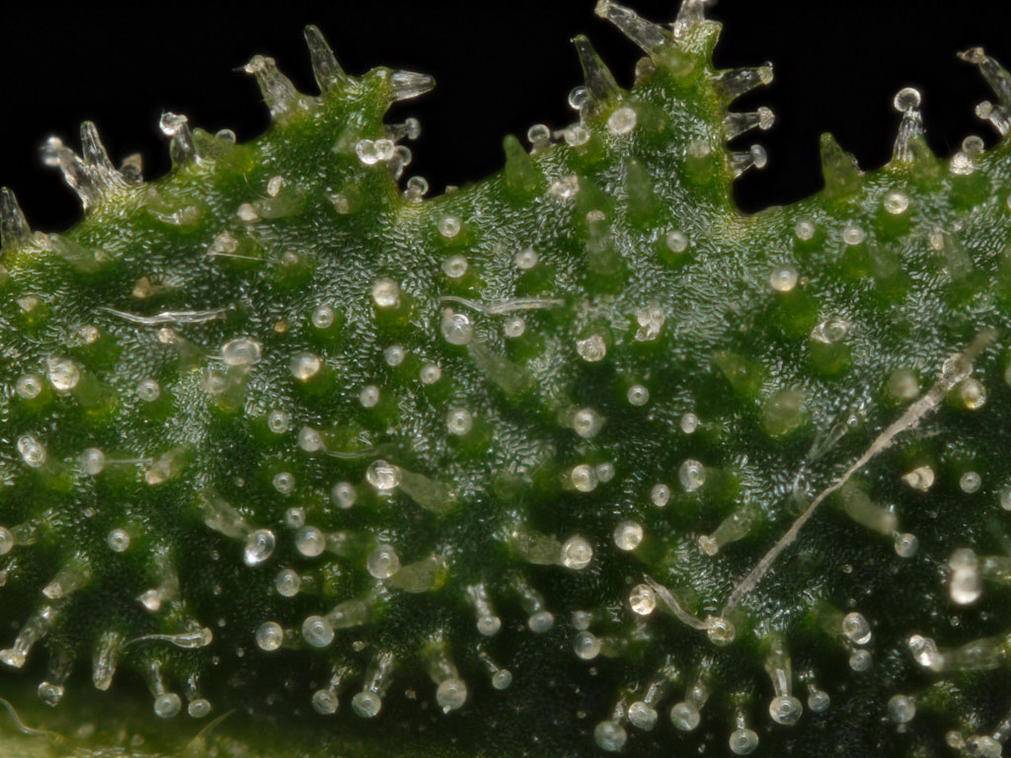
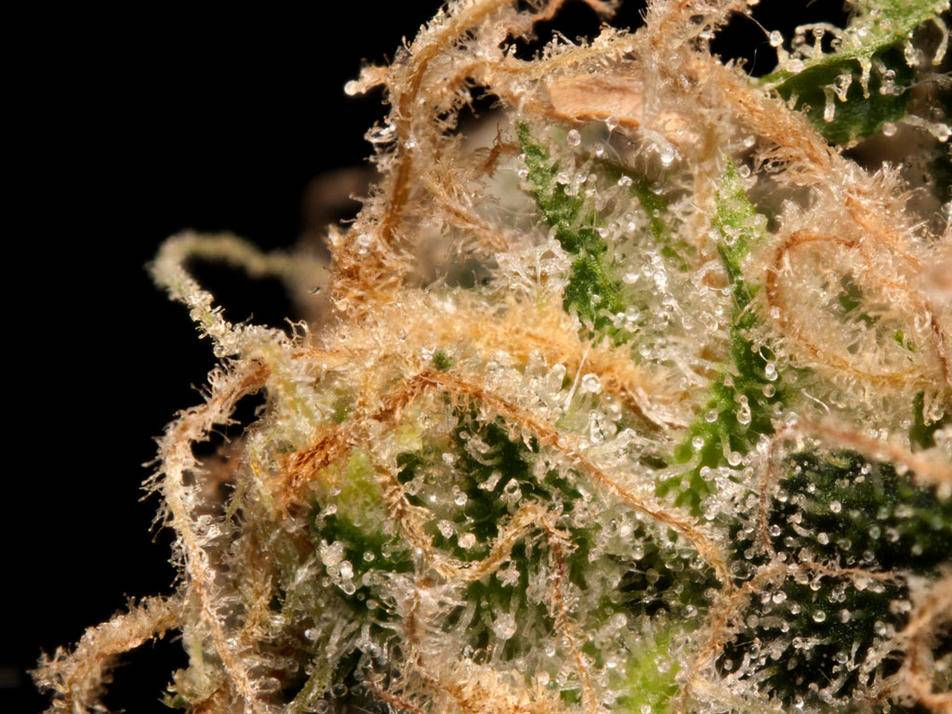
Update time. Some 45 day critical mass here. Clearly another 3 weeks are in order.
Another series:
This one is a 100% pixel for pixel crop:
Another series of the same leaf:
100% crop:
A series of another leaf:
100% crop:
Another nice leaf:
And lastly is a nice virgin pistil on display:
That's all for now. More pics to come now that I have all my stuff set up again.
Keep it Green
MGT
MyGreenToe
Member
Just doing some shooting this morning of a ruler to get an idea of what magnification I'm getting. Thought I would share a series of shots to put it all into perspective.
This is the full frame resized to fit here. The two black boxes are where the next two shots come from. The ruler in the shot is showing millimeters, so that means at maximum magnification I am photographing an area a little over 4mm wide. My camera has a sensor that is 18mm wide. This means my max magnification is a little over 4x real life size. Not bad for a setup that could be put together under 100 bucks(minus camera body)!
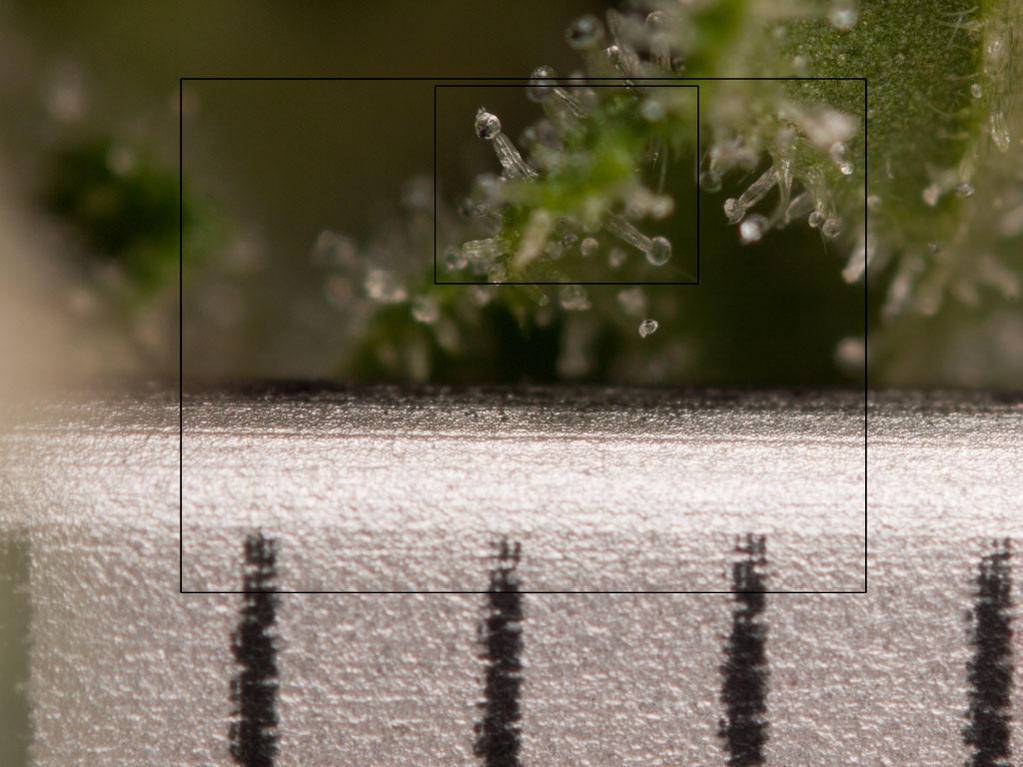
Here is the next step closer:
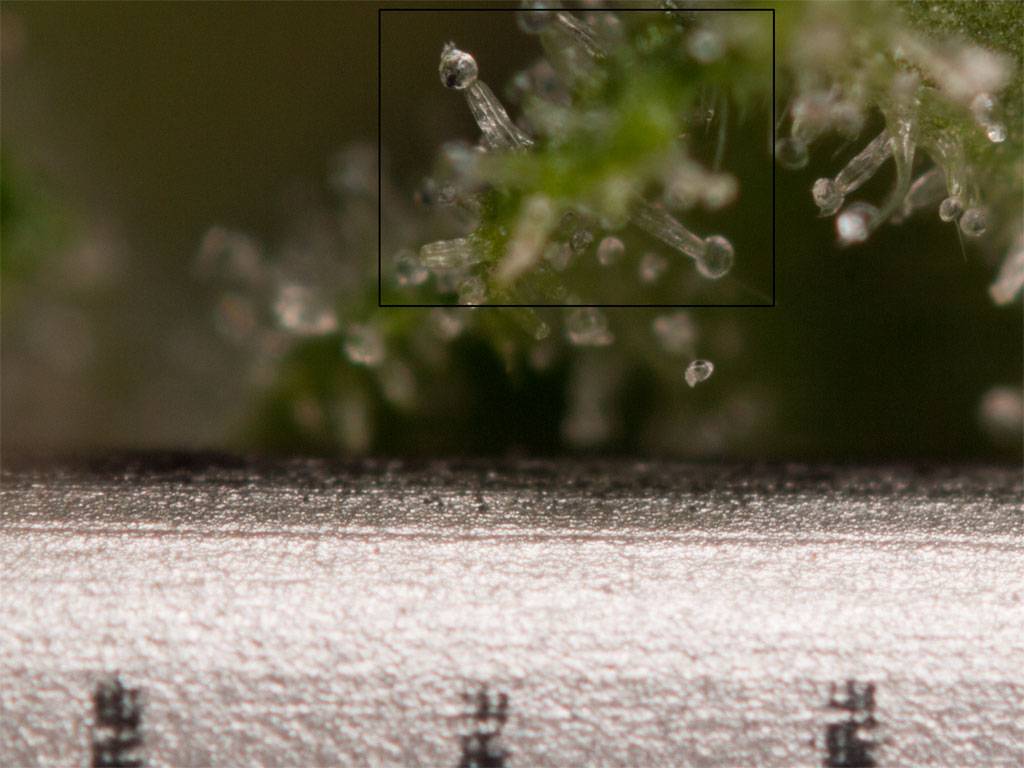
And finally, this shot is a 100% crop from the original image, no resizing. Macros make me wish I had a 20 megapixel camera... I still love my GF1 anyways.
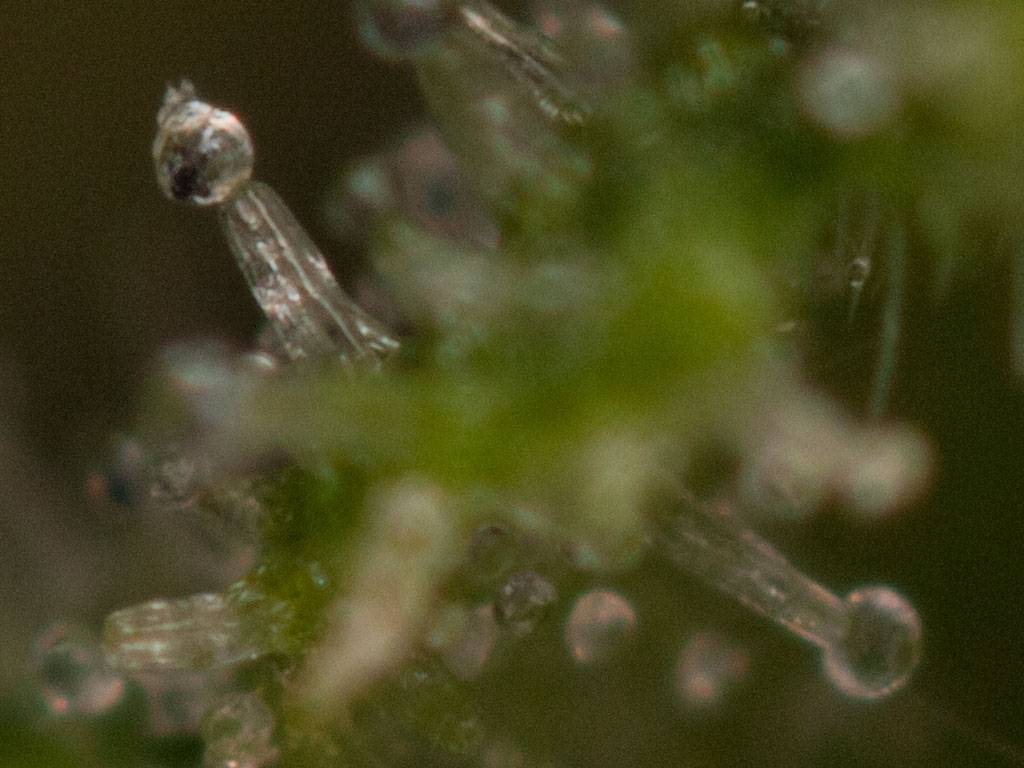
Thanks for looking. Should be more interesting soon as these crtical mass girls move to cloudy and beyond.
Keep it Green
MGT
This is the full frame resized to fit here. The two black boxes are where the next two shots come from. The ruler in the shot is showing millimeters, so that means at maximum magnification I am photographing an area a little over 4mm wide. My camera has a sensor that is 18mm wide. This means my max magnification is a little over 4x real life size. Not bad for a setup that could be put together under 100 bucks(minus camera body)!
Here is the next step closer:
And finally, this shot is a 100% crop from the original image, no resizing. Macros make me wish I had a 20 megapixel camera... I still love my GF1 anyways.
Thanks for looking. Should be more interesting soon as these crtical mass girls move to cloudy and beyond.
Keep it Green
MGT
simply amazing MGT  stellar macro work..thx for sharing and keep em coming
 ")
stellar macro work..thx for sharing and keep em coming CannabisDog
Member
Great macros! Really cool seeing the plants close up.
MyGreenToe
Member
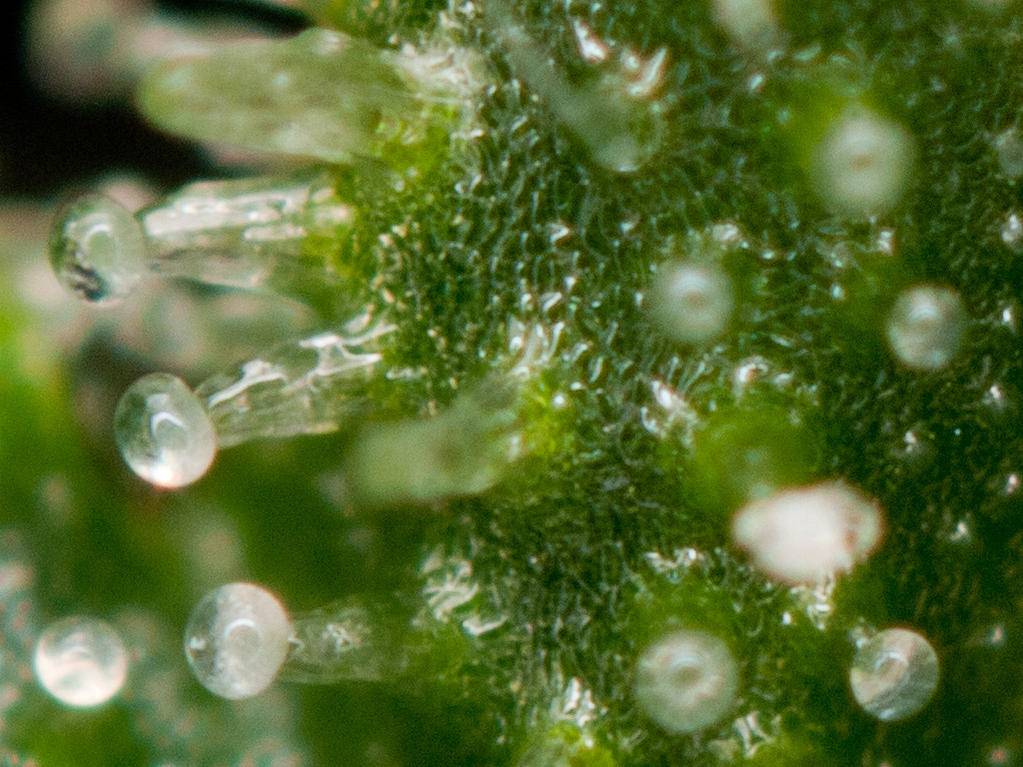
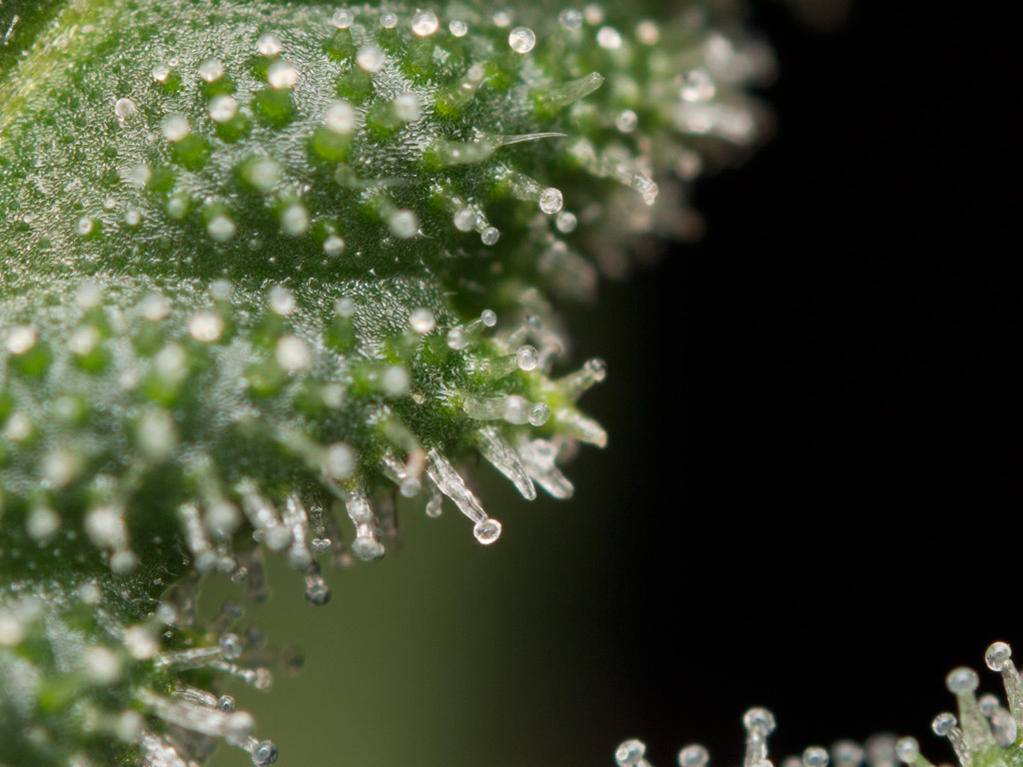
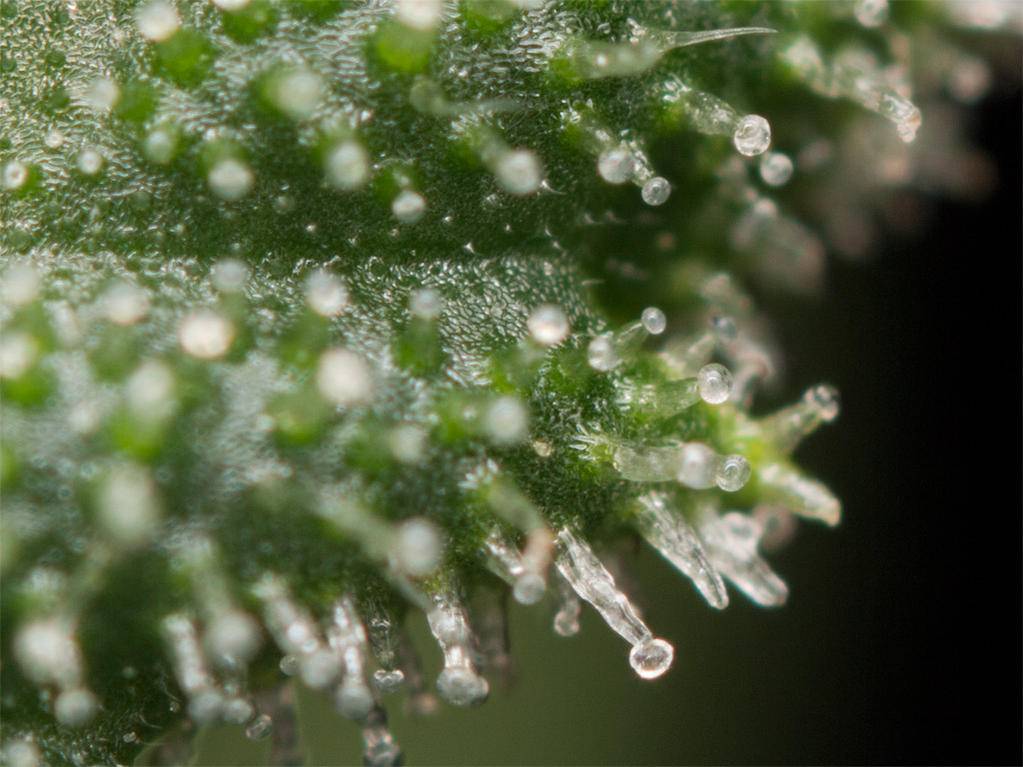
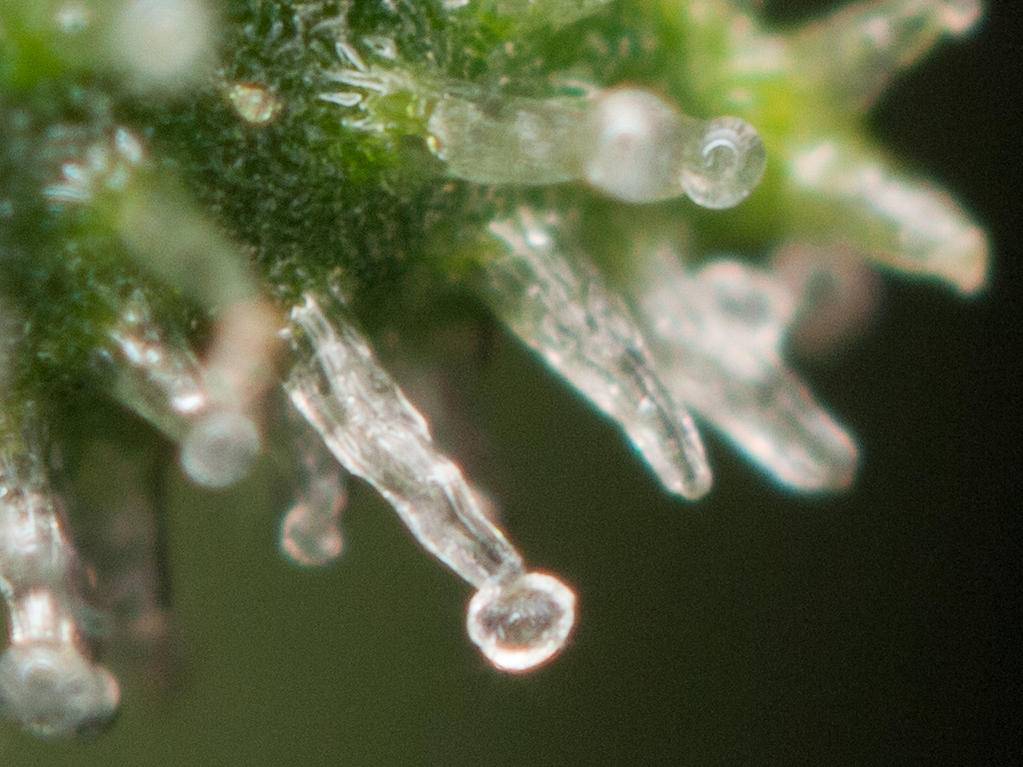
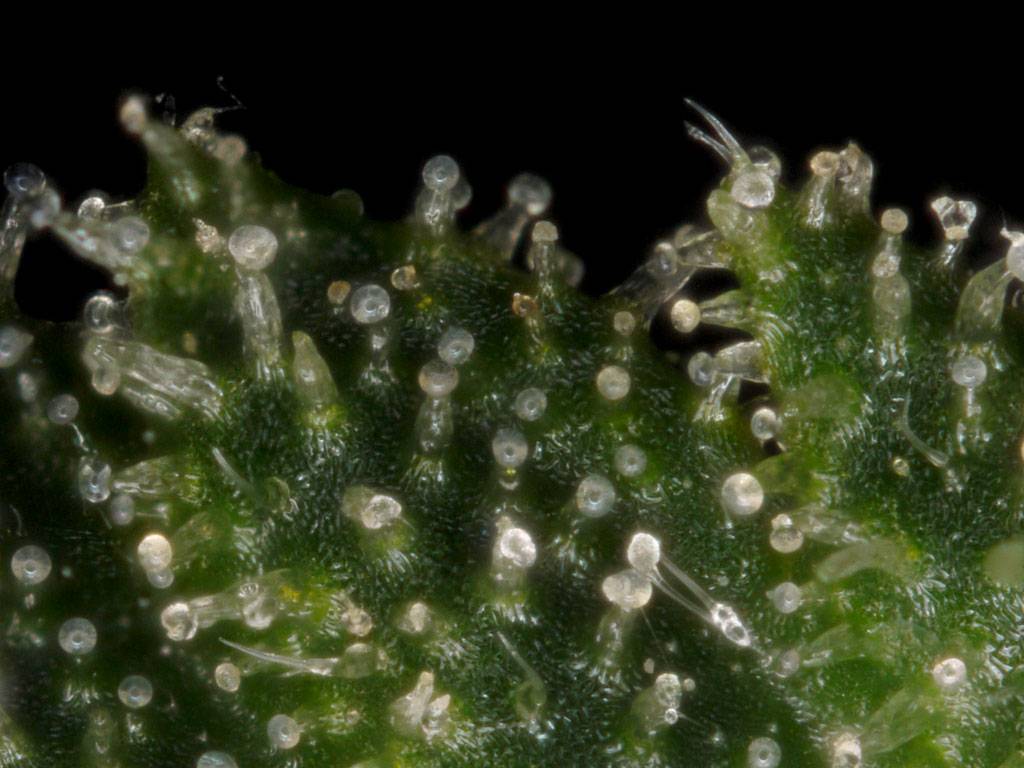
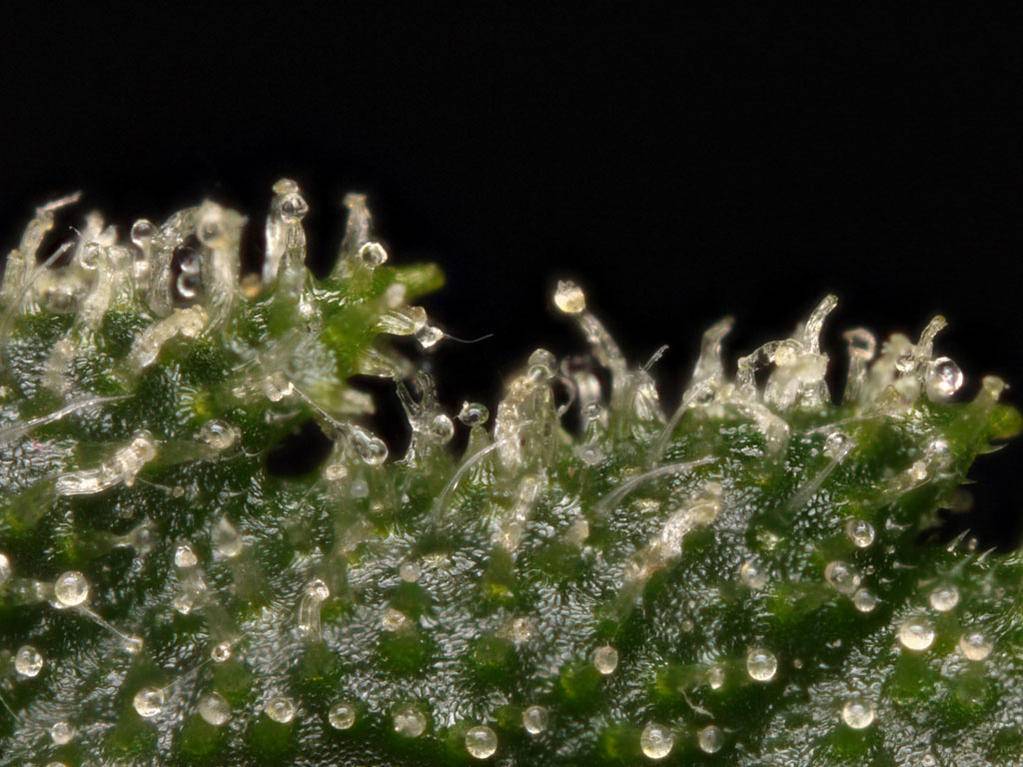
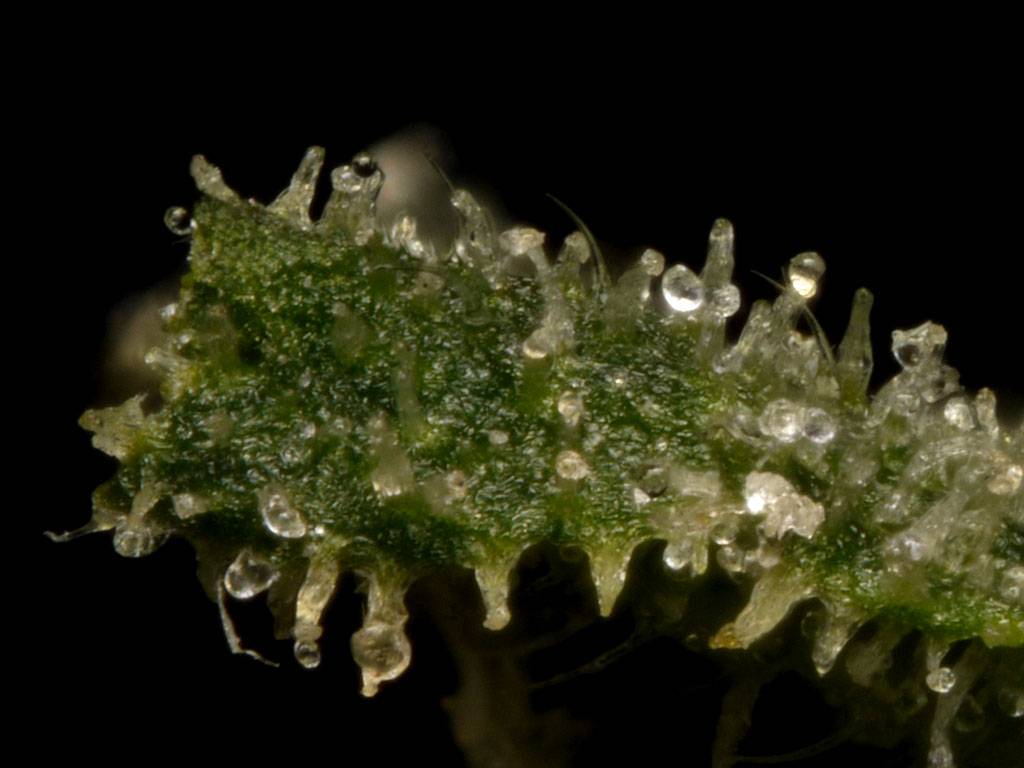
Hi guys just playing around this morning and thought I would share some image stacks I did real quick. Each of these finish shots consists of 5-10 frames combined. These are all critical mass at 55 days. Finally getting cloudy with just a few ambers peekin out here and there. 2 more weeks and what is hopefully my last schwag odyssey is over !
Thanks for lookin!
Thanks for lookin!
Wow! can you post some shots of your home made ringflash rig please? your shot are what I aspire to, 1st class. thanks.
MyGreenToe
Member
Yeah no prob. I'll have to straighten up my area and I'll get some shots of the whole rig for ya.
MyGreenToe
Member
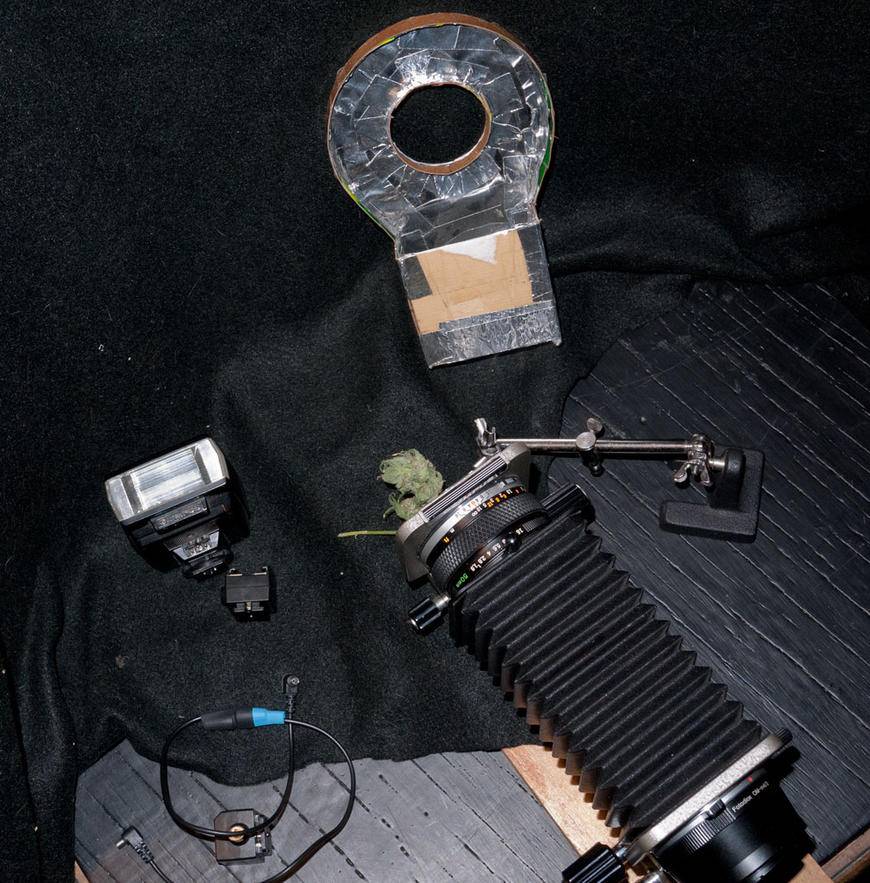
For those interested in my macro rig, here it is. This is everything I need to take my closeups, besides the camera body(I needed it to take these shots).
That includes:
-old Olympus bellows(very high quality, i snagged it for less than 50 bucks shipped on ebay)
-Olypmus 50mm lens to fit the bellows(this was a freebie, but is a common kit lens and can be had cheap)
-old manual flash, mine happens to be olympus(got it free with the 50mm lens and an old camera body that needs new seals, thanks Woodrow!)
-2 flash shoe to flash cable adapters plus a flash cable(maybe a buck or two ea on ebay)
-helping hands, has an alligator clip and a maneuverable arm, to hold my subject matter(had this forever, they are cheap at radio shack or harbor freight)
-adapter to fit my modern digital camera body onto the olympus bellows(20 bucks on amazon)
-improvised ringflash adapter made to fit the old flash, made from cardboard and tape, and lined with mylar and aluminum foil. a couple sheets of plain paper make a diffuser for it(shown here without it)
Here is all that stuff
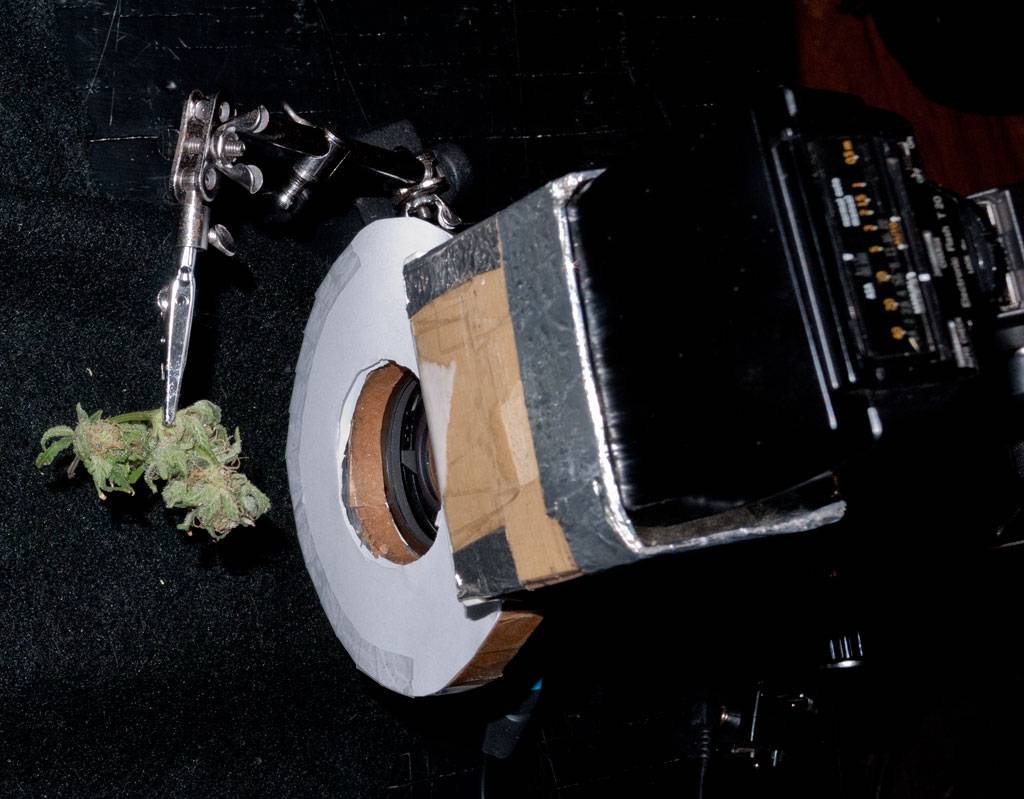
Here's the back side of the ring flash adapter. It all started with a hole made to snugly fit the lens i wanted to use it on(or in this case the bellows, which is the same size as the 50mm lens too, how convenient). I cut that hole in a piece of rigid cardboard and that piece became the base upon which i built the whole thing. I played around with a few designs for other purposes before i built this one for bud macros and my bellows.
Here's the front side of it, without the diffuser sheets mounted. The mylar and aluminum tape help reflect as much light as possible down into the ring.
Here's a side view where you can see how I had to modify it after the initial build. It was too deep. At this magnification range, you are working very very close, and I forgot about that when I built the ring, so it was basically throwing light out past the object I was focusing on. Bust out the utility knife and a few minutes later I had it thinned down to a size that works with my working distance. It does a good job of moving the light, and still allows me to get in as close as I can.
Here's the front side again, this time with the diffuser sheets taped in place. They even out the light and allow you to control a flash that is a bit too bright(add more sheets to block more light).
Here it is mounted on the front of the bellows.
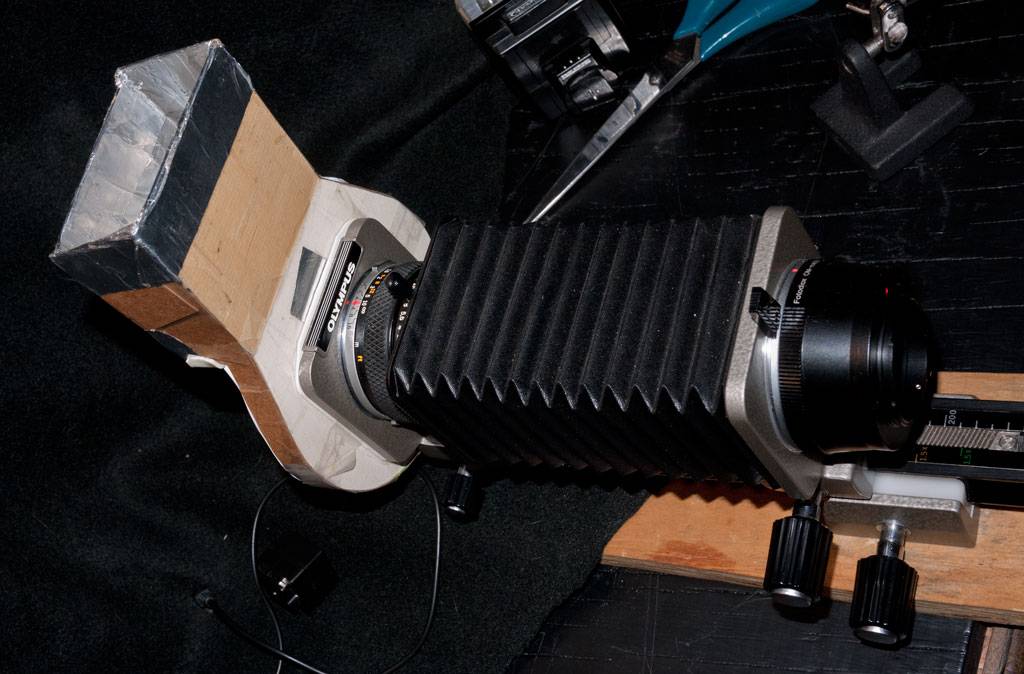
This is the whole setup, ready to shoot(minus camera body).
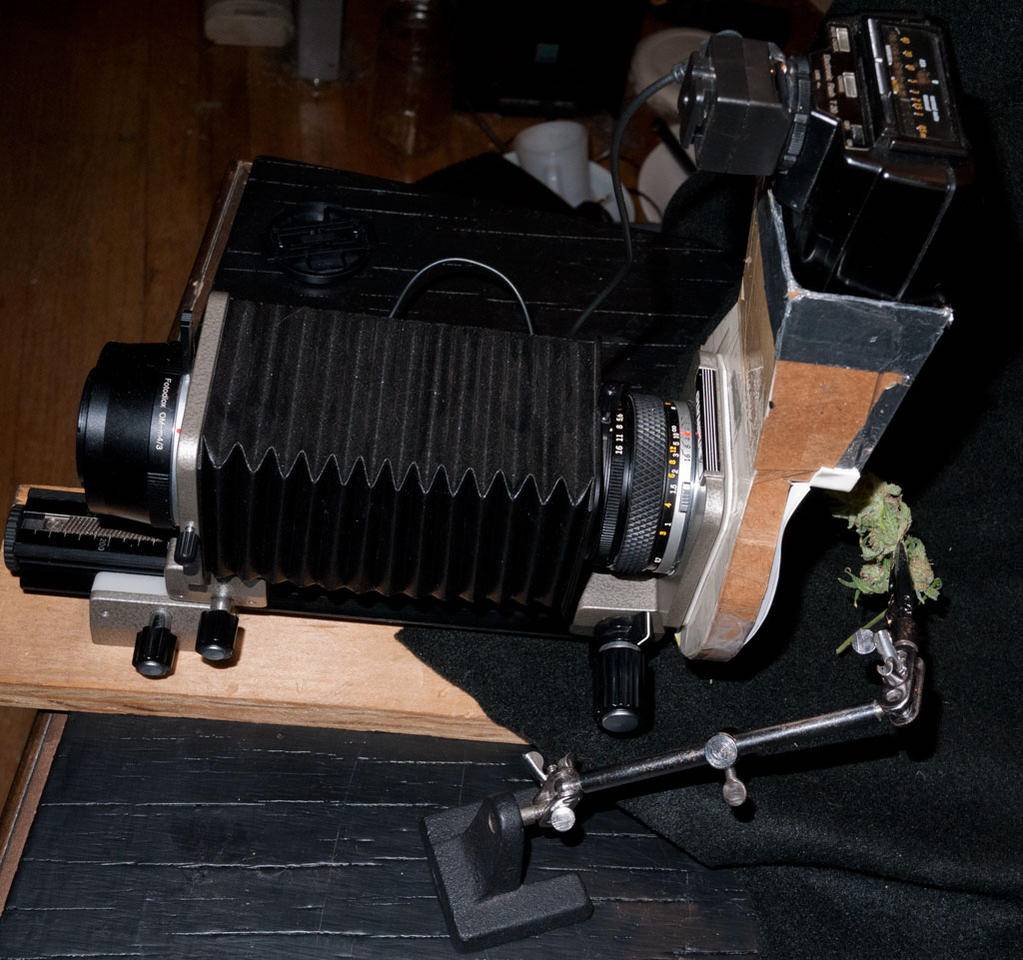
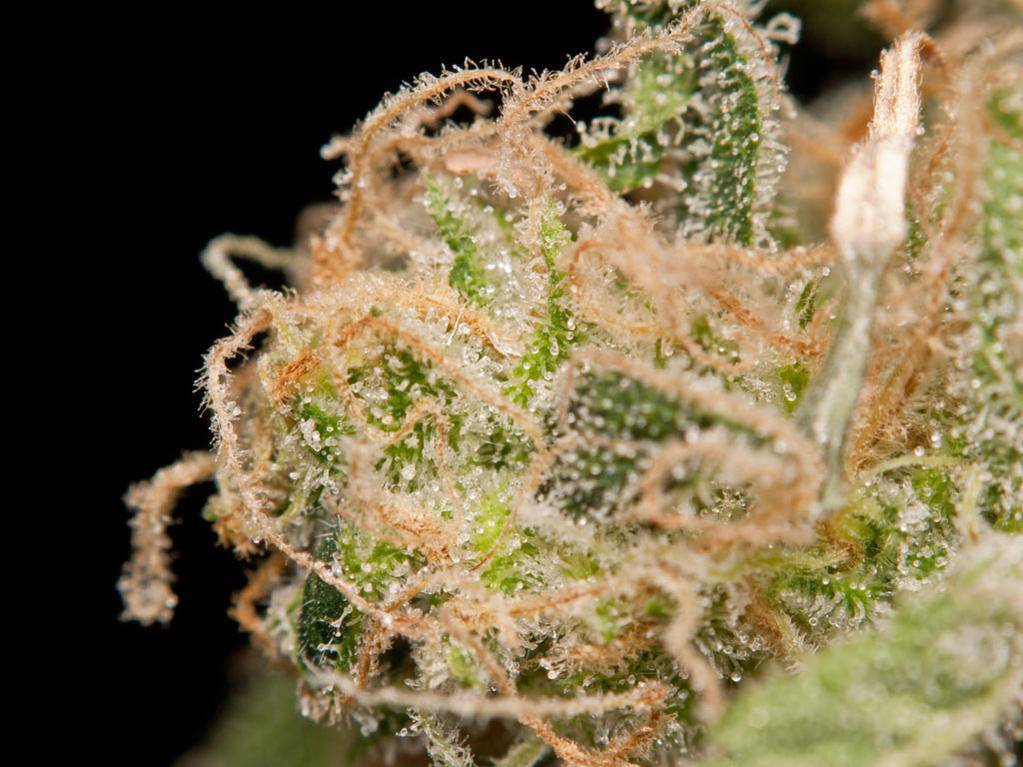
And here are some gratuitous shots of that bud used in the example shots above. This first one is a single shot, and the last two are stacks of 5-10 frames.
Ok that's all for today. Thanks for looking, and I hope that helped answer any questions.
Keep it Green
MGT
That includes:
-old Olympus bellows(very high quality, i snagged it for less than 50 bucks shipped on ebay)
-Olypmus 50mm lens to fit the bellows(this was a freebie, but is a common kit lens and can be had cheap)
-old manual flash, mine happens to be olympus(got it free with the 50mm lens and an old camera body that needs new seals, thanks Woodrow!)
-2 flash shoe to flash cable adapters plus a flash cable(maybe a buck or two ea on ebay)
-helping hands, has an alligator clip and a maneuverable arm, to hold my subject matter(had this forever, they are cheap at radio shack or harbor freight)
-adapter to fit my modern digital camera body onto the olympus bellows(20 bucks on amazon)
-improvised ringflash adapter made to fit the old flash, made from cardboard and tape, and lined with mylar and aluminum foil. a couple sheets of plain paper make a diffuser for it(shown here without it)
Here is all that stuff
Here's the back side of the ring flash adapter. It all started with a hole made to snugly fit the lens i wanted to use it on(or in this case the bellows, which is the same size as the 50mm lens too, how convenient). I cut that hole in a piece of rigid cardboard and that piece became the base upon which i built the whole thing. I played around with a few designs for other purposes before i built this one for bud macros and my bellows.
Here's the front side of it, without the diffuser sheets mounted. The mylar and aluminum tape help reflect as much light as possible down into the ring.
Here's a side view where you can see how I had to modify it after the initial build. It was too deep. At this magnification range, you are working very very close, and I forgot about that when I built the ring, so it was basically throwing light out past the object I was focusing on. Bust out the utility knife and a few minutes later I had it thinned down to a size that works with my working distance. It does a good job of moving the light, and still allows me to get in as close as I can.
Here's the front side again, this time with the diffuser sheets taped in place. They even out the light and allow you to control a flash that is a bit too bright(add more sheets to block more light).
Here it is mounted on the front of the bellows.
This is the whole setup, ready to shoot(minus camera body).
And here are some gratuitous shots of that bud used in the example shots above. This first one is a single shot, and the last two are stacks of 5-10 frames.
Ok that's all for today. Thanks for looking, and I hope that helped answer any questions.
Keep it Green
MGT
Ryu
Member
Nice update man, loving the budget ring flash, looks solid. Elegant setup for stacking and superb shots.
Do you ever get any problems from the ring flash moving through the stacks? It doesn't look like it but is this canceled out by the second flash or just not an issue at these high mags/ tiny steps?
I'm also wondering what your minimum repeatable step is with this rig?
Thanks, really enjoyed the pics
Sweet! that is some setup, thanks for posting it.
pezmasterelite
Member
Hi,
I really like your shots, I am amazed at what you can do, really makes me feel like I no little about photography. If you have any advice/info on the flash diffuser I would appreciate.
Thanks, excellent shots.
Peace
I really like your shots, I am amazed at what you can do, really makes me feel like I no little about photography. If you have any advice/info on the flash diffuser I would appreciate.
Thanks, excellent shots.
Peace
MyGreenToe
Member
Nice update man, loving the budget ring flash, looks solid. Elegant setup for stacking and superb shots.
Do you ever get any problems from the ring flash moving through the stacks? It doesn't look like it but is this canceled out by the second flash or just not an issue at these high mags/ tiny steps?
I'm also wondering what your minimum repeatable step is with this rig?
Thanks, really enjoyed the pics
Thanks Ryu. At this range, I noticed that the perspective shift between the first and last frame in a stack is more significant than you would think. The same thing goes for the flash movement through the frame. I havent noticed any problems yet. So long as the steps don't leave any gaps in the in focus area, the stacks come together just fine. I'll get halos and persepective problems if my steps are too big. Zerene Stacker does a great job of morphing everything into an exact fit when I get it right while shooting.
As to what my step size is, I haven't a clue. I've been freehanding it all so far. I have my eyes on a motorized rail setup that can control the whole operation for me with perfect steps. For the cost of a decent macro lens it takes alot of the guesswork out for the photographer:
http://www.cognisys-inc.com/catalog...d=122&osCsid=55289bba05abb41734466910f84ee737
Thanks for stoppin through!
MGT
MyGreenToe
Member
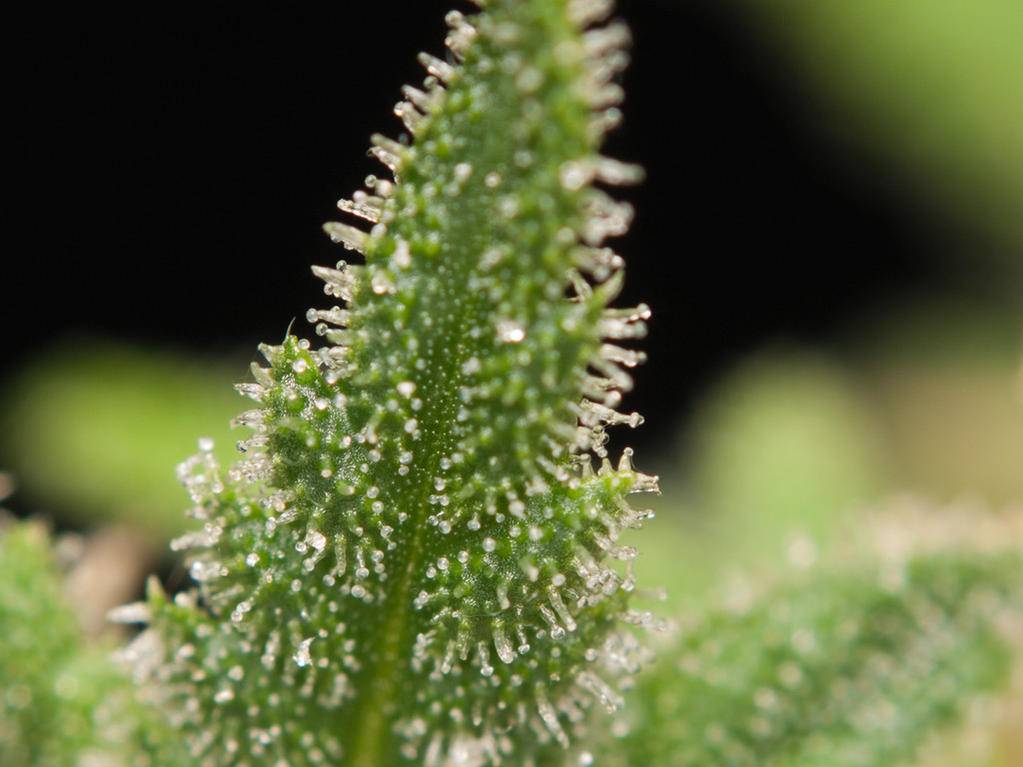
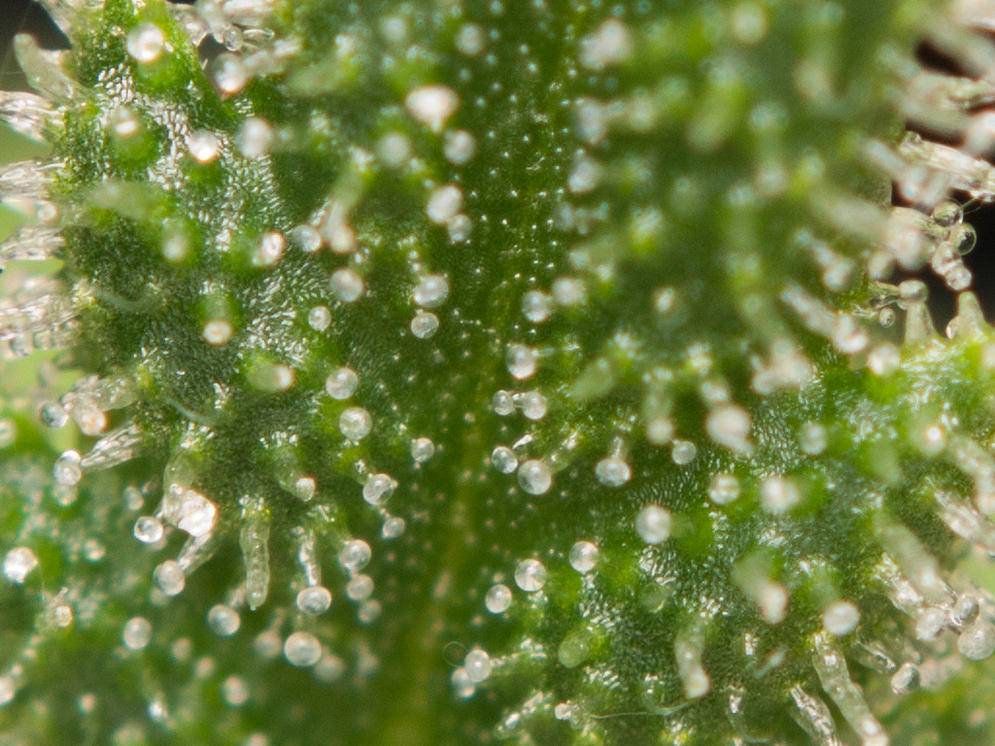
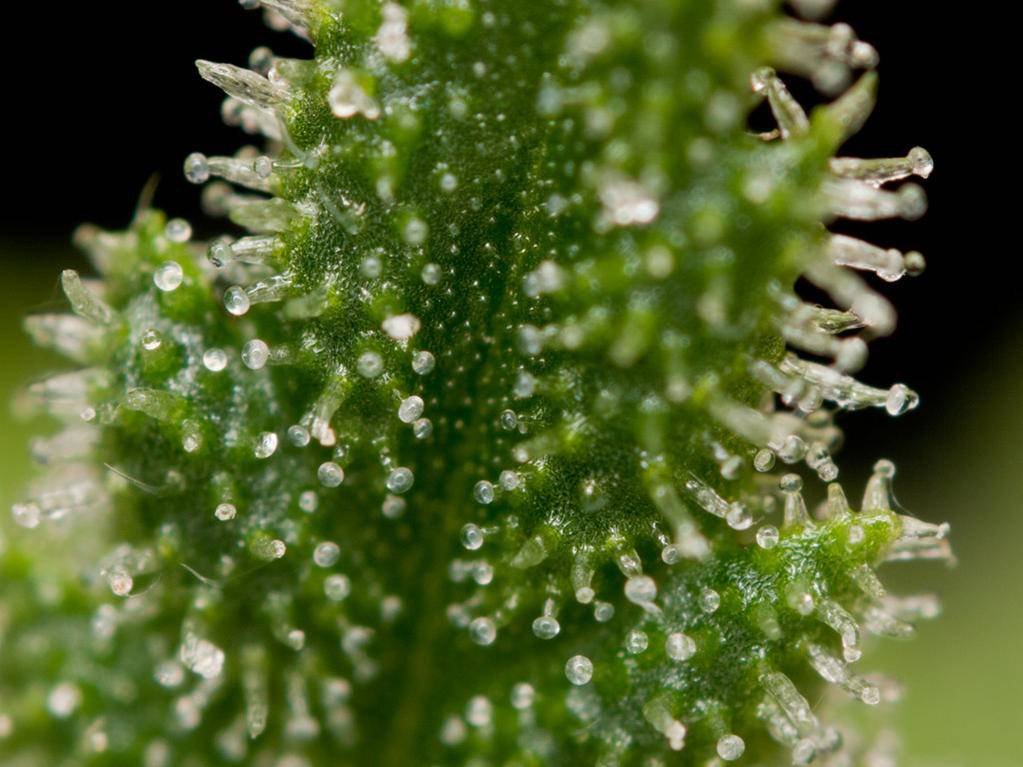
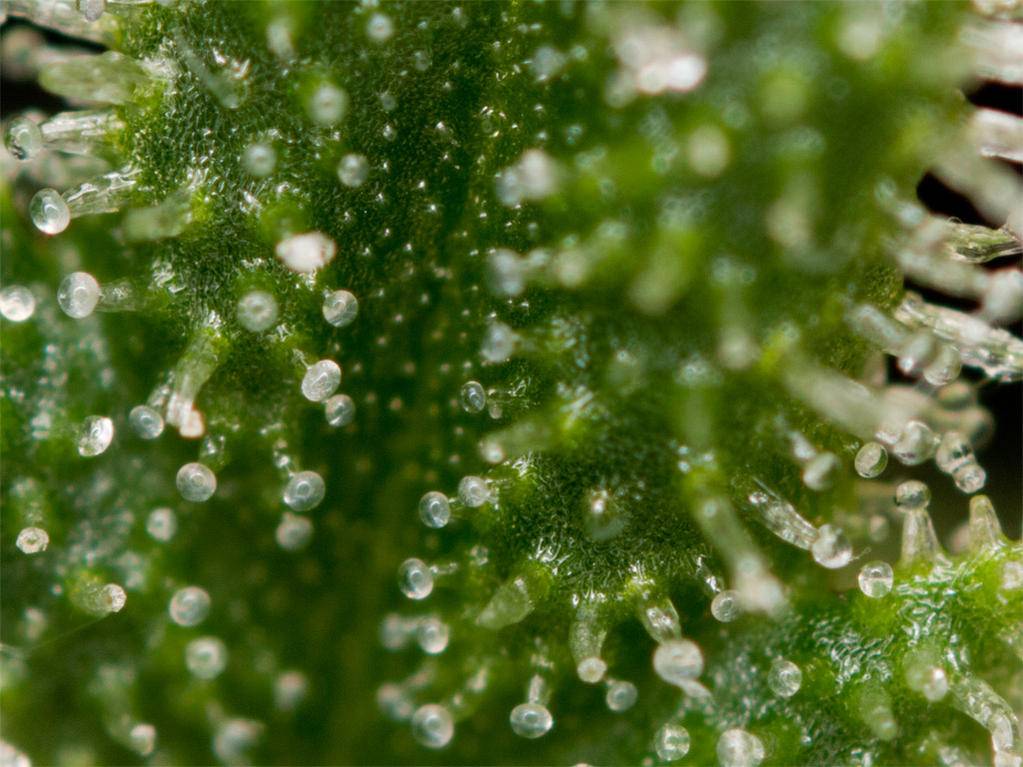
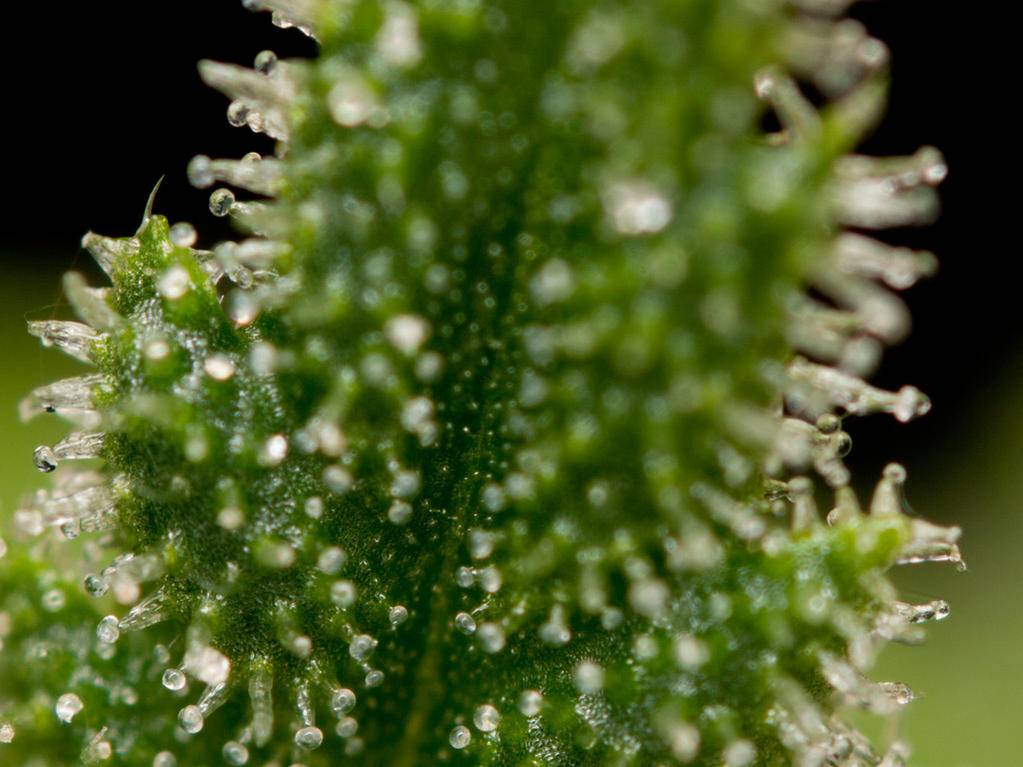
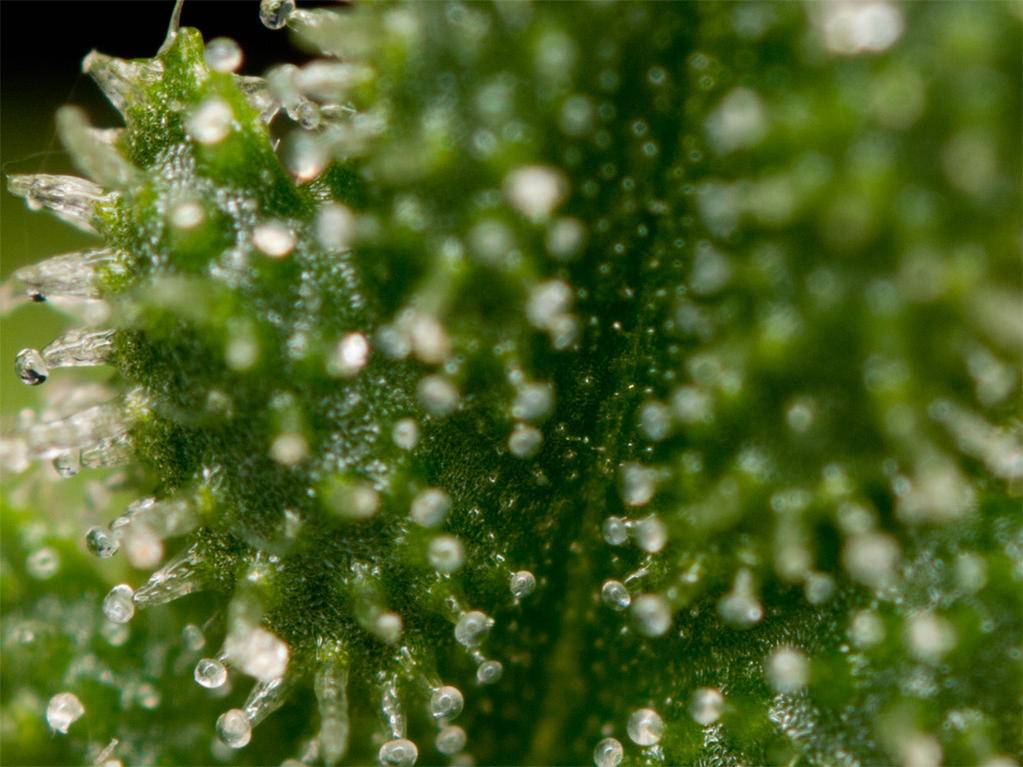
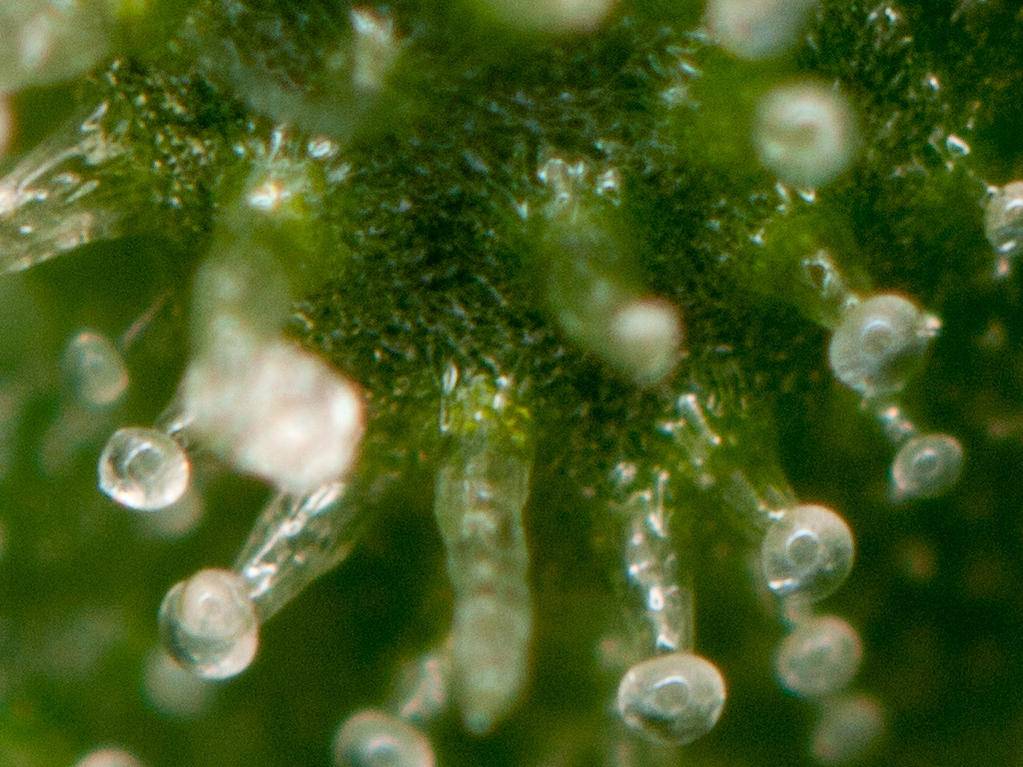
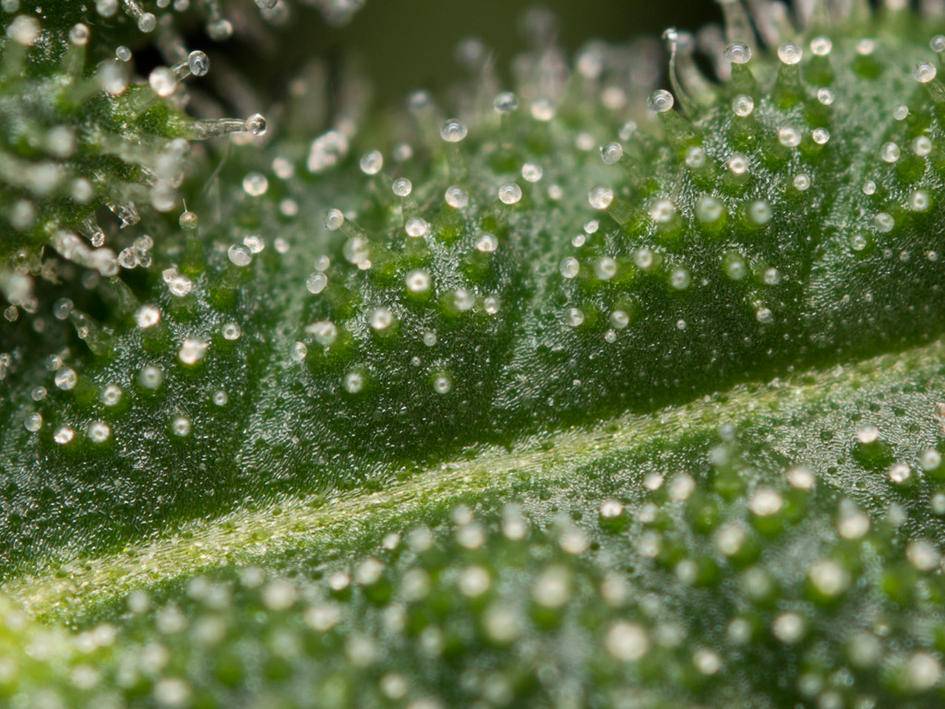
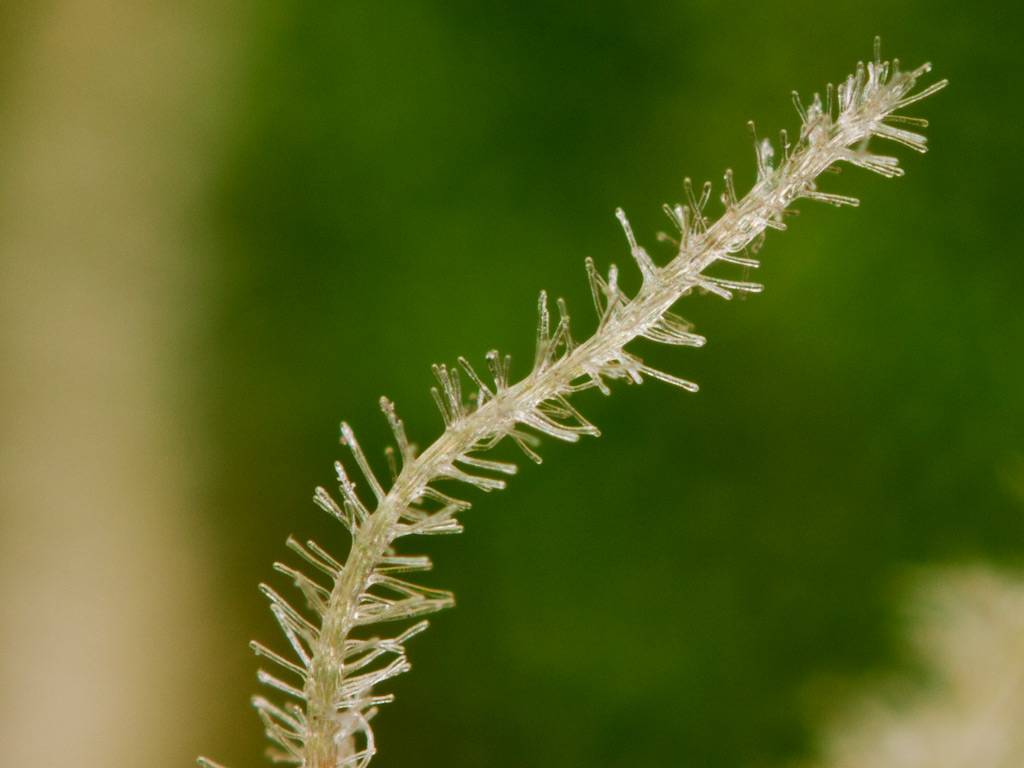
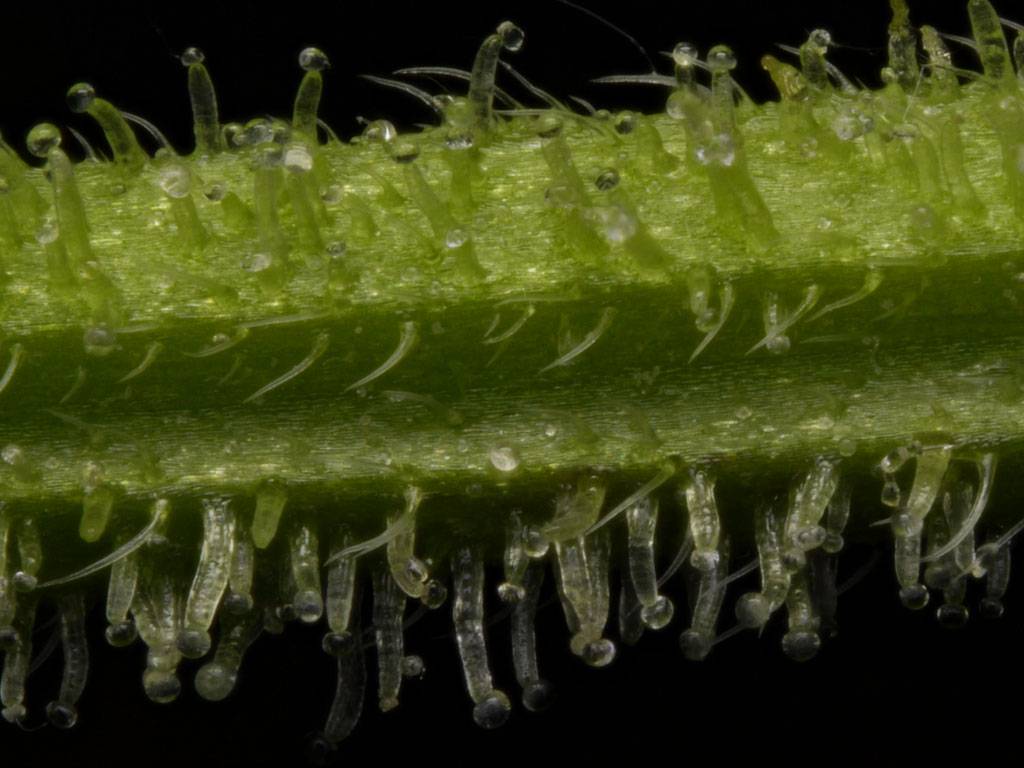
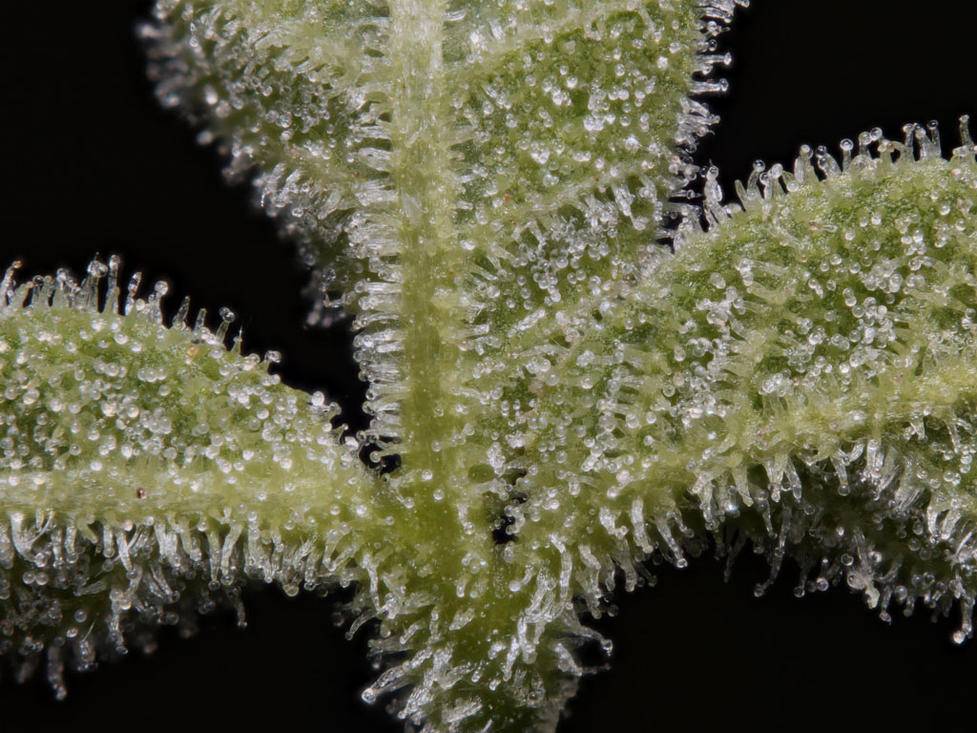
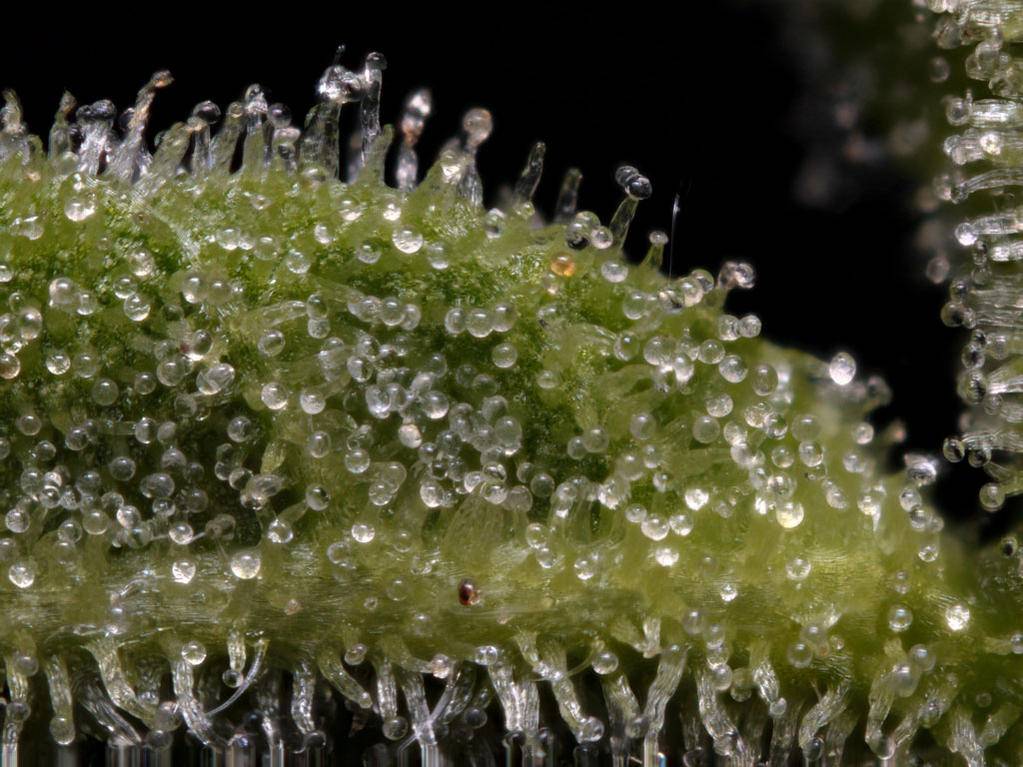
Here are 3 stacks I threw together this afternoon. The critical mass is about at 60 days, showing mostly cloudy, no milky, just a few amber. Here's a shot of the trich covered stem of a frosty fan leaf, followed by shots of the leaf itself.
That's it for now.
Keep it Green
MGT
That's it for now.
Keep it Green
MGT
