
HempAlchemist
Member
Figure I would do a write up on a simple technique that can help people maintain a steady supply of clones, or prevent you from throwing away cuts that you dont have room for. First off, i must give credit to I.M. Boggled for the original thread in which I modified for my needs. Without that thread I would have never gotten the idea to modify and I would still be throwing away handfuls of cut every two weeks. So lets get down to it!
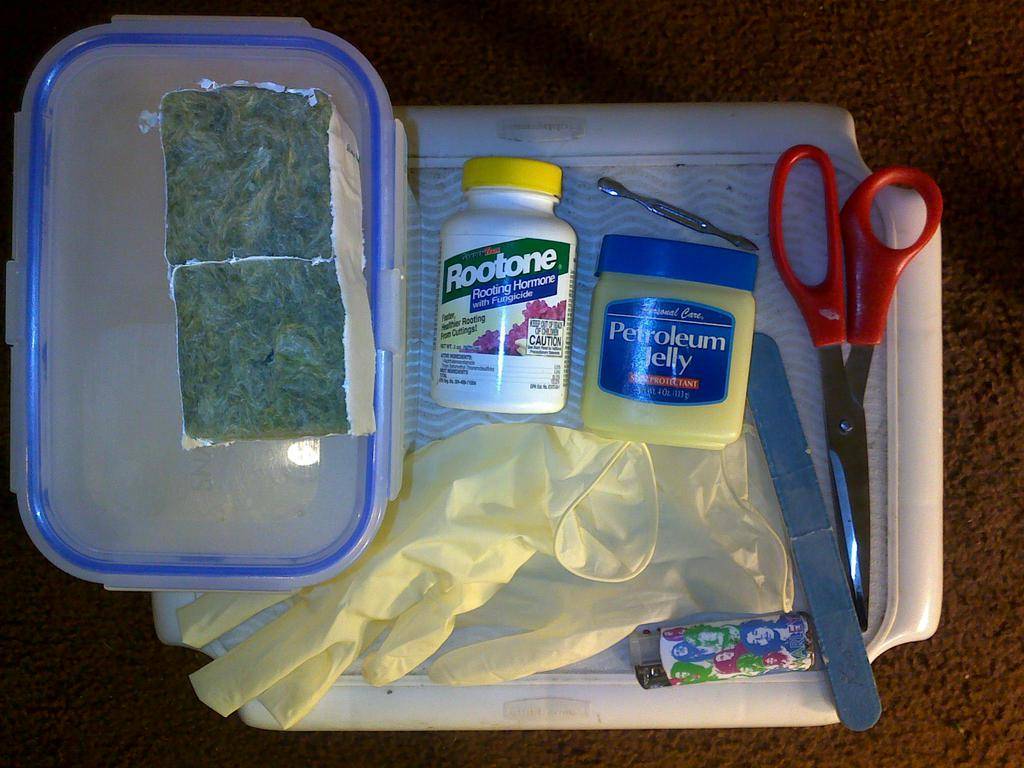
First off lets get everything setup so that all your tools are in hands reach. What you will need is:
1 Rooting compound. In this demo I used Rootone powder and mixed it with petrolium jelly to make a thick paste that would stick well to my cuttings. But anything will do so pick your favorite and get busy.
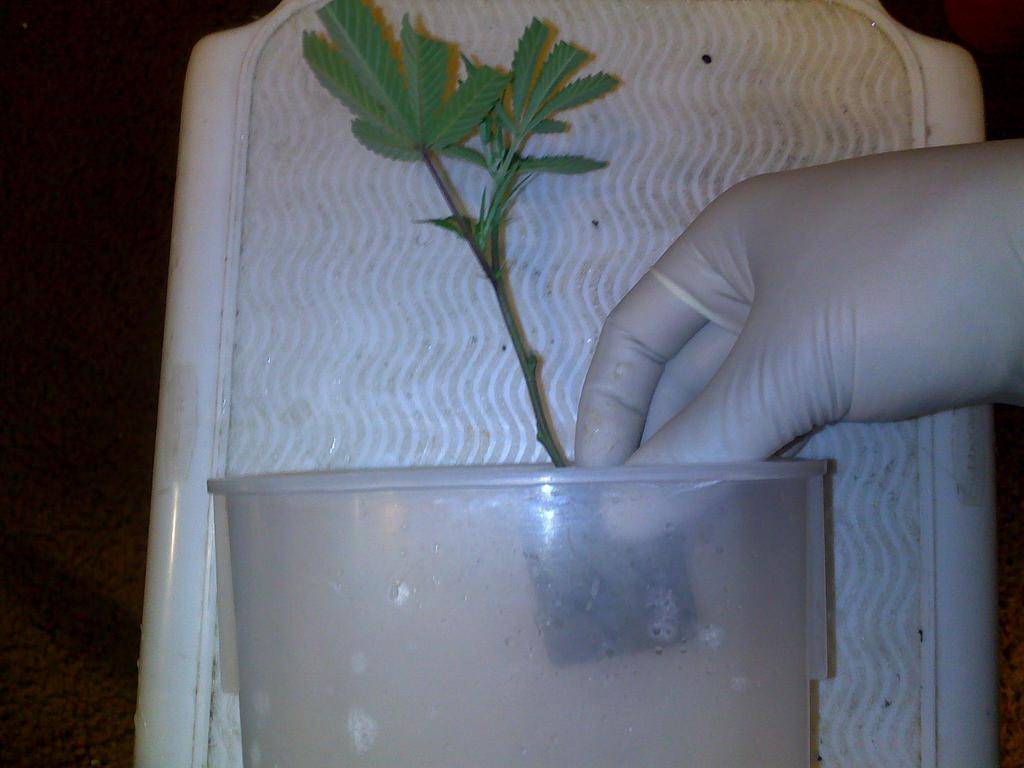
2. Gloves. rooting compound, along with most other chemicals, should not be handled with bare hands. Safety first!
3. Starter plugs. For this demo, I will be using rockwool cubes but any starter plug should do.
4. Scissors. any clean, sharp pair will do.
5. Plastic ''tupperware'' like container. Anything will do as long as its food grade plastic and can be hold your cuts as well as fit into your fridge. Poke a couple of holes in the lid to allow air exchange.
6. Lighter (optional). I use fire to clean my blades, alcohol will work as well. bottom line keep everything clean!
7. Clean, unused nail file (optional). I use this to score my cuttings before they get treated with rooting compond. this helps create more surface area for roots to grow from.
8. Stir stick(optional). If you make a paste like I did this is very helpful to mix everything up with.
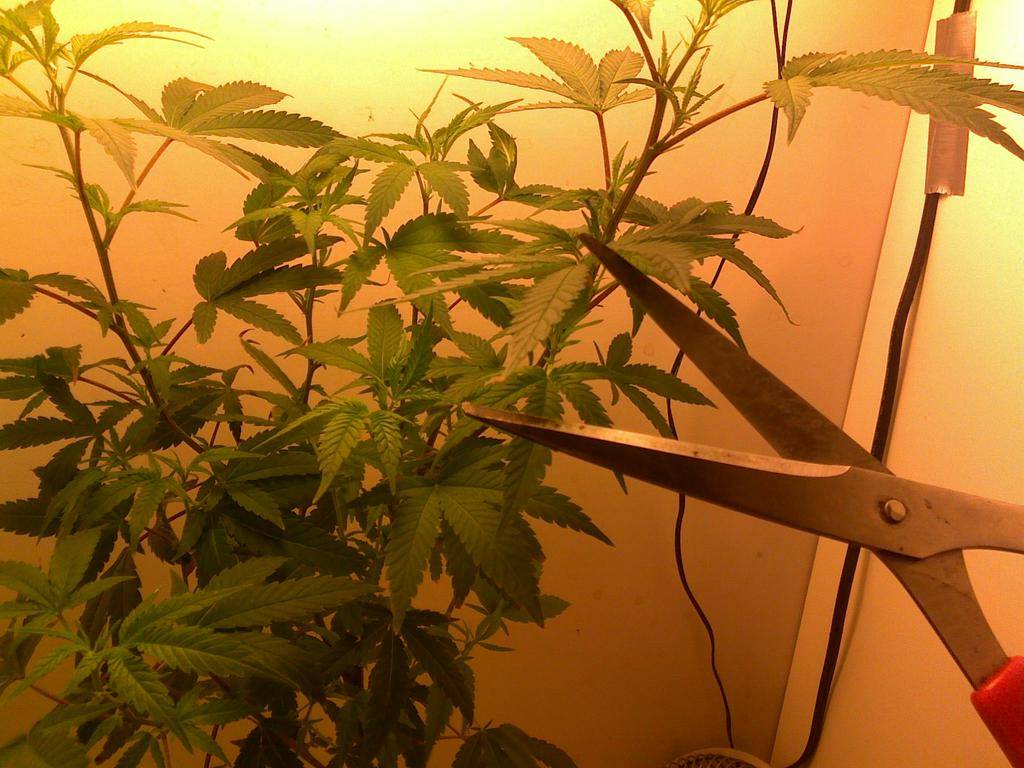
Now that we have all the tools that we will need lets select our first cut. One thing to keep in mind with this technique, is that you must select your best cuts for this process. This is true with any cloning technique, but this one is a little more stressfull than most, so you want the healthiest cuts that you can get off your mom.
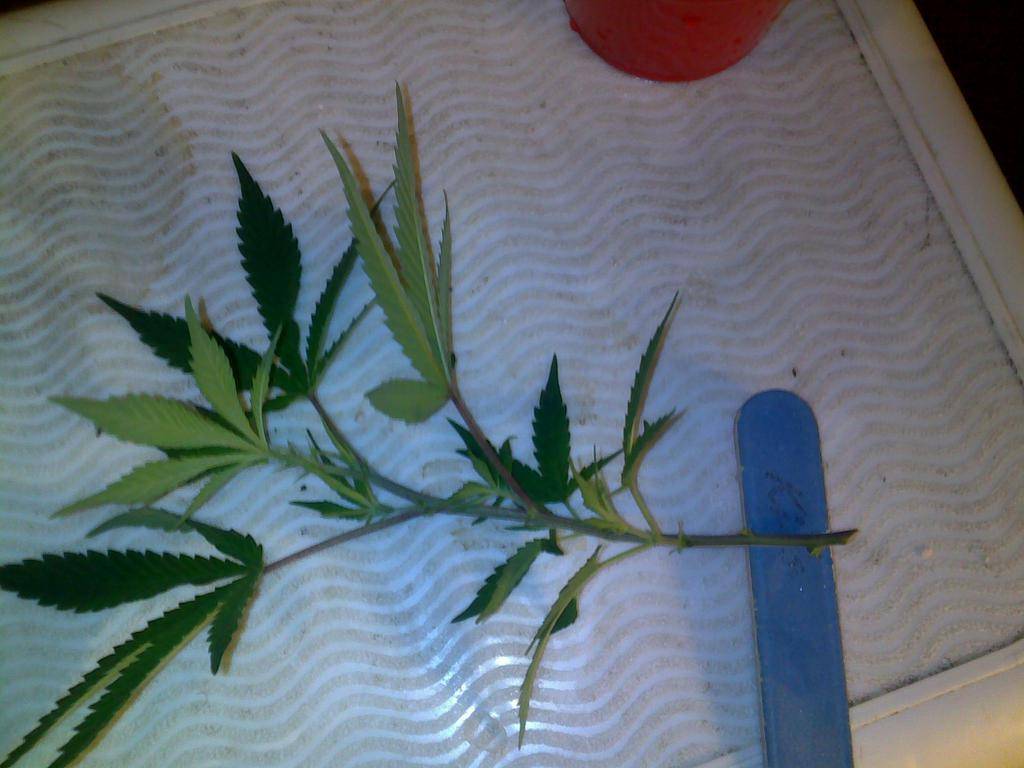
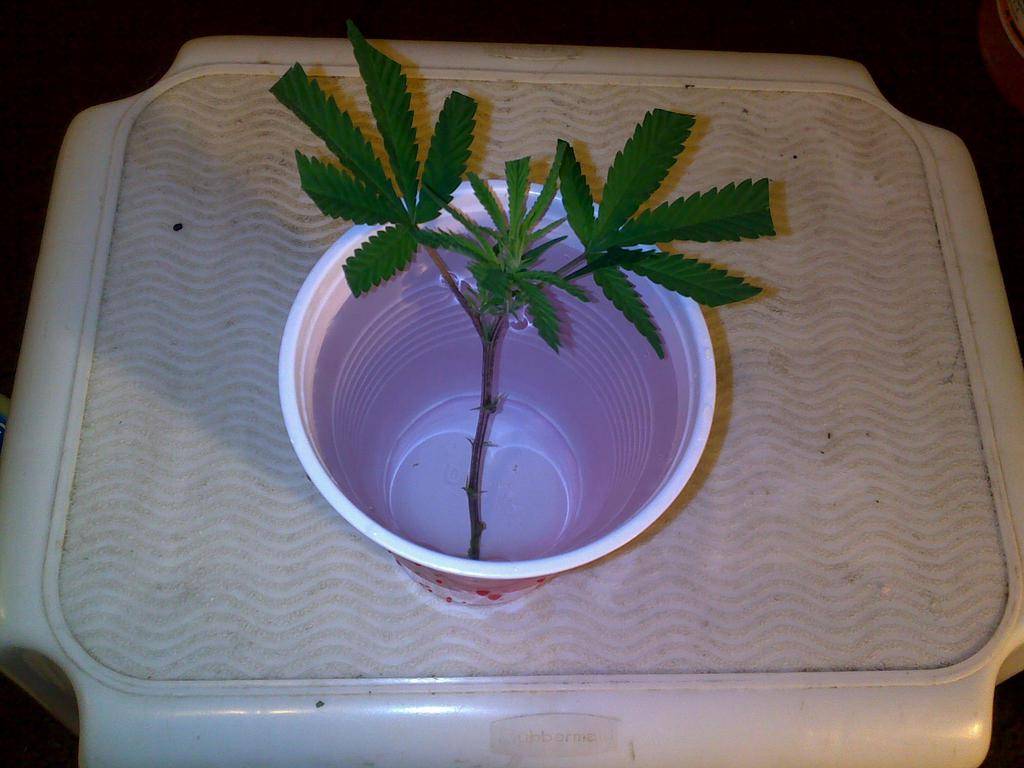
Next step is to clean your cuts. I like to score the cuts with the nail file to create more surface area for the roots to grow from. I will then trim everything off the cut except for the growing tip and one set of fan leaves. The fan leaves should be trimmed down a little bit to slow down the transpiration of water through the leaves. This will help prevent the cuts from drying out as well as reducing the chances of mold. I then place my cut into a cup of luke warm tap water. for this technique, I like tap water because of the chlorine. this will help clean the cuts of any mold spores before they get a chance to grow. Any cuts that show any kind of mold growth should not be used for this. This cant be stressed enough, so if you are having a mold problem with your mother plants, it must be taken care of before trying this.
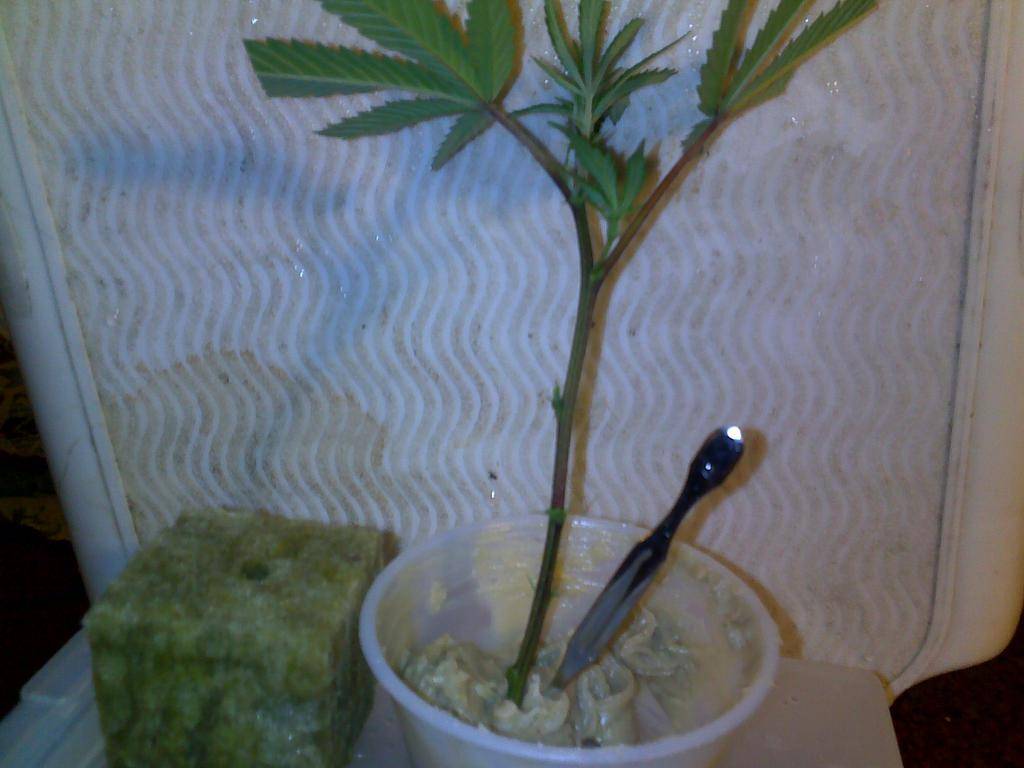

After all of my cuts are in water, I now prep my rockwool cubes with 5.5 pH'ed water. Make sure that cubes are completely soaked and then the excess water shaked out. Cubes should feel wet in your hand, but not be dripping. Your hands should still be dry after handling the cubes. Now dip your cuts into your rooting compound and place into your cubes.
Once all of your cuts are in cubes, place your cubes into your container and then place you container into your fridge. Your fridge should be cold, but not freezing, around 40*F/4-5*C. It is important to check on your cuts within the first few hours to see if you are having condensation in your tub. If you do, then your cubes were too wet going into the tub. Just wipe up any moisture in the tub and place back into the fridge. Your tubs should be checked for moisture a couple of times a week and if found should be wiped dry. If maintained well, your cuts should last for about 4-6 weeks in stasis. I have had cuts last 10 weeks, but most wont and those that do look really bad for a week or two.
Once your ready to use your cuts, they need to be slowly aclimated to your growroom temps. I do this by pulling the tub out the day before I plan on using my cuts. I will let them sit out at room temp for about 12-24 hours before they go into the grow room. I find its best to put them in the growroom about 3-6 hours before the lights turn off. That way the first day under the lights isnt so stressful and gives them a lil bit more time to get up to temp. I normally see roots within a week of placing them under the veg lights. After they have roots its fair game on what you do. I let mine veg till they reach the size I want, but if you have height issues, they can be flowered as soon as they have roots.
Couple of tips I've learned doing this:
*Water in the tub is a big no-no and must be cleaned out whenever its noticed.
*If you notice your leaves starting to become transparent then you have either have too much water in your tub, and/or your fridge is too cold. The cells in the leaves are dieing. This is also an indicator that the cuts have been in stasis too long if everything else is kept in check.
*Date and label your tubs, good record keeping is the key to success.
*Don't waste your time with spindly, weak cuts. they wont survive more than a few weeks.
*Mold can still grow in the tubs, albiet very slowly. keep an eye on your cuts for mold during your moisture checks. if spotted early, you can salvage a tub by just removing the infected cuts, but if your not paying attention, you can loose a whole tub.
That's basicly it everyone. I hope this helps. Please post any questions/comments/issues you might have and i'll try my best to answer them all
First off lets get everything setup so that all your tools are in hands reach. What you will need is:
1 Rooting compound. In this demo I used Rootone powder and mixed it with petrolium jelly to make a thick paste that would stick well to my cuttings. But anything will do so pick your favorite and get busy.
2. Gloves. rooting compound, along with most other chemicals, should not be handled with bare hands. Safety first!
3. Starter plugs. For this demo, I will be using rockwool cubes but any starter plug should do.
4. Scissors. any clean, sharp pair will do.
5. Plastic ''tupperware'' like container. Anything will do as long as its food grade plastic and can be hold your cuts as well as fit into your fridge. Poke a couple of holes in the lid to allow air exchange.
6. Lighter (optional). I use fire to clean my blades, alcohol will work as well. bottom line keep everything clean!
7. Clean, unused nail file (optional). I use this to score my cuttings before they get treated with rooting compond. this helps create more surface area for roots to grow from.
8. Stir stick(optional). If you make a paste like I did this is very helpful to mix everything up with.
Now that we have all the tools that we will need lets select our first cut. One thing to keep in mind with this technique, is that you must select your best cuts for this process. This is true with any cloning technique, but this one is a little more stressfull than most, so you want the healthiest cuts that you can get off your mom.
Next step is to clean your cuts. I like to score the cuts with the nail file to create more surface area for the roots to grow from. I will then trim everything off the cut except for the growing tip and one set of fan leaves. The fan leaves should be trimmed down a little bit to slow down the transpiration of water through the leaves. This will help prevent the cuts from drying out as well as reducing the chances of mold. I then place my cut into a cup of luke warm tap water. for this technique, I like tap water because of the chlorine. this will help clean the cuts of any mold spores before they get a chance to grow. Any cuts that show any kind of mold growth should not be used for this. This cant be stressed enough, so if you are having a mold problem with your mother plants, it must be taken care of before trying this.
After all of my cuts are in water, I now prep my rockwool cubes with 5.5 pH'ed water. Make sure that cubes are completely soaked and then the excess water shaked out. Cubes should feel wet in your hand, but not be dripping. Your hands should still be dry after handling the cubes. Now dip your cuts into your rooting compound and place into your cubes.
Once all of your cuts are in cubes, place your cubes into your container and then place you container into your fridge. Your fridge should be cold, but not freezing, around 40*F/4-5*C. It is important to check on your cuts within the first few hours to see if you are having condensation in your tub. If you do, then your cubes were too wet going into the tub. Just wipe up any moisture in the tub and place back into the fridge. Your tubs should be checked for moisture a couple of times a week and if found should be wiped dry. If maintained well, your cuts should last for about 4-6 weeks in stasis. I have had cuts last 10 weeks, but most wont and those that do look really bad for a week or two.
Once your ready to use your cuts, they need to be slowly aclimated to your growroom temps. I do this by pulling the tub out the day before I plan on using my cuts. I will let them sit out at room temp for about 12-24 hours before they go into the grow room. I find its best to put them in the growroom about 3-6 hours before the lights turn off. That way the first day under the lights isnt so stressful and gives them a lil bit more time to get up to temp. I normally see roots within a week of placing them under the veg lights. After they have roots its fair game on what you do. I let mine veg till they reach the size I want, but if you have height issues, they can be flowered as soon as they have roots.
Couple of tips I've learned doing this:
*Water in the tub is a big no-no and must be cleaned out whenever its noticed.
*If you notice your leaves starting to become transparent then you have either have too much water in your tub, and/or your fridge is too cold. The cells in the leaves are dieing. This is also an indicator that the cuts have been in stasis too long if everything else is kept in check.
*Date and label your tubs, good record keeping is the key to success.
*Don't waste your time with spindly, weak cuts. they wont survive more than a few weeks.
*Mold can still grow in the tubs, albiet very slowly. keep an eye on your cuts for mold during your moisture checks. if spotted early, you can salvage a tub by just removing the infected cuts, but if your not paying attention, you can loose a whole tub.
That's basicly it everyone. I hope this helps. Please post any questions/comments/issues you might have and i'll try my best to answer them all

")

