What's new

Kaskadian's 150w HPS Growbox

Kaskadian

Active member
Veteran
Evening everyone,

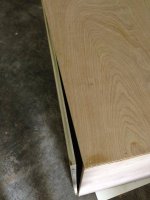
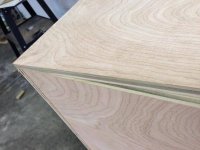
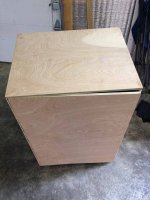
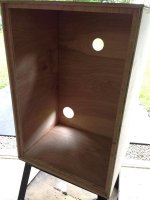
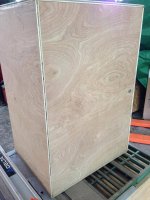
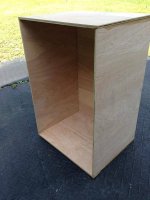
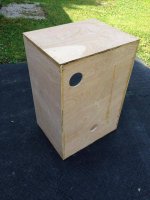
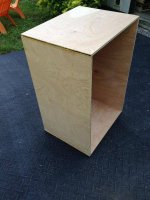
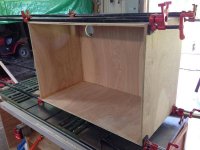
I've got another quick update for you all. Today I glued & nailed the back, sides, top, and bottom. After gluing & nailing the parts, I used homemade vices to squeeze the boards tight to assist in the glue setting. I still need to made a couple of small cuts, but it's starting to come together. You'll notice a few dark marks on the wood in this state; this is primarily drying wood glue. I will be sanding everything down to remove any imperfections, dirt/glue, etc. Not long and I will begin sanding, staining/painting, and afterword I will be getting the goodies installed.

Cheers,
Kas
 

Attachments

  • p1.jpg
    p1.jpg
    60.2 KB · Views: 8
  • p2.jpg
    p2.jpg
    51.9 KB · Views: 7
  • p3.jpg
    p3.jpg
    66.4 KB · Views: 9
  • p4.jpg
    p4.jpg
    59.8 KB · Views: 5
  • p5.jpg
    p5.jpg
    56.4 KB · Views: 6

Kaskadian

Active member
Veteran
Loving the craftsmanship and the plywood. Do you know what wood the face of the plywood is made from?

Thanks for the kind words!

I believe the face of the wood is made from birch. I'm not 100% sure (pretty sure though), but I will confirm next time I stop by the hardware store.

:tiphat:

*Edit*
The wood face is indeed birch.
 

Attachments

  • birch.jpg
    birch.jpg
    43 KB · Views: 7
Last edited:

Kaskadian

Active member
Veteran
I cut the basic outline for the door today. I've decided that this door will actually close up inside of the cabinet to minimize size & help further reduce light/sound leaks. In addition to closing inside of the cabinet, the door will also use internal hinges and I will be building a frame around the opening that the door will back up against (internal). I am also installing a locking system that will not only help keep the door shut from everyone but my wife & myself, but also help the door to be held tightly in place to avoid any cracks letting light out. This is all done to keep things stealthy. The door still needs to be sanded to get a perfect fit, but the wheels are in motion. I will get the internal frame glued/nailed today. Tomorrow I will drill the holes for all of the hardware (fans, cooltube, hinges, lock, etc), and should be able to get started sanding/painting/staining. I will also be installing trim for all the edges, places with nail holes, etc.

Unfortunately I've not had enough time to put multiple hours into this cabinet daily; because of this progress is slow. Stay tuned. :)
 

Attachments

  • d1.jpg
    d1.jpg
    47 KB · Views: 9
  • d2.jpg
    d2.jpg
    48.7 KB · Views: 7
  • d3.jpg
    d3.jpg
    57.4 KB · Views: 6

Kaskadian

Active member
Veteran
Hey everyone,

This may be the last update for a few days. Today was a decent day for progress; I drilled the holes for the door handle, lock, and installed the internal door frame. The door will be backing up to the internal frame and there will be additional light proofing such as foam between the door & frame. I mentioned before that I plan to install internal hinges; I may have to re-evaluate how I want to do that. It's definitely doable with the internal frame, but I may just opt for external hinges for simplicity sake.

Next up... sanding out imperfections, and staining/painting.

Cheers,
Kas
 

Attachments

  • 53.5 KB · Views: 11
  • lock1.jpg
    lock1.jpg
    43.4 KB · Views: 4
  • frame1.jpg
    frame1.jpg
    42 KB · Views: 6
  • Frame2.jpg
    Frame2.jpg
    31.9 KB · Views: 6
  • door2.jpg
    door2.jpg
    59.4 KB · Views: 5

Kaskadian

Active member
Veteran
Looks VERY NICE AND CLEAN!

im waiting for first grow in this cab :)

Thanks! It's a work in progress my friend. I'll be sure to post up a grow log when I get everything finished.

Thanks again to everyone who's stopped by. :tiphat:
 

Latest posts

Latest posts

Top