I was always under the impression CFLs were best placed horizontally?

You are using an out of date browser. It may not display this or other websites correctly.
You should upgrade or use an alternative browser.
You should upgrade or use an alternative browser.
diggin' the rabbit burrow
- Thread starter NKOTS
- Start date
this is the ready hood, still working on remote ballasting though.
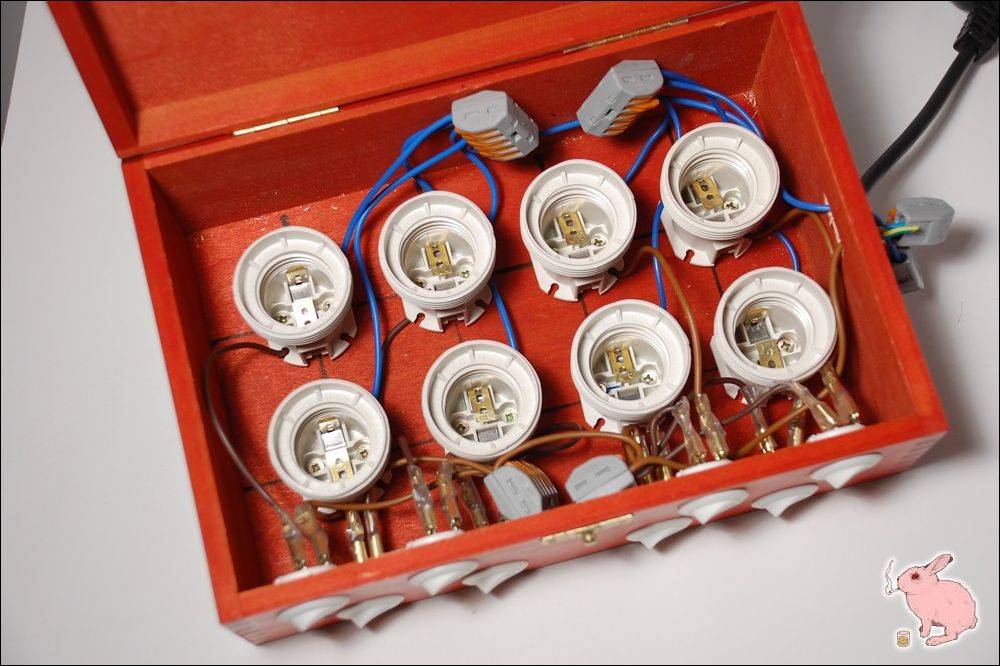
what we're looking on is 8 x 23W = 184W CFL.
do you guys think it is enough for this area (1.45 sqf / 0.13 sqm)?
Wow, 184W for this space ? Man, this is huge ! If you handle the heat problem, your plants will explode under that light. They don't need so much light on veg, especially when they are small, but hey, you can't have to much light

Last edited:
sgap thx a lot for your light-trap suggestion. do you really think my 90 degree tube turns will block the airflow? shit, hope not!
Diminish not blocking. However , as you have remote ballasted the cfl , you will have less heat = lower temps= better environment . With more light you will get more photosynthesis , good supply of CO2 is as important as everything else.
Good things started in my cab when i oversized my passive intake leaving everything else the same, never looking back again
Peace S

Love the CFL hood 
Hi folks. exploziv and doji, thanks for visiting the burrow!
hempfield glad to hear your comment, i also think too much light is never too bad. However not sure about venting efficiency, we'll see.
Anyway - why so high wattage? Well i mainly want this to be a veg cab and then i do not need that many bulbs, but i would like to be able to flower in here as well, occasionally. For that more Watts will be beneficial.
In the design phase i took it into account and my intention is to have each bulb 'switchable' on the level of remote ballasts. i will show you once this gets done.
Now, i received some PMs and requests to share the multi-CFL-hood construction step by step. When the whole lighting system is in place i will share all that in the Lighting Forum but for now here are key highlights:
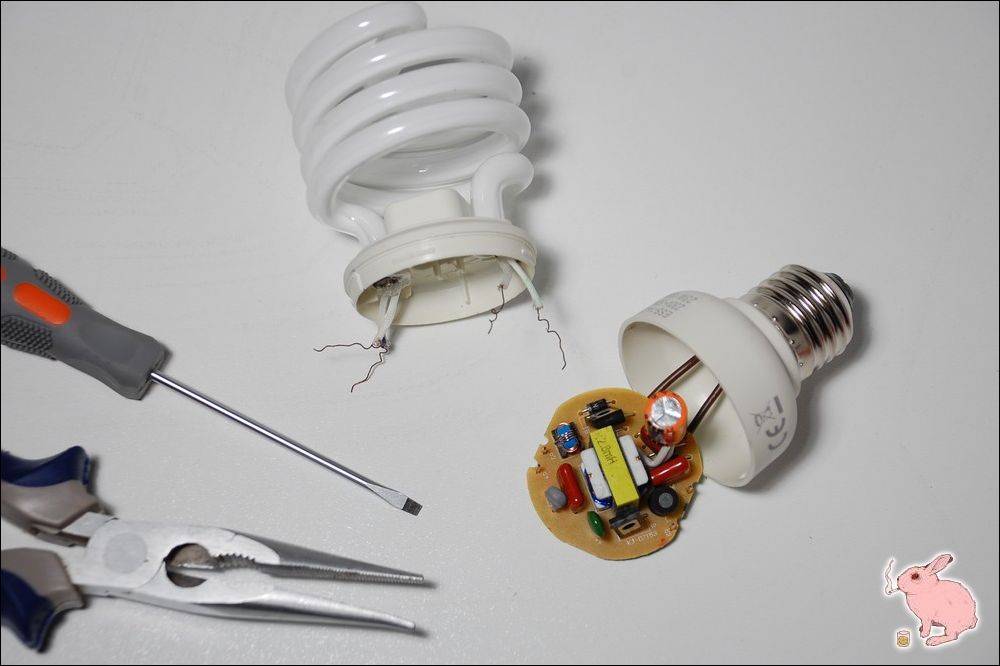
1. Split the CFL into 2 parts with a screwdriver
3. Detach the little wires and sign their numbers as it will be important to attach the ballast back to the bulb later on (also good to mark the wires with colour. i used blue, red, green & white as you will notice in the 3rd picture)
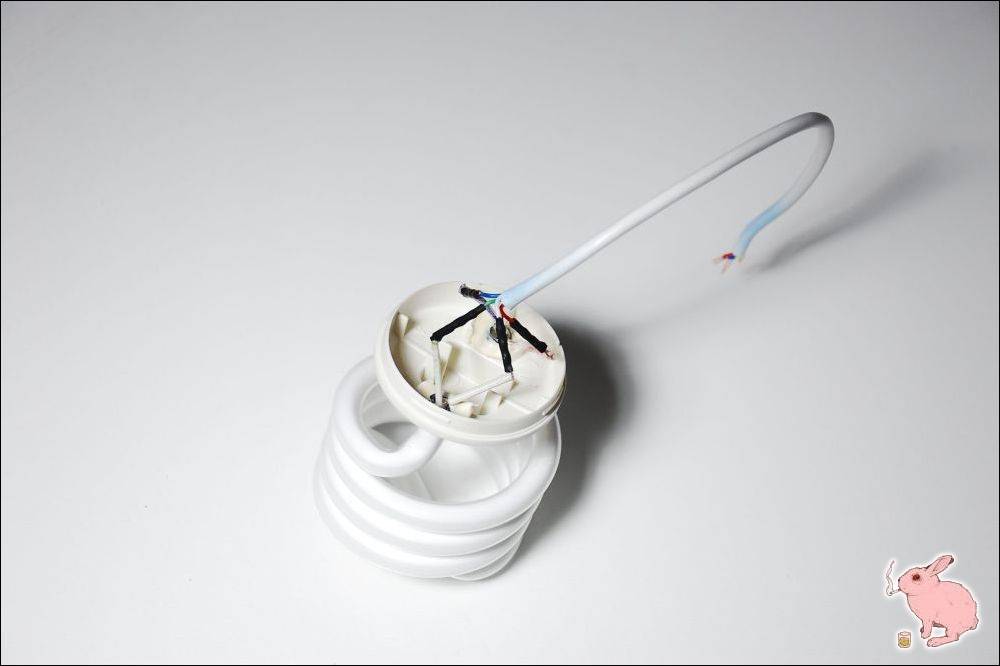
3. Attach new cable to the bulb. it must be long enough to reach out to the remote ballast. It is good to solder it to make sure it is firmly attached
4. Screw the bulb to the hood. i drilled little hole in the bulb case and attached it by little bolt to the steel sheet baking pan
5. Direct all the cables into the ballast location.


I will share how i dealt with ballasts a bit later.
hempfield glad to hear your comment, i also think too much light is never too bad. However not sure about venting efficiency, we'll see.
Anyway - why so high wattage? Well i mainly want this to be a veg cab and then i do not need that many bulbs, but i would like to be able to flower in here as well, occasionally. For that more Watts will be beneficial.
In the design phase i took it into account and my intention is to have each bulb 'switchable' on the level of remote ballasts. i will show you once this gets done.
Now, i received some PMs and requests to share the multi-CFL-hood construction step by step. When the whole lighting system is in place i will share all that in the Lighting Forum but for now here are key highlights:
1. Split the CFL into 2 parts with a screwdriver
3. Detach the little wires and sign their numbers as it will be important to attach the ballast back to the bulb later on (also good to mark the wires with colour. i used blue, red, green & white as you will notice in the 3rd picture)
3. Attach new cable to the bulb. it must be long enough to reach out to the remote ballast. It is good to solder it to make sure it is firmly attached
4. Screw the bulb to the hood. i drilled little hole in the bulb case and attached it by little bolt to the steel sheet baking pan
5. Direct all the cables into the ballast location.
I will share how i dealt with ballasts a bit later.
RosettaStoned
Member
Looks like this cab is gonna kick some ass. I like what you've done with the CFLs. Can't wait to see it in action.
hello there.
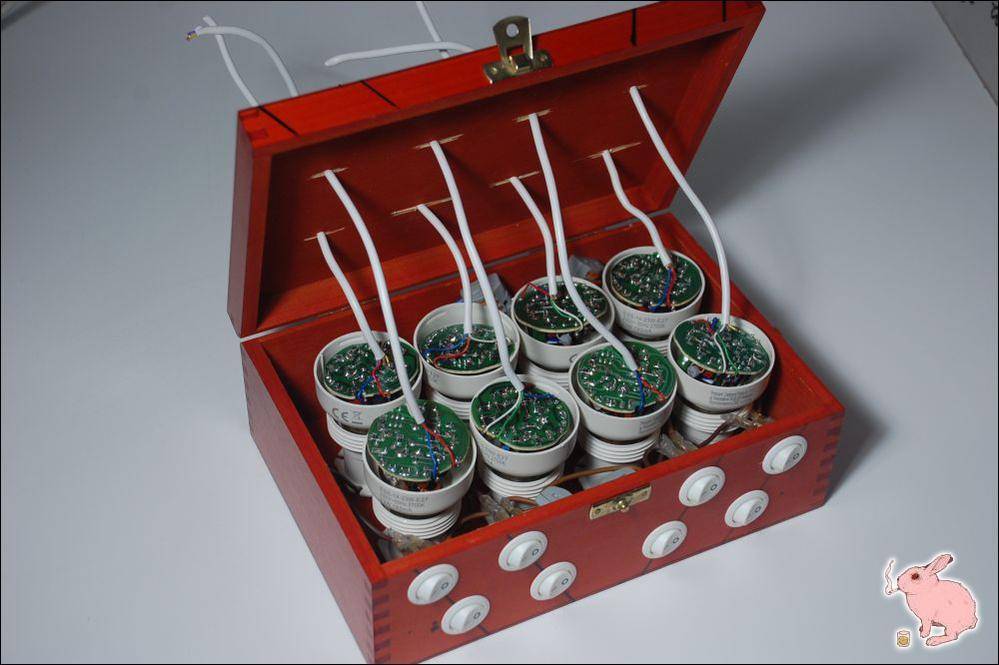
i am done with external ballast.
it was quite complicated but i will get all of this into one thread/tutorial another time, maybe will be useful for other growers too.
anyway, the simplest way to describe what to do is:
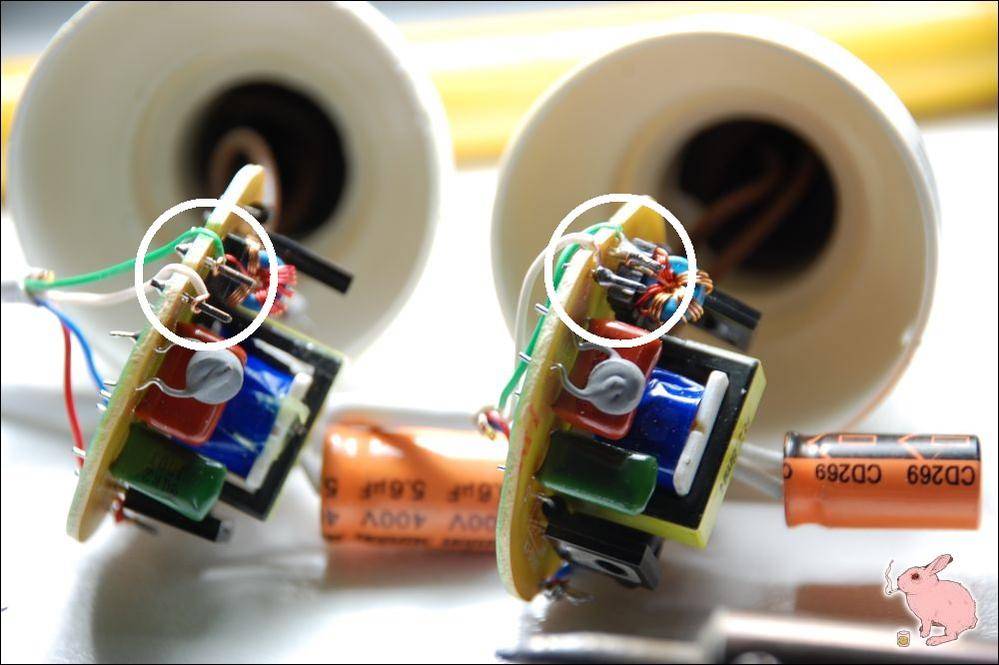
1. add new cables to the ballast separated from the bulbs (best to selder them)
2. provide power to the ballasts -i made a dedicated case with 8 swithes for each of the 8 bulbs, this way i can turn them on and off easily whenever i need to (e.g. small/big plants; clones/rooted plants; veg/flower)
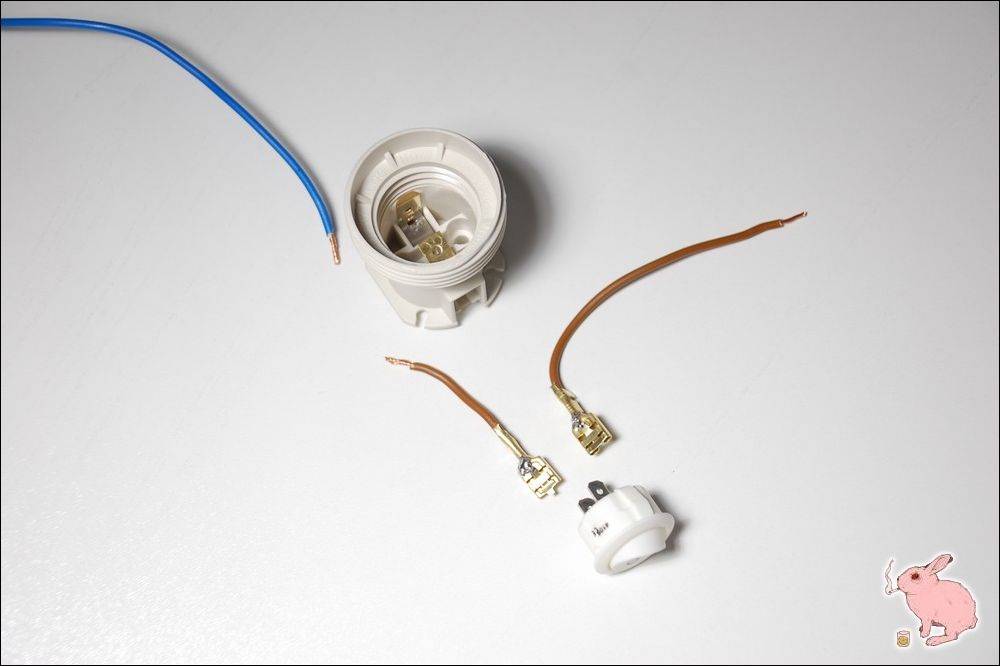
3. connect the mutli-CFL-hood (or other contraption hosting your bulbs) to the ballasts


i am done with external ballast.
it was quite complicated but i will get all of this into one thread/tutorial another time, maybe will be useful for other growers too.
anyway, the simplest way to describe what to do is:
1. add new cables to the ballast separated from the bulbs (best to selder them)
2. provide power to the ballasts -i made a dedicated case with 8 swithes for each of the 8 bulbs, this way i can turn them on and off easily whenever i need to (e.g. small/big plants; clones/rooted plants; veg/flower)
3. connect the mutli-CFL-hood (or other contraption hosting your bulbs) to the ballasts
before going forward, it is wise to test the system at this step.
testing with incandescents:

works! time to add the ballasts:
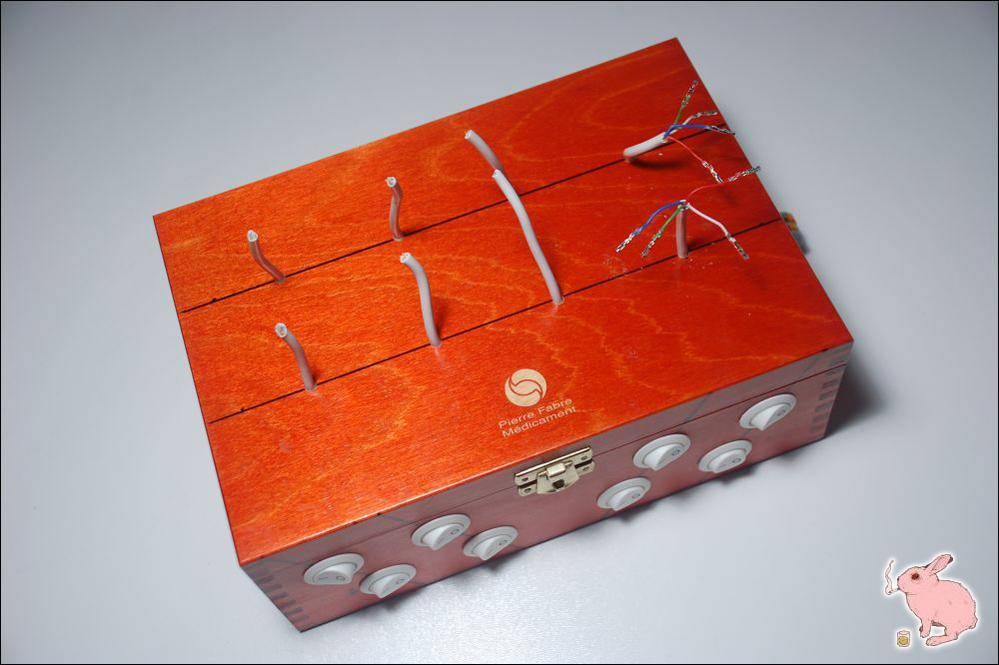
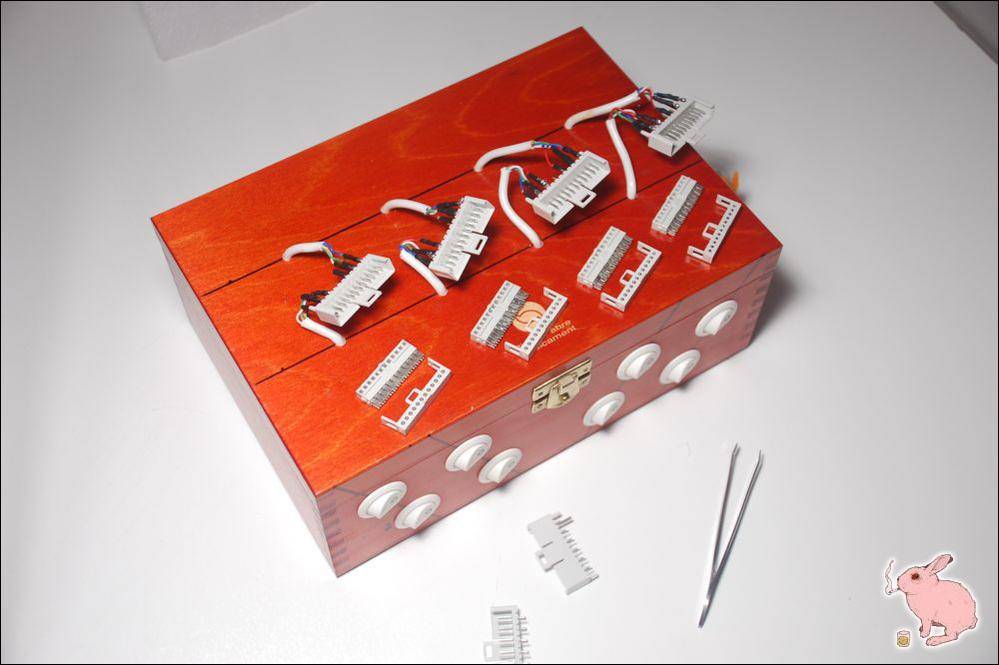
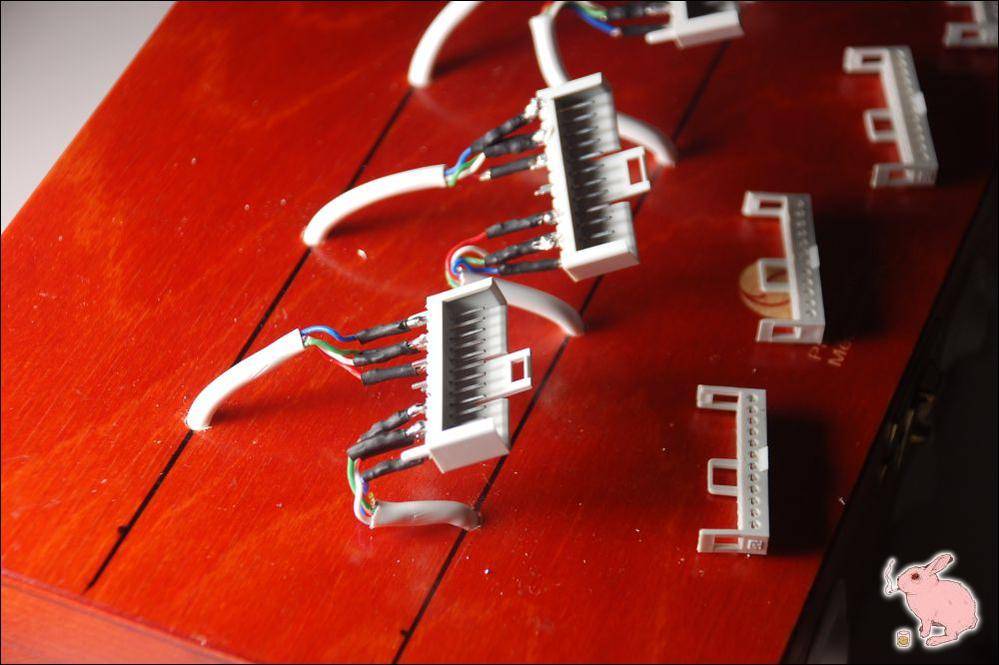
in the last pix you can notice the connectors i used. they will connect the bulbs with the ballasts. this way i can detach them in any given moment for maintenance etc.
testing with incandescents:
works! time to add the ballasts:
in the last pix you can notice the connectors i used. they will connect the bulbs with the ballasts. this way i can detach them in any given moment for maintenance etc.
one more thing i did today is insulation, reducing light leaks and adding the last wall of the cab. it makes for the double-door now which helps keep it stealth.
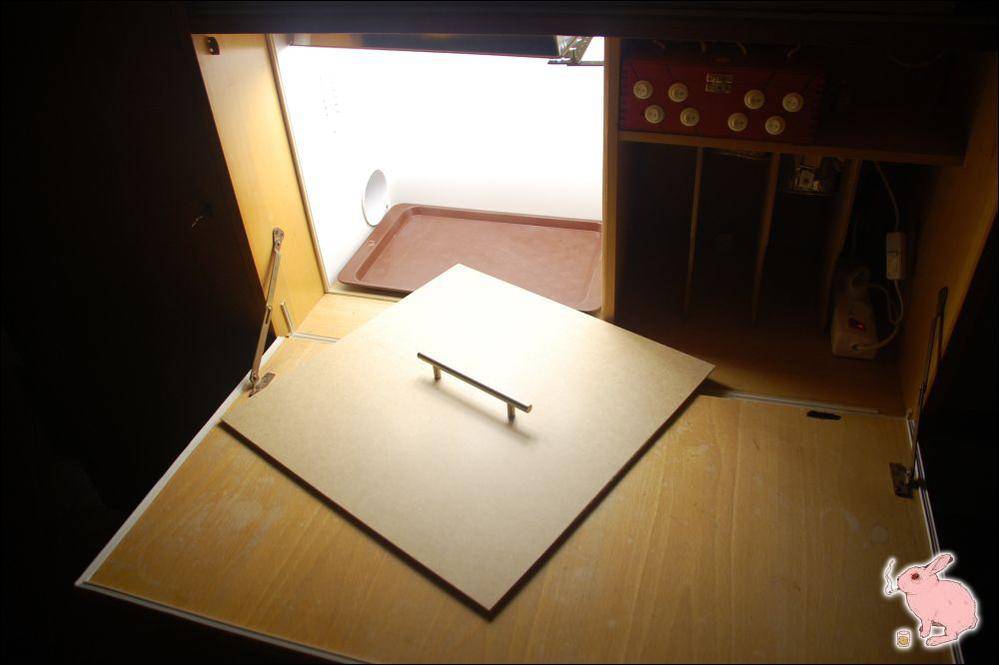


last thing was temp test.
in given circumstances here is what the system puts out:
8 CFLs on give 184 W and temp of 80 F / 27 C
6 CFLs on give 138 W and temp of 75 F / 24 C
4 CFLs on give 92 W and temp of 70 F / 21 C
not so bad i think...?
does anybody think it is time to pop some beans?
if so then plase help me decide on the strain in this poll!
make sure you are not late as the poll only goes till 4.20
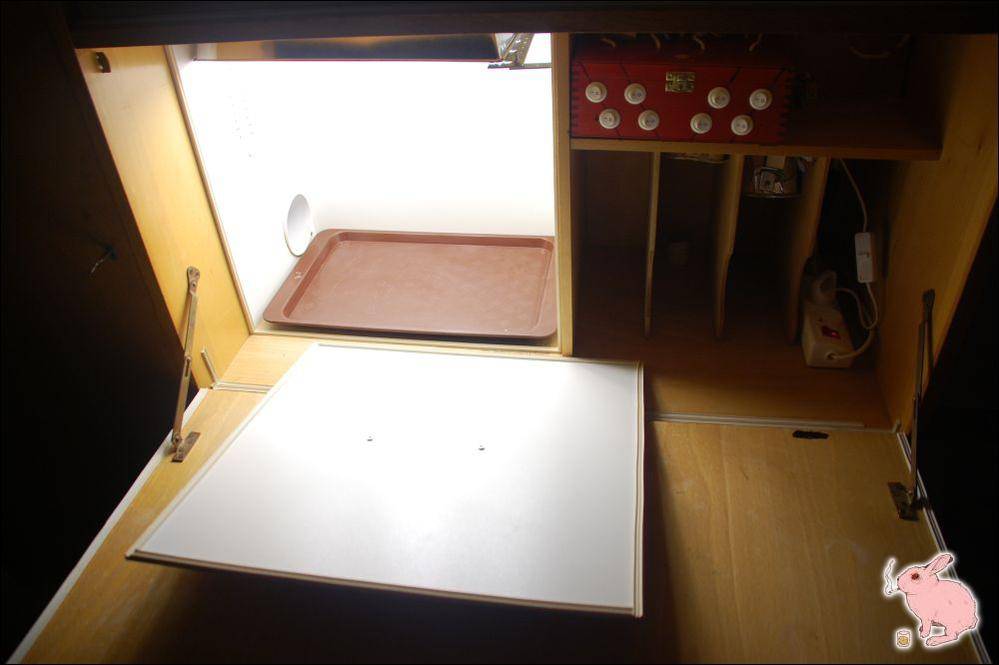
Damn dude, this cabinet is rocking!
You can really tell you put a bit of time in that because that wiring is tight! Managed to make me feel a little embarrased about my own wiring job
I envision some dank ass buds being produced in that cabinet.

You can really tell you put a bit of time in that because that wiring is tight! Managed to make me feel a little embarrased about my own wiring job
I envision some dank ass buds being produced in that cabinet.
thelaughingman
Active member
I think I speak for alot of people ..I hella want to see this in action, That pink rabbit is living the high-life in his burrow haha
Lol i know everyone's impatient but before i start i need two things:put the box to hard work. we want to see all running
1. Decision what strain to choose (please take part in the voting)
2. Confidence about fire hazard level. iron, thanks for your concern and pointing out the weakest link in the burrow. The ballast box does get warm, true, and i will investigate how it performs at different loads of current. i may use the thermo-fuse as suggested above, just need to figure out what it takes.
Still there are a few days to go before the poll ends so i hope i don't prolong the action more than neccessary
Anyway, security first!

