
-
Happy Birthday ICMag! Been 20 years since Gypsy Nirvana created the forum! We are celebrating with a 4/20 Giveaway and by launching a new Patreon tier called "420club". You can read more here.
-
Important notice: ICMag's T.O.U. has been updated. Please review it here. For your convenience, it is also available in the main forum menu, under 'Quick Links"!
You are using an out of date browser. It may not display this or other websites correctly.
You should upgrade or use an alternative browser.
You should upgrade or use an alternative browser.
Anti's MicroStealth Cab Design (Dr. Bud Method)
Absolutely LOVE the presentation of your cab design Anti. I also dig the dual chamber setup you have going there. Opens up a lot of options I don't currently have right now.
I was wondering if you had considered using the PL-L lamps with that design yet?
Yeah, I've read through your thread and I spent a lot of my initial research planning how to build something with the PL-L in mind. But when I got to reading the Dr. Bud thread, the biggest thing that impressed me was:
He buys everything for his grows at walmart or lowes or whathaveyou. Nothing bought online, no credit card trail, no raised eyebrows.
I'm so paranoid, I plan to purchase lights and soil at different locations. All cash. At the self-checkout lane. Wearing a disguise.
Are you suggesting that I mount them vertically on the walls? Given the setup you see, what would you do with the $100?They really are the most efficient CFLs for growing right now and, since your cab size is perfect and the wattage is just about the same, only a bit higher, I can't see why it wouldn't be a super win situation for you.
Granted it would run you about $100 for lighting on each side but you'd enjoy lower temps and a higher lumen output as well as an almost 2 year lifespan on your bulbs.
24" is perfect to mount a PL-L lamp in.")
I'd really like to run a cab that is as close to the dr. bud cab as possible, because I'm hoping to achieve similar results. Once I've experimented with the screw-in CFLs, I may modify or rebuild a new cab.
By my math, 19,000 lumens would be a bit over 9000+ lumens per square foot.Then again, that's 19,000+ lumens in that little of a space. Might be overkill??
the room's 17x17 so it's 2.0164 sq ft... so 9422.73 lumens per square foot.
for comparison, in this room:
(8) 27w CFLs x 1600 lumen each = 12,800 lumens / 2.0164 = 6347.94 lumens per square foot.
Last edited:
G
guest 77721
....Basically, I would just need to build a little shelf bracket about an inch below the lights and drop a pre-cut piece of glass in. Is there a certain kind of glass I'm looking for, or just regular hardware store replacement window glass?

I'm using some ordinary window glass from an old bookshelf cabinet that I cut to fit using a glass cutter. I recycle and reuse anything available and try to buy stuff over the counter at the local hardware stores. The exhaust air temps are 90* - 100*F so you don't need tempered glass. I used plexiglass touching the CFL's with no problems.
Your plans look great and is really inline with my basic design ideas.
You've put a lot of thought into this and I hope to see a successful build soon.
Good Luck!!!
I'm going to buy all of the lumber needed to build this thing tonight.You've put a lot of thought into this and I hope to see a successful build soon.
It consists of:
Three pieces of 4'x8'x1/2" plywood
Two 8 ft long 2x4s
Some screws
Some nails
Some glue
Some flat white paint (for interior)
Some flat black paint (for exterior)
I'm going to document this process with my camera and hopefully get started on construction tonight!
Watch this space, friends.
the room's 17x17 so it's 2.0164 sq ft ... (8) 27w CFLs
At 50 watts per square foot, your CFLs leave you slightly underpowered but, not by much. Lumens measures the human eyes ability to see green light. Between spectrum, wattage and lumens, lumens comes in last if at all.
Six 42w CFL instead of Eight 27w CFL
Six 42w CFL instead of Eight 27w CFL
Each room is 2.01 sq ft. With 8x27w=216w total. 216/2.01=107.46w per sq ft, unless I don't understand the math.
I decided to go with Six 42w CFL instead of Eight 27w CFL, because the 42's are only $3 more than the 27's and I can use two fewer light sockets so it comes in only slightly higher in wattage, slight boost to overall lumen and cheaper on the buy.
So that revised math (unless I have no idea what I'm talking about) is:
6x42w=252w total 252/2.01=125.37w per sq ft.
Please let me know how and why I got this wrong, if I did. Thank you for your help.
If 6 can run with absolutely no heat issues, There'll be room to add 2-4 more if I don't like results of first batch.
Six 42w CFL instead of Eight 27w CFL
At 50 watts per square foot, your CFLs leave you slightly underpowered but, not by much. Lumens measures the human eyes ability to see green light. Between spectrum, wattage and lumens, lumens comes in last if at all.
Each room is 2.01 sq ft. With 8x27w=216w total. 216/2.01=107.46w per sq ft, unless I don't understand the math.
I decided to go with Six 42w CFL instead of Eight 27w CFL, because the 42's are only $3 more than the 27's and I can use two fewer light sockets so it comes in only slightly higher in wattage, slight boost to overall lumen and cheaper on the buy.
So that revised math (unless I have no idea what I'm talking about) is:
6x42w=252w total 252/2.01=125.37w per sq ft.
Please let me know how and why I got this wrong, if I did. Thank you for your help.
If 6 can run with absolutely no heat issues, There'll be room to add 2-4 more if I don't like results of first batch.
One more thing everybody, and then I swear I'm leaving to the hardware store! I was looking at this:
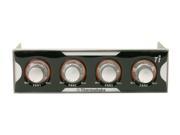
based on your recommendations. It's cheap, it'll handle one more fan than I'm running, so that's all good... but on the same site I saw this:

This one will only control two fans, so I'd have to get a separate one to run the fan for the carbon scrubber, but what I was thinking was, besides looking cool, this one has the ability to run 2 fans and sense the temperature at 3 different locations. So I could set two of the thermo-sensors in the two light box areas... and then the fans would sense when the lights kicked on and turn up... they wouldn't be needed to vent the rest of the cab when the lights were off, so they could just kick off when the sensors noticed it had cooled off.
Will this work? It's only another 8 bucks or so from the first one, so totally worth the extra 10-15 total it'd cost to have this thing for the two lightbox fans and then a separate single fan controller for the carbon fan. What do you guys think? I've never gotten this serious about it before. I used to use a fan I had lying around as my exhaust fan in previous grows. Now I've "gone to school" for awhile and I wanna try to do this right this time. Please school me.
based on your recommendations. It's cheap, it'll handle one more fan than I'm running, so that's all good... but on the same site I saw this:
This one will only control two fans, so I'd have to get a separate one to run the fan for the carbon scrubber, but what I was thinking was, besides looking cool, this one has the ability to run 2 fans and sense the temperature at 3 different locations. So I could set two of the thermo-sensors in the two light box areas... and then the fans would sense when the lights kicked on and turn up... they wouldn't be needed to vent the rest of the cab when the lights were off, so they could just kick off when the sensors noticed it had cooled off.
Will this work? It's only another 8 bucks or so from the first one, so totally worth the extra 10-15 total it'd cost to have this thing for the two lightbox fans and then a separate single fan controller for the carbon fan. What do you guys think? I've never gotten this serious about it before. I used to use a fan I had lying around as my exhaust fan in previous grows. Now I've "gone to school" for awhile and I wanna try to do this right this time. Please school me.
Agent-Smith
Member
DO IT! A little technology never hurt anyone.

Agent-Smith
Member
BTW, I still think that you should increase the width of your flowering chamber and decrease the width and height of the veg chamber. The plants are going to be smaller in veg anyways and you could get get rid of that 4 inches or so of dead space at the top of your cab and move the exhaust to the side of the chamber.
Yeah, I've read through your thread and I spent a lot of my initial research planning how to build something with the PL-L in mind. But when I got to reading the Dr. Bud thread, the biggest thing that impressed me was:
He buys everything for his grows at walmart or lowes or whathaveyou. Nothing bought online, no credit card trail, no raised eyebrows.
I'm so paranoid, I plan to purchase lights and soil at different locations. All cash. At the self-checkout lane. Wearing a disguise.
Are you suggesting that I mount them vertically on the walls? Given the setup you see, what would you do with the $100?
I'd really like to run a cab that is as close to the dr. bud cab as possible, because I'm hoping to achieve similar results. Once I've experimented with the screw-in CFLs, I may modify or rebuild a new cab.
By my math, 19,000 lumens would be a bit over 9000+ lumens per square foot.
the room's 17x17 so it's 2.0164 sq ft... so 9422.73 lumens per square foot.
for comparison, in this room:
(8) 27w CFLs x 1600 lumen each = 12,800 lumens / 2.0164 = 6347.94 lumens per square foot.
First off, don't be so paranoid about buying soil. Lots of people (myself included) are pissed off at the food that's killing us and are growing our own. If you buy your lights online you can go buy all the soil you want without a disguise.
The lights are common lighting. No issues about ordering them online as it's done every day. Usually in much greater quantity than a ballast and a couple lamps, but hey, Some of us have to start small and work up. There's no issue there.
I would go with the suggestion that others have made and increase the size of your flower chamber while decreasing the overall mum/clone chamber size. Look into the Bonsai mums and you'll still have plenty of space.
Mount the lamps across the ceiling, just like the Dr.Bud method, only you'll be using 4 lamps instead of how many? They'll cover the ceiling as well so you'll get an even better light saturation than the multiple coiled bulbs would. Many points of light vs. an entire ceiling of light is a big difference.
Yeah, the lumen count is a lot higher AND, you actually need fewer lumens than what the generally accepted rates are with coiled lamps. In other words, you can increase the size of your chamber and stick with just the 220w of PL-L and still come out way ahead.
Your plans look awesome and if you've spent as much time researching the grow method and other issues, you're set for an awesome first grow experience.
As for the $100? I would use it to buy the Fulham ballast, sockets and 3000K lamps. If you're stuck on the budget, keep reading until you have more cash. You'll thank yourself in the long run.
SHOPPING LIST SO FAR (THIS STUFF HAS BEEN BOUGHT AND PAID FOR)
# Qty Size Use
--=-------=-------------=-------------------------=
PLYWOOD:
A (1) 48" x 37" - rear outer wall
B (1) 48" x 33" - cd case rear vertical wall
C (1) 48" x 24" - bottom
D (1) 48" x 25" - top
E (5) 48" x 6.5" - cd shelves
F (2) 37.5" x 25" - outer sides
G (2) 27.5" x 17" - inner sides (tall)
H (2) 20" x 17" - inner sides (short)
I (1) 17" x 13" - inner horizontal shelf
J (2) 17" x 5" - "middle" partitions
K (2) 17" x 17" - drawer shelves
L (6) 6" x 5" - CD spacers/supports
-------------------------------------------------------------------
(26) pieces
2x4:
(2) 48" - base frame (length)
(4) 21" - base frame (width)
--------------------------------------------------------------------
All of the above wood came from:
(3) sheets of 4ftx8ftx0.5" pre-sanded plywood - $24 each ($72)
(2) eight ft long 2x4s - $3 each for premium) ($6)
I had all of the above cut for me to exact size in the store by asking a friendly-looking employee to help me pull down my sheets of plywood. I then asked him if doing the rip cuts was one of his regular duties. It was. I told him I had a bunch of cuts to do and that I'd give him $20 if he'd take his time and do them as precisely as possible. I highly recommend doing this step. All of my cuts measure perfectly and it was all done in less than an hour. I don't own a truck, so having all of the boards ripped at the store means not having to try to find a way to get them home. Plus, now I just need to cut my vent holes, slap paint on everything and start assembling. I suggest having the guy label each piece as it gets cut, so you'll know what you need in the end. So each of my pieces has an "A" "B" or "C" or whatever, as in the sheet above.
(2) 17"x17" window glass $12
The same friendly guy who cut all of my wood for me showed up again when I needed to have my glass cut. He was more than happy to do this extra service. He wrapped everything up really nice, too.
(6) - 42w GE "General Purpose" CFL w a rating of 2700 lumen - $60
(6) - 40w Phillips 2700k CFL w a rating of 2600 lumen - $60
(1) Gallon of flat white paint $8
(1) Gallon of semi-gloss black paint $13
(1) Caulk Gun $2
(1) Liquid Nail Wood Glue $3
(2) 100lbs heavy-duty drawer sliders $26 for both
(1) Box of 100 (6x3/4") Wood Screws $3
I went to walmart, home depot, target and lowe's and only lowe's had the 2700 bulbs. walmart and target had the same "General Purpose" CFLs which don't have their Kelvin rating so I have no idea. But I bought 'em, hoping they're somewhere in the 5000K+ range. Maybe I can find info on them online.
So. .. total expenditure so far: $285
All that I have left to buy are the fans and the fan controllers and the supplies to build my carbon filters. Oh and the sockets and wiring for the bulbs. (Didn't wanna buy the sockets in same purchase as wood. Also bought my bulbs at two different locations, at different times from the other purchase.)
I'm going to start cutting and painting tomorrow, and I'll be sure and get some happy step-by-step shots of the work in progress. Once the paint dries, I'll start assembly the next day. Hoping to be germing seeds within the week. Keep your fingers crossed.
I'm exhausting the way I am because the exhaust points need to be "invisible". If it exhausts out the side of the box, people may ask "why are there vents on the sides of your CD cabinet?"
The exhausts are going to be vented out the top of the box into little rooms that will be sound-dampened to help muffle the fan noise. I think it will make more sense when you see the step by step pics.
# Qty Size Use
--=-------=-------------=-------------------------=
PLYWOOD:
A (1) 48" x 37" - rear outer wall
B (1) 48" x 33" - cd case rear vertical wall
C (1) 48" x 24" - bottom
D (1) 48" x 25" - top
E (5) 48" x 6.5" - cd shelves
F (2) 37.5" x 25" - outer sides
G (2) 27.5" x 17" - inner sides (tall)
H (2) 20" x 17" - inner sides (short)
I (1) 17" x 13" - inner horizontal shelf
J (2) 17" x 5" - "middle" partitions
K (2) 17" x 17" - drawer shelves
L (6) 6" x 5" - CD spacers/supports
-------------------------------------------------------------------
(26) pieces
2x4:
(2) 48" - base frame (length)
(4) 21" - base frame (width)
--------------------------------------------------------------------
All of the above wood came from:
(3) sheets of 4ftx8ftx0.5" pre-sanded plywood - $24 each ($72)
(2) eight ft long 2x4s - $3 each for premium) ($6)
I had all of the above cut for me to exact size in the store by asking a friendly-looking employee to help me pull down my sheets of plywood. I then asked him if doing the rip cuts was one of his regular duties. It was. I told him I had a bunch of cuts to do and that I'd give him $20 if he'd take his time and do them as precisely as possible. I highly recommend doing this step. All of my cuts measure perfectly and it was all done in less than an hour. I don't own a truck, so having all of the boards ripped at the store means not having to try to find a way to get them home. Plus, now I just need to cut my vent holes, slap paint on everything and start assembling. I suggest having the guy label each piece as it gets cut, so you'll know what you need in the end. So each of my pieces has an "A" "B" or "C" or whatever, as in the sheet above.
(2) 17"x17" window glass $12
The same friendly guy who cut all of my wood for me showed up again when I needed to have my glass cut. He was more than happy to do this extra service. He wrapped everything up really nice, too.
(6) - 42w GE "General Purpose" CFL w a rating of 2700 lumen - $60
(6) - 40w Phillips 2700k CFL w a rating of 2600 lumen - $60
(1) Gallon of flat white paint $8
(1) Gallon of semi-gloss black paint $13
(1) Caulk Gun $2
(1) Liquid Nail Wood Glue $3
(2) 100lbs heavy-duty drawer sliders $26 for both
(1) Box of 100 (6x3/4") Wood Screws $3
I went to walmart, home depot, target and lowe's and only lowe's had the 2700 bulbs. walmart and target had the same "General Purpose" CFLs which don't have their Kelvin rating so I have no idea. But I bought 'em, hoping they're somewhere in the 5000K+ range. Maybe I can find info on them online.
So. .. total expenditure so far: $285
All that I have left to buy are the fans and the fan controllers and the supplies to build my carbon filters. Oh and the sockets and wiring for the bulbs. (Didn't wanna buy the sockets in same purchase as wood. Also bought my bulbs at two different locations, at different times from the other purchase.)
I'm going to start cutting and painting tomorrow, and I'll be sure and get some happy step-by-step shots of the work in progress. Once the paint dries, I'll start assembly the next day. Hoping to be germing seeds within the week. Keep your fingers crossed.
Agent-Smith said:you could get get rid of that 4 inches or so of dead space at the top of your cab and move the exhaust to the side of the chamber.
I'm exhausting the way I am because the exhaust points need to be "invisible". If it exhausts out the side of the box, people may ask "why are there vents on the sides of your CD cabinet?"
The exhausts are going to be vented out the top of the box into little rooms that will be sound-dampened to help muffle the fan noise. I think it will make more sense when you see the step by step pics.
Agent-Smith
Member
I'm exhausting the way I am because the exhaust points need to be "invisible". If it exhausts out the side of the box, people may ask "why are there vents on the sides of your CD cabinet?"
The exhausts are going to be vented out the top of the box into little rooms that will be sound-dampened to help muffle the fan noise. I think it will make more sense when you see the step by step pics.
I had a feeling you were going to misunderstand what I meant. I meant the exhaust from the flowering chamber being moved to the side overtop of the other two chambers instead of above it like now. If you still can't figure it out I will draw you up a little picture in MS Paint and post it.
Agent. I read and re-read your sentence over and over... for a second I almost understood what you're trying to say, but alas, I don't.
It's 2:20am. I've just purchased 3 fans w/controllers and power supply. Supposed to arrive within 3 business days.... so I should have them right around the time I need them. That added another $66 to my total so: $351 spent on parts thus far.
Only a few piddling details to buy at this point: power cable for the lights and sockets for the lights. Oh yeah, and maybe some weather stripping to be sure the door seals nice and tight. Then we'll have a grand total for building the prototype of "Anti's MicroStealth Cab 3000".
Actual photos of the build coming soon. Should be a fun week!
Agent-Smith
Member
Here's a picture to show you what I am talking about. Your final "outside" exhaust vent can be put anywhere you want, top, side, front, or rear panels. Please excuse my shitty drawing skills, and the fact that the text button on my paint program doesn't work?

Y
yoinker
Anti - THIS CAB IS AMAZING!
Let me just tell you - I have been in the beginning steps of planning the construction of a cab, and your design fits my size requirements PERFECTLY!!! Not to mention I love the idea of putting CD racks on the front =] I might spice it up a bit and throw in a few shelves of DVD racks with the CD racks hehe.
Let me just tell you - I have been in the beginning steps of planning the construction of a cab, and your design fits my size requirements PERFECTLY!!! Not to mention I love the idea of putting CD racks on the front =] I might spice it up a bit and throw in a few shelves of DVD racks with the CD racks hehe.
Here's a picture to show you what I am talking about. Your final "outside" exhaust vent can be put anywhere you want, top, side, front, or rear panels. Please excuse my shitty drawing skills, and the fact that the text button on my paint program doesn't work?
Ok. Well, your drawing is almost exactly how things are already exhausted. The air comes in the drying room, moves through the veg and flower room and vents back in the inside wall into the carbon room. The only difference is that you've shrunk the height of the mother room and directed the filter exhaust to run out the side of the box.
It's not an idea without merit, but since I already spent $95 yesterday having my plywood cut to the design specs, I'm gonna stick with that for now.
I'm sure this won't be my last cab. It's designed to be a learning experience.
Tonight's phase? Cutting vent holes, sanding, painting.
I'll take pics to document. Maybe up tonight, maybe up tomorrow.
Agent-Smith
Member
The only difference is that you've shrunk the height of the mother room and directed the filter exhaust to run out the side of the box.
actually you can run the exhaust out any direction you want, it only exits the flowering room from the side, not the entire box. But yeah, definitely run with whatcha got for now since you got the wood precut lol
First Pics of Build In Progress!!!
First Pics of Build In Progress!!!
Ok. Here's tonight's work. Didn't get as far as I'd hoped, but had some jigsaw issues. Gonna have to do something about that tomorrow if possible.
So I stuck to painting.
First, a nice gallery shot of all the lumber assembled for your perusal:
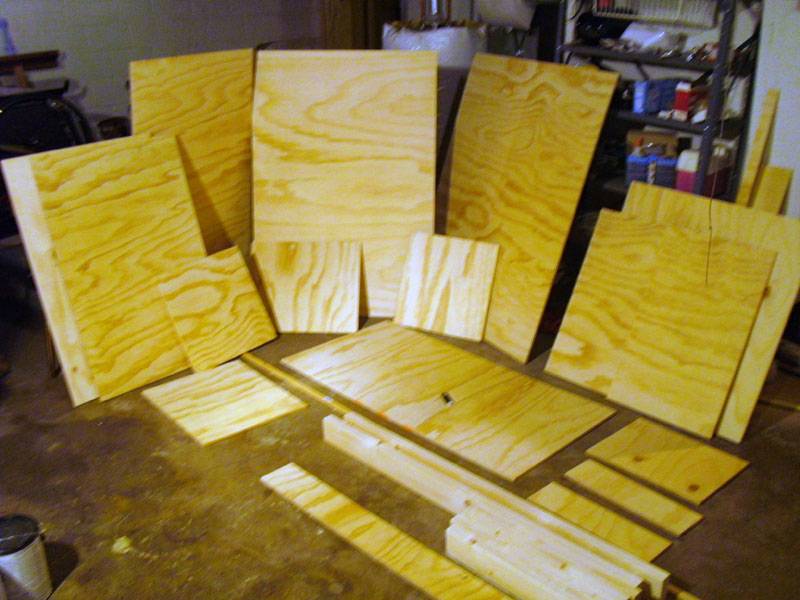
That black smudge is a bic lighter for scale.
Various stages of the painting process:

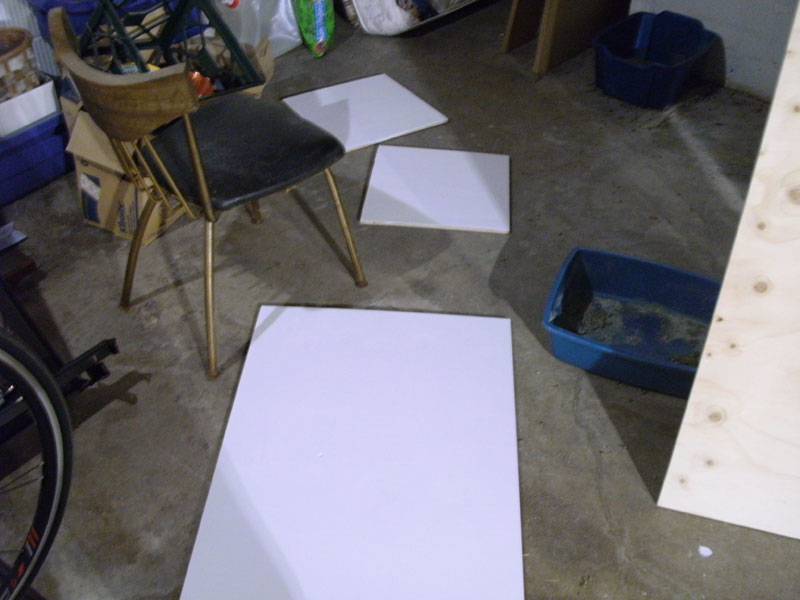
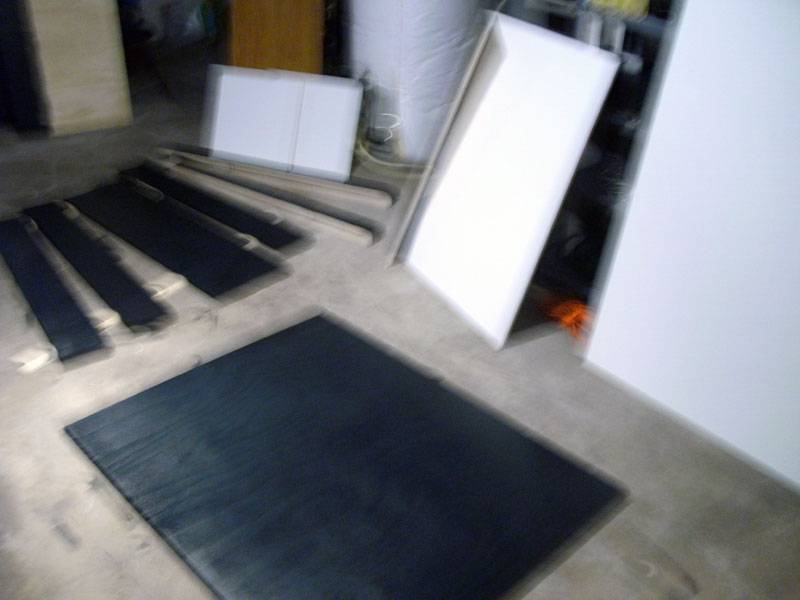
Last one is a bit smudged, but you get the idea. Everything that got painted tonight got two coats with approximately 30-45 min drying time in between. (Panels were dry to touch.) Once it's all assembled, I'll slap paint on anything that needs it and touch up any dings which occur. Bought my sockets today. So other than my soil mix and nutes, the spending is done!
$1.50x12 light sockets. I have a heavy duty extension cord that I'm going to splice up to wire the lights. I bought a regular old $15 computer power supply which I'm going to use to supply power to the exhaust fans. Each fan has a temp sensor and/or manual controller. This way, I don't have to mess with rewiring any of my fans. Even if I had spliced a 12v converter, it would've cost me $10 or so anyway. This way it's completely plug-and-play.
My intended planter, will be cut to 3"x3"x8" with drainage holes in bottom:
More to come. Assembly begins tomorrow!
First Pics of Build In Progress!!!
Ok. Here's tonight's work. Didn't get as far as I'd hoped, but had some jigsaw issues. Gonna have to do something about that tomorrow if possible.
So I stuck to painting.
First, a nice gallery shot of all the lumber assembled for your perusal:
That black smudge is a bic lighter for scale.
Various stages of the painting process:
Last one is a bit smudged, but you get the idea. Everything that got painted tonight got two coats with approximately 30-45 min drying time in between. (Panels were dry to touch.) Once it's all assembled, I'll slap paint on anything that needs it and touch up any dings which occur. Bought my sockets today. So other than my soil mix and nutes, the spending is done!
$1.50x12 light sockets. I have a heavy duty extension cord that I'm going to splice up to wire the lights. I bought a regular old $15 computer power supply which I'm going to use to supply power to the exhaust fans. Each fan has a temp sensor and/or manual controller. This way, I don't have to mess with rewiring any of my fans. Even if I had spliced a 12v converter, it would've cost me $10 or so anyway. This way it's completely plug-and-play.
My intended planter, will be cut to 3"x3"x8" with drainage holes in bottom:
More to come. Assembly begins tomorrow!

