
ThisBuds4You
Member
Howdy fellow ICMAGers! Welcome to another stealth grow installment with ME, ThisBuds4You!!! This post will show you how I made a STEALTH chest of drawers (dresser) for less than $150 and YOU CAN TOO. A little know how, a couple tools and a few items from your neighborhood hardware supplier and you'll be growing in no time! Alright, enough talk, lets get growing!!!
Here are a few tools you will need:
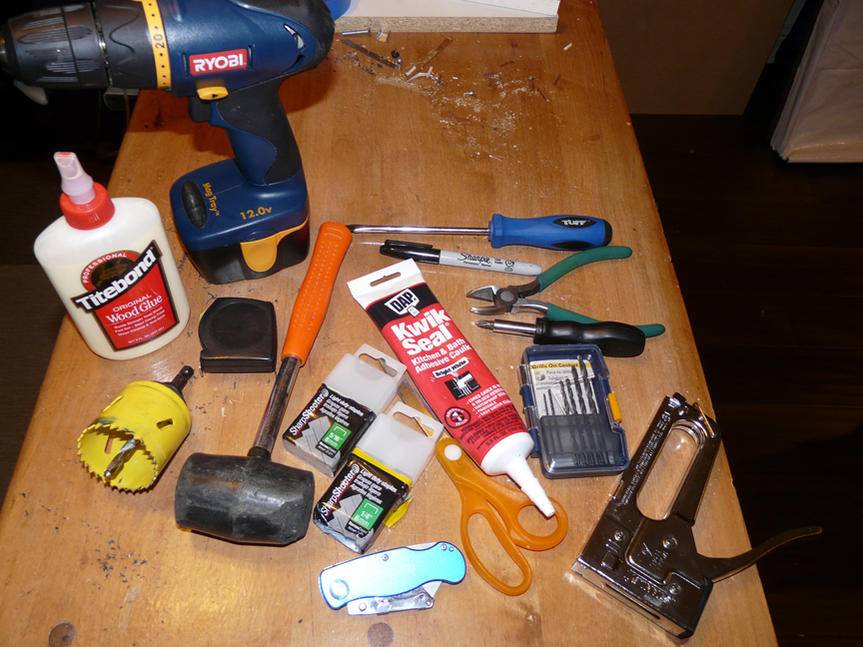
Drill & Drill bits (standard sizes)
Jigsaw
2" hole saw drill bit
Phillips Screwdriver
Rubber mallet or hammer
Staple Gun & Staples
Tape Measure
Sharpie Marker
Carpenter's Knife
White caulk, NOT CLEAR
Scissors
Sandpaper
Wood Glue (not necessary, but nice to have)
If you don't have all the items, BORROW THEM FROM YOUR FRIENDS & FAMILY! If they ask you why you need them, make up some bullshit! I didn't want to spend $20 on a hole saw drill bit so I borrowed it, just ask!
Supplies you will need to complete your box:
Dresser
6'x10' of Panda film
1 - 4'x2' 0.25" MDF or Hardboard (I prefer MDF)
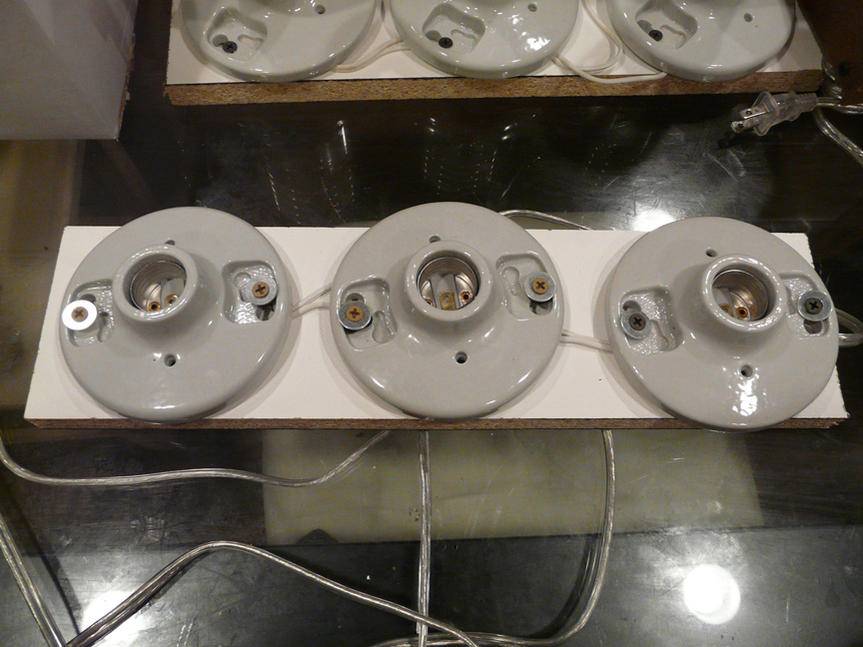
9 Ceramic light fixtures
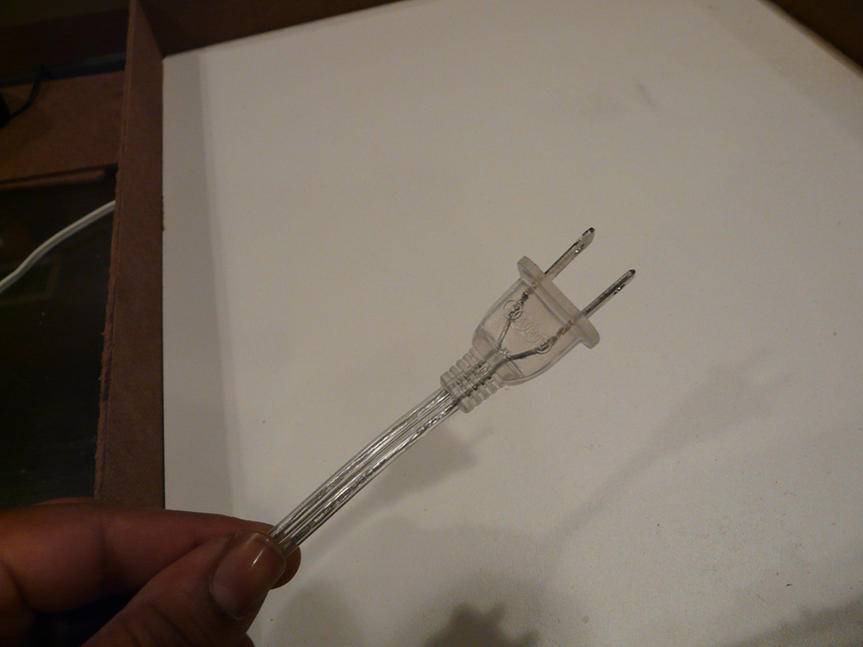
About 8 ft of lamp cord
3 standard plugs (for lamp cord)
Duct fan (I used a 6" but a 4" is also sufficient)
3 - 120mm computer fans
2 - 80mm (standard) computer fans
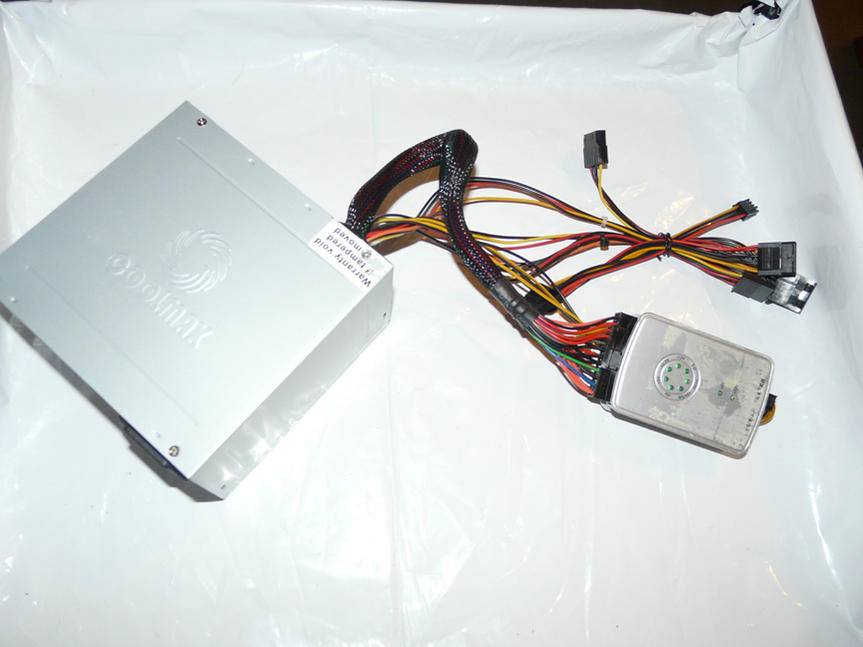
1 standard computer power supply & tester
1 carbon scrubber (i got the smallest one CAN AIR makes)
9 CFL bulbs (I used a mix of 42 and 23 watt bulbs)
2 Hinges
2 Magnetic Closures
1 power strip
1 heavy duty extension cord
1 piece of plexi glass 3mm thick
8 door/cabinet pulls (not necessary but a very nice touch)
Money Saving Tips
1. Re-purpose the wood from inside the dresser! I got an old ass dresser that was probably hand-built by some old pioneer and I was able to reuse a lot of the wood. I only had to purchase 1 new piece of wood (the MDF) for the back door.
2. Get an old junked computer and use the fans and power supply from that, you can probably find one for free!
3. Check the free section of craiglist for dressers, computers, etc. If you can't find free ones, pretty sure you can find cheap ones. I got my dresser for $30.
4. Don't pay for lamp cords! Find some old ass lamps in the garbage, free section of craigslist or whatever and use those. Just cut them off from the lamp and wa la!
Disassembling the dresser
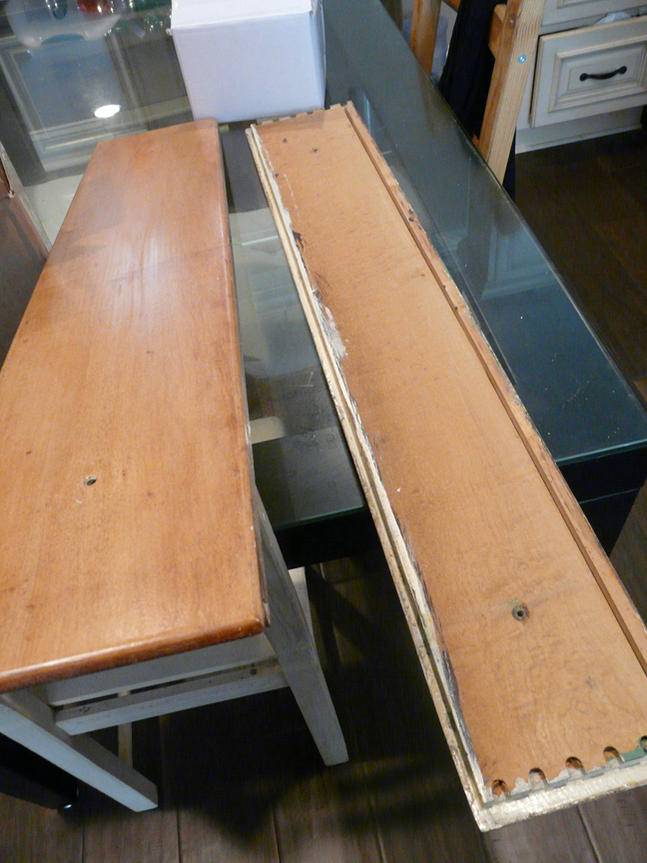
Take great care in taking the dresser apart. We took time taking it apart and ended up being able to reuse most of the wood from the dresser. We took apart the drawers and used the bottoms to make the front face that the drawer fronts attached to. We also used the bottom of the drawers for the floors of our new grow box.
Now, I'm not going to get into too much detail from here on out; the pictures are pretty self-explanatory. If you've got any questions, feel free to fire away!
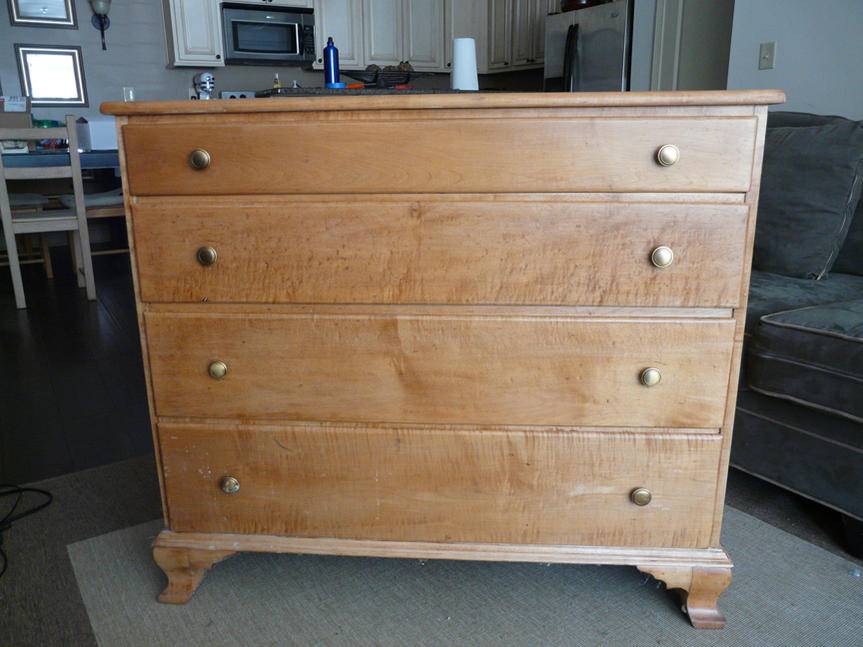
The Beginning
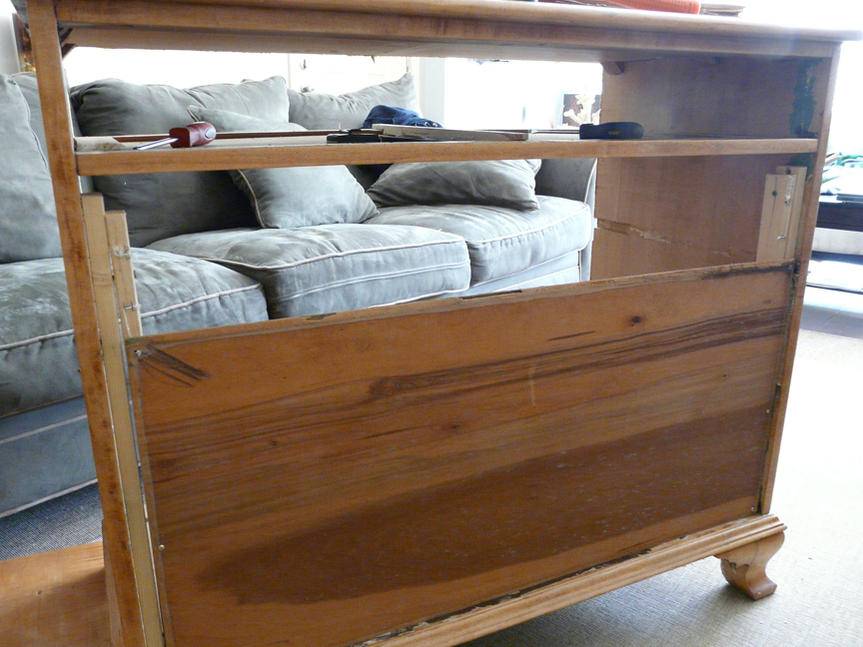
Here's the dresser untouched
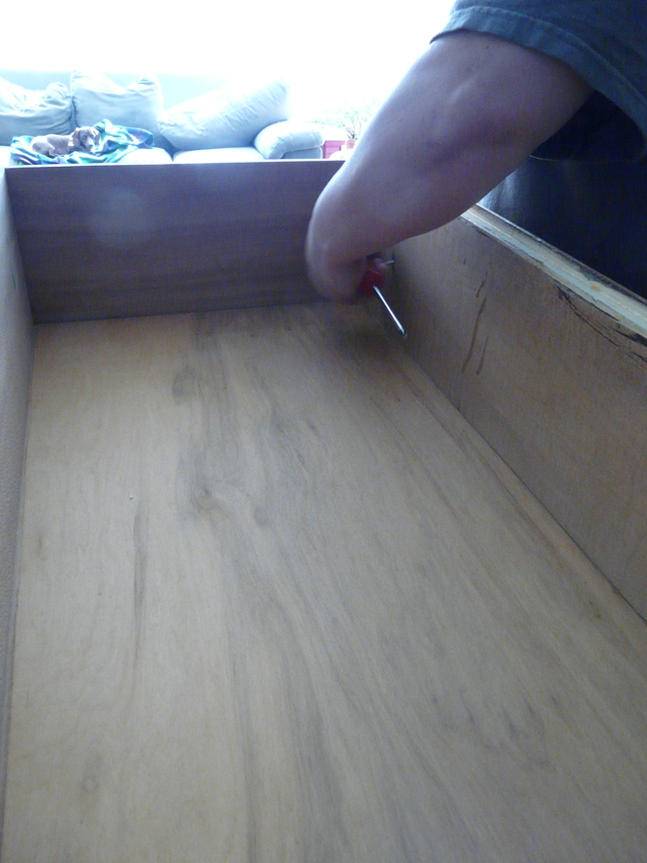
First, we took all the drawers out and began to take those apart with a rubber mallet
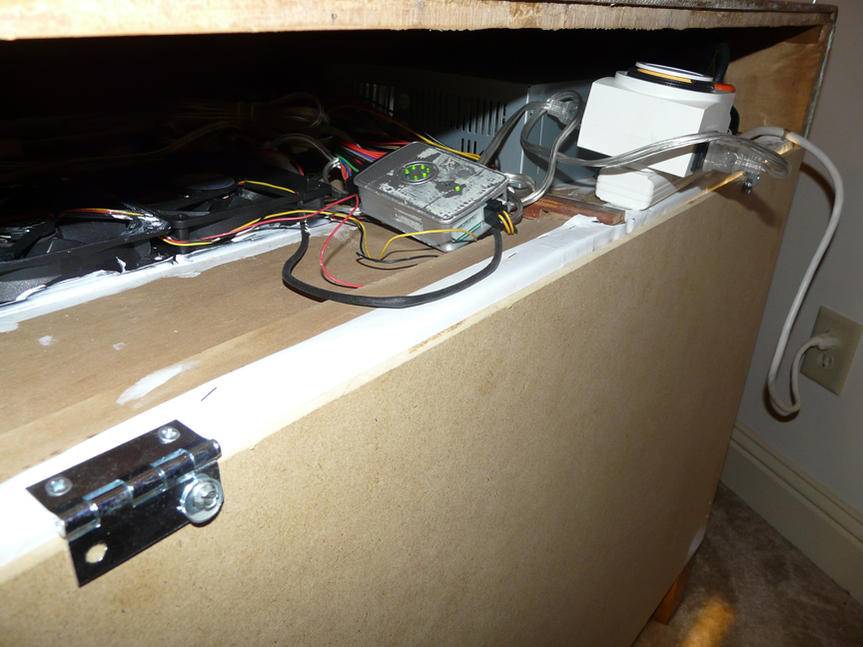
Here's the dresser completely gutted (except for the top shelf, I left that in so we could mount the exhaust fans and run the power through there)

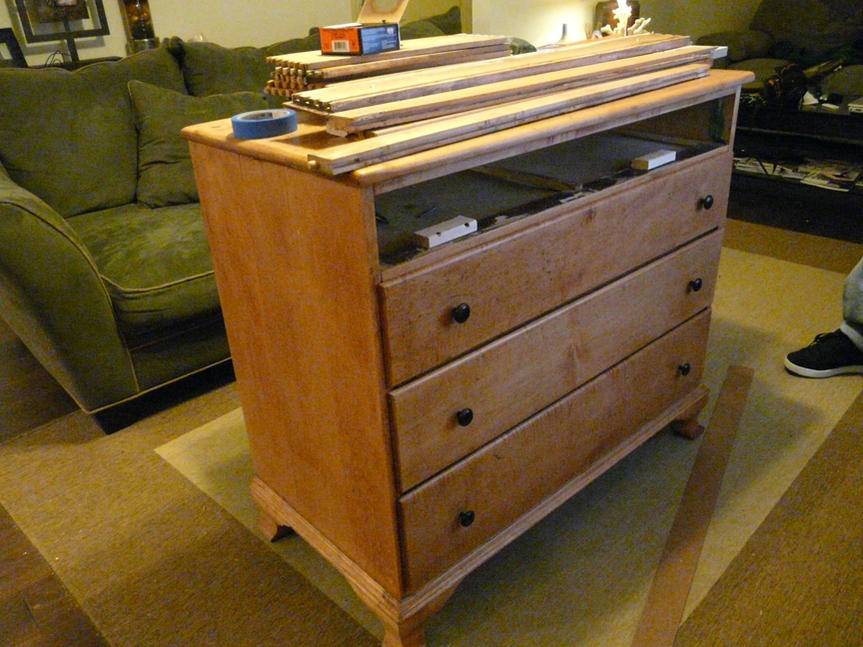
Then we attached one of the drawer bottoms to the front of the dresser, so we would have something to screw the drawer fronts to
Then we attached the drawer fronts with the new drawer handles/pulls
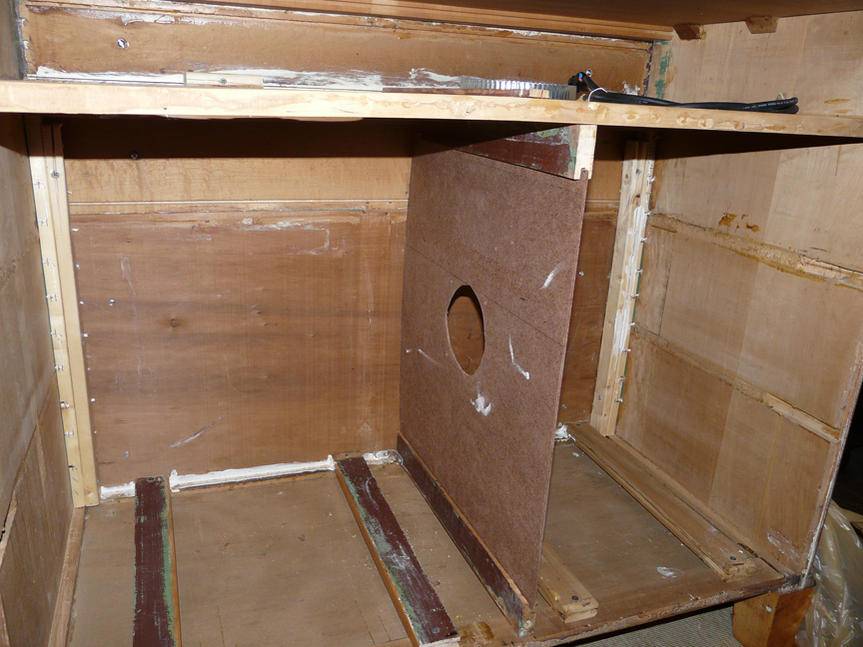
Once that was completed we cut a 6" hole on the inside top shelf we left in and we also added a partition wall in the middle with a hole cut out for a 120 mm fan. We also cut holes in the top of our flowering chamber for the 2-120mm fans we will mount there. Be sure to run caulk around the edges on the inside of the dresser so we don't have an issue with light leaks. I also cut 4 pieces of wood the same depth as the dresser and screwed them into the bottom. These are going to support our new floors.

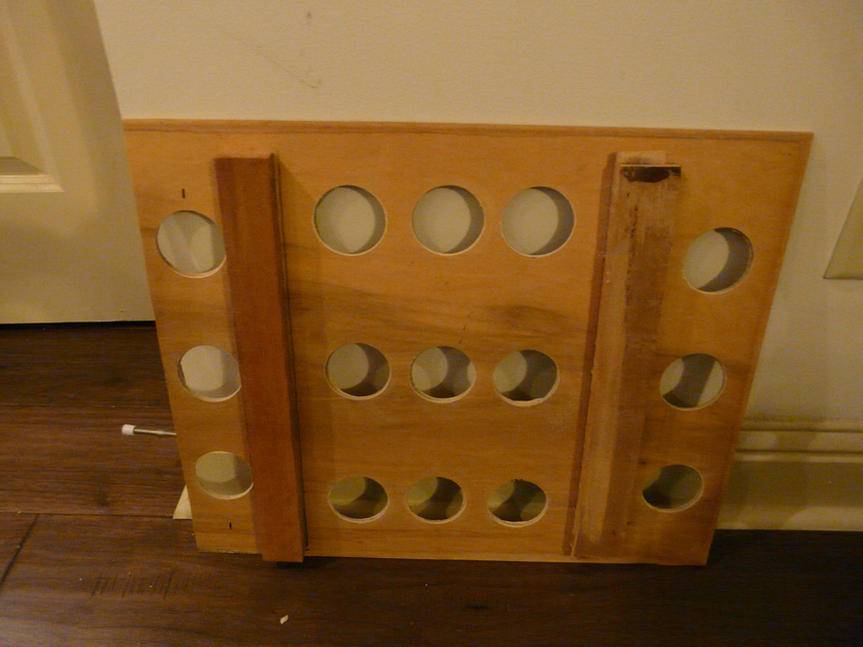
Next, make your floors from the scrap drawer bottoms. I drilled holes in them with a 2" hole saw bit for air flow. Air is your best friend in these small spaces! I lined the floor of the veg room with panda film, I'm making a separate tray to place the plants in the flowering area so I did not line that floor with panda film
Next, line the entire interior of the dresser with panda film and install the floors
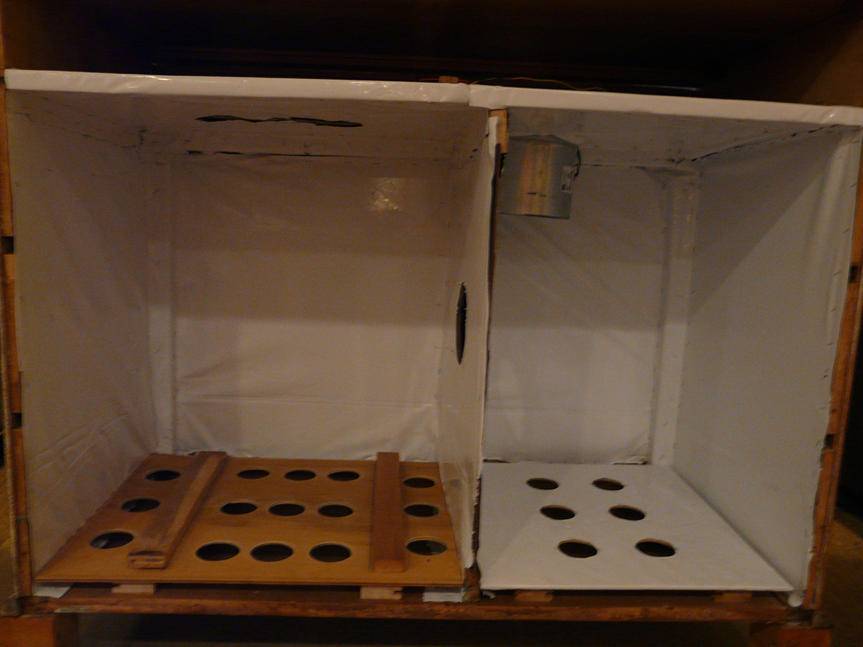
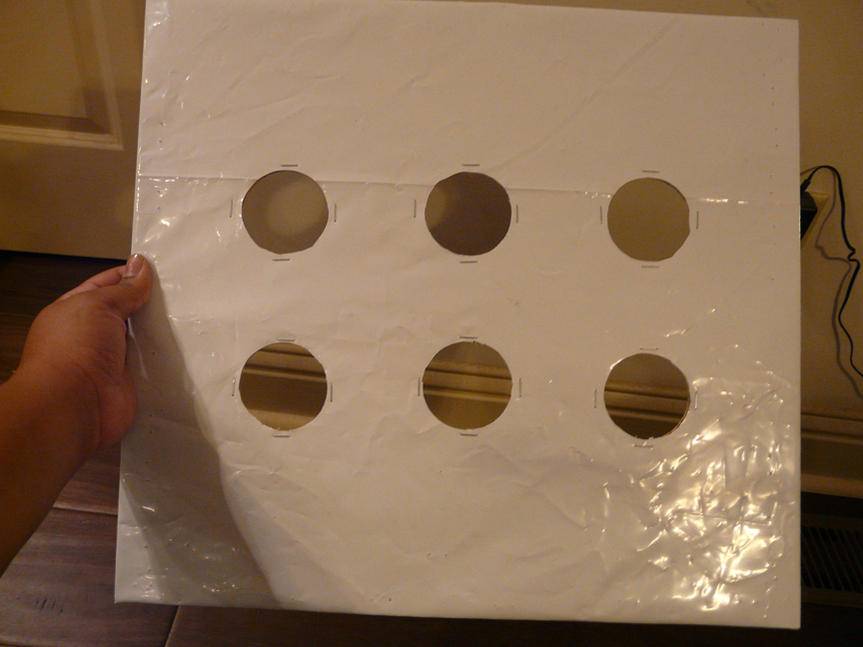
Now, time for the lights. I daisy-chained all the lights together and mounted them to some scrap 1/2" board I had laying around. You can use pieces of the dresser drawers for this also.
Break time with Sweetwater 420 and Mandala Hashberry

Now for the fans, I used 3-120 mm fans. I'm using 2 in the ceiling to exhaust hot air out of the flowering chamber (the lights will be sealed off by a piece of plexi glass), and 1 fan will be blowing air from the flowering chamber into the veg chamber. I powered these fans with a PC power supply. I got a power supply tester so the power supply would power the fans.
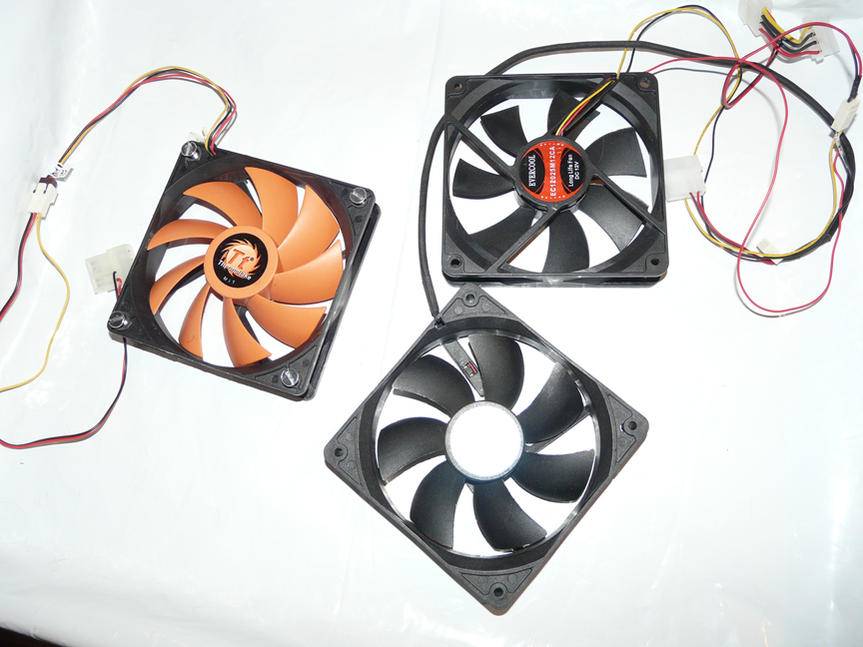
Now, mount the fans and the lights. I mounted 2-80 mm computer fans in the corners of the flowering box, air flow is our best friend in these small spaces!
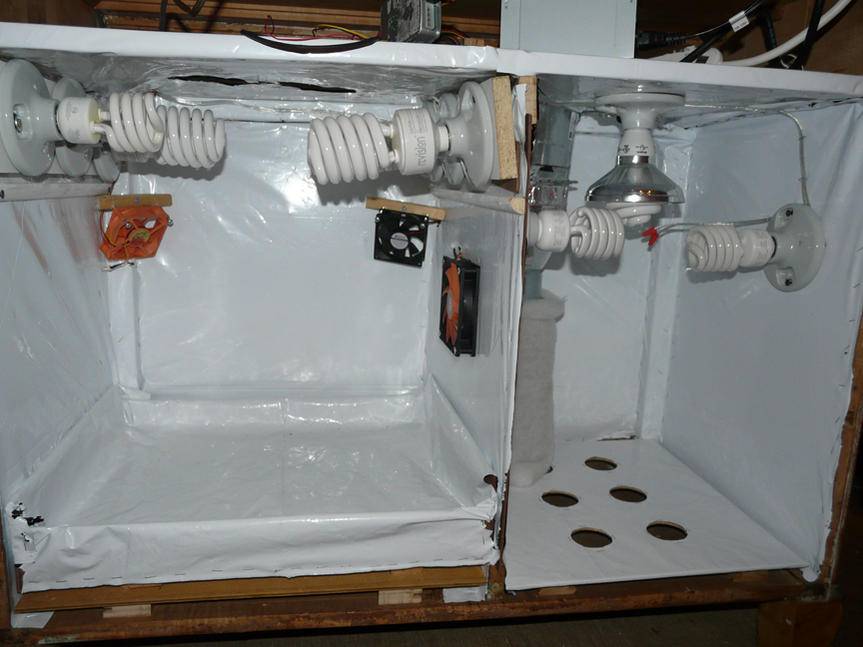
Exhaust fans for lights in flowering chamber

Hinges attached to door
Magnetic closures attached to dresser

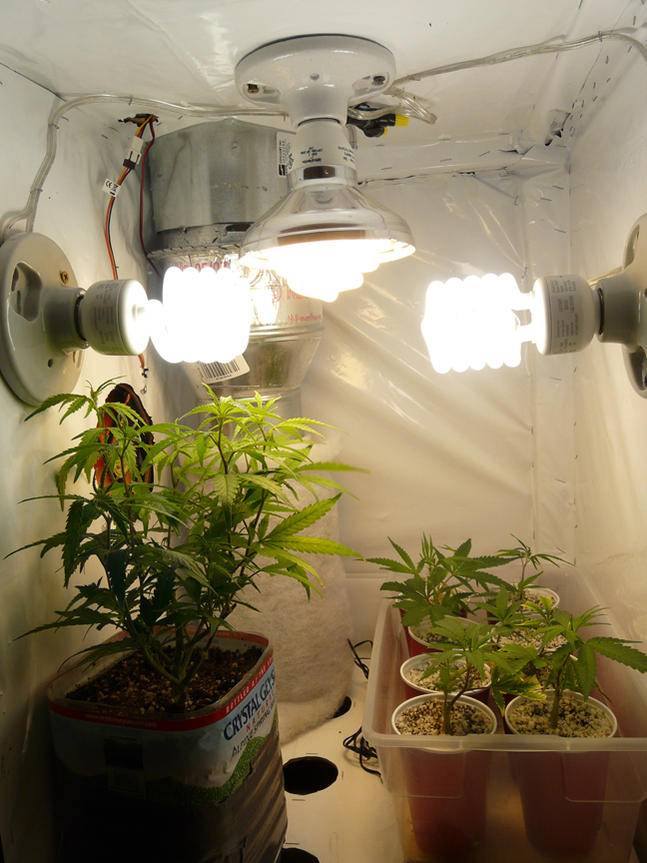
Veg chamber up and running!!!
Flowering chamber plexi glass installed, lights on!


TB4U
Here are a few tools you will need:
Drill & Drill bits (standard sizes)
Jigsaw
2" hole saw drill bit
Phillips Screwdriver
Rubber mallet or hammer
Staple Gun & Staples
Tape Measure
Sharpie Marker
Carpenter's Knife
White caulk, NOT CLEAR
Scissors
Sandpaper
Wood Glue (not necessary, but nice to have)
If you don't have all the items, BORROW THEM FROM YOUR FRIENDS & FAMILY! If they ask you why you need them, make up some bullshit! I didn't want to spend $20 on a hole saw drill bit so I borrowed it, just ask!
Supplies you will need to complete your box:
Dresser
6'x10' of Panda film
1 - 4'x2' 0.25" MDF or Hardboard (I prefer MDF)
9 Ceramic light fixtures
About 8 ft of lamp cord
3 standard plugs (for lamp cord)
Duct fan (I used a 6" but a 4" is also sufficient)
3 - 120mm computer fans
2 - 80mm (standard) computer fans
1 standard computer power supply & tester
1 carbon scrubber (i got the smallest one CAN AIR makes)
9 CFL bulbs (I used a mix of 42 and 23 watt bulbs)
2 Hinges
2 Magnetic Closures
1 power strip
1 heavy duty extension cord
1 piece of plexi glass 3mm thick
8 door/cabinet pulls (not necessary but a very nice touch)
Money Saving Tips
1. Re-purpose the wood from inside the dresser! I got an old ass dresser that was probably hand-built by some old pioneer and I was able to reuse a lot of the wood. I only had to purchase 1 new piece of wood (the MDF) for the back door.
2. Get an old junked computer and use the fans and power supply from that, you can probably find one for free!
3. Check the free section of craiglist for dressers, computers, etc. If you can't find free ones, pretty sure you can find cheap ones. I got my dresser for $30.
4. Don't pay for lamp cords! Find some old ass lamps in the garbage, free section of craigslist or whatever and use those. Just cut them off from the lamp and wa la!
Disassembling the dresser
Take great care in taking the dresser apart. We took time taking it apart and ended up being able to reuse most of the wood from the dresser. We took apart the drawers and used the bottoms to make the front face that the drawer fronts attached to. We also used the bottom of the drawers for the floors of our new grow box.
Now, I'm not going to get into too much detail from here on out; the pictures are pretty self-explanatory. If you've got any questions, feel free to fire away!
The Beginning
Here's the dresser untouched
First, we took all the drawers out and began to take those apart with a rubber mallet
Here's the dresser completely gutted (except for the top shelf, I left that in so we could mount the exhaust fans and run the power through there)
Then we attached one of the drawer bottoms to the front of the dresser, so we would have something to screw the drawer fronts to
Then we attached the drawer fronts with the new drawer handles/pulls
Once that was completed we cut a 6" hole on the inside top shelf we left in and we also added a partition wall in the middle with a hole cut out for a 120 mm fan. We also cut holes in the top of our flowering chamber for the 2-120mm fans we will mount there. Be sure to run caulk around the edges on the inside of the dresser so we don't have an issue with light leaks. I also cut 4 pieces of wood the same depth as the dresser and screwed them into the bottom. These are going to support our new floors.
Next, make your floors from the scrap drawer bottoms. I drilled holes in them with a 2" hole saw bit for air flow. Air is your best friend in these small spaces! I lined the floor of the veg room with panda film, I'm making a separate tray to place the plants in the flowering area so I did not line that floor with panda film
Next, line the entire interior of the dresser with panda film and install the floors
Now, time for the lights. I daisy-chained all the lights together and mounted them to some scrap 1/2" board I had laying around. You can use pieces of the dresser drawers for this also.
Break time with Sweetwater 420 and Mandala Hashberry
Now for the fans, I used 3-120 mm fans. I'm using 2 in the ceiling to exhaust hot air out of the flowering chamber (the lights will be sealed off by a piece of plexi glass), and 1 fan will be blowing air from the flowering chamber into the veg chamber. I powered these fans with a PC power supply. I got a power supply tester so the power supply would power the fans.
Now, mount the fans and the lights. I mounted 2-80 mm computer fans in the corners of the flowering box, air flow is our best friend in these small spaces!
Exhaust fans for lights in flowering chamber
Hinges attached to door
Magnetic closures attached to dresser
Veg chamber up and running!!!
Flowering chamber plexi glass installed, lights on!
TB4U
Last edited:
")


