What's new
  • Happy Birthday ICMag! Been 20 years since Gypsy Nirvana created the forum! We are celebrating with a 4/20 Giveaway and by launching a new Patreon tier called "420club". You can read more here.
  • Important notice: ICMag's T.O.U. has been updated. Please review it here. For your convenience, it is also available in the main forum menu, under 'Quick Links"!

Kaskadian's 150w HPS Growbox

Kaskadian

Active member
Veteran
Evening all,

I decided to go ahead and get started on this thread a little bit earlier than I had originally planned; I wanted to be able to keep a build diary for both you guys & myself. This thread will be a work in progress but I hope you guys will check in from time to time. Ideally I'd like to make progress as quickly as possible, but sometimes life gets in the way. I'll do my best to update this thread as often as possible.

I'd like to start things off on a personal note; this cabinet is dedicated to those who taught me much of what I know about micro growing and growing in general. In particular I feel it necessary to mention mtnjohn, and pieceofmyheart; they've both been mentors, inspirations, and above all, friends. There have been many others that have helped me over the years, far to many to name. I'd also like to thank all of my new friends here at ICMAG, and old friends from previous places.

Let's get to it!

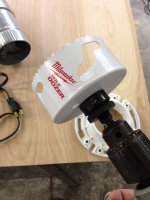
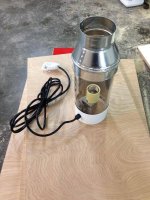
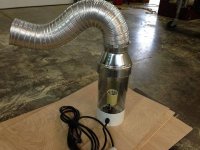
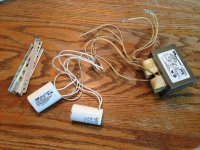
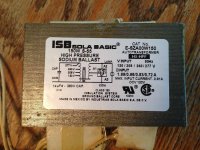
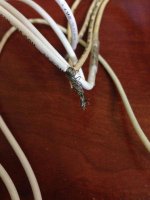
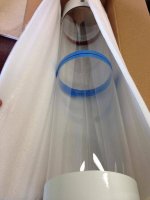
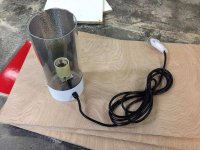
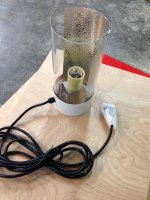
This new cabinet will be using a 150w cooltube HPS. I'll be wiring up my own lighting for this cabinet. Below you'll see pictures for the ballast, ignitor, and capacitor. More parts are needed to wire up the lighting, so I will go into further detail later as I'm getting it all wired up. The wiring you see on the pictures is just to show which wires need to be wired together. I decided to wire up my own lighting because it's cheap and fun. An entire HPS system can be built for under $100 in most cases.

Right now I'm thinking about 36" tall x 28-30" wide x 18-20" deep; this may change as I begin building. I will mostly be scrogging in this cabinet, so after I make a few measurements I'll let you all know what dimensions I end up going with.

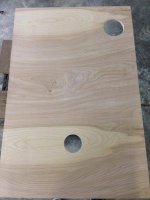
All questions, comments, insults, etc are welcome. Next update coming ASAP. I should be making measurements and making the first cuts before the end of the week.

Kas :tiphat:
 

Attachments

  • Ballast1.jpg
    Ballast1.jpg
    98.6 KB · Views: 5
  • Ballast2.jpg
    Ballast2.jpg
    80.2 KB · Views: 5
  • Ballast3.jpg
    Ballast3.jpg
    40.7 KB · Views: 9

Kaskadian

Active member
Veteran
I should be adding more pictures tomorrow. I will be picking up the wood for the cabinet tomorrow in preparation for making the first cuts this week. If I have enough time, I may even be able to complete all the necessary cuts this weekend.
 

Kaskadian

Active member
Veteran
I went ahead and picked up the wood and a few other small supplies today. If I get time, I plan to make a few cuts before bed. I chose high quality finishing (aka "furniture grade") plywood. I chose it for the beautiful wood grain, durability, and cost. After I get this cut I will start staining & painting the wood. I'm not sure which color stain I will be using yet; I'm thinking either a light mahogany or cherry. I want this wood grain to really shine through. More updates ASAP. :tiphat:
 

Attachments

  • Wood1.jpg
    Wood1.jpg
    44.9 KB · Views: 3
  • Wood2.jpg
    Wood2.jpg
    42.9 KB · Views: 4

Kaskadian

Active member
Veteran
First cuts done tonight! I cut the two sides and the back. I'm still debating on how I want to design the door, so I'll have to get to that tomorrow. So far the cuts went off without any major problems. I found one section of the plywood that had a gap due to manufacturing, but I tossed that piece aside and cut a new one.

Official dimensions are 36" (91.4 cm) tall x 24" wide (60.9 cm) x 20" (50.8 cm) deep.

Next set of updates coming ASAP.
 

Attachments

  • IMG_3260.jpg
    IMG_3260.jpg
    37.6 KB · Views: 9
  • back1.jpg
    back1.jpg
    64.9 KB · Views: 8
  • side1.jpg
    side1.jpg
    61.3 KB · Views: 4

Kaskadian

Active member
Veteran
Good luck with the box. Subbed

good luck, i have been watching

Thanks guys! Glad to have you all here.

I had a cooltube laying around that wasn't going to be used so I decided to modify it for my cabinet. I carefully cut this cooltube in half. I will be connecting a reducer to the other end of this cooltube and take it from 6" to 4" for ventilation. Don't be mad about the cooltube... it was a cheap-o and wasn't being used anyway; it'll have a new home.. or two! Enjoy the pictures fellas. I'll be uploading pictures of the finished cooltube soon.

:tiphat:
 

Attachments

  • ct4.jpg
    ct4.jpg
    107.1 KB · Views: 4
  • ct3.jpg
    ct3.jpg
    129.8 KB · Views: 5
  • ct2.jpg
    ct2.jpg
    28.5 KB · Views: 4
  • ct1.jpg
    ct1.jpg
    32.4 KB · Views: 8

Kaskadian

Active member
Veteran
I promise I'm not trying to post whore here. I'm trying to keep the build log as up to date as possible. Since cutting the cooltube, I've rewired it and added some reflective goodness; I'll look prettier once everything has been completed.

Tomorrow I will be doing the following:

1. Adding a reducer onto the cooltube
2. Installing the mounting hardware onto the cooltube.
3. Making ventilation cuts.
4. Starting the staining/painting (post-cutting).

Cheers!
 

Attachments

  • ft1.jpg
    ft1.jpg
    76.6 KB · Views: 5
  • ft2.jpg
    ft2.jpg
    93.5 KB · Views: 5
  • ft3.jpg
    ft3.jpg
    71.9 KB · Views: 5

Kaskadian

Active member
Veteran
what sort of ply is that? it looks almost like MDO?

Hey bro,

This isn't MDO; I'm a huge fan of MDO for some projects because of it's water resistant qualities though. The plywood being used in this build could also be known as "project panel" plywood. Project panel plywood is often used for cabinets, furniture, shelving, etc. I also chose "A grade" plywood simply for aesthetic reasons. It's roughly $30-40 for a 4' x 8' sheet. This type of plywood isn't necessary to produce a wonderful growing cabinet. I chose this simply out of personal preference.


Let me mention a few thoughts for anyone planning on building their own setup:


  1. A few extra $$ goes a long way. I've seen a lot of people try to cut corners in their builds. Building a micro growing setup doesn't need to be expensive, but don't cheap out on the necessities. Make sure you have everything you need before you really get growing. Back in the day for my first micro grow I cheaped out big time on my exhaust and my grow suffered with temperature related issues. The entire grow was a nightmare and my temps went as high as the low 90's. This entire build will be less than $350 lighting and all.
  2. Measure 10x and cut once. I'm almost OCD about the measurements of my cuts. I'll measure in 1" increments until I'm sure each cut will be perfectly uniform. Do it right the first time and save yourself a lot of headache.
  3. Read, read, and read some more. There are lots of brilliant micro growers on this forum (and elsewhere). Take advantage of being able to seek advice from this wonderful community and it's members. I've built many cabinets now and I always take advice from others more knowledgeable than myself.
  4. Be reasonable. You won't be pulling lbs out of a micro setup (normally). There is a lot of hate towards 150w HPS setups, but they're damn good when used properly (see mtnjohn's link below). Also, you aren't limited to HPS; there are growers around here that are using LEDs, CFLs, etc. Find what's right with your setup and don't even try to stuff a 1000w HPS in a tiny cabinet. A previous cabinet similar to this one yielded between 95-112g (3.2-4 oz) per SCROG harvest. Make sure you keep your temps under control, good airflow (you don't want old stale air sitting around), etc.
  5. Be patient. For me the journey is enjoyable. I love building my grow setups as much as I love growing. Take your time and do things properly. If growing has taught me anything, it's taught me to be patient. Use the same mentality when it comes to building your cabinet, room, warehouse, etc.
I'm far from an expert, so please don't take my advice as arrogance. This advice was directed at anyone reading through my thread and thinking about building their own rig. I learned to take the time and listen to advice the hard way.


I also want to plug mtnjohn's thread in here. Johnny boy has been a source of inspiration and I encourage all of you to look over his thread. His thread shows the true potential of a dialed in 150w HPS setup.
https://www.icmag.com/ic/showthread.php?t=49829


Updates coming soon!

Kas :tiphat:
 

Kaskadian

Active member
Veteran
Good work on the cool tube mod!

Thanks! Believe it or not I used a dremel tool... Very sketchy cutting glass with a dremel, but it can be done with a steady hand and some patience. :biggrin: "You must spread some Reputation around before giving it to Midwest sticky again."
 

Midwest sticky

Resident Smartass & midget connoisseur
Yeah I tried to mod one once and it ended with a broken cool tube and a big chunk of it in my palm. No steady hand here lol.
 

Kaskadian

Active member
Veteran
Yeah I tried to mod one once and it ended with a broken cool tube and a big chunk of it in my palm. No steady hand here lol.

I know that feeling bro. :biggrin: I've broken more than one in my time haha! I'd wager I spent an 45 mins + cutting this tube and heated/cooled the glass multiple times (via rotation). Luckily it broke clean when I cooled it down the final time.
 

Kaskadian

Active member
Veteran
Only a small update tonight. I went ahead and started cutting holes for the exhaust & intake. Tomorrow I may be assembling the cabinet. After getting everything assembled I can then focus on staining/painting completed. I'll also be drilling out the holes for the door handle. I will be adjusting the exhaust to prevent any hangover from the scrubber. After the staining/painting has been completed I will begin installing the light, fan, and other final goodies.

The top cut is the exhaust and I'll be using a 4" ducting fan for this. The bottom hole is a 3" intake hole. I will be rigging something to to prevent light from entering/exiting the cabinet via the intake. The flange on the back isn't in it's final position, I was giving it a fitting test. Once it's in position it will sit flush and be screwed into.
 

Attachments

  • back4 - Copy.jpg
    back4 - Copy.jpg
    46.1 KB · Views: 3
  • back3 - Copy.jpg
    back3 - Copy.jpg
    23.1 KB · Views: 6
  • back2 - Copy.jpg
    back2 - Copy.jpg
    42.5 KB · Views: 3
  • back1 - Copy.jpg
    back1 - Copy.jpg
    44 KB · Views: 7

Kaskadian

Active member
Veteran
I will also be fitting the reducer onto the cooltube. The pictures below show a rough fitting with some loose ducting. It'll be trimmed back and fitted to verify that the reducer doesn't cover any part of the light. It's already been measured and I can confirm that the light will not be obstructed in any way.

Cheers
 

Attachments

  • lite1 - Copy.jpg
    lite1 - Copy.jpg
    71.3 KB · Views: 4
  • lite2 - Copy.jpg
    lite2 - Copy.jpg
    71.9 KB · Views: 3
Top