What's new
  • Happy Birthday ICMag! Been 20 years since Gypsy Nirvana created the forum! We are celebrating with a 4/20 Giveaway and by launching a new Patreon tier called "420club". You can read more here.
  • Important notice: ICMag's T.O.U. has been updated. Please review it here. For your convenience, it is also available in the main forum menu, under 'Quick Links"!

my 'Lil' Vegebox

Latitude18

Member
Well I messed up and started this thread in the wrong place accidently. So I'll restart it, already in progress , here where it's s'pose to be. The beginning part will be found in the tokers den under "starting the long process".

as of today , I took a few days off and yesterday started to build the door , went to rip some oak and the table saw , less then a year old , blew up.
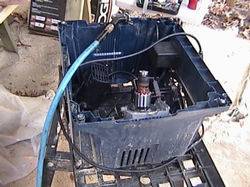
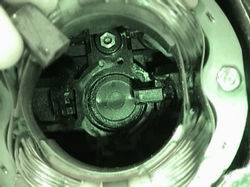


I can fix it up though

Here's where i'm at on the build


Have to frame the dor a lil and make a lock system Then i can get the inside done .... Need my table saw
 
G

Guest

What are the dimensions of that sweet little box? Also what kind of wood is that being used?
 
G

Guest

18

That is a first class box you are building there!! :woohoo:
You are a craftsman for sure. I'll bet you are planning on putting a nice stain & finish on that & making it look like a piece of furniture or built-in. A great idea for stealth. Are you a cabinet maker by trade by any chance?
Please provide us with some pics when you gottr all done.

Bh
 

Latitude18

Member
I try

I try

I do some furnuture building here and there , it takes alot of special tools to do it right. As far as the outside , i wanted to leave it natural and just clear coat it , all nails would be under to trim except the door , but if i can fill them , make a lil glue and sawdust filler , I'll clear coat it if not i'll spray it black acrylic. Inside , spray it white with some Kilz2

going to HD today to get another table saw , i'll get the same model that broke and return the broken one

hopefully I'll get some work done today , I also have to fix my new used truck , seems to be a short in the back lights , when the lights are on everything is fine , till you hit the brake , then all kinds of weird stuff happens , So i'll be chase'n shorts , hope its a short chase :chin:

plus today is beachday

This is easy stuff , I use to do the big stuff , bridges , houses , heavy marine contr.

I can tear it down , load it up , truck it away , come back and build it new , soup to nuts , don't matter what it is ... bikes to planes .. dog houses to multi million dollar weekend homes for movie stars ... even poured concrete with a heilocopter in the east river right outside the UN building in NYC... now i sit on my ass alot and do lil projects when i can


night shot .. before and after corners ... made them this way for strength , top and bottom are 3/4 marine ply

can't wait to do the inside ... just wait till you see whats gunna happen in there... i have two 2 foot 20w 5000k floro tubes and two 42 watt 2600k cfl's and a 80 cfm fan .... to be continued :sasmokin:
 
G

Guest

Alright, gussets for the corners!!

Keep us updated...I'm pulling up a chair. :lurk:

Bh
 

Latitude18

Member
todays update

todays update

Got my new saw , and added another tool to the collection, a nice jigsaw w/laser line. Had to chase the short down in the truck lights , that got a DONE stamp , and did a lil trim on the door , did the long sides and it fits so good i had to loosen it up some. Top trim is easy and bottom trim is going to be part of the stealth lock , thats gunna take some time ... but I did take a few crapy pics in the dusk light, hope you can see


Latitude18

Member
got a lil done today..

got a lil done today..

... I'll start with a few pics of the door trim in daylight


Next I did the inside ventalation panels
heres the corner ready to go in


And installed


both corners 45'd and a 3/4 x 10" temp. installed in back


heres the light shelf installed


got these shelf pins from a old shelf unit so i can adjust the height


lights on


and in


I know ... what's up with that back wall ?... well , the 45's are the air in and the back panel is exhaust and wires ... got a quiet fart fan that blows @80cfm , i'll connect that in the bottom , pop holes where I need them exhaust holes in the top (elec sec. ) and grow section in the back panel , all feeds down and out the bottom .. size and quantity of holes , yet to be determined
 

Latitude18

Member
no work done...

no work done...

... well yesterday was a wash , Company landed at 12 noon and spent some time at the beach and the bar :sasmokin:

But that don't mean my brain was off , What do you'all think about this idea ....

Seen my cabinet , i was think'n use'n carbon water filters for scrubbers ... check this out , block one end hole (or not and do step 2 twice), you could use anythins from plastic from a milk container to a pvc cap , step 2 >>> put a elbow in the other end ( or both , depending on how much flow you need) , then seal the elbows to the out holes . I'm thinking i have a 4" fan setup so 2- 1" filters , with elbows out at both ends will give me about all i need , maybe the third if needed could be smaller , all depending on the actual output dimensions

what do you all think?
:chin:
 

Latitude18

Member
ok ... i guess it was such a good idea you all ran out to get some , either that or your mom's told you'z .... If you can't say anything nice don't say anything at all ... I'm just not sure if the carbon is the same in water filters as it is in scrubbers

Man , no one has even commented on the vents and lights , guess i'll post pics of electrical work today and try to get the vents all finished and fart fan mounted

can't wait till I actually get a plant in the thing
 

Sauce

Active member
Wow, that's one of the nicest looking diy cabs I've seen! :yes:

Keep at it, can't wait to see the finished look. :smoker:
 
G

Guest

Latitude

Are you planning on screwing a 42W cfl into the socket between the two floro tube fixtures? So far it doesn't look like you're going to wind up with a heck of a lot of lumens in there.

As for your a carbon filter.......the only thing I know is that you need to get "activated" carbon.

Bh
 

Latitude18

Member
yeah .. I have the two 42w cfl's and two 20w tubes ... that's 84watts at 2600 lumes and 40w at 5000lumes ... thats what i have now , never ran any numbers to figure it out but i have more room , and amps , it's onlt 24 x 22 . the thing is they are diff. light temps i'll have to find the formula again

and it is activated carbon in them water filters
 
Last edited:
S

strain_searcher

Great job. I ended up using a door that slides in like yours just not as cool.
 

Latitude18

Member
thanks SS .

and the numbers and I come up with 31 watts per sq foot , 33% @ 2600k and 67% @ 5000k lumes ... 50 being rule for flower i'm pretty good to vege for outside flowering , still only pulling 2.44 amps , could add two more CFL's , they just didn't have the ones i wanted ( i live on a little island , very limited on whats avail. )..... I do have then wired and ready to go , just have family in for vaca and it's rained for two days , on and off, progress is slow
 

BaboKoyanggi

New member
Nice job on the cab. so far, having the right tools and work space is key. I am a little confused about the venting. I think I need to see the whole set up finished with the fan installed. Are you going to mount the exhaust fan on the bottom, and push the air up and out?
I would mount the exhaust fan near the top of the cab( where the air is hotter) and the intake holes in the base of the cab.( colder air). To create an upward flow of fresh air, and to get rid of all that hot air.
Great job, good luck to you and your project.
 

Latitude18

Member
on the home stretch

on the home stretch

ok heres a few shots , I'm almost done


4" pots and a lil Jiffy Greenhouse from HD... show'n size and where the intake and exhaust is


lights on


lights off - with shelf in high poss.


shelf low


electrical .. ballast grounded to 4x4 box ..timer out front


this is the top inside ... I can pop holes any size i need right here for exhaust from top section to head down ,,, lil holes to the right and left on the 45's will feed cool air , shouldn't need much though


intake hole go anywhere i want all the way up size yet to be det.


low grow area .. can move the shelf 1/4 " at a time or less if i want


Faced of the front of the bottom shelf ... for fun


Intake goes in from the fan , right and left to the 45's in the back corners and into the grow area and electrcal area ... then into the back panel andd out just at the sign within 2" from the bottom shelf ,,, hose is connected but not in this pic


Fart fan corner and the plug mounted and sealed out the bottom


Lights hang .. and lay flat against the back so i can lay it down and not break anything... and show you the bottom


holes driled and screened off ... and you can see the male end plug stick'n a touch out the bottom

Things left to do :

-Exhaust filters : have to get two activated carbon water filters and pop two 2" elbows in the ends of each , then pop holes in bottom seal and angle to the sides
-Pop vent holes : lil math and see where holes go , intake and exhaust , size and pos. matter but i can mount a lil thicker piece of wood on the face and angle holes threw that to get air in the right place ,, exhaust is just big holes as high as possable
-Paint : have the paint just have to tape up and spray
-Trim and top: thats last , may get grow'n first
-2nd Light shelf : I want to make a HPS light shelf for it also , for in-between veg cycles ... two 150's would work

Well that's it for now more to come
 

Latitude18

Member
very lil progress

very lil progress

got a few shots of the activated carbon water filters i'm installing to filter exhaust

elbows in , you can see they are 3/4" male and female ends , fit tight and seal right with no glue or anything , for easy replacment


this is as far as I got though , the flu is kick'n me in the butt ,
from here I have 45's for the bottom I'm going to customize

what do you all think ? don't know if no feedback is a good thing or not :pointlaug
 

Latest posts

Latest posts

Top