
You are using an out of date browser. It may not display this or other websites correctly.
You should upgrade or use an alternative browser.
You should upgrade or use an alternative browser.
A new start
- Thread starter Palindrome
- Start date
Palindrome
King of Schwag
Wall build
Wall build
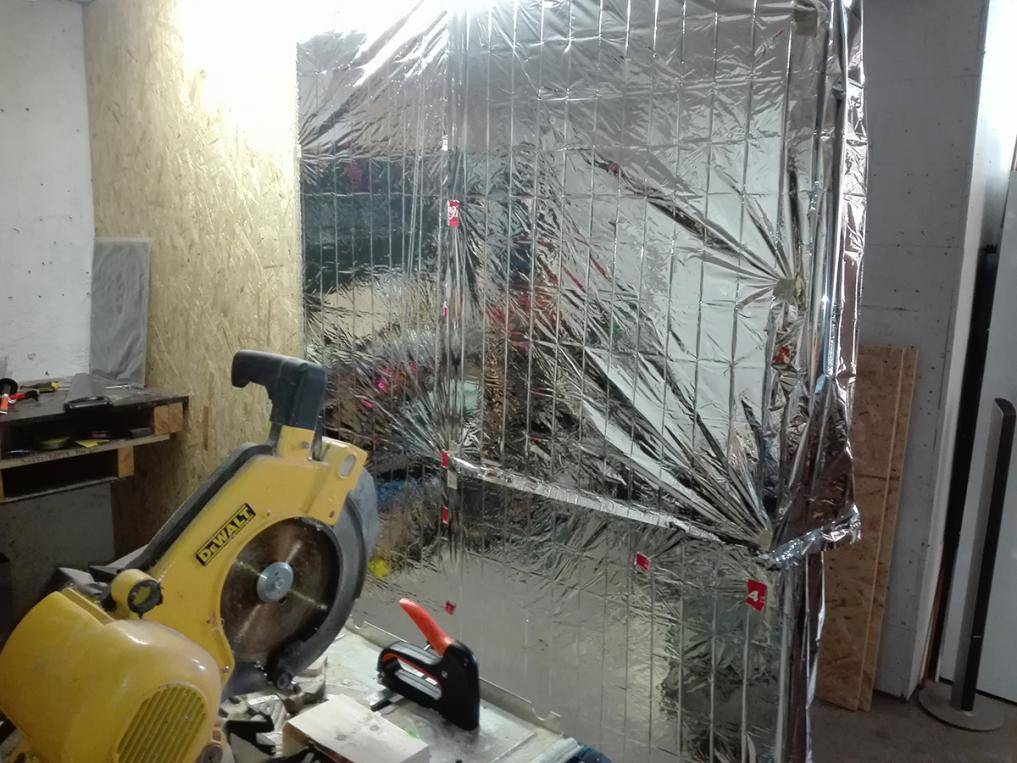
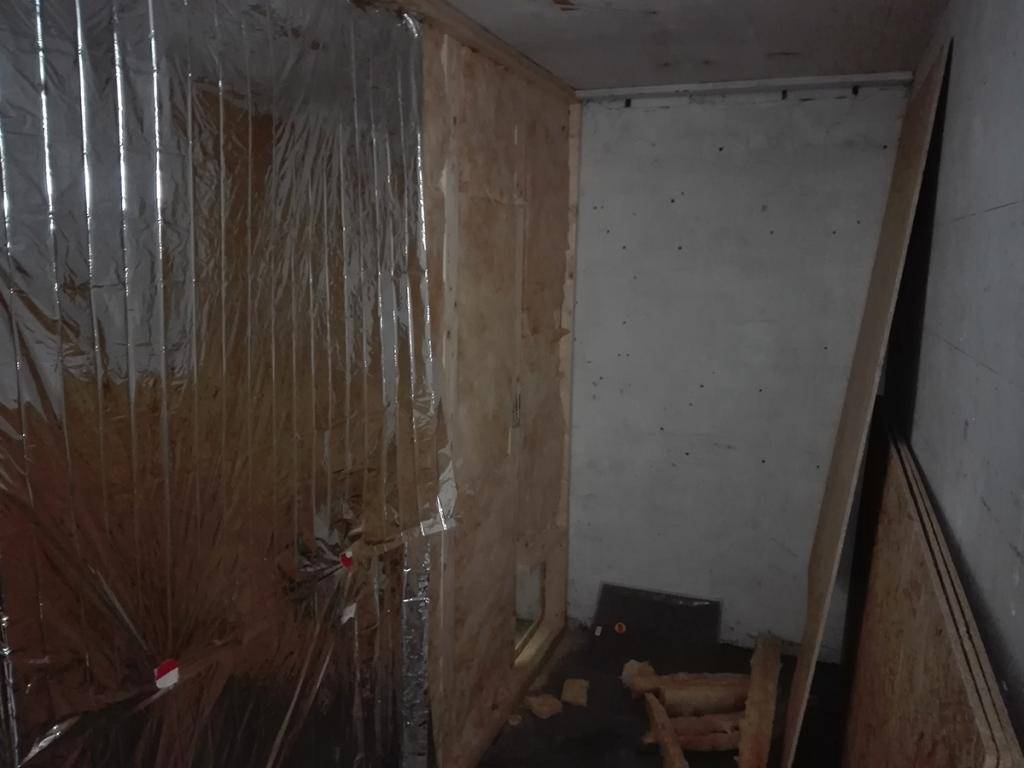
Got started on the wall, hung mylar on the outside of the woodframe. Mounted two wood sheets, now I need to get started on the passive air in take.
As this room won't be running 24/7, I plan to add a simple DIY Carbon scrubber to the passive in take. To prevent any backflow of smelly air, to the garage as the fan will turn off during lights out. It might seem like overkill, but I like to play it safe. It will also help to keep the room clean, from dust and fumes from my I work in the garage.
Wall build
Got started on the wall, hung mylar on the outside of the woodframe. Mounted two wood sheets, now I need to get started on the passive air in take.
As this room won't be running 24/7, I plan to add a simple DIY Carbon scrubber to the passive in take. To prevent any backflow of smelly air, to the garage as the fan will turn off during lights out. It might seem like overkill, but I like to play it safe. It will also help to keep the room clean, from dust and fumes from my I work in the garage.
Palindrome
King of Schwag
happy building, am sure those new seedlings will love the new space.
have a great day man
Thank you, we will see how the seedlings will turn out. I hope everything is going to work out, if not, I'll just get the new space going with clones.
Palindrome
King of Schwag
Wall update
Wall update
It's slow progress, but im getting there. I have a back injury, that prevents me from working more than a few hours per day.
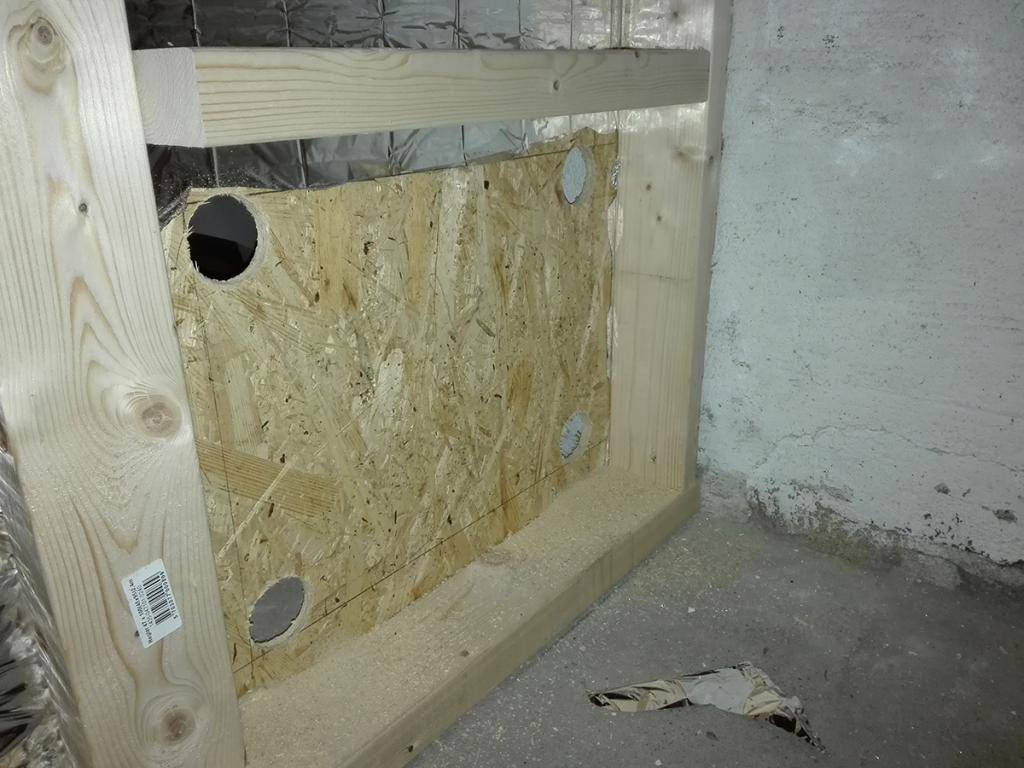
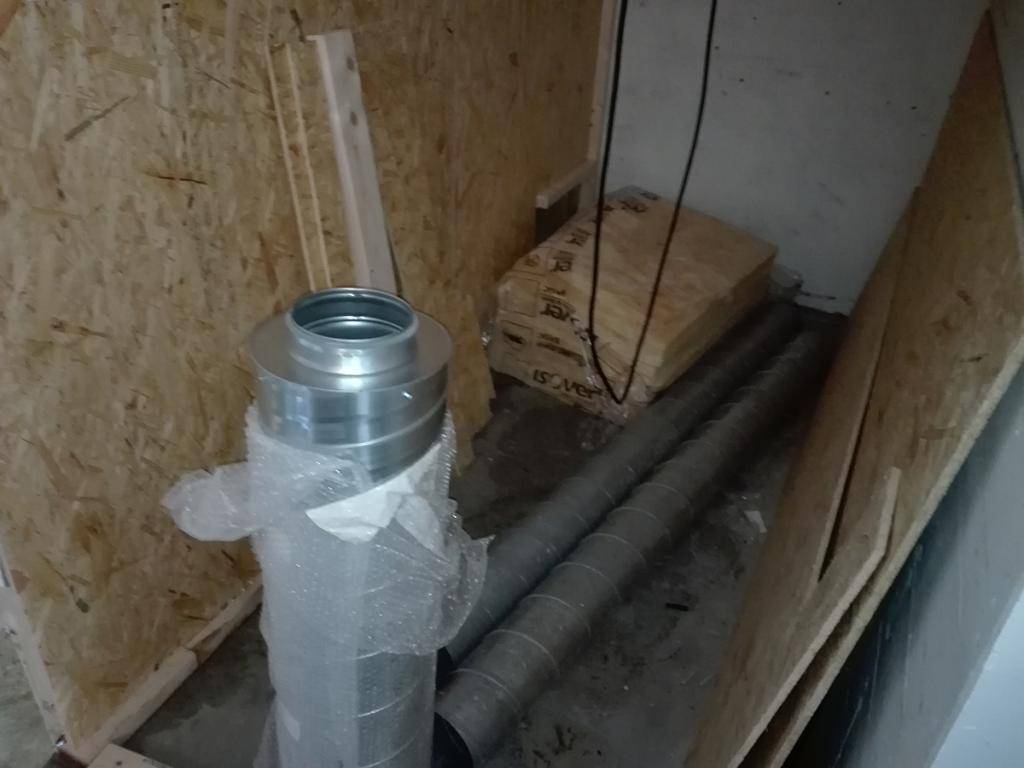
Cut a good size hole in the wall, for my passive in-take. The plan is to make a simple 4" box filter, that slides into place on the inside of the wall.
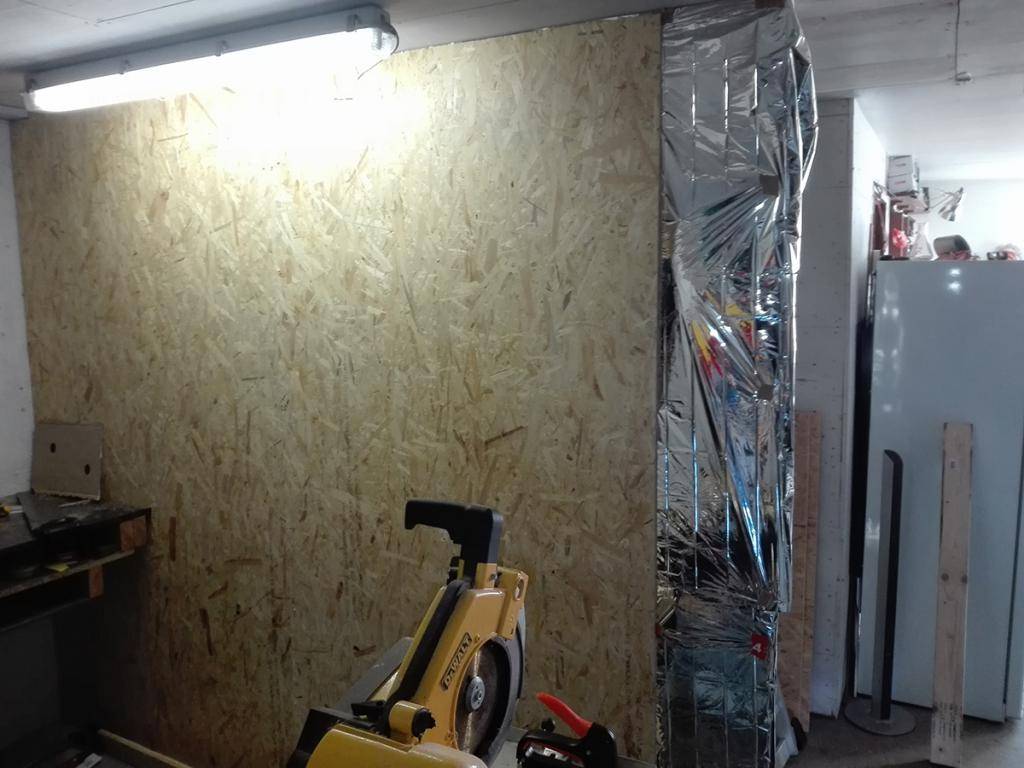
I had the pleasure to insulate my room today.
Had to be done, and now it's a job done. Covered the backside with mylar,
for IR reflection and moisture block. Finaly covered the whole thing up, with wood sheets.
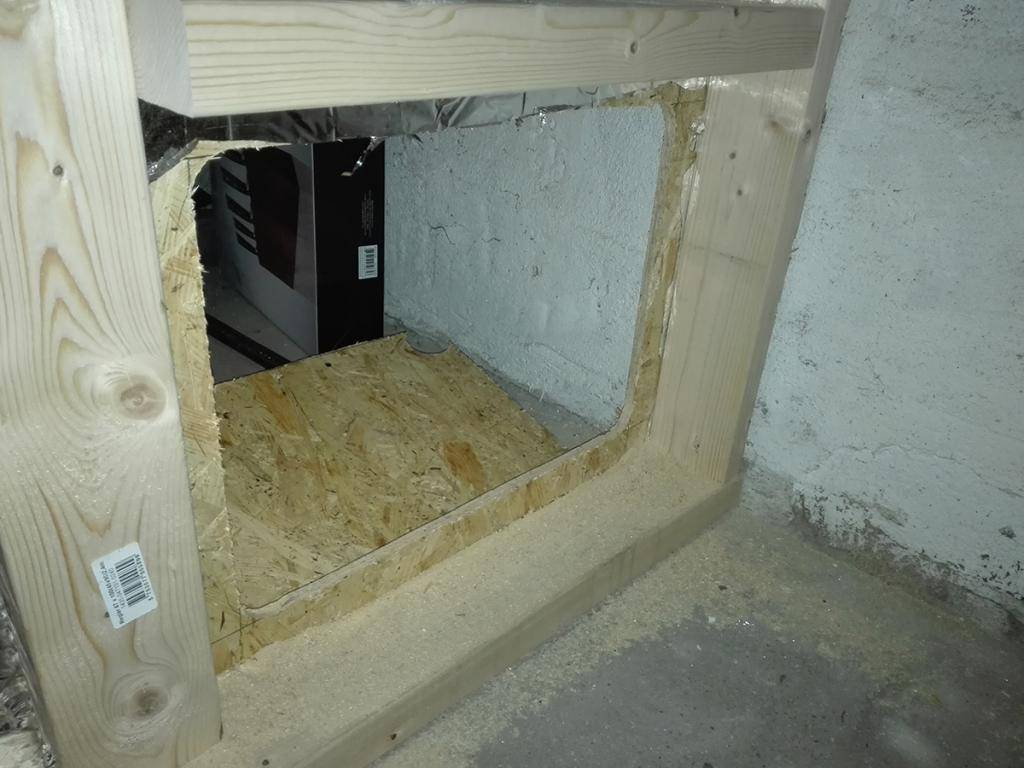
Now I need to build the end wall/hidden door, but waiting for rotery hinges ordered on ebay.
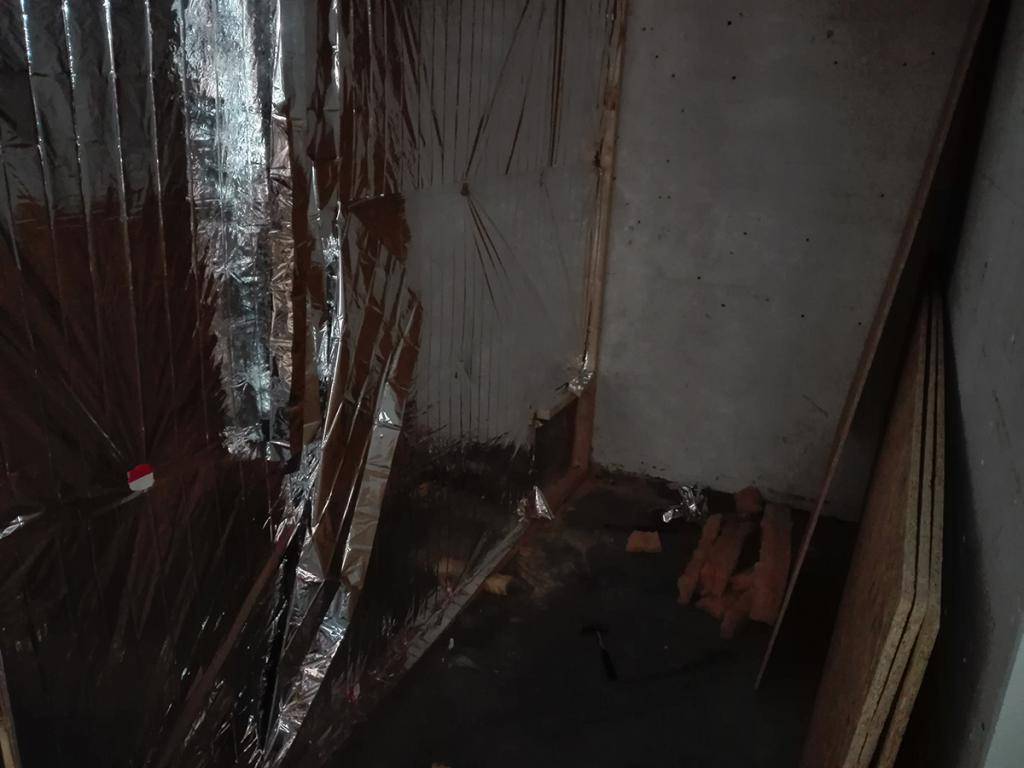
Then it just need a litte paint, a few electric wires and some ventilation.
Wall update
It's slow progress, but im getting there. I have a back injury, that prevents me from working more than a few hours per day.
Cut a good size hole in the wall, for my passive in-take. The plan is to make a simple 4" box filter, that slides into place on the inside of the wall.
I had the pleasure to insulate my room today.
Had to be done, and now it's a job done. Covered the backside with mylar,
for IR reflection and moisture block. Finaly covered the whole thing up, with wood sheets.
Now I need to build the end wall/hidden door, but waiting for rotery hinges ordered on ebay.
Then it just need a litte paint, a few electric wires and some ventilation.
Palindrome
King of Schwag
Electrical wiring
Electrical wiring
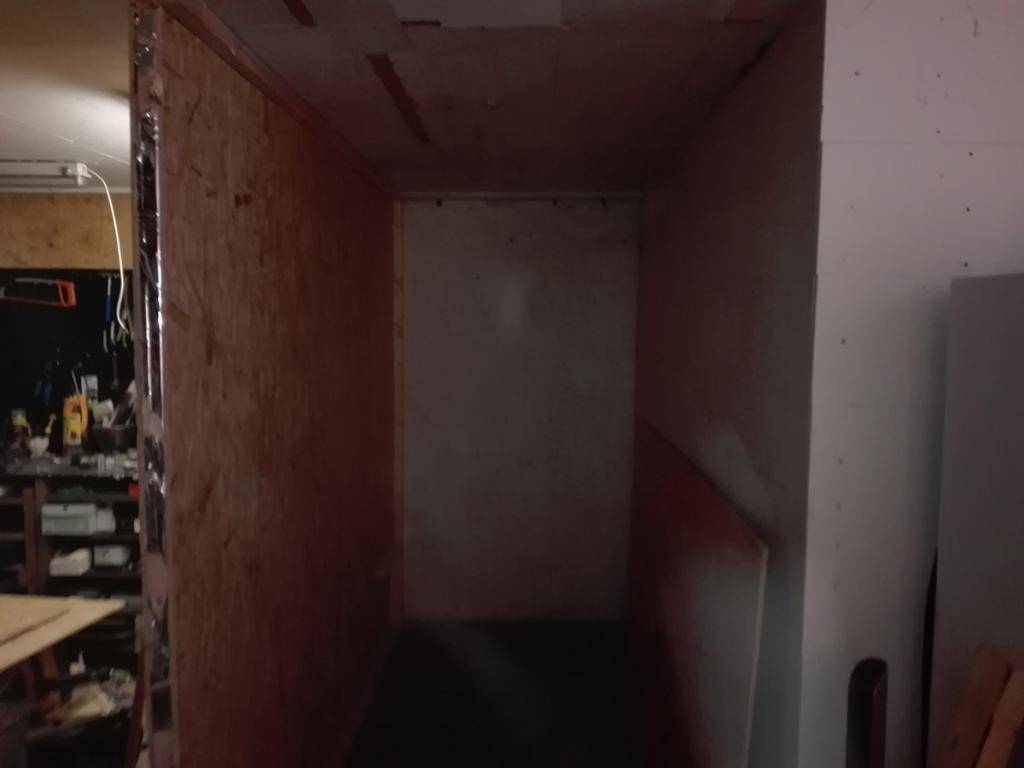
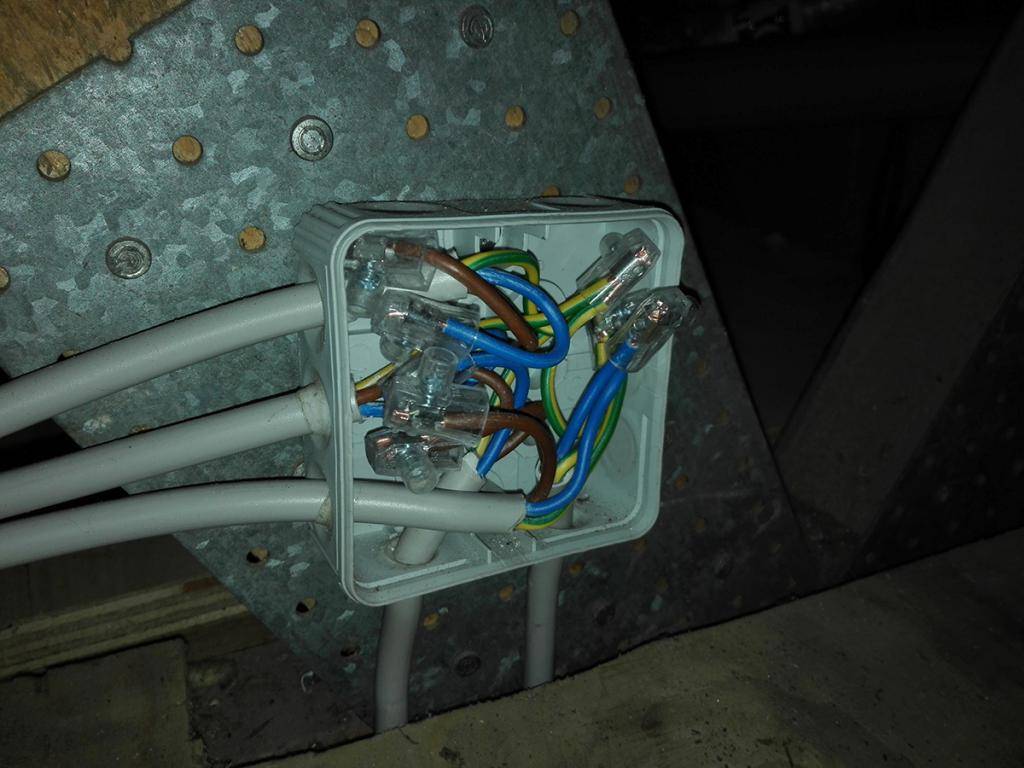
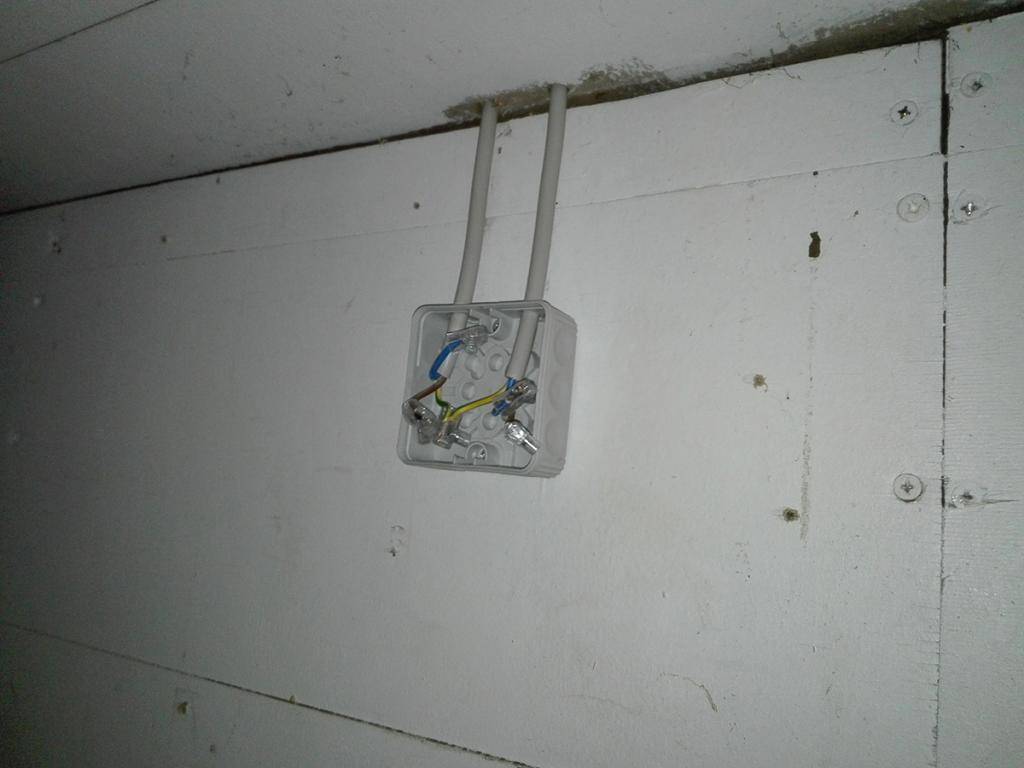
Started pulling cables today, from the main breaker box to the room.
I'm gonna hook the 3 wires to a 3x 16 amp breaker, splitting the room of from the rest of the house. One line will power the lights, second line will run watering and exhaust and the third line will power a few wall plugs for what ever.
The 3x 16 amp will make sure, that every line have enough juice to run everything. But in case of a fail on the exhaust, it will cut all power on all 3 lines. (once had a shortage in a exhaust, but light kept running. With no cooling or watering, and everything in the room died.)
In the garage attic, I have placed a small box. Running two main wires down to the room, for wall plugs and watering. The lights will be wired from the attic, keeping my ballasts out of the room. The same goes for the exhaust, but a third and smaller wire for the fan controll need to be installed.
Electrical wiring
Started pulling cables today, from the main breaker box to the room.
I'm gonna hook the 3 wires to a 3x 16 amp breaker, splitting the room of from the rest of the house. One line will power the lights, second line will run watering and exhaust and the third line will power a few wall plugs for what ever.
The 3x 16 amp will make sure, that every line have enough juice to run everything. But in case of a fail on the exhaust, it will cut all power on all 3 lines. (once had a shortage in a exhaust, but light kept running. With no cooling or watering, and everything in the room died.)
In the garage attic, I have placed a small box. Running two main wires down to the room, for wall plugs and watering. The lights will be wired from the attic, keeping my ballasts out of the room. The same goes for the exhaust, but a third and smaller wire for the fan controll need to be installed.
FrozenFire
Member
I've got me a bucket to sit on! Looks like you are making great progress. Nothing quite like building your own custom stuff.
Palindrome
King of Schwag
I've got me a bucket to sit on! Looks like you are making great progress. Nothing quite like building your own custom stuff.
Welcome aboard FrozenFire, I try to get something done every day while the misses is at work. I've always build my own setups, but I have testet several pre made grow systems. Most have been a bit of a disapointment, that in some way needed modding to work for growing weed.
Im running low on cash, to build the flow table. So I might do a first crop, in a smaller pre made Ebb n Flow system I got in the attic.
Palindrome
King of Schwag
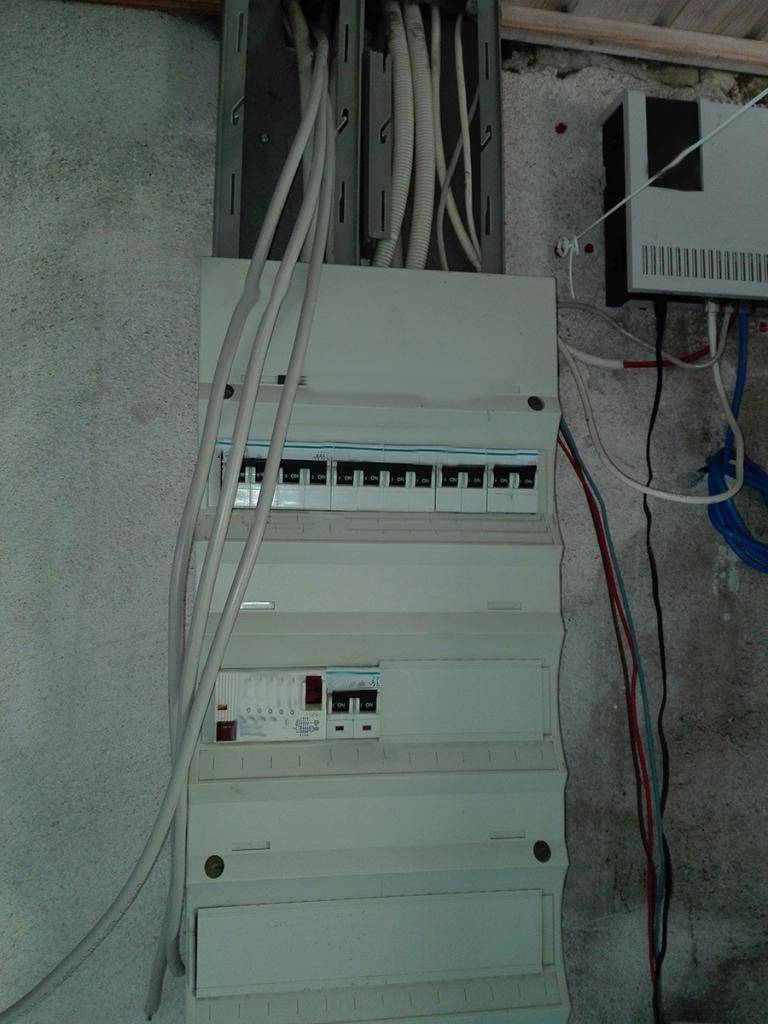
Circuit breaker
Circuit breaker
All right
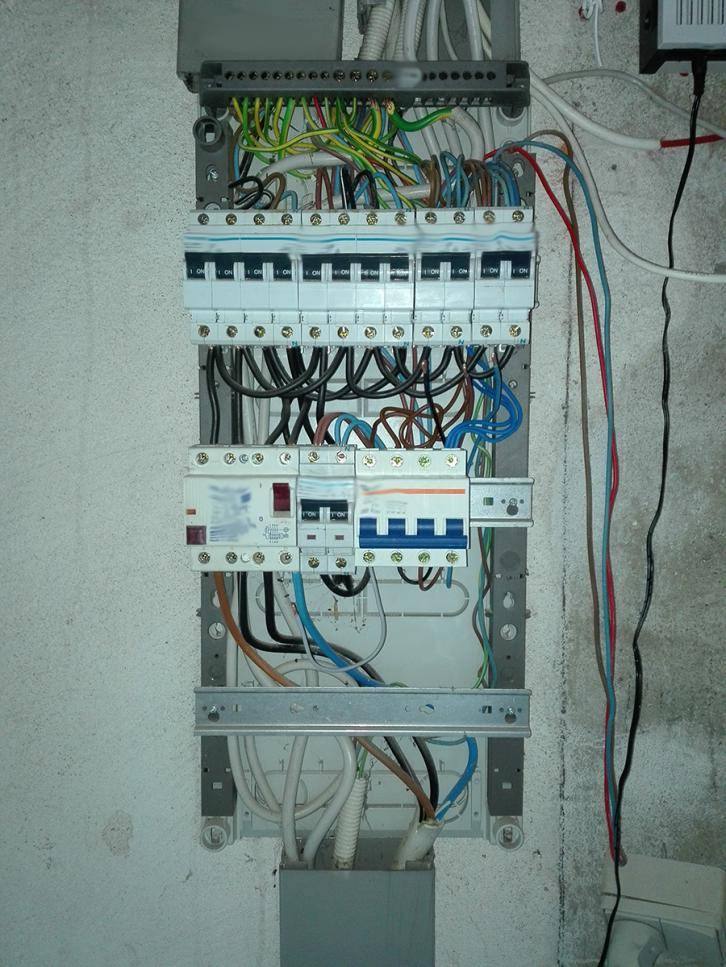
Working on my circuit breaker install, assing a new 3x 16 amp breaker.
This is fairly simple to do, BUT I would not recommend doing this. Unless you have some knowledge, about what goes where and what wire gauge to use. Fucking this up, could burn you house down and leave you without insurance. So do the research or pay an electrician.
Atm im at a stand still, as I won't fuck with the main breaker when im home alone. In worst case, the wrong side of the breaker could easy render you unconscious or even kill you. Best to have some kinda backup IMO, but it's a given I don't plan to electrocute myself.
Circuit breaker
All right
Working on my circuit breaker install, assing a new 3x 16 amp breaker.
This is fairly simple to do, BUT I would not recommend doing this. Unless you have some knowledge, about what goes where and what wire gauge to use. Fucking this up, could burn you house down and leave you without insurance. So do the research or pay an electrician.
Atm im at a stand still, as I won't fuck with the main breaker when im home alone. In worst case, the wrong side of the breaker could easy render you unconscious or even kill you. Best to have some kinda backup IMO, but it's a given I don't plan to electrocute myself.
Palindrome
King of Schwag
Build is looking good. Should be dynamite when you are done.
Thanks Starke, thats the plan
")
And I survived installing the breaker

Now I'v got the power
https://www.youtube.com/watch?v=_BRv9wGf5pk
Palindrome
King of Schwag
Ordering stuff
Ordering stuff
I have to admit I enjoy building grow rooms, it's been so long I had almost forgot how nice this is.
Programmable timers for the light and main exhaust, will be installed in the circuit box.
This way I will avoid wall plug timers, making a better, much cleaner and accessable installation.
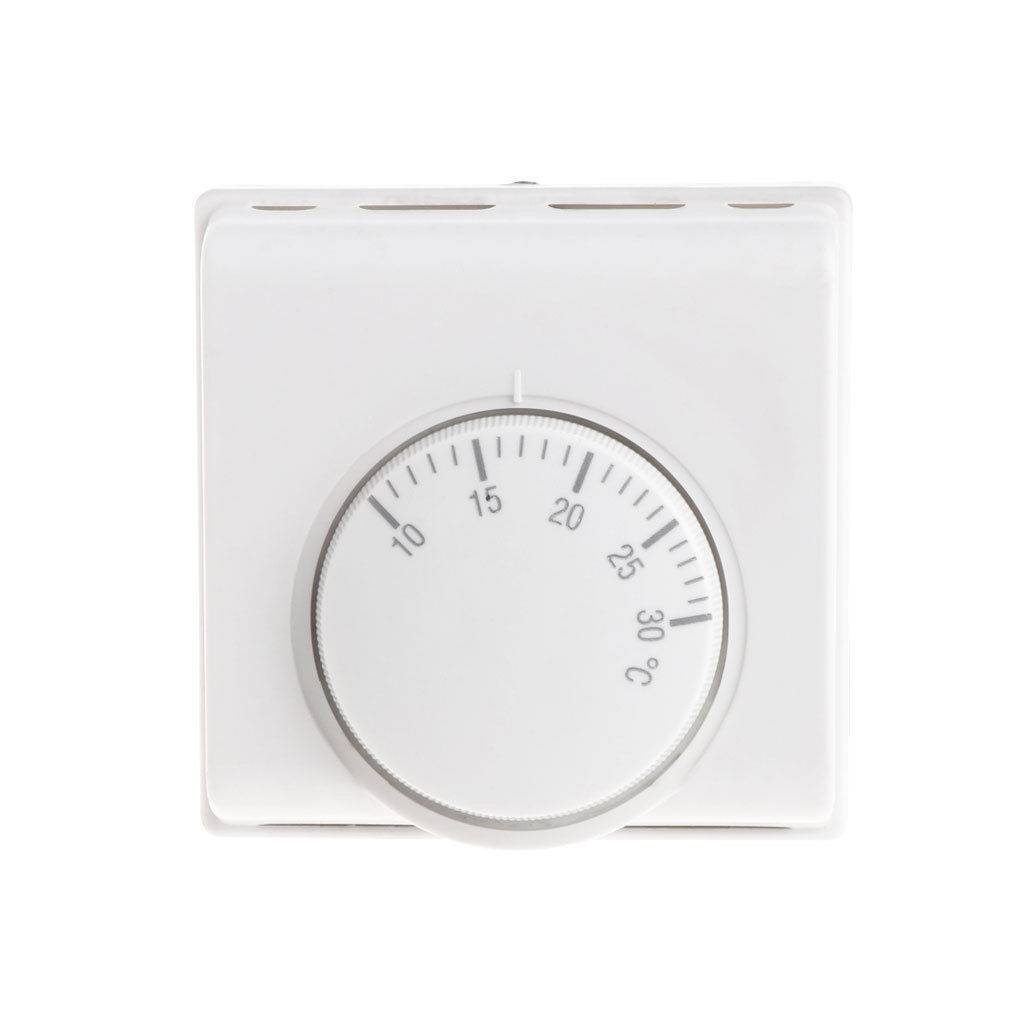
For the secondary exhaust, I will install a thermostat controller.
That will turn on, if the temp. spikes above the max setting.
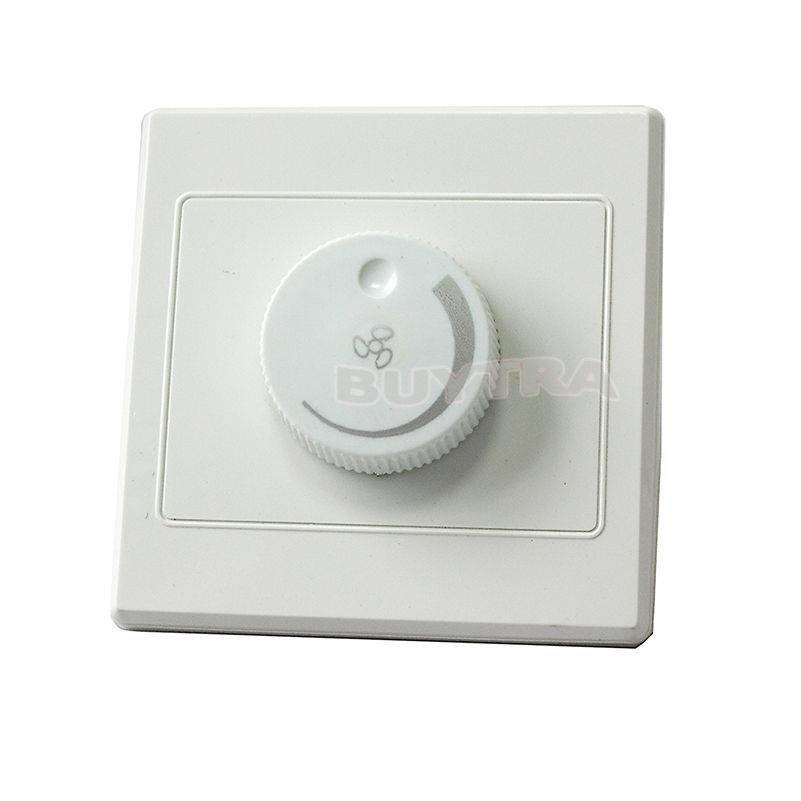
Both exhaust fans will be controlled, by each their own fan controller.
This way I can adjust the fan speed, according to the season.
But without ever having to run any of the fans, at 100% and limit exhaust noise without use of a muffler.
On a side note, I changed the curcuit breaker from 3x16 amp to a 3x 13 amp breaker.
As it's more than enough, but the installation cable for 16 amp was twice the price of 13 amp cable.
Ordering stuff
I have to admit I enjoy building grow rooms, it's been so long I had almost forgot how nice this is.
Programmable timers for the light and main exhaust, will be installed in the circuit box.
This way I will avoid wall plug timers, making a better, much cleaner and accessable installation.
For the secondary exhaust, I will install a thermostat controller.
That will turn on, if the temp. spikes above the max setting.
Both exhaust fans will be controlled, by each their own fan controller.
This way I can adjust the fan speed, according to the season.
But without ever having to run any of the fans, at 100% and limit exhaust noise without use of a muffler.
On a side note, I changed the curcuit breaker from 3x16 amp to a 3x 13 amp breaker.
As it's more than enough, but the installation cable for 16 amp was twice the price of 13 amp cable.
Palindrome
King of Schwag
Welcome back m8! Glad to hear you're back up and growing. I'm subbing this and pulling up a chair to watch the show.

Thank you mate and welcome aboard, still got a bit of building a head of me.
Palindrome
King of Schwag
Mucking around
Mucking around
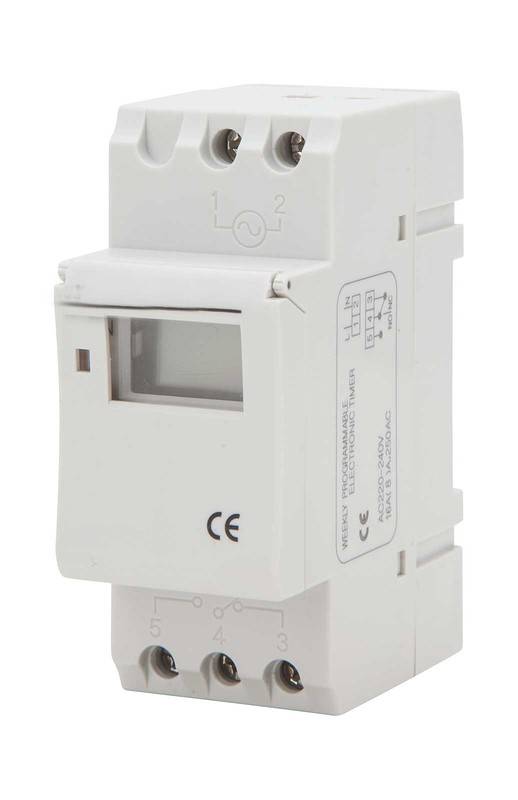
Picked up the timer for the lights today, and gave it my best at intalling it myself. It should be fairly easy, even tho it's been a long time.
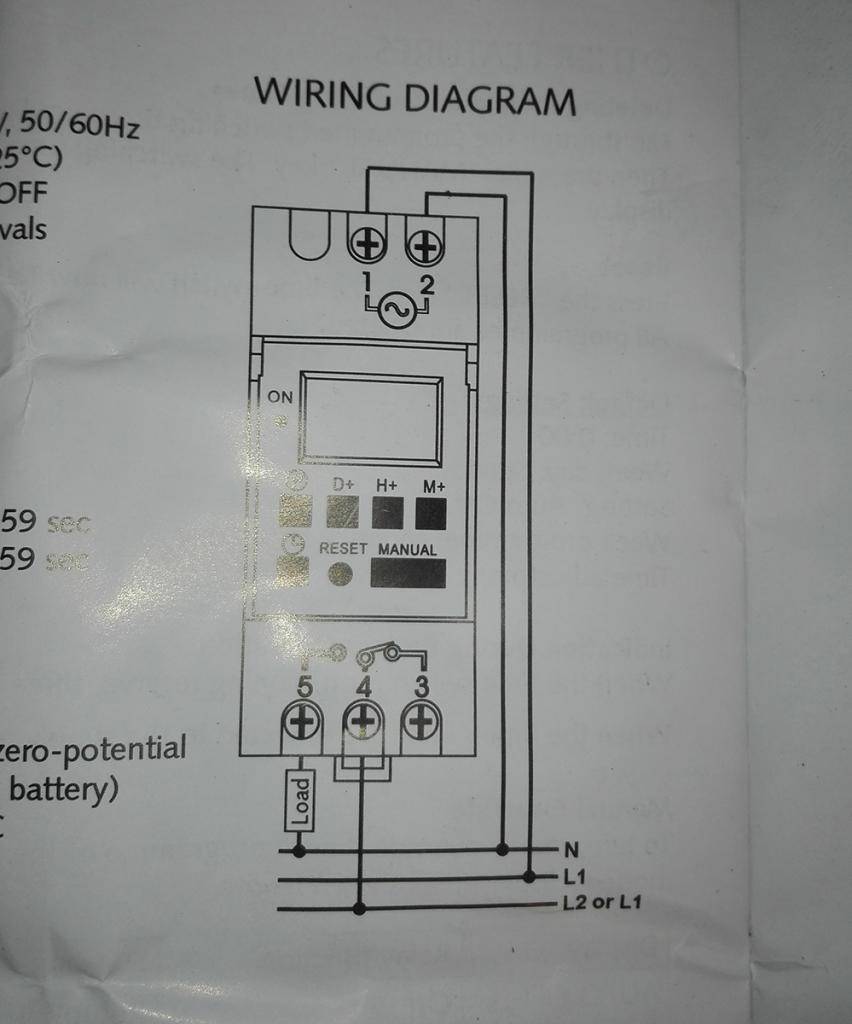
Power to 1
Neutral to 2
Power to the switch at 4
Power to the light from 5
Took me a while to get it working, as I accedently had crossed two wires. After a joint break, I figures that out. Swapped the two wires and now the light timer is working.

As I was trying to find my old ballasts, I was sure I had two of them. I found a exhaust muffler I forgot I had, but I never found the second ballast.
If I can't find it, I'll get one back from a friend.
Mucking around
Picked up the timer for the lights today, and gave it my best at intalling it myself. It should be fairly easy, even tho it's been a long time.
Power to 1
Neutral to 2
Power to the switch at 4
Power to the light from 5
Took me a while to get it working, as I accedently had crossed two wires. After a joint break, I figures that out. Swapped the two wires and now the light timer is working.
As I was trying to find my old ballasts, I was sure I had two of them. I found a exhaust muffler I forgot I had, but I never found the second ballast.
If I can't find it, I'll get one back from a friend.
Palindrome
King of Schwag
Exhaust start
Exhaust start
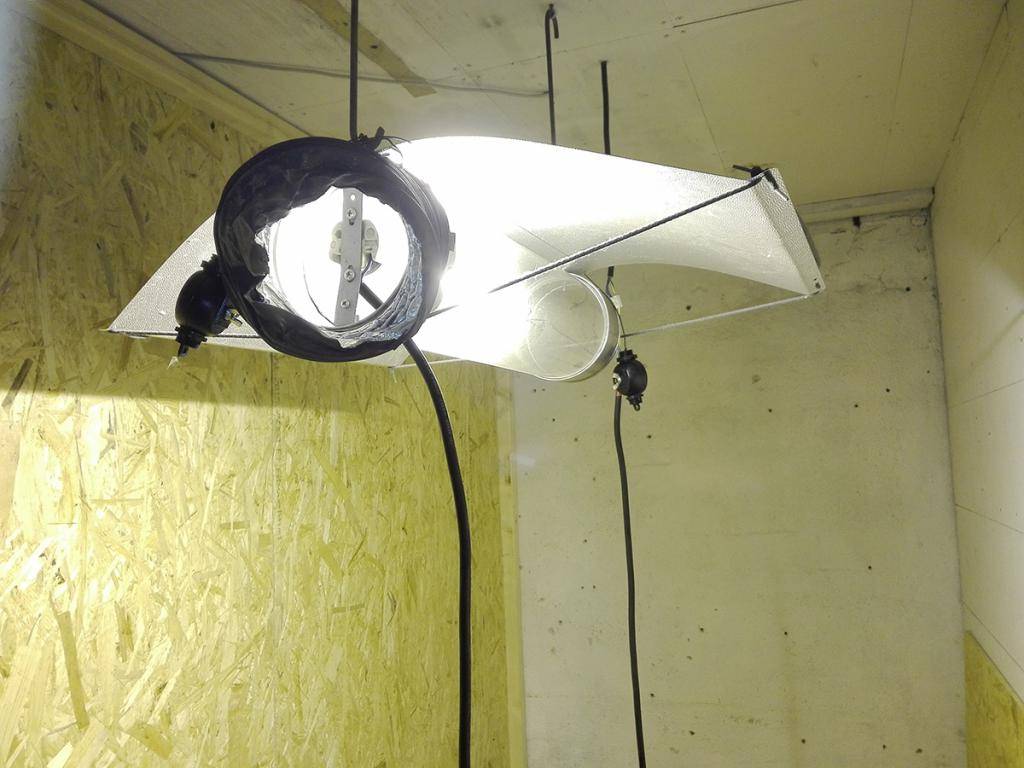
Got started on building my exhaust system, I had almost everything laying around. Ducks, the main fan and the muffler I forgot about. All I needed to pick up, was a few 90 degree fittings and I was ready to build.
I can't remember the ratings on my fans, but I build them for rooms running 4x 600 watt. Given the filter I use is a 700-1100 m3/h unit, id say my fan moves something in that range.
(I used to work as a production manager, at a factory building exhaust and heat exchange systems)
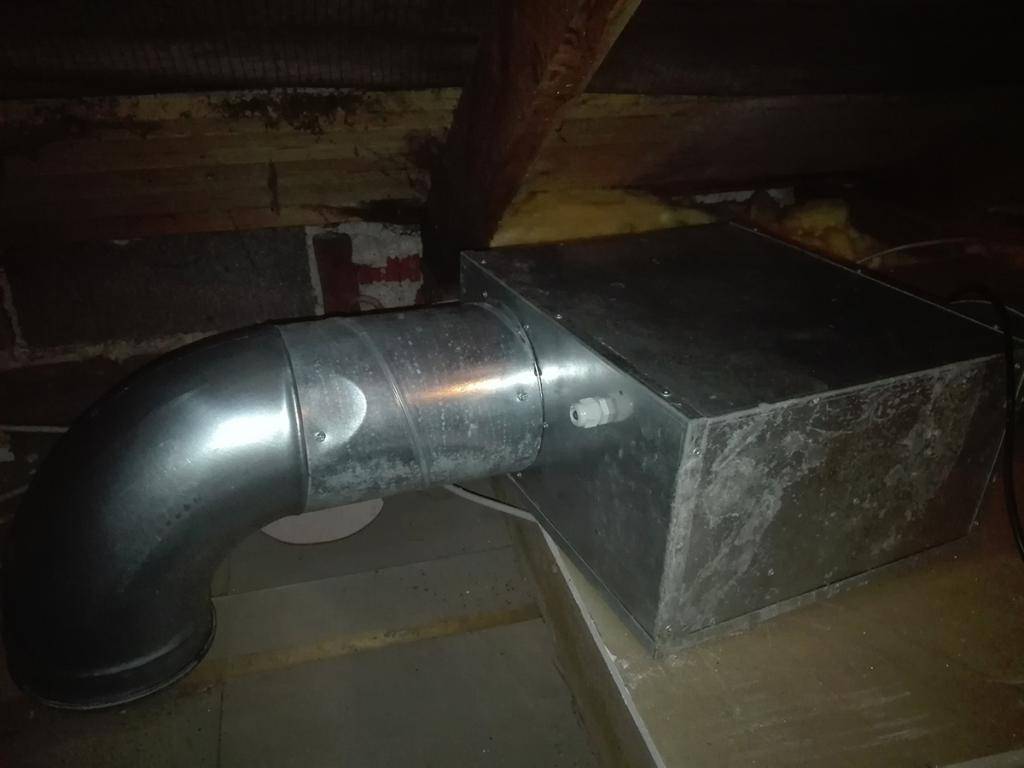

Cut a 6" hole in the celing, with a jig saw and pulled some "hard" alu flex duckting thru the hole. This will connect the carbon scrubber, to the exhaust on the attic.
I was sugested to paint the room, when I showed the picture of the light timer test. It's been part of the plan all the time, the room will be painted flat white. in the long run, it's the best reflective surface. Foils get spotted very easy, so it might have a higher reflection the first two grows. But it's not as easy to wash down, and give a good clean between grows.
Exhaust start
Got started on building my exhaust system, I had almost everything laying around. Ducks, the main fan and the muffler I forgot about. All I needed to pick up, was a few 90 degree fittings and I was ready to build.
I can't remember the ratings on my fans, but I build them for rooms running 4x 600 watt. Given the filter I use is a 700-1100 m3/h unit, id say my fan moves something in that range.
(I used to work as a production manager, at a factory building exhaust and heat exchange systems)
Cut a 6" hole in the celing, with a jig saw and pulled some "hard" alu flex duckting thru the hole. This will connect the carbon scrubber, to the exhaust on the attic.
I was sugested to paint the room, when I showed the picture of the light timer test. It's been part of the plan all the time, the room will be painted flat white. in the long run, it's the best reflective surface. Foils get spotted very easy, so it might have a higher reflection the first two grows. But it's not as easy to wash down, and give a good clean between grows.
Palindrome
King of Schwag
Painting
Painting
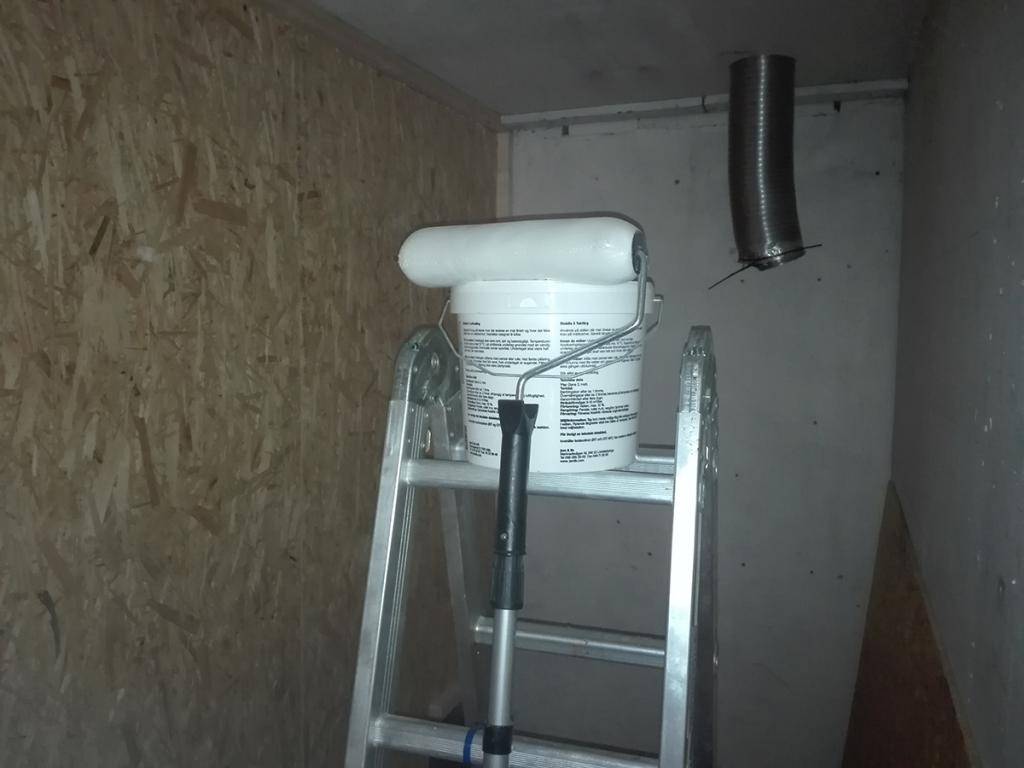
And on the 18th day, he painted it white!
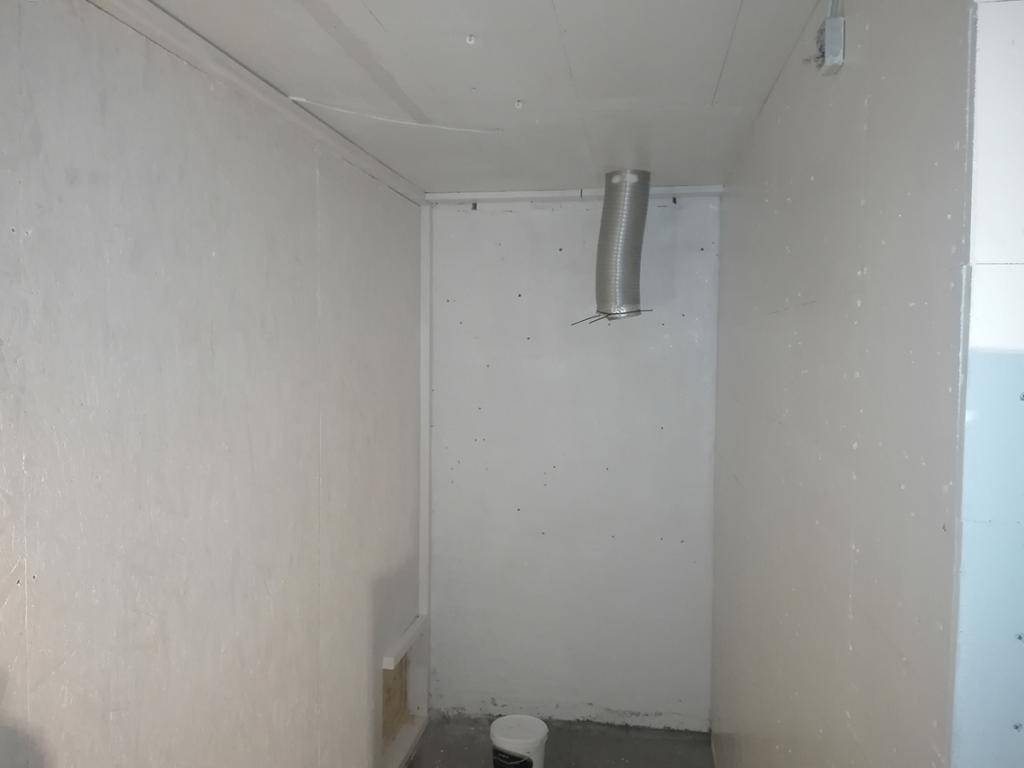
Will give it another layer tomorrow
Painting
And on the 18th day, he painted it white!
Will give it another layer tomorrow
Last edited:
Palindrome
King of Schwag
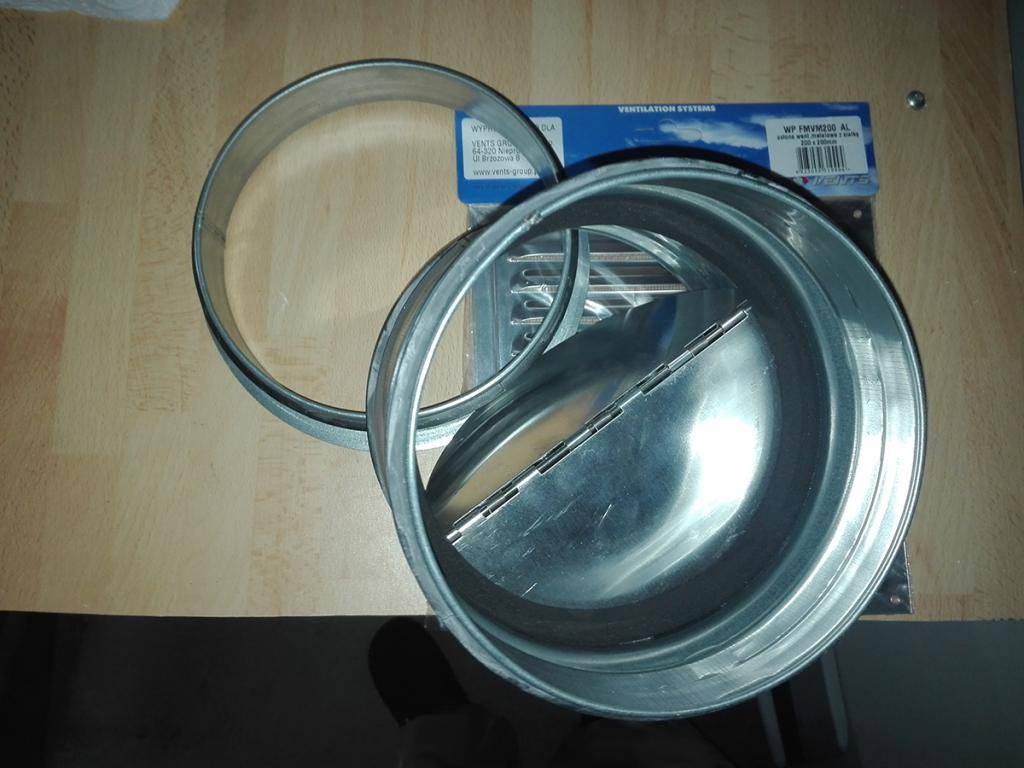
Back draft valve
Back draft valve
Got my back draft valve and exhaust grill today, to prevent cold wind and bugs getting into the grow room.
The valve is just two thin flaps, kept close with a few light springs.
Once the fan turns on, the flaps will open and air can pass with little restriction.
When the fan turns off, the flaps will close and prevent air flowing from the outside into the room.
The exhaust grill have a bug net, that will keep larger bugs away.
I don't think anything small enough to pass thru the bug net, would be able to while the fan is on.
Once the fan is off, the back flow valve will close.
This should in the end result in a clean and pest free room, unless I bring them in myself.
Back draft valve
Got my back draft valve and exhaust grill today, to prevent cold wind and bugs getting into the grow room.
The valve is just two thin flaps, kept close with a few light springs.
Once the fan turns on, the flaps will open and air can pass with little restriction.
When the fan turns off, the flaps will close and prevent air flowing from the outside into the room.
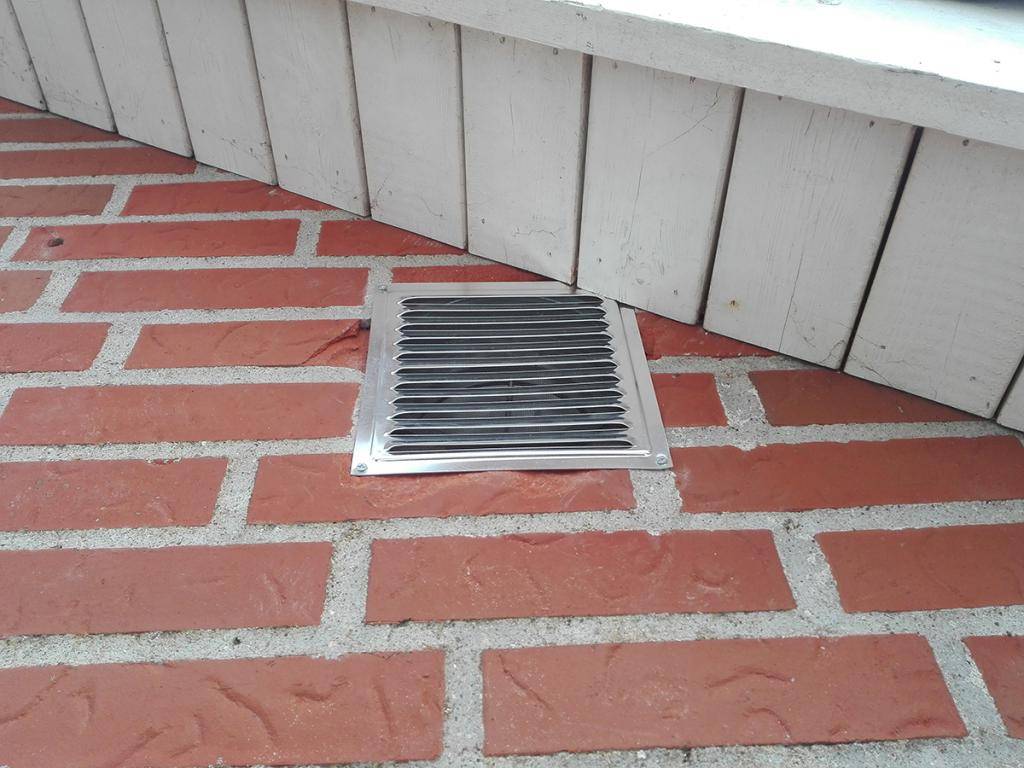
The exhaust grill have a bug net, that will keep larger bugs away.
I don't think anything small enough to pass thru the bug net, would be able to while the fan is on.
Once the fan is off, the back flow valve will close.
This should in the end result in a clean and pest free room, unless I bring them in myself.
Palindrome
King of Schwag
Working on the exhauts
Working on the exhauts
Yesterday I finished the wall paint, there will be more painting to doo once the door is made and put up.
The outside walls will also need some paint, I think I'll end up painting the whole garage at that point.
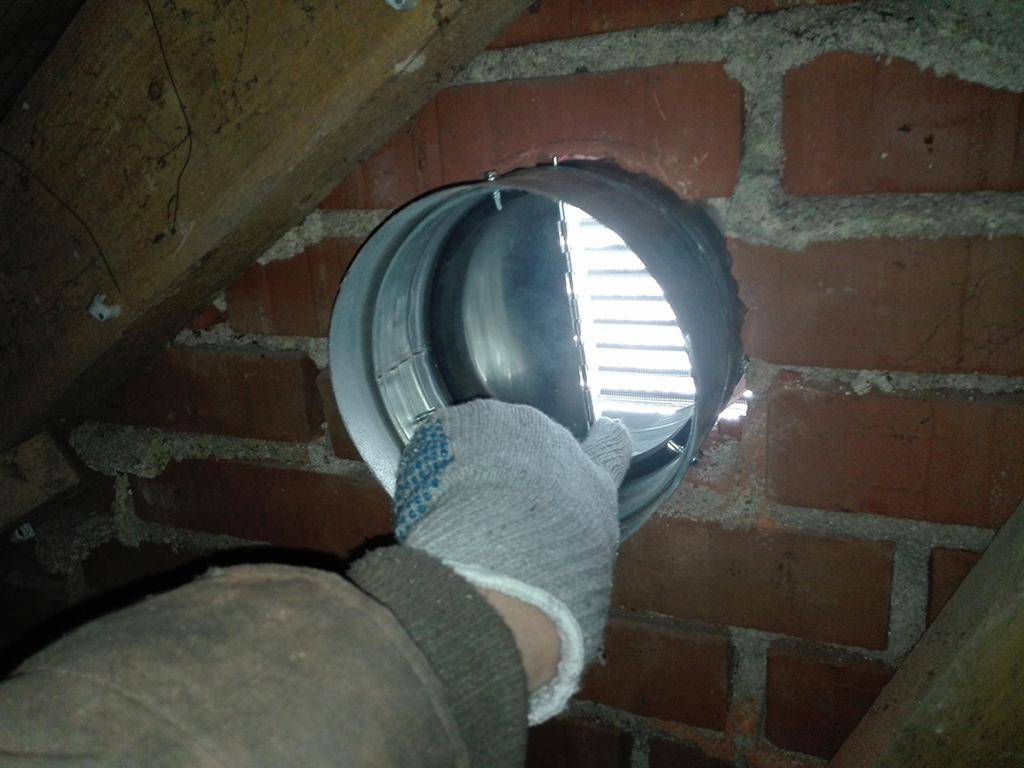
Took the last step, and just made a exhaust hole in the wall of the garage attic.
This way I don't need to worry about things like, snow melting off the garage but not the rest of the house.
A 6 " Cup drill for brick and concreate, was to expencive to buy for one hole and I wasn't able to rent it local.
So had to use my hammer drill, made a circle of holes. Then removed the center, with a chisel and hammer.
Put together my wall flange and back draft valve, here it's a good idea to cut the screws.
So they won't block the valve flaps, before you install it.
Then you don't have to take it all apart again like me!
Pushed it thru the hole from the outside, so the wall flange have a tight fit. Then I mounted the exhaust grill, to give it a nice finish.
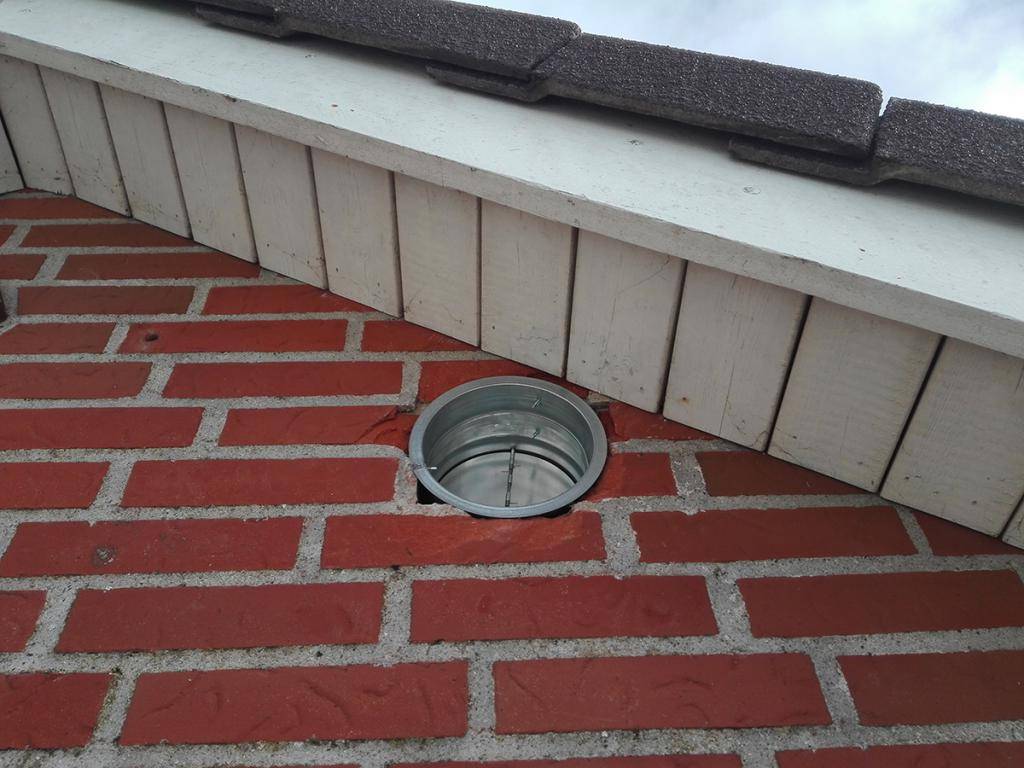
From the inside, check and make sure the valve flaps can open.
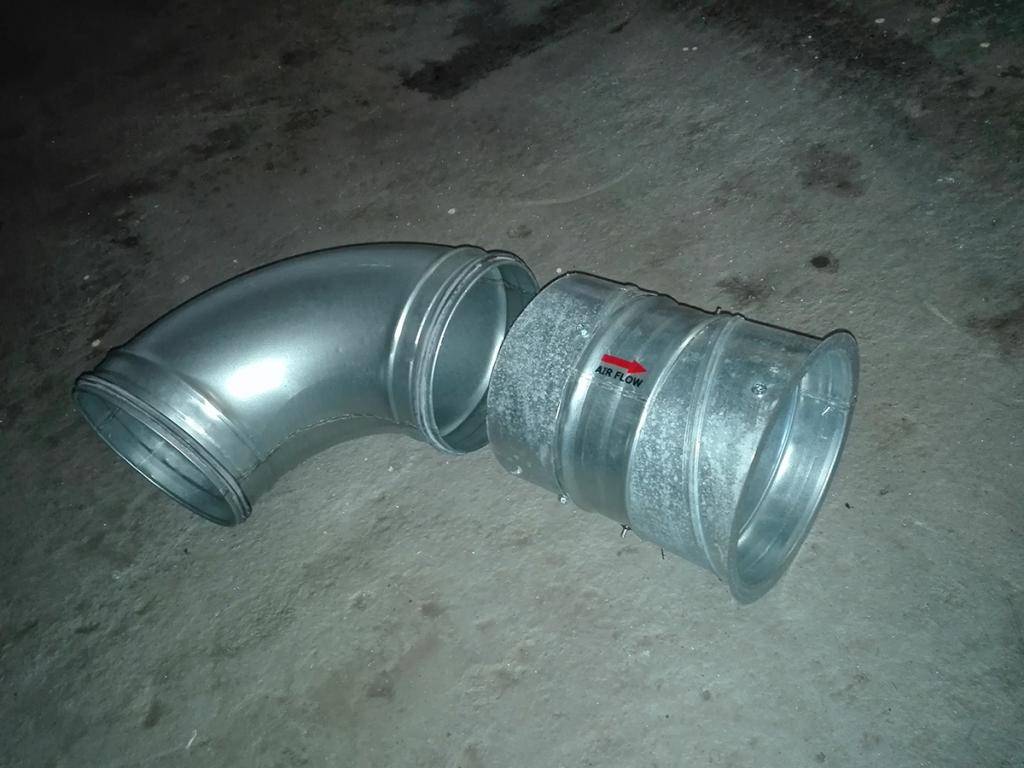
Now it was just a matter of connecting the fan and silencer, with a few 90 degree bends and some straight ducting.
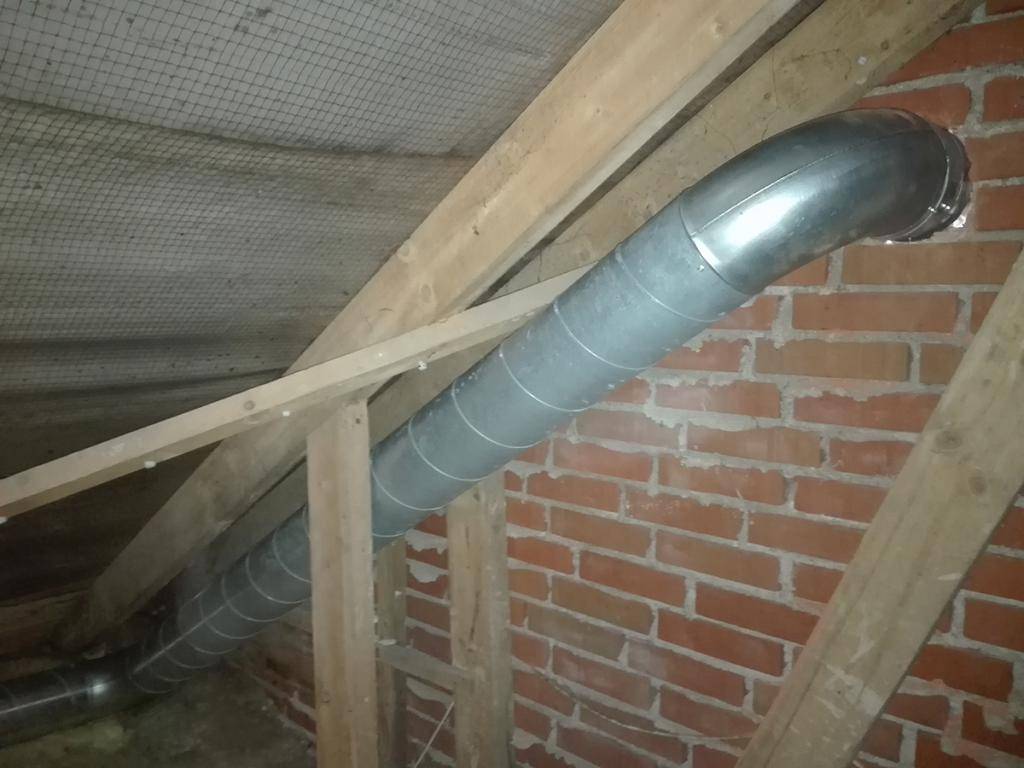
For now the ducting is resting on the insulation, I have mounting clamps for hanging the whole exhaust, for noize reduction but first I will wait and see if it's needed.
Working on the exhauts
Yesterday I finished the wall paint, there will be more painting to doo once the door is made and put up.
The outside walls will also need some paint, I think I'll end up painting the whole garage at that point.
Took the last step, and just made a exhaust hole in the wall of the garage attic.
This way I don't need to worry about things like, snow melting off the garage but not the rest of the house.
A 6 " Cup drill for brick and concreate, was to expencive to buy for one hole and I wasn't able to rent it local.
So had to use my hammer drill, made a circle of holes. Then removed the center, with a chisel and hammer.
Put together my wall flange and back draft valve, here it's a good idea to cut the screws.
So they won't block the valve flaps, before you install it.
Then you don't have to take it all apart again like me!
Pushed it thru the hole from the outside, so the wall flange have a tight fit. Then I mounted the exhaust grill, to give it a nice finish.
From the inside, check and make sure the valve flaps can open.
Now it was just a matter of connecting the fan and silencer, with a few 90 degree bends and some straight ducting.
For now the ducting is resting on the insulation, I have mounting clamps for hanging the whole exhaust, for noize reduction but first I will wait and see if it's needed.
FrozenFire
Member
Hammer drills are the shit for drilling holes in masonry. Good job on the exhaust install. You do some clean work amigo.
Palindrome
King of Schwag
Good job on the exhaust install. You do some clean work amigo.
Thank you mate, better do it right the first time round. But it's funny, as in my everyday life im a bit of a slob. My desk is caos, never know where I put my tools. But my grow rooms, have always been nice and tidy.

