
prelude91sir
Member
Does anybody know where and how i would put a varistor to help with arcing between the contacts.
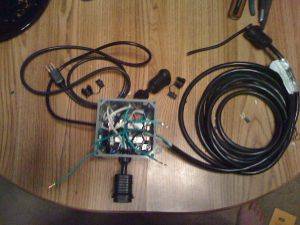
step 1
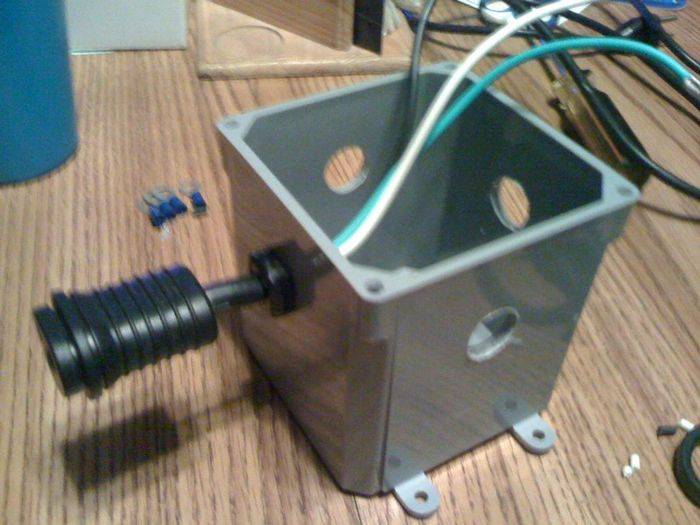
drill 3 hole's 3/4" one on each side make sure you drill them above the relay all so why your at it in the middle of the bottem of this box theres a bump drill that flat as well or the relay dont set right..... this was the test box so one female plug was put in place to make sure every thing was OK... the 4th hole i drilled at 3/4" but i think that its to big im still waiting on the last strain relief the one i ordered was wrong

step 2
remove all screw's from relay and set in project box
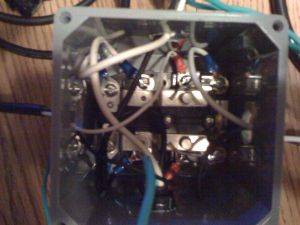
if you look at the relay theres 4 set's of screw's the way the relay is facing in the pic the top is lamp 1 , the next set down is lamp 2 the 3rd set is 120volt coli, & 4th is ballast input.....
you want your lamp 1 & 2 female plugs coming in from the sides as the pic show's if you put them any where else it is a pain in the ass to wire

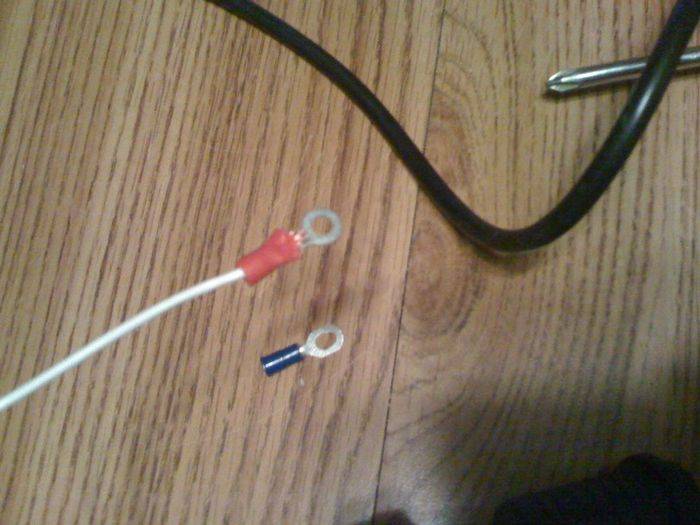
step 3
crimp all ring term's the blue ones is for the female plug's and the ballast cord

step 4
add the ballast cord & the 120volt coli wire's
the ballast cord should be put in on the side that its hooked up on the power cord will be added on top
step 5
brake out that screw driver again and go to town.......
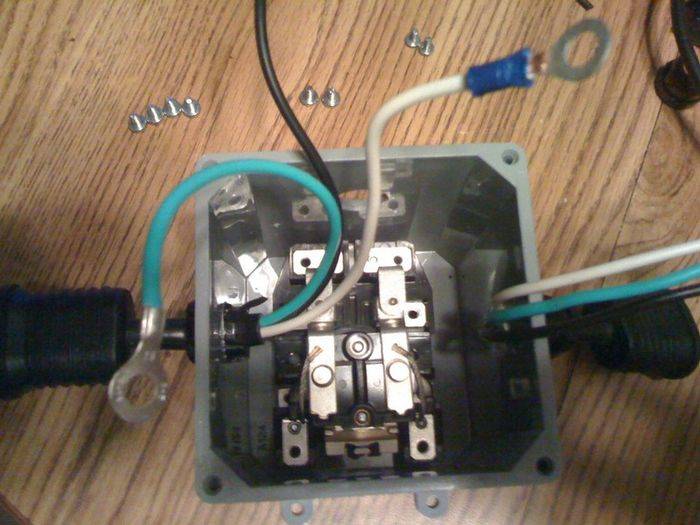
all the white wires go on one side and all the black's go on the other just make sure you do one item at a time ie lamp 1 do your white then black then move to lamp 2 add both wire's then to your power cord (120volt coli) and last the ballast load..... after all the white/blacks wire's are screwed down your left with 4 green wires...... you can do a 2 things here
1. wire nut and black tape
2. buy a ground bar and screw it in the box
im going to pick #2 i just have not went to home depot to pick it up all add pic of that asap...
step 6 holding down the relay..... i have not yet got this far i was thinking of glue as i dont want screw's hanging out the bottem... again i will post this once its done....

The timer sends a current to relay, shifting power to the other pole/bulb, and is plugged into an outlet that generates electricity.
http://www.icmag.com/gallery/data/500/7541relaywire.jpg
That's as clear as the wiring gets, use a ground bar for the grounds.
The timer sends a current to relay, shifting power to the other pole/bulb, and is plugged into an outlet that generates electricity.
http://www.icmag.com/gallery/data/500/7541relaywire.jpg
That's as clear as the wiring gets, use a ground bar for the grounds.
take a 6' extension cord cut off the female end and connect those wires to the coil 5 and 6 in the diagram linked to above. now plug the other end with the male plug in, into a timer that is already plugged in.
how can a flip flop help you out and how does it work


