hey guys wad up have you ever seen one of these 3 boxes somehow miraculously fell off a truck in front of my house ") )
)
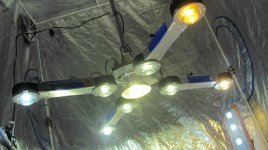
spinning LED ????
PS: just kidding but this would be kinda cool way to go wondering Vuk somehow you make yours spinning ????
using a used ceiling mounted fan show the boys you can do it
)spinning LED ????
PS: just kidding but this would be kinda cool way to go wondering Vuk somehow you make yours spinning ????
using a used ceiling mounted fan show the boys you can do it