Agreed^^^^

-
Happy Birthday ICMag! Been 20 years since Gypsy Nirvana created the forum! We are celebrating with a 4/20 Giveaway and by launching a new Patreon tier called "420club". You can read more here.
-
Important notice: ICMag's T.O.U. has been updated. Please review it here. For your convenience, it is also available in the main forum menu, under 'Quick Links"!
You are using an out of date browser. It may not display this or other websites correctly.
You should upgrade or use an alternative browser.
You should upgrade or use an alternative browser.
best worm bins avaiable
- Thread starter Bullfrog44
- Start date
So here goes my new worm bin.
Step one: buy 5 or 6 2x4x8's and one sheet 4x8x1/2'' Plywood. Paint all lumber before starting. I did one coat of primer and one coat of paint.
Step two: draw out your plywood. Make all cuts dead in the middle of your lines drawn.
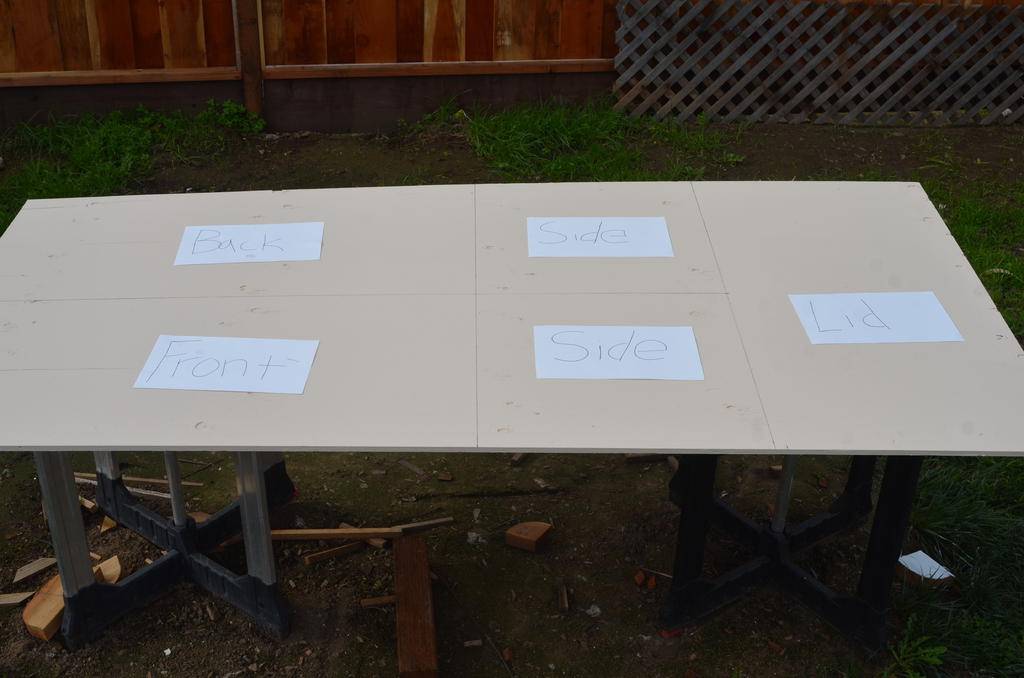
Front: 2'x4'
Back: 2'x4'
Sides: 23"x24"
Lid: 25"x48"
Step three: Cut all 2x4's
Legs: 48" (4 pieces)
Top rail: 40" (2 pieces)
Bottom Rail: 40" (2 pieces)
Top middle supports: 19 7/8 (3 pieces) You may want to wait and measure what your box comes out to. This will be one of the last steps so you can wait to cut these until then. If all cuts are not made clean, measurements can change.
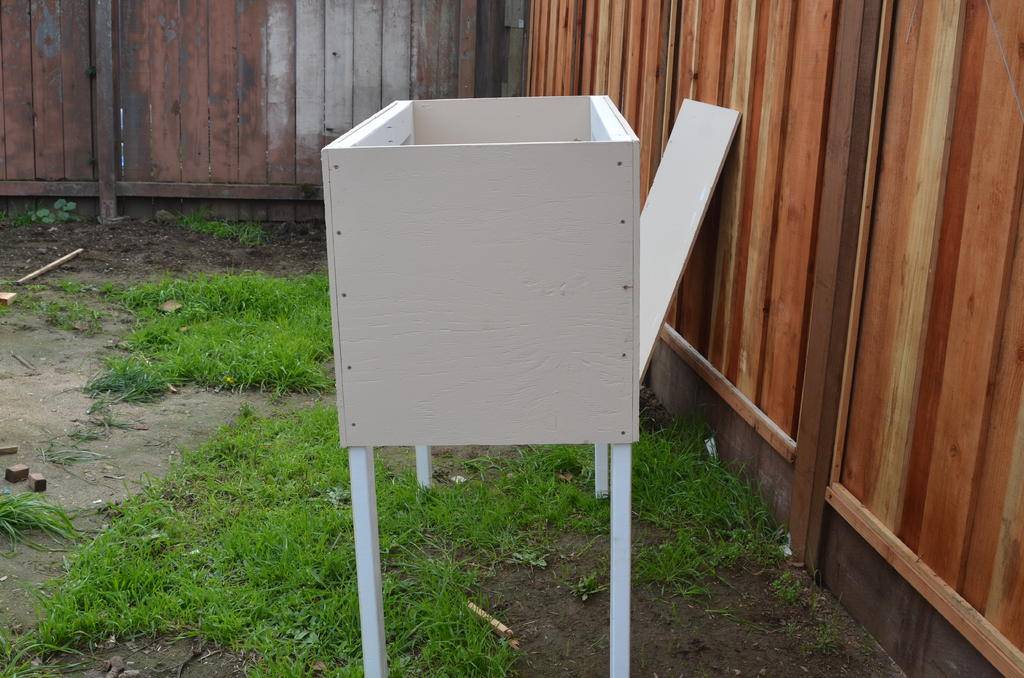
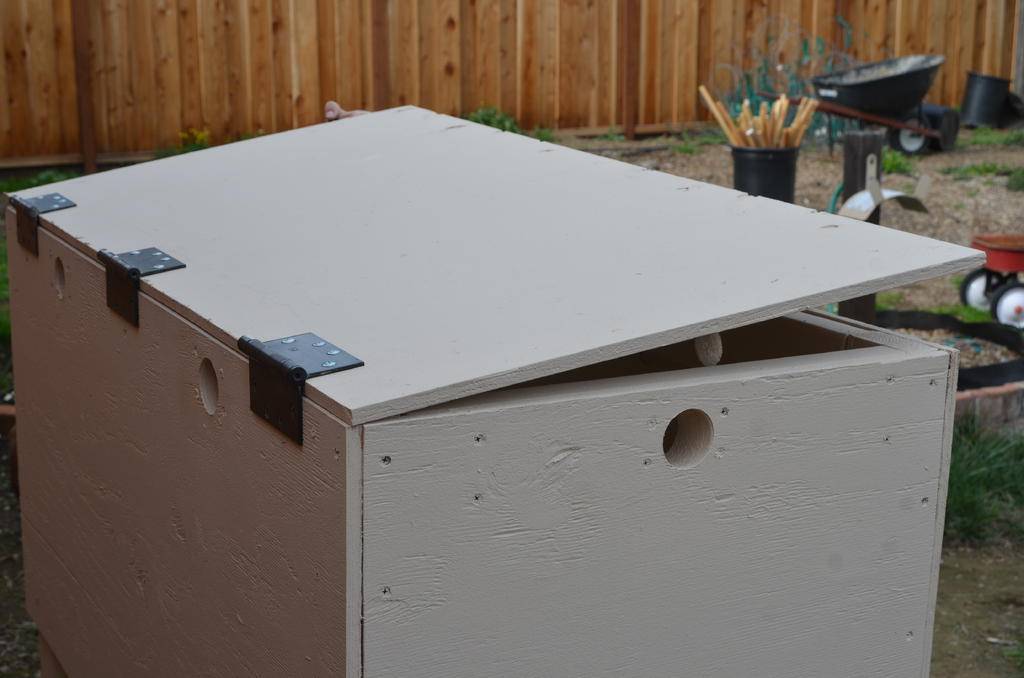
Step Four: Take your plywood labeled "front" and two of your 2'x4'x48" legs. Look at the picture below and see how to connect. On your plywood you will need a half inch line from the edge. Only on the sides, the top you want your 2x4's to be flush with the end of your plywood. You also want your factory edges faces up. Meaning when you cut your plywood you will now have a raw edge that is not painted. You want your painted edges facing up to help keep you square.
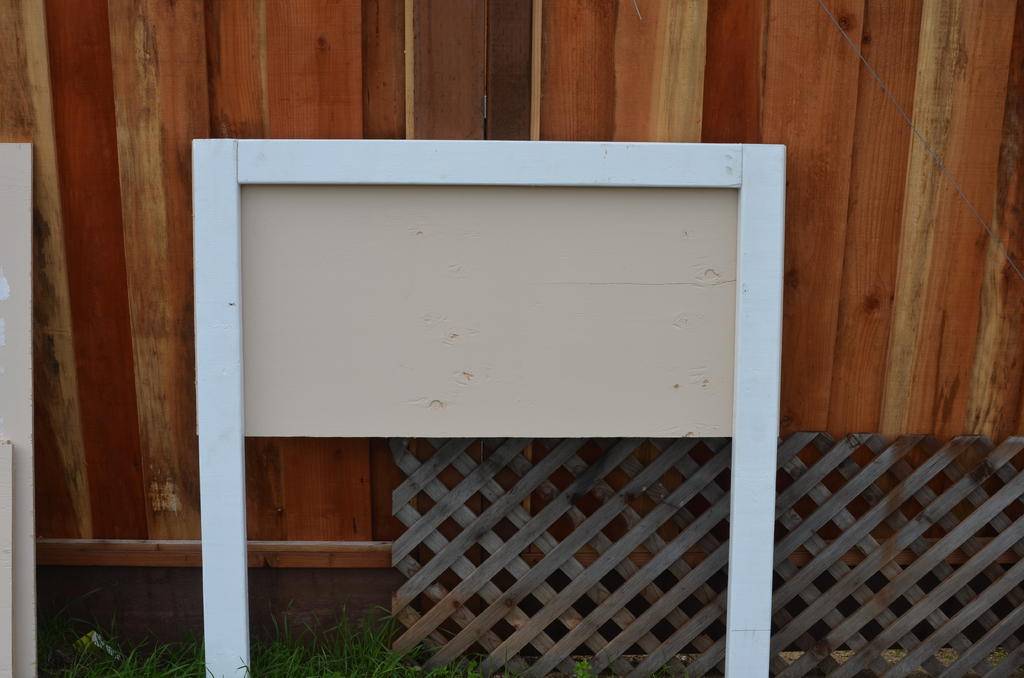
Notice on this pic below the half inch line that you will square your 2x4 with, but remain flush with the top.
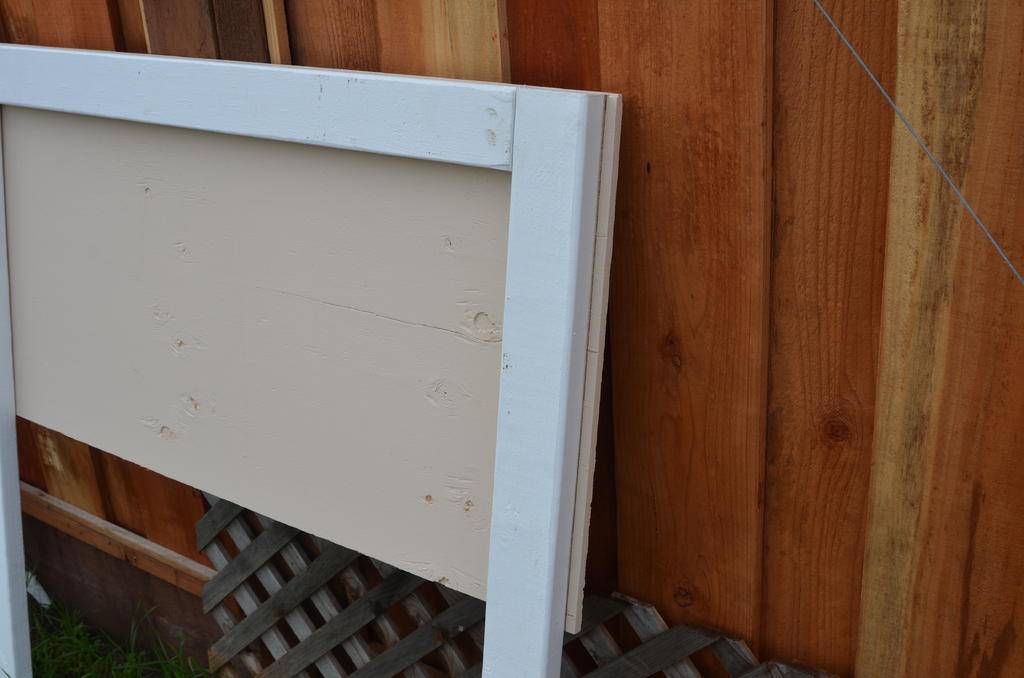
I just screw from the face of the ply wood and don't worry about screwing the 2'x4's to each other. The plywood will hold it all together. 1 1/4" wood screws work great for this part. They don't have to be galvanized if you paint them at the end.
Step one: buy 5 or 6 2x4x8's and one sheet 4x8x1/2'' Plywood. Paint all lumber before starting. I did one coat of primer and one coat of paint.
Step two: draw out your plywood. Make all cuts dead in the middle of your lines drawn.
Front: 2'x4'
Back: 2'x4'
Sides: 23"x24"
Lid: 25"x48"
Step three: Cut all 2x4's
Legs: 48" (4 pieces)
Top rail: 40" (2 pieces)
Bottom Rail: 40" (2 pieces)
Top middle supports: 19 7/8 (3 pieces) You may want to wait and measure what your box comes out to. This will be one of the last steps so you can wait to cut these until then. If all cuts are not made clean, measurements can change.
Step Four: Take your plywood labeled "front" and two of your 2'x4'x48" legs. Look at the picture below and see how to connect. On your plywood you will need a half inch line from the edge. Only on the sides, the top you want your 2x4's to be flush with the end of your plywood. You also want your factory edges faces up. Meaning when you cut your plywood you will now have a raw edge that is not painted. You want your painted edges facing up to help keep you square.
Notice on this pic below the half inch line that you will square your 2x4 with, but remain flush with the top.
I just screw from the face of the ply wood and don't worry about screwing the 2'x4's to each other. The plywood will hold it all together. 1 1/4" wood screws work great for this part. They don't have to be galvanized if you paint them at the end.
Last edited:
Step five: Repeat step 4, but use plywood labeled "back".
Step six: Take your front and back pieces you just assembled and screw one of your pieces of ply labeled "side" to these as show in the picture below. In this step you will see why we left a 1/2 inch, it is so your side piece will be flush with your front and back pieces.
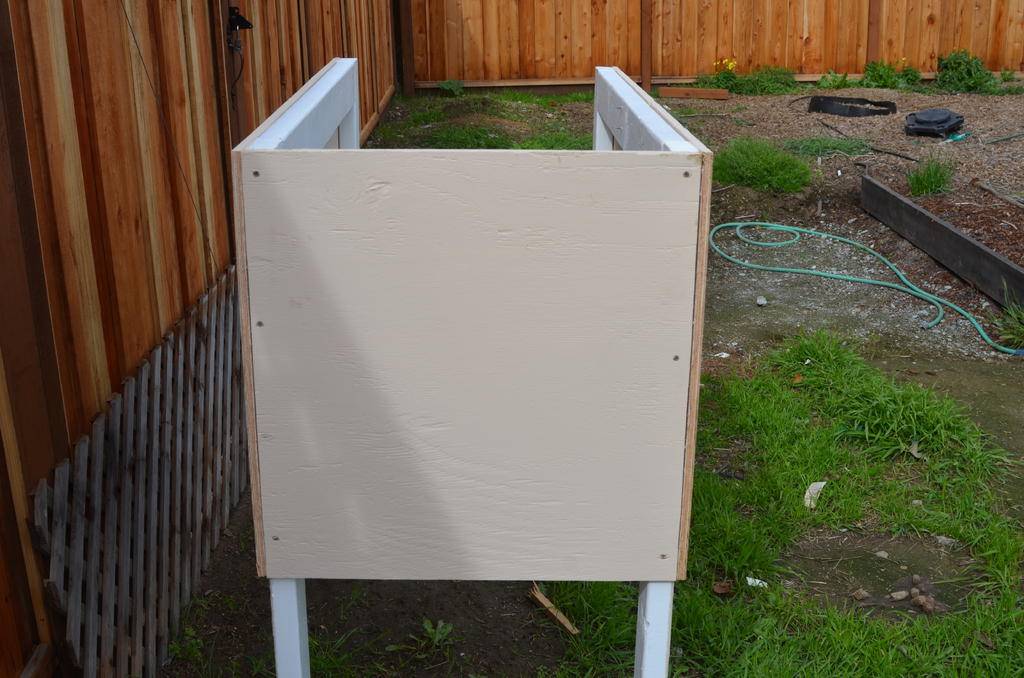
Step seven: Repeat step six with your other "side" piece of ply.
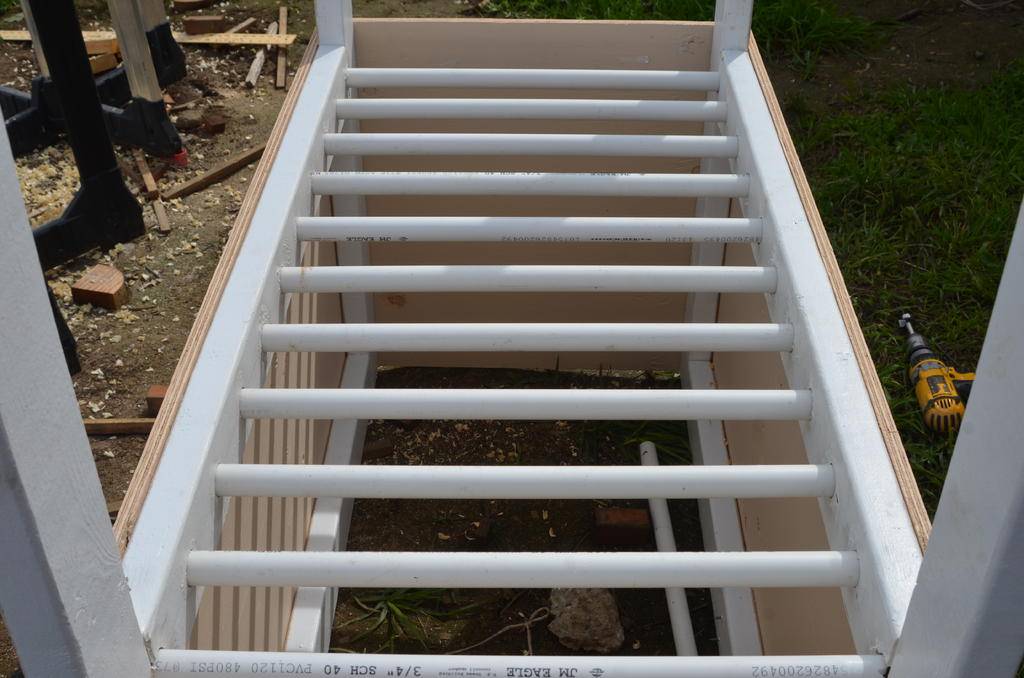
Step eight: Now you will want to flip her over. Take your 2x4x40" pieces for the bottom. You will need to drill holes in this for the PVC as shown in the picture below. Spacing is up to you, but I have two bins and I spaced one at 3" on center. And the other was 4" on center. I used 3/4 pvc in my bins and have no problems to date. However (spacing on name right now) said you can put 1/2" EMT inside the 3/4 pvc to eliminate sag and rust. After I drilled my holes I painted the inside of the holes. I want to make sure that no wood is left exposed to moisture. When installing this part you have to drop both pieces in at the same time with the PVC already in place. This can be kind of hard and helps to have another set of hands. This is also a good time to paint the cut edges shown in the picture while you are flipped upside down.
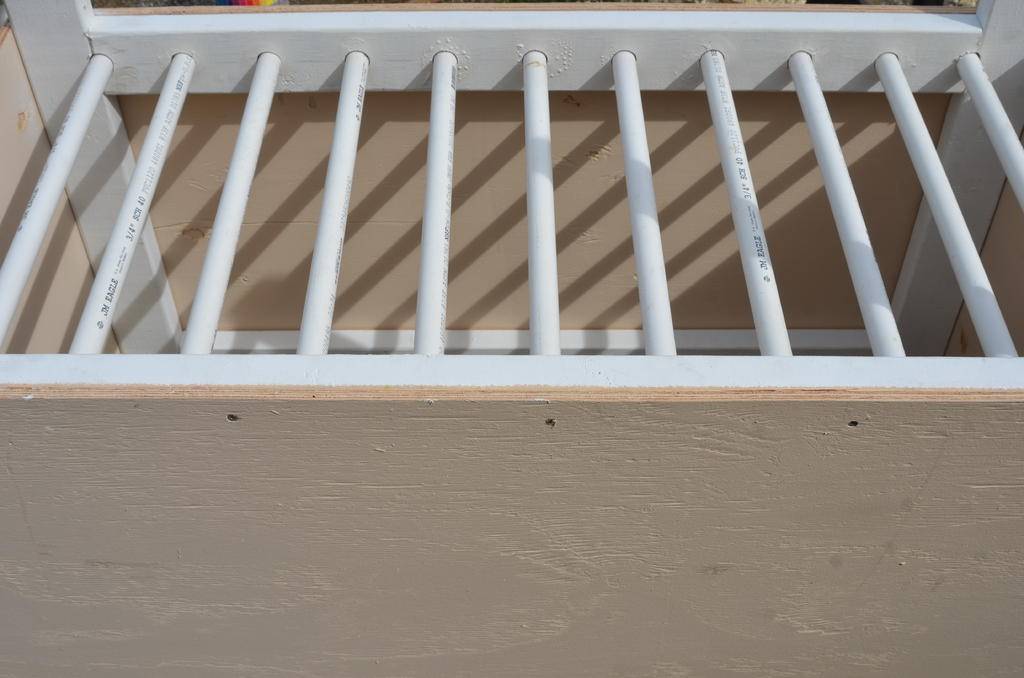
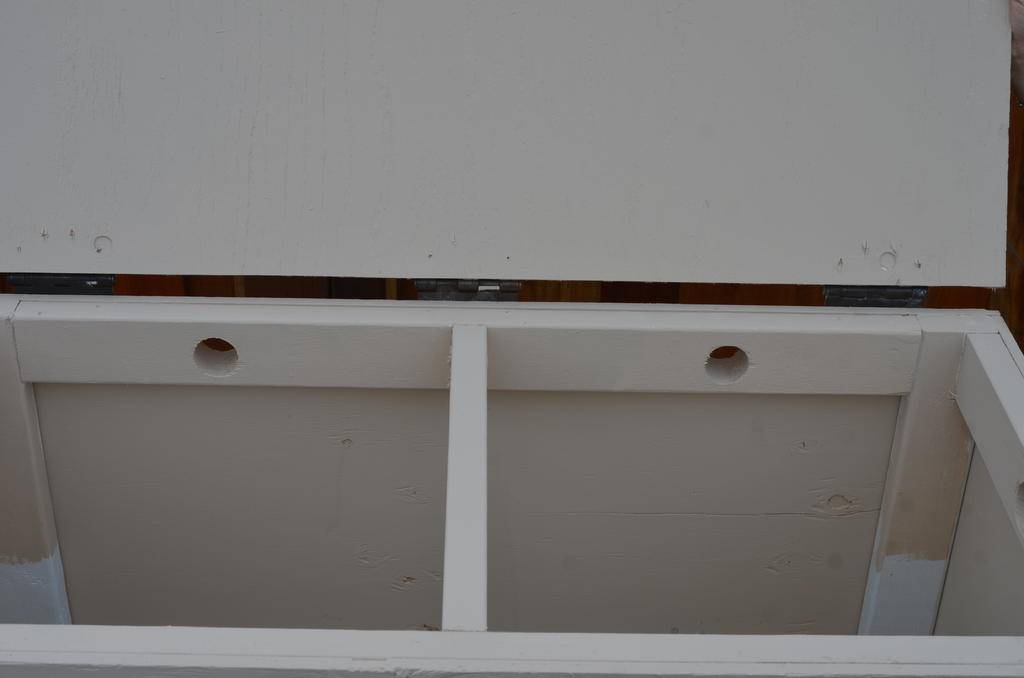
Step nine: Flip her back over and drill 6, 2" holes for ventilation right threw your upper 2x4's as shown in picture below. Two in front and back, one on each side. Later 2" stucco vents will be installed, check last picture.
Step six: Take your front and back pieces you just assembled and screw one of your pieces of ply labeled "side" to these as show in the picture below. In this step you will see why we left a 1/2 inch, it is so your side piece will be flush with your front and back pieces.
Step seven: Repeat step six with your other "side" piece of ply.
Step eight: Now you will want to flip her over. Take your 2x4x40" pieces for the bottom. You will need to drill holes in this for the PVC as shown in the picture below. Spacing is up to you, but I have two bins and I spaced one at 3" on center. And the other was 4" on center. I used 3/4 pvc in my bins and have no problems to date. However (spacing on name right now) said you can put 1/2" EMT inside the 3/4 pvc to eliminate sag and rust. After I drilled my holes I painted the inside of the holes. I want to make sure that no wood is left exposed to moisture. When installing this part you have to drop both pieces in at the same time with the PVC already in place. This can be kind of hard and helps to have another set of hands. This is also a good time to paint the cut edges shown in the picture while you are flipped upside down.
Step nine: Flip her back over and drill 6, 2" holes for ventilation right threw your upper 2x4's as shown in picture below. Two in front and back, one on each side. Later 2" stucco vents will be installed, check last picture.
Last edited:
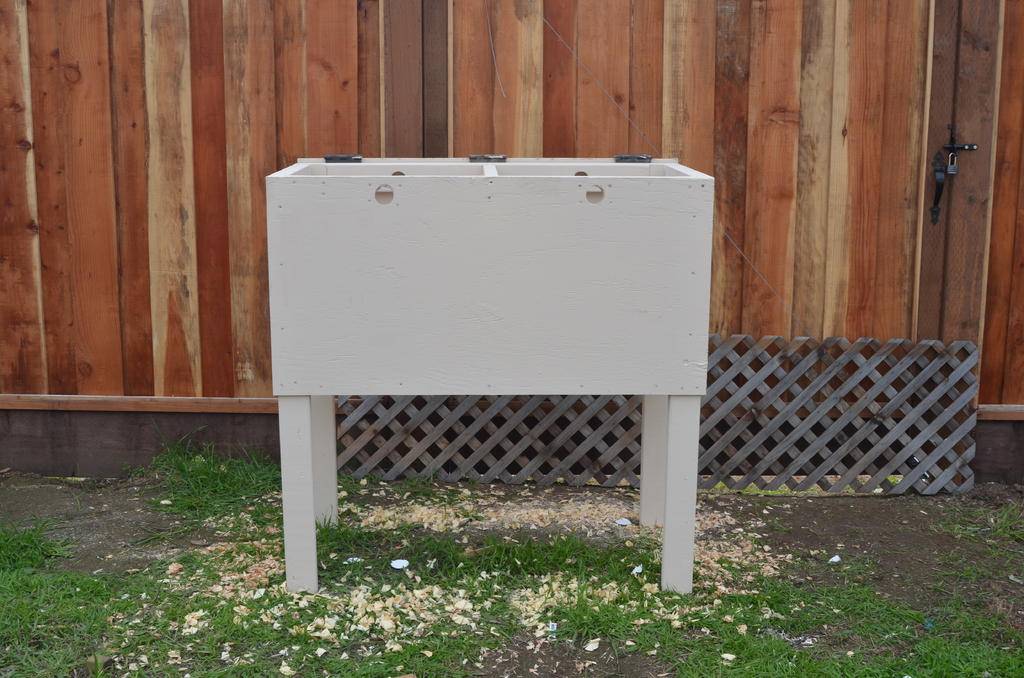
Step ten: Attaching your lid. Grab three hinges rated for outdoor use. You don't want to paint these ass they will clog up, so the outdoor rating is need for both the hinges and screws. The part of the hinge that connects to your back piece of ply can use long screws. However when screwing your hinge to your lid, you only have a half inch. I like to pre-drill my holes, then I take and cut my screws down to about a half inch, depending on how thick your hinge is. If you can find 1/2 or 5/8 inch screws then all the better. You will notice that your lid sticks out a half inch past your front, but I like that, it give your a handle of sorts.
Step eleven: (optional) This is for support across the top as show in the picture. These are the three 2x4x19 7/8" pieces I talked about waiting to cut because measurements may very. You don't have to install these if you want to save some time and effort, but I recommend it. Without these pieces over time you box may push out and widen.
Step twelve:
Caulk all seams inside and out with outdoor caulking. Make sure there are no spaces for water to sit in between wood. Then paint one last time any holes drilled, cut edges, screws or caulked areas. I don't have this pic yet but I will upload it soon.
I consider myself very handy and this took me several days to finish. It was cold and painting took forever, but it isn't the quickest project in the world. However when you are done you will have a quality worm bin for years to come.
Last edited:
edit
Last edited:
beautiful tutorial BF!! please don't be discouraged from sharing!
first off, i admire your carpentry skills.
one question about the bin. how do you collect castings? seems like a flow through design. are you going to put a tub or something underneath?
first off, i admire your carpentry skills.
one question about the bin. how do you collect castings? seems like a flow through design. are you going to put a tub or something underneath?
Last edited:
you can try freezing your food scraps which will help break down the cell walls of the materials and speed up the process. Also adding egg shells, and/or sand will aid the worm in breaking down the bacteria, also speeding up the process. Im currently working on building my own worm bins from rubbermain containers
Awesome tutorial Bullfrog!
Might have to use that in the future to build one to myself!
Thanks for sharing bro!
Might have to use that in the future to build one to myself!
Thanks for sharing bro!
beautiful tutorial BF!! please don't be discouraged from sharing!
first off, i admire your carpentry skills.
one question about the bin. how do you collect castings? seems like a flow through design. are you going to put a tub or something underneath?
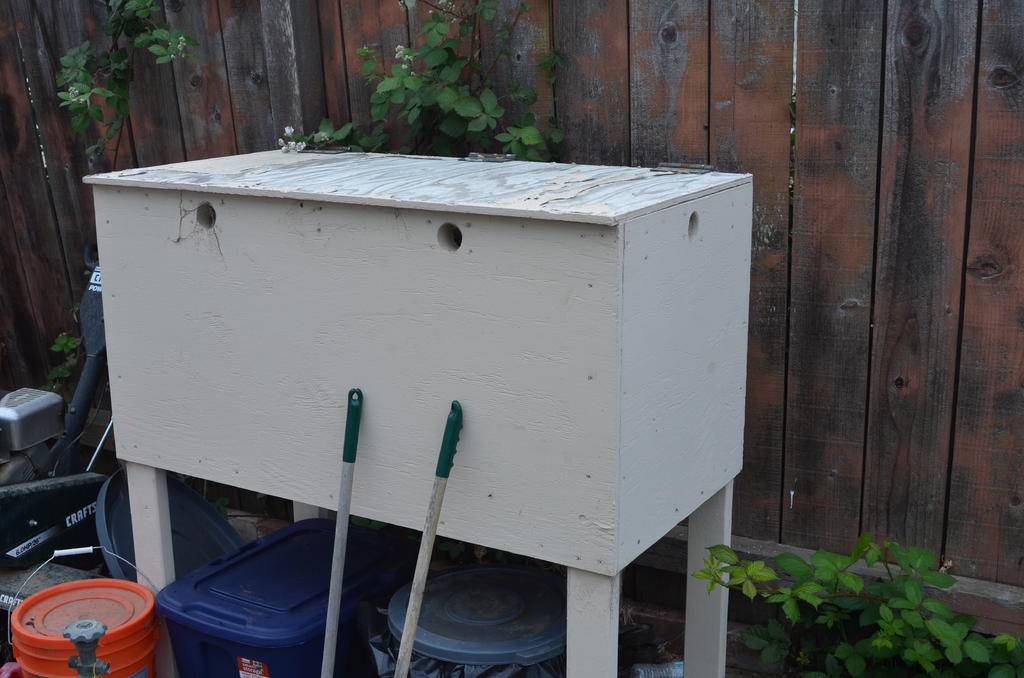
It is a flow through device. I have a mixing bin that is used for mixing mortar that Home Depot sells for cheap. It is just the right size and can sit on the ground. In my other bin I do have cross rails that this mortar bin actually sits on. I don't have pics of the mortar bin but you can see the cross pieces that would hold it on my first bin I built.
You could even use a plastic tarp to catch the castings, anything will work is why I didn't add that to the tutorial.
Awesome tutorial Bullfrog!
Might have to use that in the future to build one to myself!
Thanks for sharing bro!
Thanks for the kind words, hope this helps in the future.

H
Harry Hoosier
So, Bullfrog? Do you have your bin charged with worms and food/bedding?edit
If so, how many worms and what food/bedding are you using?
bullfrogs like worms too. lol great job man
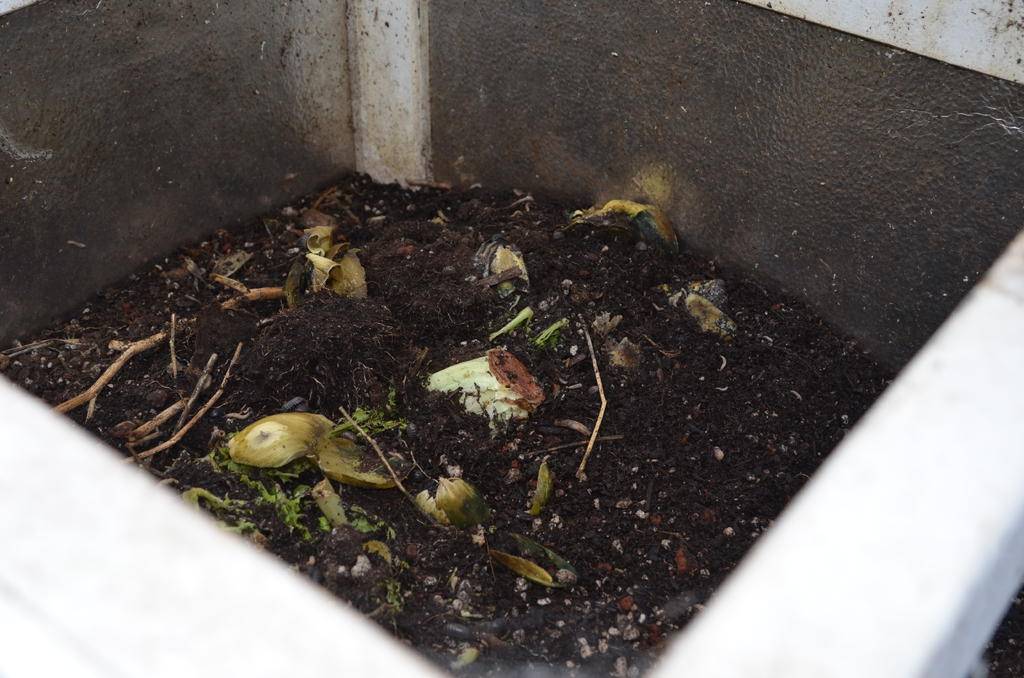
I built a bin back in dec/jan that is fully loaded with worms and has been going strong. When I started the bin I put down one big piece of cardboard at the bottom so the material didn't fall through the PVC pipe. Then I added about 2-3" of peat moss, followed by small pieces of cardboard and a small amount of shredded paper. Next I added about a 5 gal bucket full of cannabis leaves and table scraps (lettuce, artichoke, basil, asparagus ends) and mixed it with the cardboard and shredded paper. Last I topped it off with another 2-3 inches of peat moss.
I let that sit for about a week and ordered up 8,000 worms. 1,000 worms cost like 30$, but I got 8,000 for around 100$, way better deal. I could use a lot more worms, but I figure once the weather warms up they will breed like crazy. I am debating on ordering another 8,000 for my new bin, or just taking a third of the old bin and using those worms to start the new bin. Seems cheaper that way, but will take longer.
I let that sit for about a week and ordered up 8,000 worms. 1,000 worms cost like 30$, but I got 8,000 for around 100$, way better deal. I could use a lot more worms, but I figure once the weather warms up they will breed like crazy. I am debating on ordering another 8,000 for my new bin, or just taking a third of the old bin and using those worms to start the new bin. Seems cheaper that way, but will take longer.
H
Harry Hoosier
and by the way.....excellent bin. I built mine last year in almost exactly the same manner and have been consistently feeding 15-20 lbs per week!So, Bullfrog? Do you have your bin charged with worms and food/bedding?
If so, how many worms and what food/bedding are you using?
Recently, I harvested 15 gallons of castings.
You will need a large foodstock supply in no time with the amount of worms you are using.
Best of luck , Harry
bump
Yeti
Active member
For cold temps I recommend just having a more conventional compost bin. Something attached to the ground. Growing up in Northern Minnesota I have seen worms in the bins in the dead of winter and it gets damn cold there. The bins need to be large enough (square footage) and fairly full (4-5 ft deep) in the winter in order to keep it hot. This shouldn't be a problem though if you've got a descent sized garden in the summer. You can add things to the top, they will freeze, but as you stratify it with food scraps throughout the winter, the warmth will also stratify and the worms with it, all the while having an escape if allowed to travel to the ground. If you feed the worms will come. Yes you could argue this is not officially castings, but when you screen them you will see a beautiful darkened glistening rich compost full of worms on the screen.
here are some pics of my worm bin after about a year and a yard of material later.
Love my worm bin. Makes the best AACT's.
Love my worm bin. Makes the best AACT's.
Yeti
Active member
Hey there Organic Buds. I built one very much like your own. Would you recommend spacing the pvc at 3" on center or 4"? That's my last step, just leaning towards 3" centers. I have enough pvc to do 4" centers though, so I'd need to find a scrap of 3/4" to do 3" centers. IF there is no difference, I'll stick with 4".
I answered this in our private message, but both designs work great. The 4" on center holds the material in just fine. I find I still have to dig a little at the bottom of my bins for the castings to fall out the bottom. I know it's suppose to be a flow through design, but it needs a little help. Good luck Yeti.

