What's new

Red's back

BongDaddy

Member
Looks mighty tasty red. Today is day 54 for my motley crew of unknowns. Just waiting for a little more amber in the trichs and then down they come!
 
Hey Mr Redgreenry :wave: Those plants are lookin bodacious! :respect:
I posted a question in the equipment and design section, but have yet to get a response. You seem to be a ventilation guru, so I thought you might be able to help me. I just got a new 80mm PC fan. I want to DIY a carbon scrubber for it, but cant find any info on how to figure out what size to make it. Diameter and length. My bloom box is ~ 20 cubic ft. The fan is rated 73cfm max air flow & 13.8mmH20 of pressure. Is that enough info? Any help is greatly appreciated. :ying:
 
G

guest 77721

Hey Packerbacker - here's my filter design. This is the second one that I've made and it works quite well. The airflow with a PC fan is 10-15 CFM with a filter bed about 1/2" deep. You need about 1-2 sqft to make a functioning filter either with my two box design or with the can style ones.

The PC fans don't develop enought pressure and these filters are too restrictive to do both cooling and scrubbing at the same time. Mine works perfect for me because my ventilation design is two stage and all the heat from my lights is taken away by a second fan.

Hey Bongdaddy, I'd like to see some pics of your girls. Mine are taking their time and haven't started showing fall colours yet. I haven't even looked at a trichrome yet.

Great little filter you made there Disco! I use aquarium carbon from a local pet store. I can buy it in 2kg containers. I always take a strainer from the kitchen and shake out the dust in the garage so it doesn't blow black powder dust around the house.

I miss my 60 gal aquarium that was full of tropical fish. Aquarium water is the best for your plants because it is pH stable, dechlorinated and has some nitrates and lot's of healthy bacteria. My plants haven't been as healthy since I lost my aquarium.


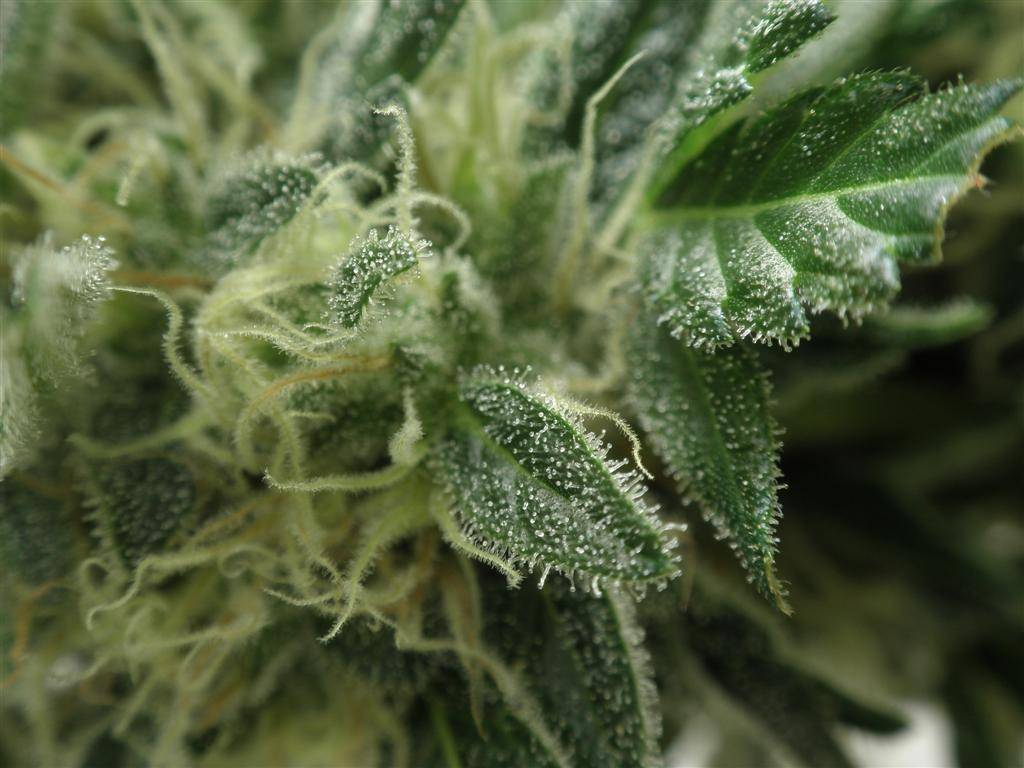
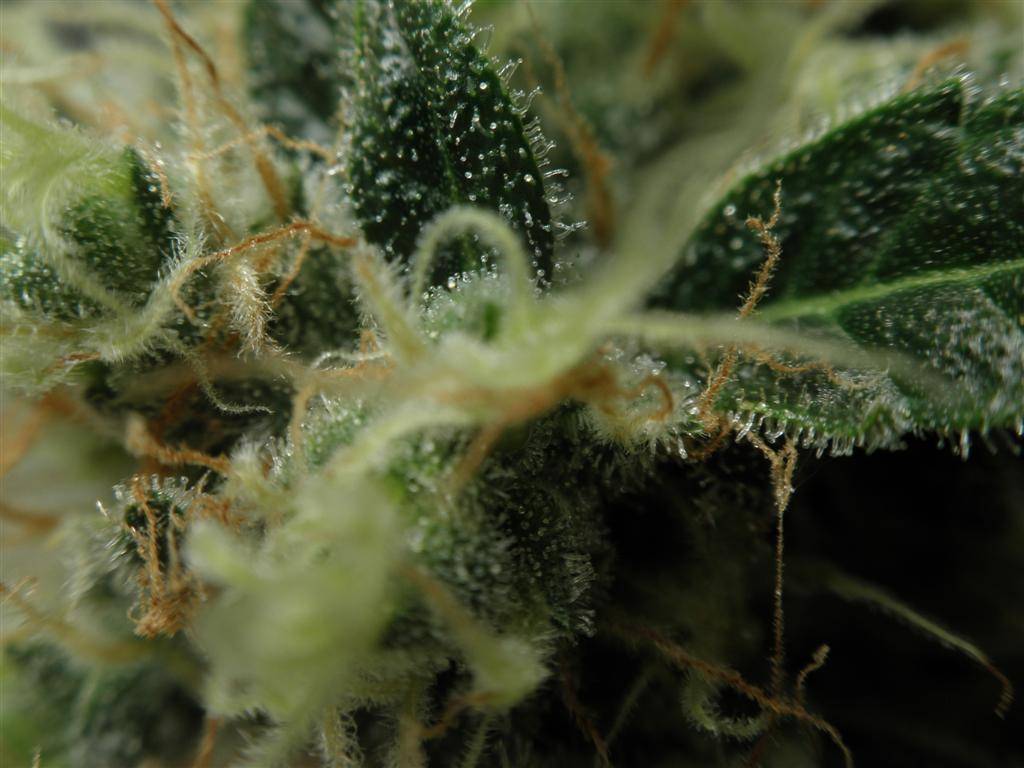
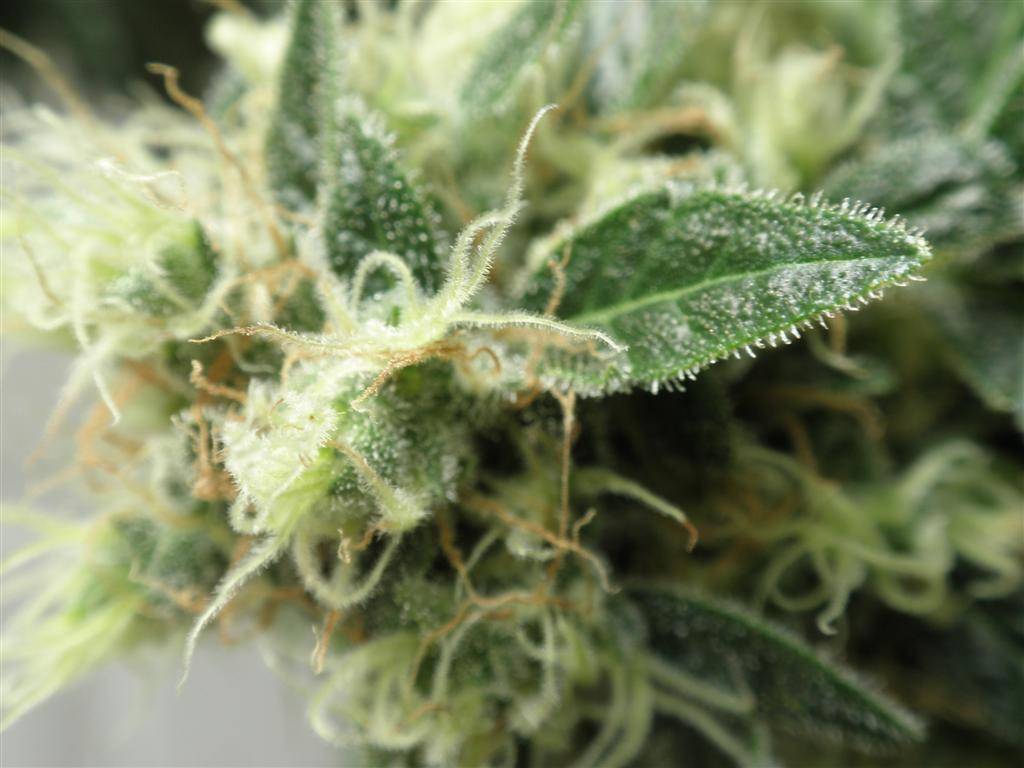
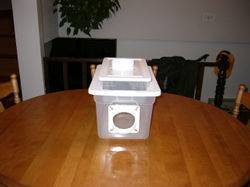
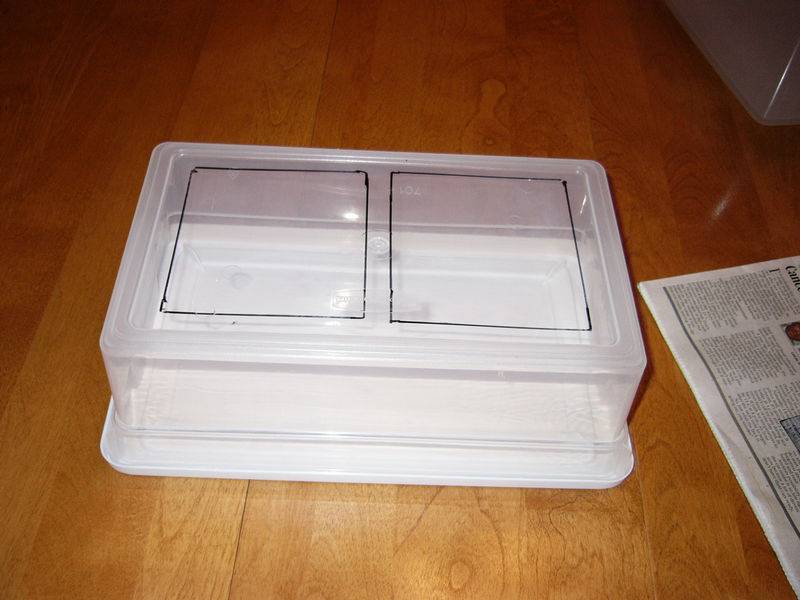
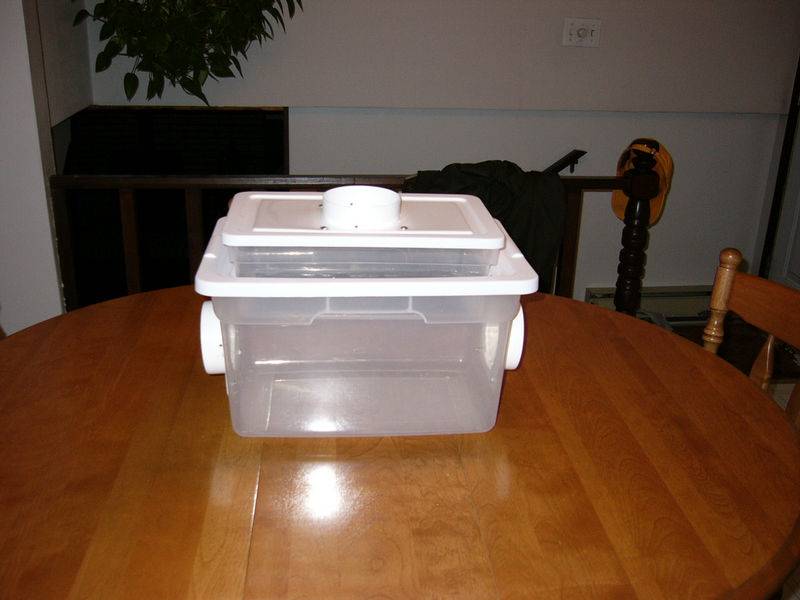
Here's my air filter design using two Sterilite containers. The small one must fit inside the large one.

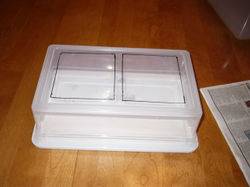
The bottom is cut out of the small tub, I left a small rib in the center to support the screening.
Glue the window screen in place with the epoxy.

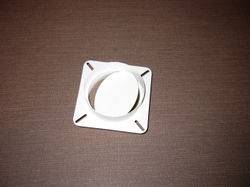
The lid of the large box is cut so that the small box with fit into it.

Intake holes are cut into the large box and the dryer adapters are fitted onto it. You can just duct tape it to the side if you don't have the adapters. This is probably the first time that duct tape is actually used for it's intended purpose. The flap is removed from the dryer adapter and I use a hack saw to trim off the pipe on one side.

A computer fan and a dryer hose adapter is fitted onto the lid of the small box.

When the filter is all assembled, I take silicone caulking and seal up crack where the small box goes into the large box lid.

My setup uses 1/2 lb of activated charcoal for a filter depth of 1" that I buy at the pet store. The 1" layer is good for the whole grow.
 
Last edited:

BongDaddy

Member
red, I'll definitely get some pics up soon. Helping a friend move tomorrow and then doing the whole father's day thing starting on fathers eve lol

I'm thinking Sunday night I'll be able to get some taken. I'll ask for a little "me time" for father's day to do a photo shoot. Hey, they're my girls and they deserve a little bit of daddy's time too lol

A couple of questions about that filter...how long do you find it lasts? Do you think carbon pellets would work as well in it? I built a much larger filter for an earlier grow and that's what I'm using. It's lasted me 2 full flowering cycles so far (since the last time I replaced the carbon). I may change the carbon soon just to be safe, but it would be nice to downsize instead. My whole setup is under the stairs, so I could stand to conserve as much space as I can.
 
G

guest 77721

Oh I'm moooving slow today. One of my lady friends got us tickets for a blues band and we went dancing with a big group of our friends. Had a great time but sure feel it this morning. Gotta go buy a card and some golf balls for my Dad too. Arghh I hate going to the mall on a busy saturday.

I'm really happy with the two-box style filter. It does have some advantages over the Can style filters. It's easy to change filter material out and you can adjust the depth of the carbon bed easily to get more/less airflow or more/less filtering.

One trick I found to extend the life of the carbon is to give it a stir which will expose the carbon more evenly to the airflow. There's dead spots where the carbon never gets used.

The media in the can filter can pack down and create a blow through space which defeats the filter. With the box type you can visually inspect and maintain the filter bed.

As far as lifespan goes, I've been able to get at least 1 - 1-1/2 grow cycles out of a fillup. On the second grow, the carbon needs to be replaced at peak flowering.

The box style takes up a lot more space than a can-filter so that might be a consideration when in a tight space.
 

BongDaddy

Member
I think it would probably still take up less space than the filter I'm using. It's a big DIY can filter, but I built a plywood box around it so that it could be self contained and not take up space in the cabinet. The whole thing is really big - 12" x 12" x 48". I suppose the 12x12 isn't so bad, but I had to pretty much wedge it in lengthwise where it is. Plus it's friggin heavy. Damn my tendency to over-engineer! lol

I considered just trimming a bit of length off the filter so I could shorten the box, or possibly even just build a smaller can and smaller box, but I like your design. It looks a lot lighter and easier to work with than a box with a can in it that I have to pull out to change.
 

BongDaddy

Member
Actually the more I think about it, the more I'm sure I'm probably going to do something like your design. I like the thought of how easy it is to maintain and change the carbon. I wouldn't mind having to change the carbon a little more frequently if it's that much easier. I may just have to make it a bit thicker since I'm using carbon pellets instead of granules.
 
G

guest 77721

The box filter has it's advantages. I've also measured the airflow by filling timing how long it takes to fill up a big garbage bag. Just dump a bunch of carbon in and keep taking away until it smells through and add and measure until you get your airflow.
 
G

guest 77721

Thanks Cheesie, I'm sure enjoying the ladies. I clipped a few random sugar leaves and put them under my Radioshack pocket microscope. Trichs are showing all clear but I've noticed more brown calyxes today.

Week 8 Day 50
I haven't taken an in cabinet shot for a while. My shelf is at it's lowest position but I think these girls are done growing now.


The big word for today is Senesence. That's the name for the flowering period when the plant stops taking up nutes and consumes nutes in fan leaves during a last final push.

Yellowing of lower fan leaves in late flowering is normal. It's easy to get fooled into over fertilizing to correct what appears to be an N deficiency in late flowering. This is a normal part of the plant's lifecycle. The plant just decides to shut down and stops taking up nutes.

I've watching carefully for signs of Senesence occuring in my girls. Not all strains exhibit this tendency but the LUI and Atomic Thai-Light parents of my Ultimate Thai did quite nicely. This morning Anna lost a few leaves and Charlene has been snacking on hers.

What was concerning me was that I repotted in mid flowering to go on my golf trip. I have had plants get stuck in flowering like a Shiskaberry that went 91 days and revegged normally at 65 days.
That plant didn't have a well developed rootball and I attributed it to overwatering. Mind you the smoke was phenominal from the plant and more than made up for the long wait.

It's my belief that the plant senses changes in it's nutrient uptake depending on how rootbound it is. The plant will move from Stretching (Weeks 1-2-3) to Budding ( Weeks 4-5) to Bulking up (Weeks 6-7) and finally Senesence (Weeks 8-9-....)
 

BongDaddy

Member
What I find interesting is that the plant is pretty much "preparing" to die, and by making a few small changes to its environment you can make it new again (revegging).
 
G

guest 77721

I'm always learning something about these fabulous plants. They really don't die off in flowering, it's just how the plant is responding to certain hormones.

To get a plant to reveg, there has to be a bit of vegetation left after harvesting to keep the stem alive. I try to keep a fan leaf or two and usually a small popcorn bud. I'll lightly fertilize with 1/4 grow nutes and be very careful just to slightly moisten the soil.

It takes about 2 weeks for the flowering hormones to begin clearing from the plant and then it will put out single smooth edged leaves followed by normal growth starting with 3 bladed serrated edged leaves.

I've revegged nearly all my plants for a second harvest on every one of my grows. You can get a plant ready for flowering quicker than starting from seeds because all the growth is mature with alternating nodes. Reveggers make great moms and can pump out lots of healthy shoots for making clones.

If I was to ever go perpetual, my system would be reveg based. I would keep 4 mother plants and have 2 in flowering and 2 in vegging. Since flowering takes 2 months and vegging only 1, there is plenty of time to reveg and prepare a plant for flowering.
 
G

guest 77721

Ok fellers, here's some bud porn fer ya'll

I checked the girls this morning and they needed watering. Charlene went an extra day and was showing some heat stress. It's been warm the last few days and the box hasn't been running any warmer than normal but these plants are slowing down and not taking up as much water.

I pulled out the CFL's and have just the 150 HPS now. I don't think there's need for excessive light levels since the plant is just winding down naturally.


Top